This site is supported by our readers. We may earn a commission, at no cost to you, if you purchase through links.
 A popped button. A torn hem. A pillow that needs stuffing. These small repairs pile up until you face a mountain of mending—or fork over cash to a tailor. Learning to quick sew puts you back in control.
With basic stitches and the right supplies, you’ll fix most problems in under ten minutes. No fancy equipment required. Just a needle, thread, and the confidence to tackle fabric problems yourself.
This guide breaks down fast hand and machine techniques that work for repairs, alterations, and simple projects. You’ll master the essential stitches, choose the right tools, and troubleshoot common mistakes—all without wasting time on unnecessary steps.
Table Of Contents
Key Takeaways
- Quick sewing puts you back in control with basic stitches—running stitch for fast seams, backstitch for strength, and whipstitch for edges—fixing most problems in under ten minutes without fancy equipment.
- Pre-washing fabric prevents up to 10% shrinkage and locks in size before you cut, while choosing midweight cotton or linen gives beginners forgiving, fray-resistant material that won’t fight back.
- Machine sewing turns hours of hand work into minutes when you master straight and zigzag stitches, backstitch at starts and stops for secure seams, and troubleshoot tension issues on scrap fabric first.
- Regular tool maintenance—wiping scissors, oiling machines monthly, replacing dull needles, and organizing supplies—keeps your gear sharp and ready so every stitch glides smoothly instead of snagging.
Essential Sewing Supplies for Quick Projects
You can’t sew fast without the right tools within arm’s reach. Speed comes from having your essentials organized and ready before you thread that first needle.
Let’s break down what you actually need to get started and keep moving.
Needles, Scissors, and Thread Basics
You’ll need three basic tools before you can start any sewing project: a needle, sharp scissors, and thread that matches your fabric. Here’s what you need to know:
- Needles – Pick sharps for hand sewing or betweens for tighter stitches; needle sizes vary by fabric weight
- Thread Types – Cotton thread works for most projects; match the color to your fabric
- Scissors – Keep one pair sharp for fabric cutting only; scissor sharpening maintains clean edges
- Sewing Knots – Tie a secure knot after weaving thread through your sewing needle to prevent unraveling
Choosing The Right Fabric
Your fabric choice can make or break a quick sewing project—cotton and linen are beginner-friendly winners that don’t fray easily or stretch out of shape. Check the weave patterns and texture selection before you buy. Tighter thread counts mean stronger fabric manipulation for hand sewing and textile art techniques.
| Fabric Types | Best For | Color Matching Tip |
|---|---|---|
| Cotton | Quick repairs, beginner projects | Matches thread easily |
| Linen | Structured items, durable seams | Natural tones work best |
| Wool | Expert sewing techniques | Test against light first |
| Silk | Delicate work, embroidery | Use contrast carefully |
Measuring Tools and Seam Rippers
Once you’ve got your fabric sorted, a measuring tape and seam ripper will save you from guesswork and fix the mistakes that even pros make. Here’s what to grab:
- Measuring tape – Flexible ruler edge for curves and long cuts
- Seam ripper – Your fix-it tool when stitches go rogue
- Fabric gauge – Marks hems and seam allowances fast
- Cutting mat – Protects surfaces and guides your scissors
Keep these in your sewing kit with needles and thread.
Setting Up Your Sewing Space
A flat, clean surface with good lighting turns chaotic fabric wrangling into smooth, confident stitching. Here’s how to claim your corner:
| Area | What You Need | Why It Matters |
|---|---|---|
| Sewing Station | Flat table or desk | Keeps fabric steady while you work |
| Lighting Essentials | Desk lamp or natural light | Shows thread colors and stitch lines clearly |
| Storage Solutions | Small bins or boxes | Holds scissors, needles, thread, and sewing tools within reach |
An ergonomic setup ensures your workspace organization allows you to sit comfortably without hunching. Keep your sewing kit close—no one wants to hunt for tools mid-stitch.
How to Choose and Prep Fabric Fast
The right fabric makes all the difference when you’re sewing fast. You need to grab something that won’t fight you, prep it quickly, and cut it without wasting time.
Here’s how to pick and prep fabric so you can start stitching right away.
Pick Fabric Weave and Weight
Think of fabric weave and weight as the foundation of your textile craft—choose wrong, and you’ll fight the material every step. Plain weave makes up about 50% of woven fabrics, offering balanced strength for hand sewing basics. Thread count affects fabric density and durability—higher counts mean smoother, tougher material. Different weaves offer unique characteristics, such as the smoothness of satin.
Lightweight fabrics (100–170 GSM) work best for quick projects like summer shirts, while midweight (170–340 GSM) gives you structure for pants and jackets. For fabric crafting speed, grab midweight twill for its drape and resilience in high-motion garments.
Match Fabric Pattern and Style
Your pattern choice speaks before your first stitch—stripes reveal alignment skills, florals demand precision placement, and solids forgive beginner mistakes. Master fabric mixing and texture blending to enhance your garment construction:
- Directional prints require careful cutting to avoid upside-down motifs
- Large-scale patterns need extra yardage for pattern matching at seams
- Color blocking works best when you coordinate fabric weight and drape
- Pattern clashing demands confidence—pair small with large scales for controlled chaos
Match your textile craft ambitions to your current hand sewing skill level.
Pre-Wash for Shrinkage Control
Shrinkage steals your hard work if you skip the pre-wash—cotton can lose up to 10% of its size in the first laundry cycle. Toss your fabric through a hot wash and dryer run before cutting. Check care labels for heat tolerance.
Pre-wash fabric to prevent up to 10% shrinkage that ruins your finished project after the first wash
This fabric preparation step locks in shrinkage now, not after you’ve spent hours on sewing basics. Pre-wash tips save your seams from puckering later.
Cutting Fabric Efficiently
Sharp scissors and a steady hand turn good fabric into clean pieces—dull blades drag, fray edges, and waste your time. Cut confidently in smooth strokes—hesitation shows in jagged edges.
Lay fabric flat and use rotary cutting with a ruler for precision measuring on straight lines. Pin efficient patterns to minimize fabric scrap management.
Master these fabric cutting tips and you’ll breeze through sewing basics faster than weaving excuses.
Step-by-Step Quick Hand Sewing Techniques
Hand sewing doesn’t have to be slow or complicated. You can master a few core stitches that’ll manage most quick repairs and projects in minutes.
Here’s what you need to know to get started with fast, confident hand sewing.
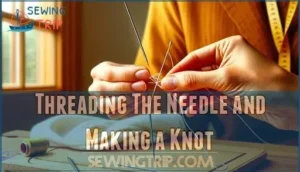
Threading The Needle and Making a Knot
Before you can start stitching, you need to get that thread through the eye of the needle and tie it off so it won’t slip loose mid-project. Cut about 18 inches of thread from your spool. Push one end through the needle’s eye, then fold it in half so both ends meet. Tie a firm knot at the bottom—this anchors your hand sewing techniques and keeps everything secure while you work.
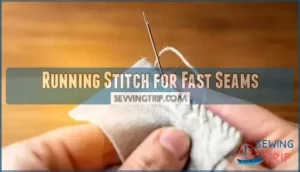
Running Stitch for Fast Seams
The running stitch is your fastest route from two loose pieces of fabric to one solid seam. Push your needle up through both layers, then back down about a quarter-inch ahead.
Keep your stitch length consistent—that’s what gives you clean fabric tension and solid seam reinforcement. This hand stitching method works for any sewing for beginners project when sewing speed matters more than heavy-duty strength.
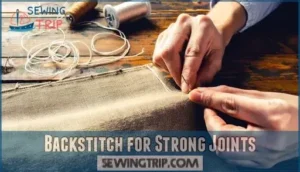
Backstitch for Strong Joints
When you need a seam that won’t quit under pressure, the backstitch locks each stitch in place like a tiny anchor. Push your needle forward, then bring it back to meet the end of your last stitch—overlapping creates joint reinforcement that beats a running stitch every time.
This hand sewing technique delivers fabric stability and seam security for anything that’ll face real stress.
Whipstitch for Edges and Repairs
Once your seam holds firm, edges still fray—and that’s where a whipstitch swoops in to bind raw fabric or patch tears without fuss. Angle your needle diagonally through both edges, wrapping thread around the raw edge for quick fabric repair and edge finishing.
Master the whipstitch basics:
- Keep consistent stitch tension—not too tight or fabric puckers
- Space stitches evenly for clean seam reinforcement
- Pick thread selection that matches your fabric weight
This hand sewing technique delivers fast fixes when you need fabric stability without dragging out the process.
Finishing Off Your Stitch
Your last stitch wraps tight, but if you don’t lock it down, that thread unravels the second you tug or wash your fabric.
Create secure knots by passing your needle through the last stitch twice, then weaving back through previous stitches for stitch reinforcement.
Snip excess thread close to your seam finishing point—maintaining proper thread tension keeps your backstitch, running stitch, or whipstitch from loosening during wear.
Speedy Sewing Machine Tips for Beginners
A sewing machine can turn hours of hand stitching into minutes of work. You’ll need to know how to set up fast, control your stitches, and fix problems without losing momentum.
Here’s what you need to master machine sewing quickly.
Setting Up Your Machine Quickly
Getting your sewing machine ready doesn’t have to feel like defusing a bomb—just follow a few simple steps and you’ll be stitching in minutes. Start with quick bobbin loading—snap it into place beneath the needle plate. Thread your machine from spool to needle, following the numbered guides. Adjust machine thread tension if needed, then test automatic stitch settings on scrap fabric. That’s sewing machine calibration done—no mystery, just mastery.
Straight and Zigzag Stitch Basics
Master two stitches and you’ll manage ninety percent of beginner sewing machine projects—straight for seams, zigzag for stretch. Here’s your quick-start guide:
- Straight stitch: Set stitch length to 2.5mm for standard seams
- Zigzag stitch: Use for fabric stretch and edge finishing
- Stitch tension: Adjust dial until threads lock between fabric layers
- Sewing speed: Start slow—thread control beats racing every time
- Test runs: Practice both on scrap fabric before committing
These sewing basics give you complete command over your machine.
Starting and Stopping Cleanly
Clean starts and stops separate sloppy work from professional finishes—nail these four moves and your seams will look store-bought.
| Action | Method | Why It Matters |
|---|---|---|
| Start | Backstitch 3-4 stitches, then sew forward | Secure knots prevent unraveling |
| Stop | Backstitch at end, lift presser foot | Clean edges lock thread management |
| Trim | Cut thread 2 inches from fabric | Flawless finishing without fraying |
You control tension and thread with every start—backstitching locks your running stitch like a vault. Lift your presser foot before trimming for clean edges every time.
Troubleshooting Common Issues
Ever watch your machine revolt mid-project? Thread breakage hits when tension’s too tight—dial it back and rethread from scratch. Fabric tears mean your needle’s dull or you’re forcing material through. Machine error codes flash when bobbin cases aren’t seated right; pop them out and reset. Sewing machine jams happen when lint clogs the feed dogs—brush them clean after every project.
Tension issues wreck both hand sewing techniques and machine work, so test scraps first. Regularly checking for bobbin thread issues can help prevent these common problems. These sewing basics keep you stitching instead of swearing.
Quick Care and Troubleshooting for Sewn Items
You’ve mastered the basics—now it’s time to keep your work looking sharp and your tools ready for action. Even quick sewing needs smart fixes and simple upkeep to stay strong.
Here’s how to troubleshoot mistakes, maintain your gear, care for finished pieces, and sharpen your skills without slowing down.
Fixing Common Sewing Mistakes
Mistakes happen—even to the most careful sewers. Don’t let a wonky seam or skipped stitch derail your project. Here’s how to fix the most common sewing mistakes fast:
- Seam Repair with backstitch: Rip out the bad section with a seam ripper, then restitch using a backstitch for strength.
- Thread Tension adjustments: Test on scrap fabric first—wrong tension causes puckering in over 60% of attempts.
- Fabric Shrinkage fixes: Pre-wash before sewing to avoid up to 7% shrinkage that ruins fit.
- Stitch Errors from needle selection: Swap worn or wrong-sized needles; they cause skipped stitches and snagging.
- Master hand sewing techniques: Keep sewing supplies ready for quick repairs using proven sewing techniques.
Basic Maintenance for Sewing Tools
Keep your tools sharp, and they’ll return the favor—a well-maintained needle glides through fabric like butter, while a neglected one snags and fights you every step of the way. Wipe down your scissors after cutting, oil your machine monthly, and store needles in a case. Organize thread by color for quick access. Clean lint from your machine after each project. Keep thimbles dust-free and replace bent needles immediately—your sewing supplies last longer when you treat them right.
Caring for Finished Projects
A finished project isn’t finished until you’ve protected it from the wear and tear that comes next—washing, storing, and everyday use will test every stitch you made.
Hand-wash delicate sewing projects in cold water to prevent color fading and seam damage. Store fabric flat or rolled to avoid creases that stress thread lines. Skip harsh detergents that cause fabric softening and weaken needlework.
Iron embroidery face-down on a towel. Check seams regularly for garment repair opportunities before small issues become big problems.
Easy Ways to Practice and Improve
Building skills takes consistent practice, but you don’t need fancy projects or expensive fabric to get better at sewing. Grab scrap fabric and drill the same stitch fifty times—that’s how you build muscle memory.
Skill building happens when you sew daily, not perfectly.
- Practice hand sewing techniques on mismatched scraps for stitch mastery without fear
- Join a sewing community online for tips and tricks from experienced sewers
- Try sewing basics for children tutorials—simple weaving projects teach fundamentals fast
- Experiment with fabric selection to understand how different materials behave
Frequently Asked Questions (FAQs)
How do I choose the right needle size for my fabric?
Don’t let fabric thickness intimidate you—matching needle to material is simpler than you think.
Use thin needles (size 60-70) for lightweight fabrics like silk, medium needles (80-90) for cotton, and heavy needles (100-110) for denim or canvas.
What is the best type of thread to use for sewing?
Thread choice depends on your fabric and project. Cotton thread suits most fabrics, while polyester offers strength and stretch.
Match thread weight to fabric weight—lighter fabrics need finer thread.
Color should blend or contrast intentionally.
Can I sew without a sewing machine?
Yes, hand sewing works perfectly without a machine. Basic handwork uses simple manual stitches like running, backstitch, and whipstitch.
Sewing by hand with just a sewing needle and thread covers repairs, hems, and small projects beautifully.
How do I fix a skipped stitch on my sewing machine?
Skipped stitches signal needle alignment or thread tension problems.
Check your needle first—replace it if dull or bent. Adjust thread tension and slow your sewing speed for better stitch quality.
How do I properly finish the edges of my fabric?
Why settle for fraying fabric when you’re aiming for polished results? Fabric edge finishing keeps your work looking sharp. Use a whipstitch along edges for fray prevention, or try binding methods for clean seam sealing. Sewing overlock stitches lock threads in place, stopping unraveling fast.
How long does a typical quick sewing project take?
Quick sewing projects take 15 to 45 minutes, depending on your sewing speed and hand sewing techniques. Simple repairs finish faster than garments.
These time management tips and efficiency hacks help beginners tackle sewing projects confidently using sewing tutorials.
Whats the best way to sew without a machine?
Master hand sewing by threading your needle carefully, tying secure knots, and practicing basic sewing techniques like running stitch and backstitch.
Focus on needle control, thread management, and fabric manipulation—sewing by hand just takes patience and steady stitch quality.
Can you sew stretchy fabric by hand easily?
Stretchy fabric by hand? Sure, but it takes patience. Use a zigzag-style stitch or backstitch with slight tension slack.
Elastic thread helps control fabric stretch. Pin well, don’t pull tight while stitching, and needle choice matters for knit fabrics.
How do you avoid tangled thread while sewing?
Imagine your grandmother’s vintage Singer suddenly jamming mid-hem because tangling thread turned simple repairs into chaos.
Use shorter thread lengths—18 inches max—and run thread through beeswax for smoother stitching. Keep tension consistent and avoid pulling too hard while weaving through fabric.
Whats the fastest stitch for temporary hems?
The basting stitch wins for temporary hems—it’s your go-to for quick fixes. Use long, loose running stitches that pull out easily when you’re ready for permanent hemming or adjustments.
Conclusion
Think of your sewing kit as a safety net—always there when the unexpected happens. Now you know how to quick sew through repairs and small projects with confidence.
You’ve mastered the stitches, prepped your tools, and learned to troubleshoot on the fly. No more waiting on tailors or tossing fixable items. Your needle gives you independence.
Each stitch you make sharpens your skill and saves you money. Keep practicing, stay curious, and watch how fast you transform fabric problems into finished wins.
- https://www.indexbox.io/blog/household-sewing-machine-united-states-market-overview-2024-2/
- https://www.threadsmagazine.com/forum/what-not-many-sewers
- https://www.globalgrowthinsights.com/market-reports/sewing-thread-market-100297
- https://jinfengapparel.com/how-many-clothes-can-factory-workers-sew-in-a-day/
- https://economictimes.com/news/international/world-news/youngsters-in-us-lack-basic-sewing-skills-study/articleshow/44825524.cms


