This site is supported by our readers. We may earn a commission, at no cost to you, if you purchase through links.
First, grab a serger or use a zigzag stitch on your sewing machine to lock those edges tight. No sewing skills? No problem!
Pinking shears create jagged cuts that slow down fraying, while fusible interfacing reinforces weak edges.
For quick fixes, fabric sealants and clear nail polish work wonders.
Pro tip: Always choose high-quality fabrics and pre-wash them to minimize future fraying, ensuring your cotton creations will look crisp and professional, with edges as clean as a freshly pressed shirt, using high-quality fabrics.
Table Of Contents
Key Takeaways
- You’ll stop cotton fabric fraying by using multiple techniques like sergers, zigzag stitches, pinking shears, and fabric sealants – each offering a unique way to protect your textile edges.
- Choose high-quality fabrics with tight weaves and pre-wash them carefully to minimize fraying before you even start your project, creating a strong foundation for your crafting.
- When you’re working without a sewing machine, you’ve got quick fixes like fusible interfacing, fabric glue, and clear nail polish that’ll lock those threads in place and prevent unraveling.
- Understanding why fabric frays is half the battle – loose weaves, fabric manipulation, and age all contribute to thread damage, so you’ll want to handle your textiles with care and use strategic reinforcement techniques.
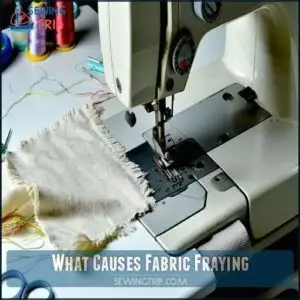
What Causes Fabric Fraying
When you work with cotton fabric, you’ll quickly discover that fraying can turn your crafting dreams into a frustrating mess.
When fabric threads start dancing wild, your crafting dreams might just unravel faster than those loose cotton edges!
Understanding why threads unravel will help you protect your projects and create professional-looking finishes that’ll make your sewing skills shine.
Loose Weave Fabrics
When working with loose weave fabrics like muslin or gauze, you’re dealing with a fraying nightmare waiting to happen.
These open-weave textiles have threads that dance and wiggle, just itching to unravel. Your secret weapon? Reinforcing those edges before cutting.
A quick zigzag stitch or fabric sealant can lock those threads in place, transforming unstable fabric into a crafter’s dream. Remember, tighter weaves mean less drama – choose wisely!
Understanding fabric fraying causes is vital to prevent damage and extend the life of your fabric, which is a key step in preventing damage.
Fabric Manipulation
Woven fabrics are delicate dance partners that demand finesse during fabric manipulation.
Every stretch, pull, or rough cut can unravel your cotton’s careful construction.
Master your craft with these pro techniques:
- Reinforce stress points strategically before cutting
- Handle fabric like a precious textile, minimizing thread tension
- Use precision tools such as pinking shears to protect vulnerable edges
Your threads will thank you for the gentle touch.
Fabric Age and Use
When your cotton fabric starts showing its age, those fraying edges can feel like battle scars of countless crafting adventures.
Just like an old pair of jeans tells a story, aging fabrics reveal their history through delicate thread unraveling. Your textile’s lifespan depends on more than just initial quality—it’s about how you care for it.
A textile’s soul is woven through care, each thread a whisper of crafting love and preservation.
- Smart storage prevents premature wear
- Gentle handling extends fabric life
- Careful laundering maintains fabric integrity
- Proper preservation stops fraying edges
Stop Fraying With Sewing Tools
You’ll save your cotton projects from unraveling disaster by mastering a few key sewing tools that stop fraying in its tracks.
Whether you’re a beginner or seasoned crafter, sergers, zigzag stitches, and overcast techniques will become your fabric’s best defense against thread meltdown.
Sergers
Serger machines are your secret weapon against fabric fraying. Think of them as Swiss Army knives for sewing – they trim, stitch, and finish seams in one swift motion. Mastering overlock settings means saying goodbye to unraveling edges forever.
Using the right serger machines can make a significant difference in achieving professional results. With proper serger maintenance, you’ll transform ragged edges into professional-looking finishes that’ll make even seasoned crafters jealous.
| Tool | Magic | Pro Tip |
|---|---|---|
| Serger | Edge Protection | Adjust tension carefully |
| Thread | Strength Booster | Match thread to fabric |
| Settings | Precision Control | Practice makes perfect |
With proper serger maintenance, you’ll be able to achieve high-quality finishes. Mastering overlock settings is key to preventing fraying and giving your projects a polished look. By following these tips and using the right tools, you can create beautiful, long-lasting pieces with professional-looking seams.
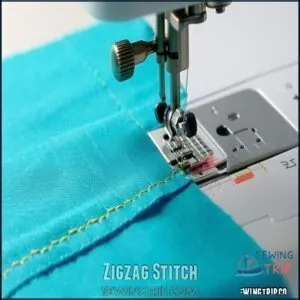
Zigzag Stitch
Your sewing machine’s zigzag stitch is your secret weapon against fabric unraveling.
Master this fraying prevention technique with these pro tips:
- Adjust stitch length and width for balanced edge coverage
- Choose a sturdy jeans needle matching your thread color
- Control thread tension for smooth, professional stitching
- Stabilize delicate fabrics with tear-away interfacing
- Maintain consistent sewing speed for even reinforcement
When stopping cotton fraying, think of the zigzag stitch as your fabric’s guardian angel.
By carefully guiding your material under the needle, you’ll create a protective barrier that locks loose threads in place.
This simple technique transforms raw edges into crisp, durable boundaries, giving your project a polished, professional finish that’ll make other crafters green with envy.
To achieve superior results, understanding the proper use of a sewing machine is essential for any sewing project.
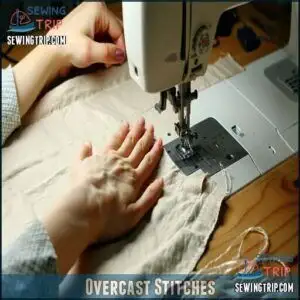
Overcast Stitches
From zigzag to overcast, your sewing arsenal just got stronger! Overcast stitches are your secret weapon for stopping cotton fabric fraying like a pro.
Master these techniques and watch your projects transform:
- Set stitch length short and tension medium
- Guide fabric gently without stretching
- Align edges precisely within 1/8 inch
Precision is your friend here. Start slowly, practicing on scrap fabric to build confidence. This method creates professional-looking seams that’ll make your crafting buddies wonder how you became such a fabric-finishing ninja.
Remember, every stitch counts in preventing those pesky fabric edges from unraveling, and with these techniques, you’ll be a fabric-finishing expert in no time.
Stop Fraying Without Sewing
When you’re working with cotton and don’t want to break out the sewing machine, you’ve got some killer tricks to stop fabric from unraveling.
Pinking shears, fabric sealants, and fusible interfacing are your secret weapons for keeping those edges neat without threading a single needle.
Pinking Shears
When your fabric edges threaten to unravel, pinking shears become your trusty sidekick.
These specialized cutting tools create strategic zigzag patterns that lock fabric fibers in place, dramatically reducing fraying risks. Perfect for tightly woven cotton, they transform potential edge disasters into clean, stable boundaries.
The unique serrated blade design interrupts thread movement, offering a simple fray reduction technique without complex stitching. Pro tip: Keep your shears sharp and clean for precision cutting every time.
While not a permanent solution, pinking shears are a quick, effective method to prevent cotton fabric from falling apart. Think of them as your fabric’s first line of defense—simple, reliable, and always ready to protect your crafting masterpiece.
For the best results, using high quality pinking shears tools is essential to achieve professional-looking cuts.
Fusible Interfacing
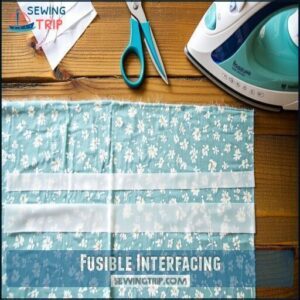
Your cotton fabric’s worst nightmare just met its match: fusible interfacing. This fabric stabilizer acts like a protective shield, stopping fraying before it starts.
Cut lightweight fusible web into slim 1/4-inch strips, positioning them carefully along fabric edges. Pro tip: Add an extra 3/8-inch to your seam allowances for maximum protection.
Ironing these interfacing strips onto the wrong side of your fabric creates an invisible barrier that locks threads in place. Different weights work for various fabric types – choose lightweight for delicate cottons and medium-weight for sturdier materials.
With these interfacing techniques, you’ll transform fragile fabric edges into rock-solid, fray-resistant masterpieces.
Fabric Sealants
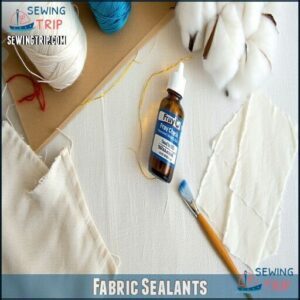
After reinforcing your fabric’s edges with fusible interfacing, you’ll want an extra layer of protection. Enter fabric sealants like Fray Check—your secret weapon against unraveling threads.
These liquid heroes create an invisible barrier that locks fabric edges in place, surviving multiple wash cycles without losing flexibility.
- Quick like a ninja’s strike
- Saves your project from disaster
- No sewing skills required
- Works on every fabric type
- Budget-friendly magic solution
Just squeeze a thin, precise line along raw edges and let it dry completely. These no-fray solutions transform fragile fabric borders into rock-solid boundaries, ensuring your crafting masterpiece stays intact through wear and washing.
Pro tip: Always test on a scrap first! Understanding fabric fraying issues is vital to choosing the right sealant for your project, and it helps to prevent fabric fraying.
Temporary Fray Fixes
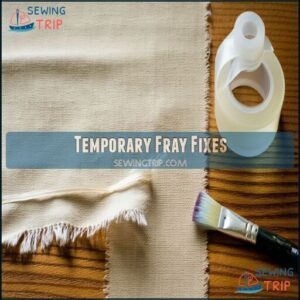
When your cotton fabric starts to fray, don’t panic – you’ve got quick and easy temporary fixes right at your fingertips.
From handy tape solutions to clever glue tricks, you’ll learn pro crafting hacks that’ll keep your fabric edges neat and tidy in a pinch.
Tape
In the battle against fabric fraying, reach for your tape arsenal and save those edges.
Different tapes offer unique solutions for every crafting challenge.
| Tape Type | Durability | Ease of Use | Aesthetic Appeal |
|---|---|---|---|
| Masking Tape | Low | Easy | Poor |
| Double-Sided Tape | Medium | Moderate | Good |
| Iron-On Hem Tape | High | Complex | Excellent |
| Fabric Adhesive Strips | High | Simple | Very Good |
Precise application matters, and understanding fabric fraying prevention is key to achieving professional results.
Press firmly, match colors strategically, and watch those pesky fabric edges transform from ragged to refined, giving your crafting confidence a significant upgrade with the right tape arsenal and fabric adhesive techniques, leading to a more refined finish.
Glue
Anyone can master the art of fabric edge sealing with the right glue techniques.
Here’s how to tame those fraying edges:
- Choose specialized fabric adhesives like no-fray fabric glue for precise application.
- Apply a thin, careful line along raw edges using a cotton swab.
- Test bonding agents on scrap fabric to prevent unexpected stiffness.
Edge sealers such as Fray Check create a flexible barrier that keeps your fabric looking crisp and professional.
With a steady hand and the right fray stop solution, you’ll transform ragged edges into clean, controlled masterpieces.
Preventing Fraying Proactively
You’ve got the power to stop cotton fabric from fraying before it even starts, and it all begins with smart choices.
By selecting high-quality fabrics and pre-washing them correctly, you’ll create a strong foundation that keeps your textile projects looking crisp and professional.
Quality Fabrics
When you’re ready to outsmart fabric fraying, your fabric selection becomes your secret weapon.
High-quality cotton is like a fortress against unraveling edges.
Here’s your battle plan for textile triumph:
- Seek smooth fabrics with ultra-tight weaves
- Prioritize higher thread counts
- Inspect fiber strength carefully
- Avoid loosely constructed materials
- Invest in premium textile finishing
Master these techniques, and you’ll transform fragile fabrics into durable masterpieces that laugh in the face of fraying.
Understanding fabric fraying causes is essential to making informed decisions about fabric selection and finishing methods, which can help you achieve textile triumph and create durable masterpieces.
Pre-washing
Dive right into pre-washing to save your cotton fabric from fraying’s sneaky grip. This essential step isn’t just about cleanliness—it’s your secret weapon against unraveling threads.
Pre-washing shrinks fibers, tightens weave density, and prevents future wardrobe malfunctions.
| Prewashing Step | Cotton Impact | Pro Tip |
|---|---|---|
| Water Temp | Reduces Shrinkage | Cold cycles only |
| Detergent | Prevents Color Bleeding | Mild, color-safe |
| Soak Time | Stabilizes Fibers | 15-20 minutes |
| Drying Method | Controls Fabric Texture | Air dry flat |
| Edge Prep | Minimizes Fraying | Trim before washing |
By mastering pre-washing techniques, you’ll transform fragile fabric into a resilient crafting companion. Your future self will thank you for this fiber-saving ritual.
Frequently Asked Questions (FAQs)
Can cotton fabric Fray?
Yes, cotton fabric can fray.
Its loose weave and natural fibers make it prone to unraveling at edges when cut or stressed.
You’ll notice threads loosening and pulling away, especially after washing or handling.
How do I stop fabric from fraying while quilting?
Cut to the chase with serger or zigzag stitches.
When quilting, prevent fraying by using pinking shears, applying Fray Check liquid, or folding edges under before stitching to keep your fabric neat and tidy.
How do you prevent a cotton fabric from fraying?
You’ll stop cotton fabric from fraying by using pinking shears, applying fabric glue along edges, or reinforcing with zigzag stitches.
These quick techniques create a protective barrier, keeping your fabric neat and preventing thread unraveling during sewing or washing.
How do you Fray a fabric?
Did you know 68% of DIY enthusiasts intentionally fray fabric for unique textures?
You’ll want sharp scissors, a sturdy work surface, and patience.
Gently pull threads, creating a soft, distressed edge that adds character to your fabric project.
Can you stop fabric from fraying?
You’ll prevent fabric fraying by using techniques like serging edges, applying zigzag stitches, using pinking shears, or adding fabric glue.
Careful handling and choosing the right method for your fabric type are key to maintaining clean, durable edges.
How do you prevent a woven fabric from fraying?
Like a fortress defending its borders, guard your fabric’s edges with zigzag stitches, serging, pinking shears, or fabric glue.
Secure those threads strategically to keep your woven material from unraveling during wear and washing, using methods such as serging to ensure durability.
How to stop cotton edges fraying?
You’ll tame cotton fabric fraying by applying zigzag stitches, using pinking shears, or sealing edges with Fray Check.
These techniques create a protective barrier, keeping your cotton fabric looking crisp and professional without unraveling.
How do you cut cotton so it doesn’t fray?
Cut cotton fabric with sharp scissors like a hot knife through butter.
Use pinking shears to reduce fraying, or seal edges with a zigzag stitch on your sewing machine for clean, professional-looking results that’ll keep threads in check.
This will help achieve professional-looking results.
How to stop fabric from fraying without sewing?
You can stop fabric from fraying without sewing by using Fray Check liquid.
Applying fabric glue along edges, creating zigzag cuts with pinking shears, or using fusible webbing to bond fabric fibers quickly and effectively.
How to seal fabric so it doesn’t fray?
Imagine fabric threads as unruly rebels seeking escape.
Seal their mutiny with Fray Check liquid, fusible webbing, or fabric glue.
Your edges will stand firm, preventing unraveling and maintaining a crisp, professional finish with fabric glue.
Conclusion
Ultimately, stopping cotton fabric from fraying isn’t rocket science—it’s crafting survival! Whether you’re a sewing newbie or a seasoned pro, you’ve got multiple tricks to keep your fabric edges pristine.
From sergers and zigzag stitches to pinking shears and fabric sealants, mastering how to stop cotton fabric from fraying guarantees your projects appear professional.
Remember, prevention is key: choose quality fabrics, pre-wash smartly, and watch your textile creations stand the test of time. Happy crafting!

