This site is supported by our readers. We may earn a commission, at no cost to you, if you purchase through links.
 To pre-wash fabric without fraying, you’ll need to take some precautions.
First, secure the raw edges with a zigzag stitch, fray-check liquid, or bias tape before washing.
Use a gentle cycle with cold water and minimal detergent. For delicates, hand-wash by soaking in cool, soapy water and gently agitating.
Always check care labels and test for colorfastness.
When drying, opt for a low heat setting or air drying to prevent shrinkage.
Finally, investing in a mesh laundry bag is a small step that can safeguard your fabric from fraying during the wash.
With these tips, your pre-washed fabrics will remain pristine and fray-free, ready for your next sewing project.
Table Of Contents
- Key Takeaways
- How to Pre Wash Fabric Without Fraying?
- Reasons to Pre-Wash Fabric
- Understanding Washability
- Pre-Washing Techniques
- Preventing Fraying Before Washing
- Effective Fray Prevention Methods
- Precautions for Fabric Selection
- Tips for Preventing Fraying During Washing
- Final Fabric Care Tips
- Frequently Asked Questions (FAQs)
- Conclusion
Key Takeaways
- Secure raw edges with zigzag stitch, fray-check liquid, or bias tape before washing
- Use gentle cycle with cold water and minimal detergent
- Always check care labels and test for colorfastness
- Invest in a mesh laundry bag to safeguard fabric from fraying during the wash
How to Pre Wash Fabric Without Fraying?
To pre-wash fabric without fraying, use a gentle machine wash cycle with cool water and a mild detergent. Prevent fraying by stitching a line of zigzag or straight stitches along the fabric edges before washing.
Reasons to Pre-Wash Fabric
You’ll want to pre-wash fabric before sewing to prevent shrinkage, which can ruin a carefully crafted garment. Pre-washing also removes excess dye and chemical treatments that could bleed or cause discoloration, ensuring your project maintains its intended vibrancy.
Prevents Fabric Shrinkage
Pre-washing natural fiber fabrics like cotton prevents shrinkage, ensuring your garment fits perfectly after the first wash. Synthetic fabrics may not need pre-washing for shrinkage, but it’s still wise to pre-shrink them to maintain fabric integrity and prevent fraying during sewing.
Removes Excess Dye
Pre-washing fabric removes excess dye, preventing color bleeding and fading. Wash fabrics separately, especially bright colors, to avoid dye transfer. Test for colorfastness before washing. Use a gentle cycle and mild detergent to protect fabric fibers and minimize fraying during pre-washing.
Washes Out Chemicals
Pre-washing fabric removes chemicals used in textile manufacturing, addressing environmental concerns and chemical sensitivities. Test a swatch first, then gently machine wash on a delicate setting using minimal detergent. Air dry to preserve fabric durability and sustainability (Source).
Understanding Washability
Before pre-washing your fabric, it’s essential to understand its washability. Check the care label for specific instructions, and test a small swatch to confirm colorfastness.
Consider the fabric’s type, weight, and construction – delicate or fragile fabrics may not require pre-washing. However, pre-wash fabrics susceptible to shrinkage or shedding, like natural fibers.
To prevent fraying, use fray-check liquid or tape on raw edges, fold and stitch with a zigzag, or secure with bias tape or a serger.
For machine washing, use a gentle cycle with cold water and mild detergent, avoiding overfilling. Air-dry or use low heat.
Hand-wash delicate fabrics in cold water, gently squeezing excess water before laying flat to dry.
Pre-Washing Techniques
When machine washing fabric before sewing, use a gentle cycle with cold water and minimal detergent to avoid color bleeding or damage. For hand washing, submerge the fabric in cool water with a mild soap, gently agitating and rinsing thoroughly before air drying or using a low heat setting.
Machine Washing
Machine wash your fabric on a delicate cycle using cold water and a mild detergent. Place fabric in a mesh laundry bag to prevent tangling and fraying. Dry on a low heat setting or air dry to maintain fabric quality and prevent shrinkage (Source).
- Avoid using bleach or fabric softener, as they can damage or discolor your fabric (Source).
- Wash similar colors together to prevent dye transfer .
- Gently remove excess water from the fabric after washing to prevent over-drying .
Hand Washing
When hand washing fabric for pre-washing, start by filling a sink or bathtub with cold water. Add a small amount of mild detergent and gently agitate the fabric. Let it soak for 45-60 minutes. Afterwards, rinse thoroughly with cold water and gently squeeze excess water before air drying or hanging on a clothesline.
| Hand Washing Tips | ||
|---|---|---|
| Use cold water for soaking | Gently agitate fabric | Rinse thoroughly |
Drying Techniques
After washing, gently squeeze excess water from the fabric. Avoid using high heat settings on the dryer. Remove fabric while slightly damp and air-dry on a flat surface or clothesline. Use a fabric steamer to remove wrinkles before pressing with an iron on the appropriate heat setting.
Preventing Fraying Before Washing
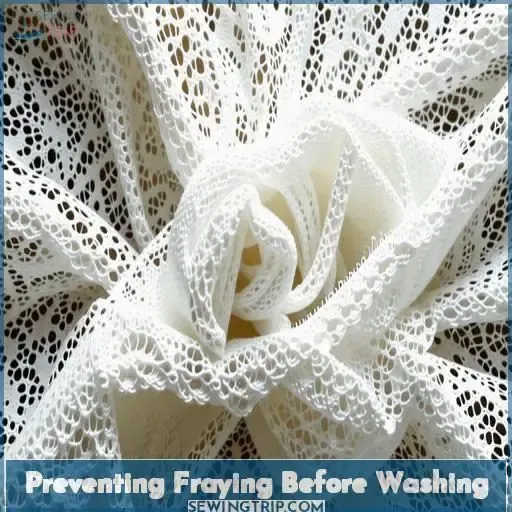
Before you toss your fabric in the wash, take a moment to prevent potential fraying. Delicate fabrics like chiffon and lace require extra care. Secure raw edges with a zigzag stitch or serger to keep threads in place. For added protection, apply a fray-check liquid or tape along the cut ends. Pinning fabric layers together also helps maintain shape. When machine washing, use a mesh laundry bag to contain loose threads. Avoid overstuffing the washer, as agitation can cause fraying. Loosely woven fabrics like gauze are more prone to fraying, so take extra precautions. With a little preparation, you can pre-wash your fabric with confidence and minimal fuss.
| Fraying Prevention Method | Suitable Fabrics | Pros | Cons | When to Use |
|---|---|---|---|---|
| Zigzag Stitch | Most fabrics | Effective, easy | May add bulk | Before washing delicate fabrics |
| Serger | Most fabrics | Secure, professional finish | Requires serger | Before washing loosely woven fabrics |
| Fray-Check Liquid | Most fabrics | Invisible, durable | Stiff feel | Along cut edges of delicate fabrics |
| Mesh Laundry Bag | Delicate fabrics | Protects fabric, contains threads | May take longer to dry | When machine washing delicate fabrics |
Effective Fray Prevention Methods
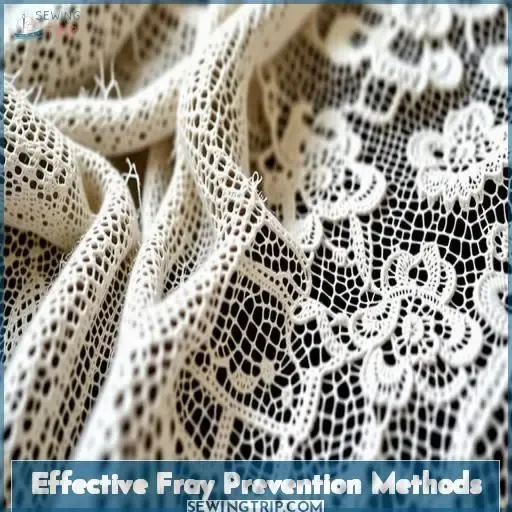
To prevent fraying when pre-washing fabric, start by using fray-resistant fabrics like tightly woven cotton or polyester.
Hemming the edges with a zigzag stitch or serging them can also help contain loose threads.
For extra reinforcement, apply a fabric stabilizer like starch or sizing to the cut edges before washing.
When drying, avoid high heat which can cause fraying. Instead, air dry the fabric flat or hang it to prevent stretching.
Finally, press the fabric with a hot iron to set the weave and smooth out any wrinkles.
Precautions for Fabric Selection
Carefully examine the fabric type, weave, and fiber content before pre-washing to determine its suitability and minimize fraying risks. Select fabrics with tight weaves or consider alternative options like knits or synthetic blends that are less prone to excessive fraying during the washing process.
Pre-Wash Fraying Precautions
To prevent fraying during pre-washing, consider using fray-check application, serging raw edges, zigzag stitching, mesh laundry bag usage, and proper fabric type selection. These precautions guarantee fabric edges remain intact.
- Apply fray-check liquid on raw edges
- Secure edges with zigzag stitching or serging
- Utilize a mesh laundry bag for delicate fabrics
- Choose suitable fabric types to minimize fraying
- Practice caution when selecting fabrics for pre-washing
Select Suitable Fabric Types
When selecting fabric, consider shrinkage, excess dye, and chemical content. Synthetic fabrics require less pre-washing, while natural fibers like cotton and linen benefit from gentle care to prevent distortion.
Identify Appropriate Washing Methods
Determine the appropriate washing method based on fabric type, weight, and weave tightness to prevent deterioration, color loss, and damage from machine agitators. Delicate fabrics may require hand-washing.
Implement Fray Prevention Techniques
To prevent fraying, baste raw edges, use a mesh bag, avoid overstuffing, select a gentle cycle, air dry, and press fabric. Experiment with fray-check liquid or tape on edges for extra protection.
Tips for Preventing Fraying During Washing
To prevent fraying when washing fabric, consider these essential tips:
- Utilize a mesh laundry bag before placing fabric in the washing machine.
- Apply fray-check liquid or bias tape on raw edges for added reinforcement.
- Opt for a zigzag stitch along the fabric edges to secure them effectively.
- When dealing with delicate fabrics, consider using pinking shears to prevent excessive fraying.
Final Fabric Care Tips
Regarding final fabric care advice, it’s imperative to heed the nuances to guarantee your fabric’s durability. Here are some pivotal tips for fabric maintenance:
- Hand Washing: For delicate fabrics or those prone to fraying, hand washing may be gentler and more effective than machine washing.
- Detergent Alternatives: Consider using minimal detergent or specialized fabric care products to avoid damage from harsh chemicals found in regular detergents.
- Drying Techniques: Opt for air-drying on a flat surface or using a clothesline to prevent excessive heat exposure that could damage the fabric.
- Ironing Tips: Use the appropriate heat setting for each fabric type to prevent scorching or damaging the fibers.
These concluding fabric care tips are essential for preserving the pristine quality of your fabrics and extending their lifespan.
Frequently Asked Questions (FAQs)
How to keep raw fabric edges from fraying?
To keep raw fabric edges from fraying, you’ll want to baste, use a mesh laundry bag, avoid overfilling the washer, use a gentle spin cycle, and air dry. Properly securing those edges before washing is key!
How do you prepare fabric for pre washing?
Before pre-washing, baste the raw edges or secure them with bias tape. Use a mesh laundry bag, and wash on a gentle cycle with cold water and mild detergent.
Can I wash fabric with raw edges?
No, you shouldn’t wash fabric with raw edges as it’ll lead to excessive fraying. Secure the raw edges first by serging, zigzag stitching, or using pinking shears. This prevents unraveling and fabric damage during washing.
How to keep fabric from fraying without sewing?
Secure fabric’s raw edges with fray-check liquid or tape. Pin edges together before washing, or use a mesh laundry bag. Air-dry on a flat surface when done.
How do I pre-wash delicate fabrics like silk or chiffon?
For delicate fabrics like silk or chiffon, it’s best to hand-wash them in cool water with a mild detergent. Gently swish and avoid wringing or twisting to prevent fraying and damaging the fibers.
Can I pre-wash fabrics with metallic prints or embellishments?
Pre-washing fabrics with metallic prints or embellishments requires extra care. Test a small swatch first, as harsh washing may damage delicate components. Hand-washing gently is often best to preserve the fabric’s details.
What if my fabric bleeds color during pre-washing?
Oh, the irony of pre-washing! If fabric bleeds, try vinegar or salt in the wash cycle – it’ll grab those pesky dyes. Or embrace the artistic flair and create a one-of-a-kind piece.
How do I pre-wash fabrics with nap like velvet or corduroy?
To pre-wash fabrics with nap like velvet or corduroy, handwash them gently using a mild detergent, rinse thoroughly, and air-dry. Avoid agitation and rubbing which can crush the nap.
Can I pre-wash fabrics with fusible web or interfacing already applied?
You’re marching into battle, fabric warriors! Tread carefully – fusibles can melt in the hot wash. Cool handwashing or a short, gentle cycle preserves those crisp foundations.
Conclusion
Ultimately, the secret to pristine, fray-free fabric lies in your diligent pre-washing approach.
Like a seamstress’s steadfast needle, you’ll conquer how to pre-wash fabric without fraying by securing edges, employing gentle cycles, heeding care labels, and air drying when possible.
Embrace mesh laundry bags as invaluable allies.
With careful preparation and suitable prevention techniques, your fabrics will emerge impeccable, poised for your next sewing masterpiece.

