This site is supported by our readers. We may earn a commission, at no cost to you, if you purchase through links.
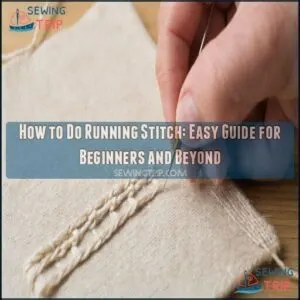
Start by threading your needle and knotting the end. Choose lightweight fabric and position your hoop for stability.
Push the needle up through the fabric from underneath, creating equal-length stitches and spaces between them. Keep your movements consistent and rhythmic – think of it like creating a musical pattern with your thread.
Work in a straight line, maintaining even tension. Practice makes perfect, so don’t worry if your first attempts look a bit uneven.
As you gain confidence, you’ll find running stitch becomes second nature.
Want to discover more sewing secrets that’ll transform your crafting game?
Table Of Contents
- Key Takeaways
- What is Running Stitch?
- How to Do Running Stitch
- Materials Needed for Running Stitch
- Threading The Needle and Starting
- Creating Lines and Fills With Running Stitch
- Running Stitch Variations and Techniques
- Advanced Running Stitch Methods
- Common Applications of Running Stitch
- Tips for Mastering Running Stitch
- Running Stitch in Embroidery and Beyond
- Frequently Asked Questions (FAQs)
- Conclusion
Key Takeaways
- You’ll master running stitch by focusing on consistent needle placement, maintaining even stitch lengths, and keeping steady fabric tension throughout your sewing process.
- Choose your thread and needle carefully based on your fabric type – lighter threads work best for delicate materials, while heavier threads suit thicker fabrics like denim.
- Practice different variations like double running stitch, looped running stitch, and whipped running stitch to add texture and depth to your embroidery and sewing projects.
- An embroidery hoop is your secret weapon for creating perfect running stitches, providing stable fabric tension and giving you crystal-clear visibility of your stitch placement.
What is Running Stitch?
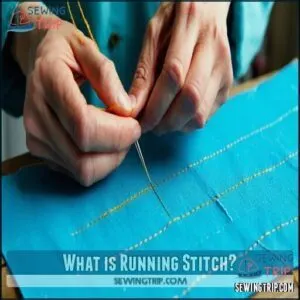
A running stitch is a simple hand-sewing technique where the needle moves in and out of the fabric in a straight line.
It’s often used for basic seams, gathering fabric, or adding decorative touches to projects.
Definition and Uses
The running stitch is the backbone of hand sewing, a basic stitch that’s simple yet incredibly versatile.
It’s a straightforward technique where you pass the needle up and down through the fabric, creating a dashed-line effect.
This stitch is perfect for beginners learning sewing techniques or tackling small, manageable projects.
Its charm lies in its adaptability.
Whether you’re repairing a seam, basting fabric pieces together, or adding decorative touches, the running stitch has you covered.
It’s also a gateway to more advanced sewing techniques and artistic expression in embroidery.
- Stitch Characteristics: Straight, evenly spaced, and easy to adjust for different effects.
- Beginner Projects: Ideal for practicing control and consistency.
- Cultural Examples: Found in traditional styles like Sashiko embroidery.
Mastering this stitch is essential for any sewing enthusiast’s stitch guide!
Basic Running Stitch Technique
Ever wonder how to master the basic stitch that forms the foundation of many sewing techniques? The running stitch is your go-to.
Sew simply, stitch boldly: The running stitch—your gateway to textile artistry.
Start by bringing the needle up through the fabric’s wrong side. Keep your hand placement steady and insert the needle back down a short distance ahead. This creates neat, dashed lines.
Focus on maintaining consistent stitch length and even thread tension—too tight, and the fabric puckers; too loose, and it looks sloppy.
Hold the needle at a slight needle angle to guide it smoothly.
With practice, this simple hand sewing technique works on any fabric choice, making it a versatile stitch guide.
For superior results, beginners should learn running stitch basics before attempting complex projects.
How to Do Running Stitch
Starting with the running stitch is a great way to get into beginner sewing. It’s simple yet essential for hand stitching projects.
To get started, focus on these key steps:
- Stitch Direction: Plan your line carefully. Move the needle in a straight path to create evenly spaced stitches. Keep your needle angle steady as you sew.
- Fabric Tension: Avoid pulling the thread too tightly, as it can distort the fabric. Keep it firm but flat for smooth results.
- Knot Security: Begin with a secure knot at the thread’s end to prevent slipping. Finish with another knot to lock your work.
Consistency matters more than speed. With practice, your running stitch will become neat, reliable, and ready for creative projects!
Materials Needed for Running Stitch
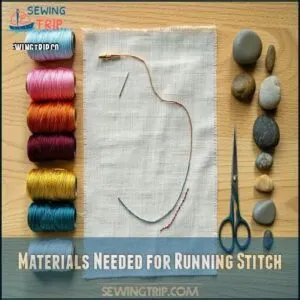
To start a running stitch, you’ll need a few basic materials. Gather a needle, thread, fabric, and scissors to guarantee a smooth process.
Thread and Needle Selection
Choosing the right needle and thread is key for a smooth running stitch.
Select a needle size that suits your fabric—smaller for delicate materials, larger for thicker ones.
Match thread weight to fabric compatibility; lighter threads work for silks, while heavier threads suit denim.
For decorative stitching, use embroidery needles with larger eyes for specialty threads like embroidery floss.
Don’t forget color choice—contrast adds pop, while matching blends seamlessly. Proper needle types for sewing guarantee neat, even stitches.
Refer to a detailed needle guide to guarantee proper selection.
Importance of Visibility
Seeing your work clearly can make or break your running stitch success. Good visibility helps you keep your hand stitches neat and evenly spaced, making the process smoother and more enjoyable.
Whether you’re following stitch instructions or experimenting, here’s how to set yourself up for success:
- Lighting Conditions: Natural light works wonders, so sew near a window if you can. If not, a bright desk lamp will do the trick. Avoid dim lighting to prevent eye strain.
- Fabric Contrast: Choose thread colors that stand out against your fabric. For example, dark thread on light fabric or light thread on dark fabric makes tracking your stitch spacing much easier.
- Practice Visibility: Sit where shadows won’t block your view. Adjust your position to keep your fabric and thread in clear sight throughout your sewing tutorial.
These tips guarantee smooth hand sewing every time! For practice, calico fabric is ideal.
Fabric and Scissors
Good fabric and sharp scissors make all the difference in running stitch projects.
Light cotton is ideal for beginners, as it’s easy to handle.
Use fabric shears exclusively for cloth to maintain scissor sharpness. For superior results, consider investing in top-rated sewing scissors.
Pay attention to the fabric grain for clean cuts.
Here’s a quick guide:
| Fabric Types | Scissor Sharpness | Cutting Techniques |
|---|---|---|
| Cotton or Linen | Keep blades sharp | Cut along fabric grain |
| Pre-washed Fabrics | Avoid paper cutting | Use smooth motions |
| Practice Materials | Regular maintenance | Trim edges neatly |
Threading The Needle and Starting
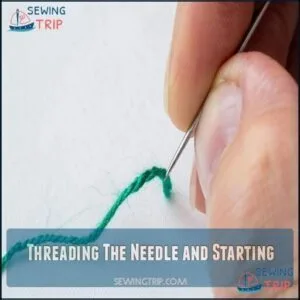
Threading the needle is the first step to starting your running stitch.
It’s simple—just pass the thread through the needle’s eye and secure it with a knot at the end.
Step 1 – Thread The Needle
Before you start your running stitch, threading the needle is key.
Cut a thread about 18 inches long—long enough to work with but not so long it tangles.
- Dampen the thread’s end to stiffen it for easy threading.
- Use a needle threader if the needle size feels too small for the thread type.
- Hold the needle steady—shaky hands can make this step tricky.
- Check your knot security by tying a firm knot at the thread’s end.
With your needle and thread ready, you’re set for some smooth hand sewing!
Step 2 – Insert Needle From Below
Flip your fabric to the wrong side and prepare for the first step in hand sewing.
Insert the needle from below, ensuring the needle insertion angle is straight. Keep the knot placement underneath to secure the thread.
Maintain smooth but not stretched fabric. Adjust thread tension so it glides easily.
Use the table below for quick tips:
| Aspect | Do | Don’t |
|---|---|---|
| Needle Insertion | Keep angle straight | Insert at an odd angle |
| Fabric Side | Start on the wrong side | Begin on the right side |
| Knot Placement | Place knot underneath | Skip knotting the thread |
| Thread Tension | Keep it balanced | Pull too tight or loose |
Step 3 – First Stitch
Your first stitch sets the tone for your running stitch journey.
After the needle’s initial insertion through the fabric, confirm the thread’s knot placement is secure underneath. Hold the fabric steady with your thumb and index finger for proper tension.
Now, make your first stitch:
- Position the needle about 1/8 inch forward for a neat, even look.
- Keep the stitch direction straight to maintain a clean line.
- Push the needle down gently, guaranteeing smooth fabric entry.
Pull the thread snugly but not too tight—this avoids puckering.
With this easy stitch, you’re mastering hand sewing basics.
Practice often, and soon this sewing tutorial will feel second nature! Proper tension, smooth fabric and easy stitch are key to mastering hand.
Creating Lines and Fills With Running Stitch
You can use running stitch to create clean lines or fill spaces with texture. Adjust the stitch length and spacing to suit your design and achieve different effects.
Working The Stitch as a Line
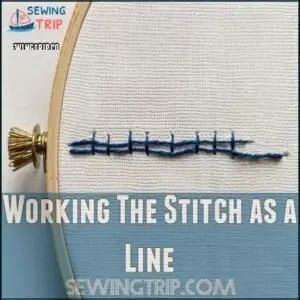
Creating straight stitch lines with a running stitch feels like sketching with thread. It’s a simple stitch type, but precision makes it shine.
To get that clean, dashed line effect, focus on control and spacing.
- Measure Consistently: Use your thumb or a ruler to keep even stitch lengths and gaps.
- Control Fabric Tension: Hold your fabric firmly but don’t stretch it too tight.
- Follow the Grain: Align your needle with the fabric’s weave for natural, straight edges.
This sewing tutorial tip helps you master consistent spacing and line thickness.
Whether for decorative lines or basic hand sewing, straight stitch lines are the foundation of many sewing basics.
Working The Stitch as a Fill
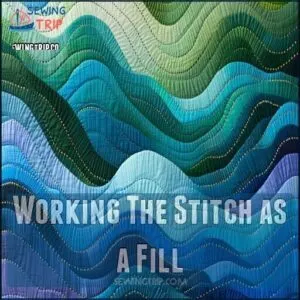
Filling fabric with a running stitch adds depth and personality to your designs.
Craft threads with purpose, transforming simple fabric into a canvas of vibrant, personal expression.
Work in parallel rows, aligning each fabric stitch with the spaces above to create balanced fill patterns.
Adjust stitch density and texture for different effects—tight rows for bold coverage or looser ones for subtle shading techniques.
Layering effects or blending colors can enhance your design further.
Think of this stitch type as a tool for painting with thread, turning simple stitch applications into dynamic artwork.
Varying Stitch and Space Length
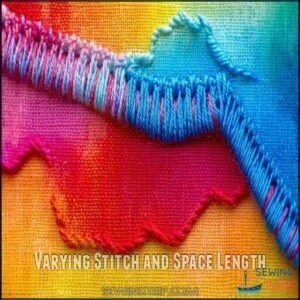
After exploring fills, let’s focus on spacing variations and stitch length. Adjusting these can transform your running stitch into a tool for creating texture or decorative effects.
Here’s how:
- Use uneven stitch length for playful, organic patterns.
- Keep stitches long with wide gaps for a light, airy look.
- Short, tight stitches add strength to seams in hand sewing.
Experiment with stitch variations to obtain endless patterning possibilities. This simple sewing technique offers incredible versatility for both practical and artistic projects.
Running Stitch Variations and Techniques
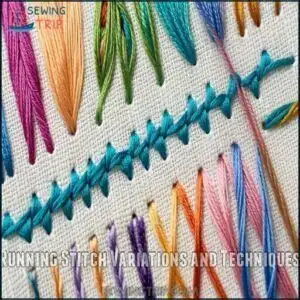
You can explore different running stitch variations to add texture and detail to your projects. Techniques like double, looped, and whipped running stitches offer creative ways to enhance your designs.
Double Running Stitch
The double running stitch, also called the Holbein Stitch, is perfect for creating reversible patterns and bold geometric designs.
This sewing method involves stitching forward, then retracing your steps to fill gaps. It’s ideal for hand sewing projects needing clean, professional lines.
- Guarantees symmetry on both fabric sides.
- Enhances designs with creative color combinations.
- Adds depth to embroidery with its historical context.
Looped Running Stitch
| Technique | Color | Use | Effect |
|---|---|---|---|
| Base Stitch | Single | Lines | Simple |
| Looped Overlay | Contrasting | Borders | Textured |
| Diagonal Lacing | Complementary | Outlines | Raised |
| Multiple Threads | Varied | Fills | Dynamic |
Ready to amp up your running stitch game?
The looped running stitch transforms basic stitches into art.
After stitching your base line, weave a second thread through without piercing the fabric.
Play with loop sizes and thread tensions to create stunning borders that’ll make your embroidery pop.
Your fabric becomes a canvas, and you’re the artist!
Whipped Running Stitch
The whipped running stitch transforms basic embroidery into a stunning rope-like design that’ll elevate your hand stitch game.
By weaving a contrasting thread around a foundation of running stitches without piercing the fabric, you’ll create eye-catching texture effects that pop.
- Select thread colors that create bold visual contrast, like navy with white or black with gold
- Use shorter thread lengths to prevent tangling during the whipping process
- Keep wrapping threads close together for a smooth, professional corded variation
Mastering this sewing technique requires practice and patience.
Your stitch tension determines the final look, so take your time and enjoy the process of creating a beautiful, dimensional hand embroidery detail that’ll make your project stand out.
Advanced Running Stitch Methods
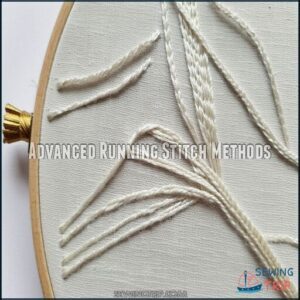
Once you’ve mastered the basic running stitch, you’re ready to elevate your sewing skills with advanced techniques that’ll transform your embroidery and textile projects.
You’ll learn how to navigate curves, turn perfect corners, and create polished finishes that’ll make your needlework look professional and precise.
Curves and Circles
Traversing curved stitching requires precision and patience in hand embroidery.
Master circular motifs by first marking your arc with light pencil guidelines—a pro tip is folding fabric in quarters to locate key points.
Keep your running stitch tension even and create tiny 1/8-inch stitches that follow the curve’s natural flow.
When filling circles, work from the outside inward using concentric rings, allowing radial lines to seamlessly converge toward the center, creating elegant freehand curves.
Turning Corners With Running Stitch
When mastering sharp corners in running stitch, you’ll need precision and patience. Think of your needle as a skilled navigator guiding fabric through tight turns.
Here’s your corner-conquering strategy:
- Shrink your stitch length as you approach the corner
- Stop at the pivot point, lifting the needle cleanly
- Reposition your fabric and continue with angled stitches
Pro tip: Shorter stitches mean smoother curves and crisper edges. Experimenting with varying stitch length can also affect the texture.
By slowing down and paying attention to each small movement, you’ll transform tricky corners into professional-looking masterpieces.
Finishing Your Running Stitch
After maneuvering corners with your running stitch, it’s time to seal your handiwork.
A well-finished project prevents unraveling and keeps your stitches looking sharp.
Try these knotting techniques to secure your thread:
| Technique | Indoor Use | Outdoor Durability |
|---|---|---|
| Double Knot | Quick & Simple | Moderate Hold |
| Weave-and-Hide | Neat Finish | Strong Anchor |
| Backstitch | Secure End | Maximum Protection |
Trim those threads close, and admire your craftsmanship!
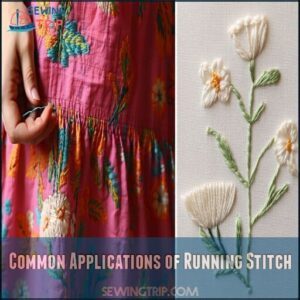
Common Applications of Running Stitch
You’ll find the running stitch to be an incredibly versatile technique that can help you complete a wide range of sewing projects.
Whether you’re mending a favorite shirt, creating decorative embroidery, or joining fabric seams, the running stitch is a foundational skill that’ll become your go-to method for both functional and creative sewing tasks.
Hand-Sewing Seams
When you’ve mastered curves and corners in advanced running stitch techniques, hand-sewing seams becomes your next skill frontier.
Select thread weight matching your fabric type, spacing stitches evenly at 1/8 inch intervals.
Double-thread your needle for extra seam strength.
Maintain steady pressure as you work, creating durable hand-sewn seams that’ll withstand wear and washing with professional-looking precision.
Basting
Basting is your secret ally in sewing, using long running stitches to temporarily hold fabric pieces together.
These 1/4 to 1/2 inch stitches give you flexibility to test fit and adjust before permanent seaming.
Perfect for delicate fabric types, basting lets you preview your project’s layout without commitment.
Whether you’re a beginner or seasoned sewist, this hand stitch technique confirms precision and gives you breathing room to perfect your creation.
Decorative Embroidery
Your running stitch can transform plain fabric into a canvas of creativity.
Here’s how to make your embroidery designs pop:
- Choose vibrant embroidery floss for eye-catching color palettes
- Experiment with stitch combinations and lengths
- Select fabrics that complement your design vision
- Play with metallic or variegated threads for texture
- Layer running stitch with other decorative stitching techniques
Imagine turning simple lines into intricate embellishment ideas that tell a story.
Blend different thread colors and textures to create depth.
Whether you’re tracing delicate flower stems or crafting bold geometric patterns, running stitch offers endless possibilities for personal expression in embroidery design.
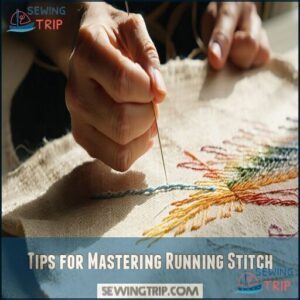
Tips for Mastering Running Stitch
If you want to improve your running stitch, you’ll need to focus on a few key techniques that’ll transform your sewing skills.
Practice makes perfect, so don’t be afraid to experiment with different thread tensions, stitch lengths, and fabric types to find your groove.
Maintaining Consistent Stitch Length
The 3 key markers of a perfect running stitch are crisp, uniform lines that march across your fabric like well-trained soldiers. Achieving consistent stitch length transforms your hand sewing from amateur to professional.
- Create visual guides using ruler-marked parallel lines
- Develop a steady, rhythmic stitching pace
- Use an embroidery hoop to maintain fabric tension
- Practice the "load and pull" technique for multiple stitches
Your hand stitch consistency depends on muscle memory and focused practice. Slow, deliberate movements will help you master stitch length, ensuring your projects look polished and precise every time.
Choosing The Right Thread
| Thread Type | Best For |
|---|---|
| Cotton | Natural fabrics |
| Polyester | All-purpose sewing |
| Silk | Delicate projects |
When you’re about to jump into your next sewing adventure, thread selection can make or break your running stitch.
Think of thread like a trusty sidekick – it needs to match your fabric’s personality.
Lightweight fabrics cry out for fine threads, while heavyweight materials demand sturdy companions.
Embroidery floss brings color and character, but all-purpose polyester thread works wonders for everyday projects.
Pro tip: start with medium-toned threads that camouflage beginner’s wobbles.
Understanding thread weight implications guarantees a smoother sewing experience.
Your thread’s weight, fiber type, and color choice are your secret weapons in creating beautiful hand stitches.
Using an Embroidery Hoop
In hand embroidery, your hoop is like a trusty sidekick for perfect running stitches.
Choose a hoop 2-3 inches larger than your design area to guarantee ideal tension control.
Gently separate the rings, center your fabric, and gradually tighten while pulling outward.
Understanding available hoop dimensions can greatly improve your project’s outcome.
You’ll create a drum-tight surface that gives you crystal-clear stitch visibility and total control.
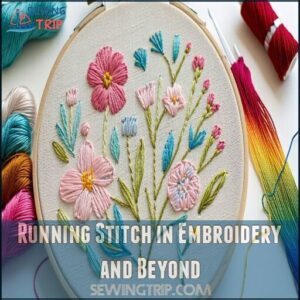
Running Stitch in Embroidery and Beyond
Running stitch is more than just a basic sewing technique—it’s a versatile craft that’ll transform your embroidery and fabric projects.
Whether you’re a beginner or an experienced crafter, you’ll find this simple stitch can create everything from delicate designs to bold decorative patterns.
Sashiko and Other Embroidery Styles
Nestled in Japan’s textile heritage, sashiko embroidery transforms simple running stitches into breathtaking storytelling. This hand embroidery technique weaves cultural wisdom through fabric, creating mesmerizing designs that speak volumes.
- Precision matters: White threads dance across indigo backgrounds
- Geometric patterns emerge from carefully placed stitches
- Historical roots connect modern crafters to rural Japanese traditions
- Architectural inspiration drives intricate, meaningful designs
By mastering sashiko’s regional variations like moyozashi and hitomezashi, you’ll discover a world where every stitch carries the whispers of generations past, bridging traditional craft with contemporary fashion.
Decorative Variations
After mastering Sashiko’s geometric patterns, you’re ready to express your creativity with running stitch decorative variations.
These techniques will transform your embroidery from basic to brilliant.
| Technique | Effect | Difficulty |
|---|---|---|
| Whipped Running Stitch | Rope-like texture | Beginner |
| Double Running Stitch | Bold outlines | Intermediate |
| Threaded Running Stitch | Colorful layers | Advanced |
| Looped Running Stitch | Dimensional texture | Intermediate |
Experiment with color combinations and stitch density to create unique mixed media designs.
Try weaving contrasting threads through your base stitches or connecting parallel lines with gentle curves.
Play with thread weights and textures to develop your signature embroidery style.
Each variation adds depth and personality to your decorative embroidery, turning simple stitches into stunning visual stories.
Frequently Asked Questions (FAQs)
What is a running stitch?
A running stitch is a basic hand sewing technique where you pass your needle up and down through fabric, creating a simple, straight line of evenly spaced stitches.
It is used in embroidery, quilting, and basic mending.
How to do the second method of running stitch?
Dance with thread like a needle’s ballet!
Thread up and create parallel rows, spacing your stitches evenly.
Alternate needle placement precisely, maintaining consistent gaps between each stitch’s entry and exit points. Complete concepts
What causes a stitch in your side during running?
A side stitch happens when your diaphragm muscle cramps during intense exercise.
It’s often caused by eating too close to workout time, rapid breathing, or weak core muscles.
Stay hydrated and pace yourself.
Do you have a side stitch while running?
You might feel a sharp pain in your side when running due to muscle fatigue or breathing patterns.
Slow down, take deep breaths, and press your hand against the sore spot to help alleviate the discomfort.
How do you do a running stitch step by step?
Weave a thread of creativity through fabric, like an artist painting with needle and thread.
Thread your needle, knot the end, then dance the needle up and down in even, straight stitches, creating a rhythmic line of connection.
What are examples of running stitches?
You’ll find running stitch variations like whipped, threaded, and Japanese darning.
Try looped or double running stitches for decorative effects.
Experiment with different thread colors and lengths to create unique embroidery patterns.
What is the running stitch in knitting?
In knitting, a running stitch isn’t standard.
85% of knitters use alternative techniques like stockinette or garter stitch.
You’ll typically create rows by looping yarn through previous stitches, forming a continuous, interconnected fabric pattern.
What is a running stitch exercise?
A running stitch exercise helps you practice creating even, straight stitches by drawing lines on fabric, threading a needle, and practicing consistent up-and-down movements to improve your hand-sewing technique.
How to do a running stitch in crochet?
Ironically, crocheting a running stitch isn’t exactly a thing.
In crochet, you’ll want to use slip stitches or single crochet to create continuous lines, mimicking that classic hand-sewn look across your yarn canvas. Slip stitches
How to do an invisible running stitch?
Learn the invisible running stitch by carefully stitching just beneath the fabric’s surface.
Pick up tiny fabric threads with your needle, creating nearly undetectable stitches that blend seamlessly into your material.
Conclusion
Let your needle dance across fabric like a graceful ballerina, mastering how to do running stitch with confidence and creativity.
You’ve learned the foundational technique that transforms simple thread into beautiful stitches.
Whether you’re mending a favorite shirt or creating stunning embroidery, running stitch is your trusty companion.
Practice will refine your skills, turning each stitch into an affirmation of your growing crafting expertise.
Keep exploring, and watch your sewing journey unfold.

