This site is supported by our readers. We may earn a commission, at no cost to you, if you purchase through links.
 Looking to master the art of hemming pants by hand? Whether you’re adjusting a vintage find or tailoring a new purchase, this guide will walk you through the process, ensuring a polished finish without the need for a sewing machine.
You’ll learn to unpick, measure, cut, and stitch your way to perfectly hemmed pants, all with the finesse of a seasoned tailor.
Yes, you can hem pants by hand by turning them inside out, measuring the new hem length, and sewing with a needle and thread using a slip stitch or running stitch for a nearly invisible finish.
Table Of Contents
Key Takeaways
- Use a seam ripper to carefully remove the existing hem, ensuring not to damage the fabric, and press the fabric flat to eliminate creases before marking and cutting for the new hem.
- Determine the new length of the pants while wearing shoes to ensure the hem complements the shoe style, and pin the fabric evenly all around to ensure even hems.
- After marking and cutting the fabric, use a hem gauge for accuracy, trim excess fabric with pinking shears to prevent fraying, and press the hem before sewing to ensure a crisp finish.
- For sewing the hem by hand, opt for a blind hem stitch for a nearly invisible finish, using small, evenly spaced stitches, and iron the hems afterward for a professional look.
Remove Existing Hem
When it comes to hemming pants by hand, the first step is crucial: removing the existing hem. This process involves using a seam ripper or an alternative tool to carefully unpick the stitches without damaging the fabric.
It’s a meticulous task but necessary to ensure a clean slate for adjusting the pant length to your preference. Once the original hem is removed, pressing the fabric flat eliminates any creases or bumps, creating a smooth surface to work on.
This preparation sets the foundation for a neatly hemmed pair of pants, ensuring the adjustments made are precise and tailored to fit.
Unpick Hem
To successfully remove an existing hem from your pants, follow these detailed steps using the right tools and techniques:
-
Gather Your Tools: Ensure you have a seam ripper at hand. This small but mighty tool is designed specifically for cutting and removing stitches without damaging the fabric.
-
Locate the Hem’s Start Point: Begin at the seam where the hem starts. This is typically easier to identify and allows for a smoother process.
-
Insert the Seam Ripper: Carefully insert the sharp point of the seam ripper under a stitch. The goal is to lift the stitch slightly without catching the fabric.
-
Cut the Stitch: Once the stitch is lifted, push the seam ripper forward to cut through the stitch. You’ll want to do this gently to avoid any snags or tears in the fabric.
By following these steps, you’ll be able to unpick the existing hem efficiently, setting the stage for adjusting the length of your pants to your precise needs.
Press to Eliminate Creases
Once you’ve unpicked the original hem, it’s crucial to press the fabric to eliminate any creases before hand sewing a new hem.
| Step | Action |
|---|---|
| 1 | Set your iron to the appropriate heat setting for your fabric. |
| 2 | Lay the pants flat on the ironing board, wrong side out. |
| 3 | Spritz any stubborn creases with water or a vinegar solution to aid in crease removal. |
| 4 | Press the fabric gently, moving the iron back and forth over the creases. |
Remember to measure the hem allowance accurately to ensure you hem pants evenly. Select the right stitch for your fabric and seam allowance, and iron the hem in place before you begin to sew. This preparation step is essential for a crisp, clean finish on your hand-sewn hem.
Determine New Length
Determining the correct length for hemming pants by hand is a crucial step that ensures your pants fit perfectly with the shoes you plan to wear.
First, try on the pants with the shoes to see how they fall and where you’d like the new hem to sit.
Then, carefully pin the fabric at the desired length, making sure to measure the distance from the top of the pant leg to the new fold all around to ensure evenness.
This process not only helps in achieving a professional-looking hem but also saves you the cost of a tailor, allowing you to invest in more wardrobe additions.
Try on With Shoes
After removing the original hem, it’s crucial to try on the pants with the shoes you’ll be wearing to ensure the new hem length is perfect for your shoe style, especially if you’re dressing for formal occasions or wearing ankle boots.
-
Try on Pants with Shoes: Slip into the pants and the shoes you intend to wear. This step is vital as different shoes can dramatically change the hem length needed.
-
Pin to Desired Length: While wearing the shoes, fold the fabric up inside each leg to your desired length. Place a pin at the back of each leg to mark this position.
-
Check Length in Mirror: Stand in front of a full-length mirror to ensure the pinned hem is even and complements the shoe style. Adjust as necessary before proceeding with hand stitching or a stitch less, invisible hem.
This process is essential for achieving a hem that looks professional and is tailored to your specific style and the shoes you’ll be wearing, without the need for a sewing machine. It’s a display of sewing expertise that results in a polished look, whether you’re creating a blind hem stitch or opting for a simpler hand stitching hem method.
Pin and Measure
After trying on your pants with the appropriate shoes and standing in front of a mirror to determine the desired length, it’s time to pin and measure.
Carefully fold the fabric up inside each leg to the new length, ensuring fold consistency. Secure the new hemline with pins at the back of each leg, checking the pin position for symmetry.
For measurement accuracy, use a hem gauge to measure from the edge of the fabric to the bottom fold, ensuring seam alignment.
Mark and Cut Fabric
When hemming pants by hand, it’s crucial to accurately mark and trim the fabric to ensure a clean, professional finish.
After determining the new length, use a hem gauge to measure and fold the hem to the desired depth, ensuring consistency all around the pant leg.
To prevent the fabric from fraying and to make the hem more durable, trim the excess fabric with pinking shears, which create a zigzag pattern that reduces fraying.
Use Hem Gauge
To use a hem gauge effectively, you’ll need to appreciate its precision. Hem gauges are designed for accuracy, ensuring your hems are even all around.
They come in various types, from sliding to T-square designs, each with unique features to suit different hemming needs. For consistent measurements, especially in tricky areas like curves, a hem gauge is indispensable.
Remember to maintain your hem gauge by keeping it clean and storing it properly to prevent damage. Alternative measuring methods exist, but a hem gauge offers a reliable standard, particularly for those who value meticulousness in their sewing projects.
With proper use, a hem gauge can greatly enhance the quality of your finished garments.
Trim Excess With Pinking Shears
After removing the original hem with a seam ripper and pressing the fabric to eliminate creases, you’re ready to trim the excess fabric.
With sharp pinking shears in hand, cut along the marked line to create a pinked edge. This zigzag pattern not only adds durability to your hem but also offers a decorative touch, especially when hemming curved edges.
The pinked edge is less prone to fraying, making it a practical choice for hand-stitched hem variations.
If you’re using a sewing machine, adjust the hem settings accordingly to accommodate the pinked edge. Remember, the key to a clean cut is using shears that are sharp and making sure to align the teeth of the shears with the previous cut for a continuous zigzag pattern.
Sew the Hem
When it comes to hemming pants by hand, selecting the right stitch type is crucial for a professional and durable finish.
The blind hem stitch is particularly effective for creating a nearly invisible hem on the outside of the pants. This stitch involves making small, discreet stitches that catch only a few threads of the fabric, ensuring the hem holds securely while remaining unseen from the exterior.
This technique requires patience and precision, but the result is a clean, tailored look that enhances the overall appearance of the pants.
Choose Stitch Type
Choosing the right stitch type is crucial for a neat, durable hem. Here’s how to proceed:
- Select Your Stitch: Opt for a stitch pattern that suits the fabric and the look you desire. For a nearly invisible finish, a blind stitch is ideal, while running stitches offer simplicity and speed.
- Prepare the Thread: Cut a length of thread for hand sewing, ideally matching the pant’s color. Thread your needle, knotting one end to prevent slipping.
- Sew with Precision: Begin at a seam allowance, sewing small, even stitches. If you’re using a blind stitch, pick up only a fiber or two from the pant to keep it invisible on the right side.
Sew Blind Hem Stitch
Once you’ve chosen your stitch type, it’s time to master the blind hem stitch, a favorite for creating an invisible hem.
Begin by threading your needle with a single strand and knotting the end. Start at a side seam, inserting the needle into the folded hem.
As you sew, make tiny zigzag stitches every 1/4 inch, ensuring to pick up only a fiber or two from the pant fabric to keep the stitch hidden. This technique requires patience and precision, but the result is a discreet and professional-looking hem.
Use your hem gauge to maintain consistent hem depth throughout, and remember, the right hand sewing tools can make all the difference in achieving that polished finish.
Finalize Hem
Once you’ve hand-stitched your hem, it’s crucial to iron the hems to ensure a crisp, professional finish.
This step not only secures the fabric in place but also checks for evenness throughout the hemline.
By carefully pressing the hem, you’ll create a polished look that’s essential for the final presentation of your pants.
Iron Hems
Once you’ve sewn your hem, it’s time to give it the final touch with a good ironing.
- Set up your pressing equipment with the right heat setting for your fabric type to avoid scorching.
- Use hemline tools like a tailor’s ham or seam roll to support curved areas and edges while ironing.
- Apply gentle pressure and steam to reinforce crisp folds, moving the iron slowly over the hem.
- To prevent new creases, avoid sliding the iron back and forth; instead, lift and press in sections.
These steps will help you achieve a polished finish, ensuring your hand-hemmed pants look impeccable.
Check for Evenness
After ironing your hems to create a crisp edge, it’s crucial to check for evenness. Use your hem gauge, a reliable ally in maintaining fabric consistency, to measure from the top of the pant leg to the fold, ensuring uniformity.
Adjust pin placement as needed to correct any discrepancies. This tool is indispensable for achieving even stitching and a professional finish.
Additional Hemming Tips
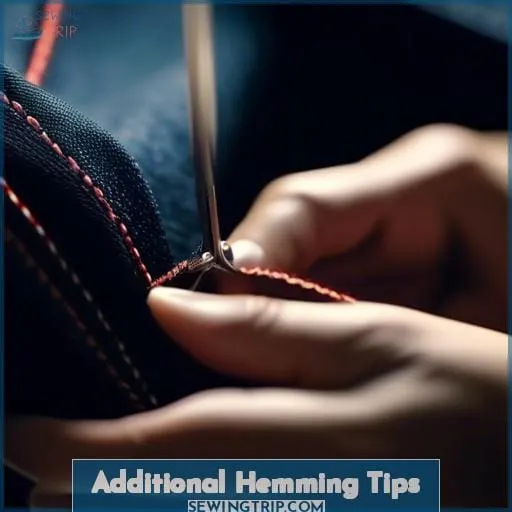
When hemming pants by hand, it’s essential to use a thimble to protect your fingers as you push the needle through the fabric.
Consistent practice with your stitching technique will lead to neater and more professional-looking hems.
Use Thimble
After ironing and checking your hem for evenness, it’s time to consider the thimble’s role in hand sewing.
A thimble’s purpose is to protect your finger as you push the needle through the fabric. For comfort, choose a thimble that fits snugly without slipping off. Thimbles come in various materials, including metal, leather, and silicone, each offering different levels of effectiveness.
When not in use, store your thimble in a small container or sewing kit to prevent loss. Remember, using a thimble can enhance your control and precision, making your sewing experience more enjoyable and less taxing on your fingers.
Practice Stitching
After mastering the use of a thimble and familiarizing yourself with various hemming tools, it’s time to focus on practice stitching. This is where you’ll refine your hand sewing techniques and learn to avoid common mistakes.
- Experiment with different stitch types, such as the slip stitch or blind hem stitch, to find what works best for your hemline variations.
- Pay attention to the tension and spacing of your stitches to prevent puckering and ensure a smooth finish.
- Practice on scrap fabric to get comfortable with the hand sewing process before moving on to your actual garment.
By dedicating time to practice, you’ll gain confidence in your ability to create professional-looking hems by hand. Remember, each stitch is an opportunity to improve your technique and achieve the mastery and control you desire.
Frequently Asked Questions (FAQs)
How do you choose the right thread color and type for hand hemming different fabrics, such as denim versus silk?
For denim, select a strong thread like polyester in classic gold or blue-grey hues.
For silk, choose a fine silk or polyester thread that matches the fabric color.
What are the best practices for hemming pants with patterns or prints to ensure the hem looks consistent with the rest of the garment?
Imagine painting a masterpiece, where every stroke counts.
For patterned pants, align the print at the hem with the rest of the leg. Measure carefully, pin precisely, and stitch with finesse to maintain the garment’s rhythm.
How can you adjust the hemming technique for pants with unique features, such as pleats or cuffs, to maintain their original style?
When hemming pleated pants or those with cuffs, carefully preserve these features.
For pleats, ensure they remain flat and aligned; for cuffs, maintain their width and positioning to keep the original style intact.
What are the recommended methods for fixing a hem that has come undone or is uneven after washing and wearing the pants?
To fix a hem that’s come undone or is uneven, first iron the hem to flatten it.
Then, turn the pants inside out and pin the hem evenly. Use a matching thread to hand sew a slip stitch or blind hem stitch around the hem, ensuring stitches are small and evenly spaced.
Finish with a knot and iron again for a crisp look.
How do you hem pants with a lining without affecting the drape or fit of the outer fabric?
To hem pants with a lining, you’ll need the precision of a surgeon and the eye of an artist.
Carefully detach the lining from the outer fabric near the hem.
Hem the outer fabric to the desired length, then trim the lining to hang slightly shorter, ensuring it won’t peek out.
Reattach the lining with a discreet slip stitch, allowing a whisper of movement between the layers to maintain the pants’ elegant flow.
Conclusion
Embarking on the journey of hand-hemming your pants is akin to navigating the seas of craftsmanship, where each stitch is a wave steering you closer to the shores of sartorial perfection.
With the steps outlined, you’ve charted a course through the removal of old hems, the careful measurement and cutting of fabric, and the meticulous sewing of a new hem.
Now, as you iron the folds and inspect your work for evenness, you stand at the helm of your own wardrobe, no longer a mere passenger.
So wear your newly hemmed pants with pride, knowing that with a needle, thread, and a bit of patience, there’s no fashion challenge you can’t meet head-on.


