This site is supported by our readers. We may earn a commission, at no cost to you, if you purchase through links.
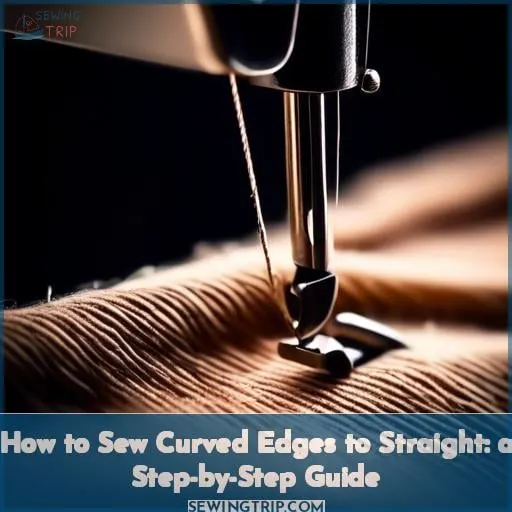
You’re about to embark on a journey where the straight meets the curve, a challenge that beckons your mastery and innovation. Sewing curved edges to straight isn’t just about joining two pieces of fabric; it’s an art that demands your attention to detail.
From staystitching to ensure your curves don’t stretch out of shape, to the careful alignment and pinning of your fabric, each step is crucial for a seamless finish.
Whether you’re a seasoned seamstress or a budding tailor, this guide will equip you with the techniques to navigate this intricate task with confidence.
Let’s dive into the world of sewing, where every stitch is a step closer to perfection.
Table Of Contents
Key Takeaways
- Snip into the seam allowance of the curved edge to allow it to open up flat, ensuring that the stitching lines of both the curved and straight pieces match up, which is crucial for a smooth connection without puckering.
- Staystitch curved edges to prevent them from stretching out of shape during the sewing process, which is especially important when attaching a curved edge to a straight one.
- Use pins effectively to secure the fabric, particularly along curved edges, to provide increased control and precision during sewing.
- Press the seam allowances towards one side using a tailor’s ham for curved seams to achieve a professional finish and to help the fabric lay flat and smooth.
How to Sew a Curved Edge to a Straight Edge
Yes, you can sew a curved edge to a straight edge by snipping into the seam allowance of the curved piece to allow it to open up flat, ensuring the stitching lines match up. This technique helps avoid puckering and ensures a smooth connection between the two pieces.
General Sewing Preparation
To kick off your sewing project on the right foot, it’s crucial to embrace practice and attention to detail. These elements aren’t just beneficial but essential for achieving proficiency and ensuring your projects turn out beautifully.
By carefully managing your machine needle and opting for a shorter stitch length, you’ll gain better control over your sewing, especially when dealing with challenging curved edges.
Importance of Practice for Proficiency
Mastering the art of sewing, especially when it involves combining curved and straight edges, is akin to learning a musical instrument: practice frequency is your best friend. Imagine your sewing machine as a piano and the fabric as your music sheet. Just as a pianist manipulates the keys with finesse, you’ll need to become adept at machine needle manipulation to ensure each stitch sings in harmony with your fabric.
Think of stitch length variation as your tempo, allowing you to control the pace and flow of your fabric’s movement.
Accuracy in seam allowance is your rhythm, keeping each piece in sync for a flawless performance. And when you hit a tricky note, such as the inward curve or sewing curved seams, don’t hesitate to refer to tutorial references for guidance.
Remember, the tailor’s ham is your metronome, ensuring each seam is perfectly pressed and in time.
Navigating the composition of opposite curves in your sewing projects might initially feel like a complex symphony, but with each practice session, you’ll find yourself closer to a standing ovation. So, keep at it, and don’t forget to enjoy the melody of your creation unfolding under your fingertips.
Tips for Handling the Machine Needle and Stitch Length
As we’ve already touched on the importance of practice for achieving sewing proficiency, let’s dive into the nitty-gritty of handling your machine needle and stitch length. These might seem like small details, but they’re the bread and butter of sewing that can make or break your project.
Needle Control: Mastering needle control is crucial, especially when dealing with curved seams or an outward curve. Think of it as steering a car through a tight bend; you need precision and gentle handling. A tip? Walk the machine needle by hand over tricky sections for impeccable accuracy.
Stitch Length: Flexibility is key when sewing curved seams. Opt for a shorter stitch length to navigate those curves like a pro. It’s like choosing the right gear for a steep hill – it gives you better control and ensures a smoother ride.
Machine Tension and Thread Quality: Don’t let poor thread quality or incorrect machine tension unravel your hard work. High-quality thread and the right tension setting are like the best road conditions for your sewing journey – they make everything smoother and more enjoyable.
Staystitching for Curved Edges
Staystitching is a crucial step in sewing, especially when you’re working with curved edges.
It’s a simple line of stitching within the seam allowance that prevents the fabric from stretching out of shape during the construction process.
When sewing a curved edge to a straight edge, you should staystitch the curved edge first to ensure it maintains its shape and matches up with the straight edge accurately.
Definition and Importance of Staystitching
Staystitching is your secret weapon for keeping those curves in check. Think of it as the unsung hero that prevents your fabric from throwing a fit and stretching out of shape.
When you’re about to embark on the adventure of sewing a curved edge to a straight edge, staystitching is like your trusty sidekick, ensuring your fabric doesn’t go rogue and warp on you.
You’ll want to staystitch close to the edge, but not too close—just enough to lock in that curve without making a cameo in the final product. And remember, after you’ve tamed those curves with your needle control, give them a good press with the iron to set them straight.
Don’t skip this step, or you might find your fabric stretching out like it’s doing morning yoga, and nobody wants a wavy neckline or a droopy armhole. So, wield that needle with confidence and stitch with purpose for that stitch flexibility and seam stability that’ll make your project look like it just stepped off the runway.
When and Where to Apply Staystitching
Staystitching is your secret weapon for keeping curves in check. Before you even think about pinning or sewing, lock those curves down with staystitching.
It’s like a fabric whisperer, keeping your edges from dancing out of line when you’re not looking. You’ll want to staystitch any curved or bias edge that’s prone to stretching out like a lazy Sunday morning.
Do it within the seam allowance, so it stays your little secret. And remember, directional stitching is your friend here; it’s like GPS for your stitches, guiding them from the high point to the low without getting lost.
So, when you’re about to tackle those curves, take a breath, staystitch, and show that fabric who’s boss.
Directional Stitching Technique
When tackling staystitching, think of it as your fabric’s secret bodyguard, keeping those curved edges from stretching out like a yoga instructor gone wild.
Precision is your best friend here, and a bit of hand basting can be the trusty sidekick. Remember, directional stitching isn’t just a fancy term; it’s your roadmap to prevent puckering and distortion.
Start at the highest point and cruise down to the lowest, like a skier swooshing down a slope. Don’t let those curves intimidate you; with staystitching, you’ll keep them in check and your project on point.
Aligning and Pinning Fabric Edges
When sewing a curved edge to a straight edge, finding the center crease through folding and pressing is your first step towards precision.
Pinning the centers and edges together carefully, and easing in any extra fabric as you go, ensures a smooth seam that aligns perfectly with your project’s design.
Folding and Pressing to Find Center Crease
After mastering staystitching, it’s time to tackle the next crucial step: folding and pressing to find the center crease. This technique is pivotal for aligning and pinning fabric edges, especially when dealing with curved pattern pieces.
- Fold Your Fabric: Gently fold your fabric pieces in half to mark the center. This simple act is the cornerstone of fabric preparation, ensuring your curved and straight edges will meet perfectly.
- Press Wisely: Use directional pressing to solidify your center crease. Remember, pressing isn’t the same as ironing. A careful press won’t stretch your fabric but will give you a clear guide for alignment.
- Mark Your Creases: Once folded and pressed, mark your creases clearly. These will serve as your roadmap when you begin pinning and sewing, guiding you to a flawless finish.
By paying attention to these details, you’re setting yourself up for success. Whether you’re a seasoned pro or a curious beginner, mastering the art of folding and pressing for a center crease is a game-changer in sewing curved edges to straight.
Pinning Centers and Edges Together
Once you’ve found the center crease, it’s time to align your fabric pieces like a match made in sewing heaven. Imagine your fabric as dance partners—the centers are their clasped hands, and the edges are their poised feet.
Begin by placing the concave curve on top, as if it’s taking a gentle bow. Now, let’s pin these partners together with the precision of a cupid’s arrow, ensuring the centers and corners are perfectly paired.
Here’s a handy table to guide you through this pinning pas de deux:
| Step | Detail |
|---|---|
| 1 | Match centers of both fabric pieces. |
| 2 | Ensure corners are touching like a tender embrace. |
| 3 | Align edges so they’re as parallel as train tracks. |
| 4 | Pin from center outwards, like spreading wings. |
| 5 | Easing in fabric, as if whispering secrets to the curve. |
Easing in Extra Fabric While Pinning
After aligning the center creases, you’re ready to tackle the extra fabric. Easing in fabric is like a gentle dance, where each step is deliberate and precise.
- Gently stretch and manipulate the fabric to avoid unwanted gathers.
- Pin with purpose, ensuring each one helps the fabric conform to its partner.
- Breathe life into your creation with patience, letting the fabric find its place.
Sewing and Pressing the Seam
When sewing a curved edge to a straight edge, it’s crucial to stitch with a 1/4 inch seam allowance and secure the beginning and end with back-tacking.
After sewing, press the seam allowances to ensure a crisp, professional finish to your garment.
Machine Stitching With a 1/4 Inch Seam Allowance
Now, let’s dive into machine stitching with a 1/4 inch seam allowance.
Select the right needle and thread type for your fabric to avoid a stitch snafu.
Adjust your machine tension to dodge puckering.
Your presser foot is your co-pilot, guiding you along the seam guide’s path.
Back-tacking at Each End
When you’re wrapping up those seams, remember, back-tacking is your secret handshake with durability.
- Begin and end with a few reverse stitches.
- Ensure stitching reinforcement for seam longevity.
- Secure each end point like it’s Fort Knox.
It’s the finishing touches that transform a good seam into a great one. Keep that machine direction on point!
Pressing Seam Allowances and Finished Edges
After back-tacking each end of your seam to secure it, it’s time to turn up the heat—literally. Grab your iron and get ready to press those seam allowances like a pro. You’ll want to coax them gently towards piece B, using a tender touch and a bit of steam.
Think of it as giving your fabric a spa treatment; it’s all about pampering those seams into submission. This isn’t just about making it look pretty; it’s seam finishing at its finest, ensuring your creation holds up to wear and tear.
Now, let’s talk pressing techniques. When ironing curved seams, you’re not just flattening fabric; you’re sculpting it. Imagine you’re an artist, and the iron is your brush, the seam your canvas. Glide the iron carefully, avoiding any tugs that could lead to a fabric fiasco.
And if you’ve used bias tape binding for a decorative touch, make sure it’s as crisp as a fall morning. This isn’t just about making it look good; it’s about crafting a masterpiece that stands the test of time.
Alternative Methods and Binding
When sewing a curved edge to a straight edge, trimming seam allowances can simplify the process, allowing for a cleaner finish.
Binding these edges with bias tape not only secures the fabric but also adds a decorative touch.
For a polished look, topstitching and careful pressing are essential steps.
Trimming Seam Allowances for Alternative Method
After you’ve sewn your seam, it’s time to trim the seam allowance with the alternative method. This step is crucial for reducing bulk and ensuring your garment has a smooth, professional finish.
You’ll want to trim close to the stitching line, but be careful not to snip the stitches themselves. It’s like performing delicate surgery on your fabric—steady hands and sharp scissors make all the difference.
Binding Straight and Curved Edges With Bias Tape
Binding both straight and curved edges with bias tape not only protects your fabric but also adds a dash of style, whether you’re aiming for a seamless finish or a pop of contrast.
When tackling curves, patience is your best friend. Slow down and let the bias tape’s inherent flexibility work its magic, hugging each curve snugly without puckering.
Whether you’re hemming a skirt or finishing the edge of a quilt, mastering bias tape application is a game-changer, offering both durability and a decorative touch.
So, grab your iron, steady your hands, and let’s dive into the world of bias tape binding—a skill that once mastered, opens up endless possibilities for your sewing projects.
Topstitching and Pressing for a Finished Look
Once you’ve mastered attaching bias tape to your fabric’s edges, it’s time to give your project that polished look with topstitching and pressing.
Topstitching techniques not only secure the bias tape in place but also add a decorative touch. Keep your stitches straight as an arrow by using the edge of your presser foot as a guide, and remember, practice makes perfect.
When it comes to pressing methods, don’t just iron willy-nilly; press with purpose. Use steam finishing to crisply set your seams without making them as flat as a pancake.
If you’re not a fan of bias tape, explore bias tape alternatives that can give your curved edge embellishments a unique twist. Remember, the devil is in the details, so take your time to ensure each stitch is spot on.
Frequently Asked Questions (FAQs)
How to adjust tension for sewing curved seams?
Adjusting tension for curved seams is akin to tuning a guitar for the perfect chord. Lower the tension slightly to avoid puckering. This ensures your fabric sings smoothly as you stitch those tricky curves.
Can I sew curved seams with a standard presser foot?
Yes, you can sew curved seams with a standard presser foot. Take it slow and steady to maintain control.
Best thread types for sewing stretchy curved edges?
Investigate the truth of a theory, and you’ll find that for sewing stretchy curved edges, polyester thread is your best bet.
It’s strong, durable, and has just enough give to maintain the fabric’s elasticity.
How to correct puckering on a curved seam after sewing?
To fix puckering on a curved seam, gently press the seam with an iron, using a tailor’s ham for shape.
If puckering persists, clip into the seam allowance at intervals without cutting the stitches, allowing the fabric to lay flat.
For stubborn areas, carefully unpick and re-sew with adjusted tension.
Techniques for sewing sharp curves without clipping?
To sew sharp curves without clipping, try using a serger for a clean finish, as it trims while sewing, reducing the need for clipping.
Alternatively, manipulate fabric with your fingers. Use your thumb to hold the seam allowance and your index finger to guide the fabric, ensuring smooth curves without the need for cuts.
Practice and patience are key. You’ll master those tricky turns in no time!
Conclusion
Embarking on the journey of sewing a curved edge to a straight edge might seem like conquering Mount Everest at first glance. Yet, with the steps outlined, you’re armed to the teeth with the knowledge to tackle this challenge head-on.
From staystitching to ensure your fabric behaves, to the precision of pinning and the finesse of pressing, every detail counts. Remember, mastering how to sew curved edges to straight transforms your sewing projects from homemade to professional with every stitch.

