This site is supported by our readers. We may earn a commission, at no cost to you, if you purchase through links.
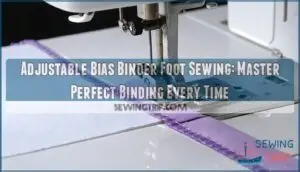 You’ll find that adjustable bias binder foot sewing transforms tricky binding work into a breeze.
This clever attachment guides bias tape around fabric edges automatically, eliminating the usual wrestling match with slippery tape.
You can adjust the foot to accommodate different binding widths, from delicate ¼-inch strips to bold ¾-inch tape.
Simply snap it onto your machine, thread the bias tape through the metal guide, and watch it fold perfectly as you sew.
It works with both store-bought and homemade tape, making professional-looking finishes achievable every time.
Getting the tension and positioning just right requires some finesse though.
Table Of Contents
Key Takeaways
- You’ll save time and frustration by using an adjustable bias binder foot that handles widths from 1/4" to 3/4", eliminating the need for multiple feet and turning tedious pinning marathons into smooth one-step operations.
- You can achieve professional-looking results on both store-bought and homemade bias tape by properly adjusting the metal dial to match your tape width and positioning the needle correctly for precise seam placement.
- You’ll need to check your sewing machine’s compatibility first – most machines built after 1980 with low-shank systems work perfectly, while high-shank machines require snap-on adapters.
- You can prevent common issues like gaps and crooked stitching by maintaining steady sewing speed, proper foot pressure, and consistent fabric feeding while letting the foot do the guiding work.
Adjustable Bias Binder Foot
You’ll love how the adjustable bias binder foot transforms your binding projects from tedious pinning marathons into smooth, one-step operations that work with bias tape widths from 1/4" to 3/4".
Transform tedious binding projects into effortless one-step magic with widths from 1/4" to 3/4".
This clever snap-on attachment fits most sewing machines built after 1980 and lets you apply both store-bought and homemade bias tape with perfectly straight stitching every time, using a technique that is both efficient and easy to master with the bias tape widths.
Transform tedious binding marathons into effortless one-step operations with professional results every time.
Benefits of Adjustable Design
Finding yourself wrestling with multiple binding projects?
The adjustable bias binder foot eliminates the need for separate sewing machine feet for each binding width.
This single sewing machine accessory offers incredible Width Versatility, handling everything from delicate 1/4" trim to bold 3/4" binding.
Your Project Adaptability increases dramatically while achieving significant Cost Savings.
One tool grants Creative Freedom across countless projects, enhancing User Skill development.
Compatibility With Sewing Machines
Your adjustable bias binder foot works with most sewing machines, but compatibility isn’t automatic.
Here’s what you need to know:
- Shank Height Matters – Low-shank machines (built after 1980) work perfectly, while high-shank models need snap-on adapters
- Machine Brand Fit – Compatible with Brother, Janome, Singer, Babylock, and Kenmore models seamlessly
- Bernina Considerations – These machines require specific adapters due to their unique presser foot system
- Older Models – Vintage machines may need compatibility checks before purchasing
- Snap-On Adapters – High-shank users can still enjoy this tool with proper adapters. You can find an adapter for purchase online.
Easy Attachment and Removal
The snap-on mechanism makes switching this adjustable bias binder foot a breeze.
Simply click it onto your low-shank sewing machine – no tools required!
Check your shank height first; most machines built after 1980 work perfectly.
Need adapter options for high-shank machines? They’re available too.
Quick changes between presser foot attachments mean you’ll spend more time sewing, less time fussing with sewing machine accessories. The snap-on mechanism is a key feature that enhances this experience.
Sewing With Bias Tape
You’ll transform your sewing projects when you master the art of working with bias tape using your adjustable binder foot.
Whether you’re using store-bought binding or creating your own custom tape, this versatile foot handles widths from tiny trims to bold 3/4-inch borders with surprising ease.
Applying Pre-Packaged Bias Tape
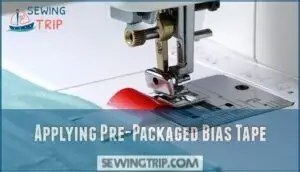
Pre-packaged bias tape takes the guesswork out of your projects. Your adjustable bias tape binder foot handles store-bought binding like a champ.
Check tape quality before starting—cheap versions can cause headaches. Set consistent feeding speed and adjust tension settings for smooth application.
For a seamless finish, remember to press creases firmly. This prepressed bias tape works perfectly on straight edges, though curve application needs extra attention for project suitability, and using store-bought binding can be very helpful, and having an adjustable bias tape binder foot is also very useful, and seamless finish is the goal.
Using Self-Made Pre-Pressed Bias Tape
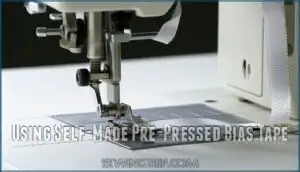
Your homemade bias tape’s success hinges on proper fabric grain cutting and consistent folding techniques.
Cut strips at 45-degree angles for flexibility, then use a bias tape maker for uniform results.
A bias tape tool can substantially improve consistency.
Accurate cutting guarantees smooth application with your adjustable bias binder foot.
Iron each fold carefully—crisp edges mean professional-looking bias binding every time you sew.
Accommodating Different Binding Widths
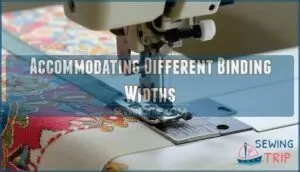
Your adjustable bias binder foot handles binding widths from 1/4" to 3/4" with ease.
The adjustable range accommodates various tape thickness levels, while material impact affects fold variations.
Turn the metal dial to match your chosen width—whether you’re using store-bought or homemade adjustable bias tape.
This sewing machine binding foot even supports decorative stitching for creative projects.
Binding Foot Features
You’ll discover that your adjustable bias binder foot comes packed with smart features that make binding projects feel like a breeze instead of a wrestling match.
The adjustable guide holds your bias tape perfectly in place while the snap-on design lets you switch between regular sewing and binding faster than you can say "perfect edges.
Adjustable Guide for Folded Bias Tape
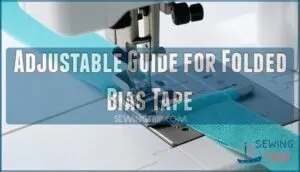
The bias binder foot’s adjustable guide transforms your binding game with Guide Adjustability that works like a charm.
This sewing machine foot holds folded bias tape perfectly while you stitch, creating Consistent Binding every time. Your adjustable bias tape stays put thanks to the clever channel design that adapts to different widths.
You can even find a bias binder foot online.
Here’s what makes this bias binding feature shine:
- Width flexibility – Accommodates bias tape from 1/4" to 3/4" for Versatile Projects
- Position control – Adjusts relative to your needle for precise seam placement
- Secure grip – Holds folded tape steady to Secure Fabric edges without slipping
- Channel design – Small folded pathway guides tape smoothly through the process
- Speed boost – Eliminates tedious pinning while installing your sewing machine binding foot
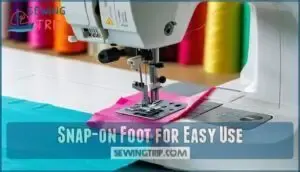
Snap-on Foot for Easy Use
Installation becomes a breeze with this snap-on foot design.
You’ll appreciate the attachment ease as it clicks securely onto your machine without tools or complicated threading.
The universal compatibility means quick changes between different sewing machine feet won’t slow your projects.
This adjustable bias binder foot fits Brother, Janome, Singer, and Babylock machines perfectly.
Storage solutions keep your sewing machine attachments organized and ready, which is a key aspect of efficient sewing with this adjustable bias binder foot.
Versatile Stitching Options
Creative freedom transforms binding projects when you master your adjustable bias binder foot’s stitching capabilities.
You’ll discover decorative stitches work beautifully alongside traditional straight seams, while proper needle position and thread tension guarantee flawless results.
This versatile presser foot accommodates various sewing techniques, letting you experiment with stitch length and fabric feed settings.
Your bias binding adventures just got more exciting with endless creative possibilities.
Proper fabric preparation facilitates smooth binding foot operation, which is crucial for achieving flawless results and enjoying endless creative possibilities with your bias binding projects.
Tips for Successful Binding
Getting perfect binding results with your adjustable bias binder foot doesn’t have to feel like wrestling with a stubborn zipper.
Follow these smart techniques to prevent those annoying gaps, keep your stitching perfectly straight, and choose the right materials that’ll make your projects look professionally finished every time.
Preventing Gaps in Binding
You’ll avoid those frustrating gaps by maintaining steady stitch consistency and proper tension adjustment.
Keep your fabric stability steady while feeding it through the adjustable bias binder foot. Check your foot pressure isn’t too light, which causes uneven feeding.
Position your needle correctly for the bias binding width you’re using. These sewing techniques with quality sewing machine feet make preventing gaps much easier, using proper tension adjustment and adjustable bias binder foot.
Ensuring Straight Stitching
Perfect straight stitches start with proper needle position adjustment on your sewing machine.
Your adjustable binder foot works best when you maintain consistent foot pressure and steady fabric feed.
Set your stitch length to medium for ideal binding precision. Guide fabric smoothly without forcing it—let the sewing machine binding precision do the work while you focus on guiding fabric evenly through the foot.
Choosing The Right Fabric and Thread
Your fabric weight determines bias tape success with your adjustable binder foot.
Choose thread type that matches your fabric texture – cotton thread for cotton fabrics works best.
Color matching creates seamless finishes, while contrasting thread highlights decorative edges.
Lightweight fabrics need delicate bias tape, heavy fabrics require wider binding.
This sewing machine foot thrives with proper fabric-thread combinations for perfect stitch density.
For ideal results, always consider thread fiber content choices to suit your project, ensuring the best fabric-thread combinations.
Troubleshooting Common Issues
Even experienced sewers hit snags when their bias binder foot acts up, but don’t worry – most problems have simple fixes you can tackle in minutes.
You’ll quickly turn those frustrating gaps, wobbly stitches, and stubborn adjustments into smooth, professional-looking binding that makes your projects shine.
Binding Foot Not Fitting Machine
Sometimes your binding foot won’t cooperate with your sewing machine – it’s like trying to fit a square peg in a round hole.
First, check your machine’s shank height measurement guide. Most adjustable bias tape feet need low-shank machines.
If you’ve got high-shank compatibility issues, grab an adapter. Different machine models require specific foot attachment systems, so verify your sewing machine compatibility before purchasing any sewing machine feet.
Inconsistent Stitching and Gaps
Gaps and uneven stitches can turn your binding project into a frustrating puzzle.
Your adjustable bias tape foot needs proper setup to prevent these headaches.
- Check Needle Position – Align your needle with the binding edge using the foot’s adjustment screws for precise stitching
- Control Sewing Speed – Slow down to maintain fabric stability and prevent shifting during binding alignment
- Monitor Foot Pressure – Adjust pressure settings to keep your sewing machine gap prevention working effectively
Adjusting The Foot for Optimal Results
Fine-tuning your adjustable bias tape foot transforms frustrating sewing sessions into smooth successes.
Start by turning the metal dial to match your tape width perfectly.
Next, adjust needle position using the second wheel to control seam distance from the binding edge.
Practice insertion without running your machine first—it’s like rehearsing before the big performance.
Fabric stretching and wrinkles can often be resolved by adjusting presser foot pressure.
| Adjustment Component | Purpose | Setting Guide | Common Issue | Quick Fix |
|---|---|---|---|---|
| Metal dial | Controls tape width fit | Match bias tape measurement | Loose binding | Tighten dial clockwise |
| Needle position wheel | Sets seam distance | Align with tape edge | Crooked stitches | Move needle right |
| Foot pressure | Prevents fabric shifting | Medium setting | Puckering fabric | Reduce pressure |
| Tape insertion | Guarantees proper feeding | Center in guide slot | Missed stitches | Check tape placement |
| Speed control | Maintains accuracy | Slow to medium | Fabric bunching | Reduce sewing speed |
Your sewing machine foot becomes your binding attachment ally when properly adjusted.
These bias binding techniques require patience, but mastering these sewing techniques pays off with professional results every time you tackle a project.
With the right adjustments and practice, you can achieve smooth successes in your sewing projects.
Frequently Asked Questions (FAQs)
How do you use an adjustable bias binder foot?
First, adjust the foot’s width to match your bias tape.
Thread the tape through the guide, position your fabric underneath, then stitch steadily.
The foot feeds binding while you sew—it’s like having an extra pair of hands!
What is a bias binder foot?
Imagine this scenario: you’re wrestling with bias tape that won’t cooperate.
A bias binder foot is your sewing machine’s superhero attachment that guides folded bias tape around fabric edges, creating perfect bindings in one smooth step.
This attachment is essentially a tool that helps in managing the bias tape efficiently.
What sewing foot do you use for binding?
You’ll want to reach for a bias binding foot when applying binding to fabric edges.
This adjustable snap-on foot guides bias tape perfectly around your fabric, creating professional-looking bindings without pins or frustration.
How to attach binding to a quilt with a binding foot?
Thread your bias tape through the adjustable binding foot, align fabric edges, and stitch slowly. The foot guides everything perfectly, creating professional-looking binding that’ll make your quilt shine.
How to clean and maintain bias binder foot?
Remove fabric threads and lint with a small brush after each use.
Wipe metal parts with a dry cloth.
Occasionally apply a tiny drop of sewing machine oil to moving parts, then test on scrap fabric.
What thread types work best with bias binding?
Choose cotton or polyester threads for reliable bias binding results.
Cotton works beautifully with cotton fabrics, while polyester offers stretch and durability.
You’ll get cleaner stitches and fewer breaks with quality thread that matches your fabric weight.
Can decorative stitches be used with this foot?
Yes, you can absolutely use decorative stitches with this bias binding foot.
The large opening accommodates various stitch patterns, letting you add zigzag, scallop, or other fancy stitches while perfectly binding edges.
How to bind curved edges and corners?
Sharp corners fight you, but curves welcome your touch.
Ease fabric gently around curves, stopping needle-down to pivot.
At corners, stop before the edge, lift foot, turn fabric, then continue stitching for crisp results.
Whats the maximum fabric thickness this foot handles?
The adjustable bias binder foot handles lightweight to medium-weight fabrics best.
You’ll get ideal results with cotton quilting fabrics and similar materials.
Thick denim or heavy canvas might overwhelm this delicate tool’s capabilities.
Conclusion
Like a skilled dance partner, adjustable bias binder foot sewing guides your fabric through each step with grace and precision.
You’ve learned the techniques to transform challenging binding tasks into satisfying victories.
Practice these methods, troubleshoot with patience, and trust your growing skills.
Soon you’ll discover that perfect binding isn’t just possible—it’s your new normal.
Your quilts, garments, and projects will showcase the professional finish that sets your work apart from the ordinary.

