This site is supported by our readers. We may earn a commission, at no cost to you, if you purchase through links.
Start by giving your jacket a once-over—check if those shoulders are too tight, loose, or just plain odd.
Measure your body and the jacket with a trusty tape measure; it’s all about matching them up!
Gather essential tools like a sewing machine and seam ripper—your new best friends.
You might face shoulder pads, but don’t sweat it; they’re removable or replaceable for that custom fit.
Fancy a shoulder seam adjustment? Mark, cut, and sew with flair. Balance that silhouette like a pro.
Curious about more tips and tricks? There’s plenty more to explore!
Table Of Contents
Key Takeaways
- You don’t need a degree in rocket science to alter jacket shoulders. Start by measuring your body and the jacket to match them up perfectly. It’s like arranging a date between your wardrobe and comfort.
- Arm yourself with essential tools like a sewing machine, seam ripper, measuring tape, and sharp scissors. They’re your sidekicks in this fashion adventure, ensuring your jacket fits like a dream rather than a nightmare.
- Shoulder pads from the ’80s might be great for retro parties, but for a sleek, modern look, you can remove or replace them. Reattach or add new ones with the finesse of a tailor, making sure you’re not auditioning for a football team.
- Master the art of adjusting shoulder seams and refine the fit with darts or tucks if needed. Consider every snip and stitch as part of a balancing act, creating a silhouette that’s all about style without the shoulder slump.
Assessing Jacket Fit
Are your jacket shoulders causing that awkward "Oh, look at me swim" vibe every time you move?
Don’t worry—you’ll fix those fit problems by learning to measure your jacket against your shoulders with precision, setting you on the path to a sharp look without the tailor.
Identifying Shoulder Issues
Identifying shoulder issues is the first step to achieving a perfect jacket fit.
Take a close look at how the shoulders sit on your frame – are they too tight, causing discomfort? Do they droop or appear uneven? Perhaps the shoulders seem puffy or the width is mismatched.
Pinpointing these problem areas will guide your alteration efforts.
Measuring Your Body
Grab your measuring tape like a trusty sidekick!
First, wrap it snugly around your chest to nail down that chest circumference.
Next, measure from the top of your shoulder to your wrist for arm length.
Sling it across your shoulders for shoulder width and down your spine for back length.
It’s like being your own personal tailor!
Comparing Measurements to Jacket
Now that you’ve measured everything from shoulder width to back length, it’s time to match these against your jacket’s details!
Lay your jacket flat, then measure its shoulder width, sleeve length, chest circumference, and compare them with yours.
If there’s a difference larger than an eagle’s wing, you’ll know that jacket size needs a tad of tailoring magic.
Determining the Type of Alteration Needed
- Is your shoulder width right? Maybe it feels like you’re wearing a hanger.
- Check the sleeve length; your arms aren’t Harry Potter’s wand!
- Evaluate the overall silhouette and jacket drape—does it flow or slump?
Gathering Essential Tools
Before you start altering your jacket’s shoulders, make sure you have the essential tools on hand.
From a trusty sewing machine to a reliable seam ripper, these items will be your sidekicks in achieving a perfect fit.
Sewing Machine and Accessories
When altering jacket shoulders, your trusty sewing machine is like a loyal sidekick.
Consider different sewing machine types for versatility.
Choose needles and presser foot types wisely—they’re the unsung heroes of precision for attaching snap-on presser feet.
Don’t let bobbin winding or thread tension wind you up—mastering these keeps stitches seamless and avoids common bobbin problems.
With these under your belt, you’re stitching success stories!
Measuring Tape and Ruler
For accuracy in your alterations, grab a measuring tape and ruler—your trusty sidekicks!
These tools bring precision to the table, helping you mark and measure effectively.
It’s like having a GPS for sewing; they guide every cut and stitch.
Next time you doubt your cutting lines, these heroes make sure your jacket fits like a glove, not a potato sack!
Seam Ripper and Scissors
Armed with a seam ripper and sharp scissors, you’re ready to tackle those stubborn seams.
A seam ripper’s your go-to for precision, while sharp scissors handle trimming with style.
Basic care includes wiping blades clean.
Store them safely; they mightn’t bite, but they can nick.
Treat your tools like old friends: with respect.
Interfacing and Stabilizing Materials
Outfitting your sewing arsenal with the right interfacing and stabilizing materials is key for a professional jacket alteration.
Consider lightweight fusible web for delicate fabrics, medium-weight fusible fleece for structure, stiff buckram for collars, and bias tape for clean edges.
Carefully select materials that complement your jacket’s fabric and desired fit.
Removing Shoulder Pads
To achieve a sleek silhouette, you’ll need to locate and remove those outdated shoulder pads from your jacket (Source).
It’s a fun, hands-on way to let your shoulders breathe a little easier without everyone thinking you’ve time-traveled from the ’80s!
Locating and Removing Existing Pads
You’ve gathered your tools, now get ready to tackle those shoulder pads with zeal! Find the seam attachment points and use a seam ripper, feeling like a ninja, to carefully remove them.
Here’s a quick look at pad removal:
| Pad Types | Removal Techniques | Pad Location |
|---|---|---|
| Foam | Seam Ripper Gently | Shoulder Seam |
| Cotton | Scissors Carefully | Jacket Lining |
| Molded | Cut and Tug Techniques | Inner Stitches |
Removing pads is like shedding layers—freeing and liberating!
Adjusting or Replacing Pads for Better Fit
After removing the old shoulder pads, it’s time to upgrade them for a better fit.
Think about:
- Pad thickness: Thin for a natural look, thick for sharp lines.
- Pad shapes: Choose oval or triangular based on your jacket’s style.
- Pad materials: Opt for foam or fabric for comfort.
- Pad placement: Avoid unwanted bulk.
Replace and adjust without a hitch!
Reattaching Pads With New Positioning
Now that you’ve removed the existing shoulder pads, it’s time to reattach them with a fresh perspective.
Carefully position the pads on the jacket, considering their thickness and placement.
Secure them in place using a needle and thread, ensuring they sit comfortably on your shoulders without adding bulk or distorting the silhouette. Take your time to get this just right.
Adding New Pads for Enhanced Support
Thinking of adding new pads for enhanced support? It’s like shopping for cozy pillows—it’s all about preference!
- Check shoulder pad types for options.
- Use a pad thickness guide to choose.
- Focus on pad placement tips for symmetry.
- Embrace this DIY pad sewing task.
- Explore diverse pad material choices.
Adjusting Shoulder Seams
Adjusting shoulder seams on a jacket can feel like taming a wild beast, but you’ve got the skills to master it!
We’ll show you how to identify seam construction, make precise cuts, re-sew them to perfection, and press for a polished finish—no more shoulder pads looking like linebacker gear!
Identifying Seam Types and Construction
Imagine this: the jacket seam as a secret labyrinth.
Your quest begins with identifying seam types like lapped, plain, or French.
Study construction details: hidden stitches hold stories, much like fabric analysis offers clues to the past.
Use sewing techniques to break down these mysteries.
It’s a stitch-by-stitch adventure, unraveling hidden pathways with your trusty needle.
Marking and Cutting New Seam Lines
Once you’ve identified the seam type and construction, it’s time to mark and cut the new seam lines.
First, use a fabric marker or chalk to outline the adjusted shoulder seam.
Be sure to account for the appropriate seam allowance based on your fabric type.
Next, carefully cut along the marked line using sharp scissors or a rotary cutter.
Re-sewing Seams With Adjusted Length
Let’s get those seams re-sewed with precision!
Start by selecting the right shoulder seam type for your fabric.
Pinning techniques are really important here—it’s like finding that perfect balance in life.
Keep a steady seam allowance as you sew, ensuring the fabric doesn’t stretch awkwardly.
Take your time, and you’ll master this step with finesse!
Pressing and Finishing Seams for a Professional Look
After you’ve re-sewn the seams, grab those pressing tools and get the stitch quality really good.
Think of your seams like unruly hair needing taming.
With a well-set iron temperature, press them flat without a fuss.
Perfect seam allowance and careful seam finishing turn chaos into calm, making your jacket shoulders stand out like a boss-level achievement. (Source)
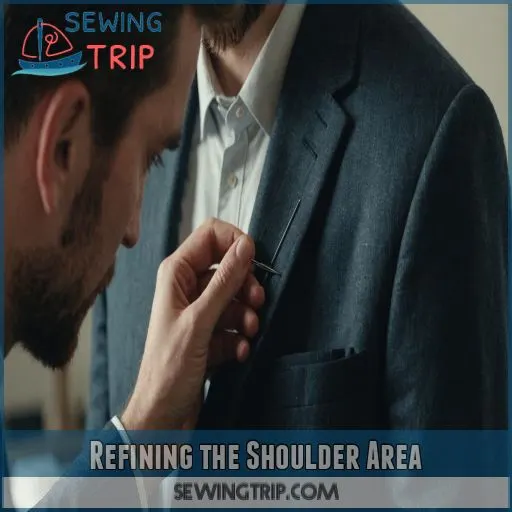
Refining the Shoulder Area
Now that you’ve tackled shoulder seams, it’s time to refine the entire shoulder area for a sleek fit.
Let’s make those adjustments so you’ll look sharp without feeling like you’re auditioning for an ’80s shoulder pad commercial.
Adding Darts or Tucks for a Better Fit
Often, adding strategic darts or tucks can work wonders for refining the shoulder area.
Carefully place them to smooth out bumps, eliminate excess fabric, and sculpt the perfect silhouette.
Consider the fabric type and construction when deciding between darts or tucks.
Experiment until you achieve the desired fit and balance across the shoulders.
Adjusting Sleeve Caps and Armholes
Adjusting the sleeve caps and armholes requires attention to detail for maximum comfort. To make sure you get a great fit:
- Check sleeve cap shape and adjust for symmetry.
- Test armhole tightness by raising your arms.
- Make sure you have ease of movement with a comfortable fit.
- Factor in fabric stretch for flexibility.
- Align with the shoulder seam fit.
You’ll never shrug awkwardly again!
Rebalancing the Jacket’s Silhouette
Get your jacket’s silhouette on point by rebalancing everything.
Start by fine-tuning shoulder width, ensuring the sleeve length fits your personal style without looking like you borrowed your dad’s old blazer.
Attention to the armhole fit and neckline shaping helps maintain overall balance, creating a polished look.
Finalizing the Alteration With Topstitching
Topstitching is the cherry on top, making the shoulder seams pop. Let’s nail it down with the right techniques:
- Thread Selection: Make sure it’s strong and matches your jacket.
- Stitch Length: Go for a longer stitch for a professional finish.
- Needle Size: A suitable needle prevents skips.
- Topstitching Tools: Use guide feet for accuracy.
You’re ready to strut with confidence!
Frequently Asked Questions (FAQs)
How can I avoid damaging jacket fabric?
Use pins only on fabric edges to avoid damage and consider binder clips for delicate materials.
Gentle wash cycles protect against wear; turning garments inside-out preserves colors.
What is the cost of professional shoulder alteration?
Ah, the cost of professional shoulder alteration – it’s a tricky one, isn’t it?
But don’t worry, my friend, we’ll get to the bottom of this without breaking the bank.
The price tag can vary, but with a bit of savvy, you can find a tailor that won’t leave you feeling the pinch.
Can shoulder adjustments impact sleeve length?
Adjusting shoulders can indeed affect sleeve length by altering how they hang.
Picture adjusting a picture frame; change one side, and the entire setup tilts, shifting sleeve length in the process.
Keep that balance in mind!
Are certain fabrics more difficult to alter?
Some fabrics, like leather or silk, can make you feel like you’re wrestling a greased pig!
They’re tricky to alter due to slipperiness and thickness.
Think twice before tackling them—seek specialist advice if needed!
How do I maintain a symmetrical shoulder fit?
Picture a seesaw balancing perfectly: that’ll be your shoulders!
Measure both sides carefully, use tailor’s chalk for guiding lines, and sew evenly.
Double-check your work; using a mirror helps maintain that balanced, symmetrical look you’re aiming for!
Conclusion
With a little elbow grease and these easy-to-follow steps, you’ll be altering jacket shoulders like a pro in no time!
From checking the fit to fine-tuning the silhouette, this DIY guide has you covered.
Embrace the joy of a perfectly fitted jacket that hugs your frame just right.
Get ready to strut your stuff in an altered jacket that’s a true reflection of your personal style.
Altering jacket shoulders DIY-style has never been simpler!

