This site is supported by our readers. We may earn a commission, at no cost to you, if you purchase through links.

Most folks think a sewing machine can handle anything, but the first time you watch fabric unravel at the seams, you realize there’s a missing piece. That’s where a serger steps in, transforming raw, fraying edges into crisp, professional finishes that look like they belong on store-bought clothes.
Basic serger sewing machine stitches aren’t just about neatness—they give your seams strength and flexibility, letting you tackle everything from delicate knits to sturdy denim. Once you see what these stitches can do, you’ll wonder how you ever managed without them.
Let’s untangle the essentials that make sergers a game changer for your sewing projects.
Table Of Contents
Key Takeaways
- Serger stitches wrap and seal fabric edges in one pass, preventing fraying while building stronger, more flexible seams than regular sewing machines can achieve.
- The 4-thread overlock creates the sturdiest seams for knits and activewear, while 3-thread and 2-thread versions work best for lightweight fabrics and decorative finishes.
- Choosing the right stitch depends on your fabric weight and project needs—stretchy seams for knits, rolled hems for delicate edges, and flatlock for bulk-free athletic wear.
- Proper tension adjustment, differential feed settings, and regular maintenance like monthly cleaning and oiling keep your serger producing professional results without skipped stitches or puckering.
What Are Basic Serger Stitches?
Serger stitches are the secret to crisp, professional-looking edges in sewing. They work differently from regular sewing machine stitches and offer some unique benefits.
Let’s take a closer look at what sets these stitches apart.
Definition and Purpose of Serger Stitches
Think of serger stitches as your secret weapon for professional edges. These multi-thread stitches, made by an overlock machine, combine Overlock Stitch Mechanics and Edge Finishing Purpose in one swoop. Here’s what they offer:
- Seam Durability
- Stitch Versatility
- Clean edge finishing
- Quick construction
- Industrial Applications
Sergers are also useful for creating professional knit garments. Serger Stitches and Uses truly improve your stitch types.
How Serger Stitches Differ From Regular Sewing Machine Stitches
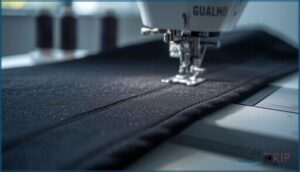
While regular sewing machine stitches leave raw edges exposed, serger stitches wrap fabric edges in a neat, overlock stitch—trimming and sealing in one pass. This means less fraying, stronger seams, and a smoother finish. Sergers are especially useful for finishing raw edges, providing a professional touch.
Here’s a quick look:
| Stitch Complexity | Edge Finishing | Speed Efficiency |
|---|---|---|
| Multi-thread | Enclosed edges | 1,200–1,700 SPM |
| Overlock stitch | No fraying | One-step process |
| Adjustable | Flat seams | Saves time |
| Adaptable | Cleaner lines | Quick results |
Benefits of Using Serger Stitches
That’s where serger stitches shine—they bring durability and fray reduction to every seam. Using a serger machine means you get time savings and a professional finish, all while handling a wide range of fabrics.
Whether you’re finishing fabric edges or exploring new seam finishing techniques, the types of serger stitches offer versatility that lifts your sewing projects to industry standards.
Common Types of Serger Stitches
Serger machines offer several stitch types, each with its own purpose. Knowing the basics helps you pick the right one for your project.
Here are the most common serger stitches you’ll use.
4. Thread Overlock Stitch
Ever wondered how professionals get those sturdy, stretchy seams on knit fabrics? The 4-thread overlock seam is your go-to for garment construction, offering excellent seam strength and flexibility. With proper tension adjustment and differential feed, you’ll prevent puckering and keep edges neat.
This serger stitching method is perfect for:
- Sewing activewear
- Finishing raw edges
- Building durable seams
3. Thread Overlock Stitch
A 3Thread Overlock Seam is a favorite for lightweight fabrics when you want less seam bulkiness but still crave durability. Using just one needle and two loopers, this overlock stitch excels in decorative applications. With careful tension adjustment, your serger machine delivers neat, flexible edges. Here’s a quick look:
| Use Case | Stitch Bulkiness | Durability |
|---|---|---|
| Lightweight tops | Low | Moderate-High |
| Scarves | Minimal | Good |
| Decorative hems | Flexible | Reliable |
2. Thread Overlock Stitch
A 2-Thread Overlock Seam is your go-to for decorative applications on lightweight fabrics that won’t fray. With converter usage, your serger machine threads just the upper and lower looper, creating a neat edge with minimal bulk. Tension adjustments are key for stitch durability, so always test first. You’ll love the flexibility and subtle finish this overlock stitch brings!
- Whisper-light seams for airy scarves
- Simple edge finishing on sheer fabric
- Creative touches for home decor
- Simple setup, impressive results
Rolled Hem Stitch
A rolled hem overlock seam is your secret weapon for lightweight fabrics—think chiffon scarves or napkins with crisp, professional edges.
With the right fabric selection, tension balance, stitch width, and differential feed, you’ll get a faultless finish.
Applications showcase its versatility, and choosing the right serger stitch here means skipping bulky hems for a delicate 3-thread rolled hem that shines.
Flatlock Stitch
Did you know flatlock seams can reduce skin irritation by 40% in performance apparel? The 2Thread Flatlock Seam joins fabric edges side-by-side, creating a smooth, bulk-free finish that’s ideal for yoga leggings or cycling jerseys.
Adjust your machine settings—loosen tension and disengage the knife—to get that signature seam comfort. Industry trends show flat lock seams are quickly becoming the preferred method.
Choosing The Right Serger Stitch
Picking the right serger stitch can make all the difference in your project. There are a few things to think about before you start sewing.
Let’s look at what matters most when choosing your stitch.
Factors to Consider (Fabric Type, Project Needs)
Choosing the right serger stitch is a bit like picking shoes for a hike—you need the right fit for your terrain. Your thread type, stitch density, and fabric weight all matter.
Knit fabrics call for stretchy seams, while woven fabrics need strong, neat edges. Think about project durability and seam stretch, especially with heavy or delicate fabric types.
Stitch Strength and Flexibility
Ever wondered why your activewear never pops a seam? It’s all about stitch strength and flexibility. Serger stitches, especially the 4Thread Overlock Seam, handle high Thread Count and Seam Elasticity, making them ideal for knit fabrics. Consider this:
- 3thread overlock: best stretch for knits
- Dense Stitch Density: boosts seam strength
- Load Durability: withstands daily wear
Decorative Vs. Functional Stitches
Stitch strength is only half the story—sometimes, you want your serger stitches to show off. Decorative sewing techniques use specialty thread types and lower tension settings, turning seams into eye-catching details.
Functional stitches focus on durability for tough fabrics, while hybrid stitches blend both worlds. Your fabric choice and project needs help you decide which stitch variations will shine.
Configuring a Serger for Basic Stitches
Getting your serger ready for basic stitches isn’t as tricky as it sounds. With a few simple steps, you’ll be set up for clean, professional seams.
Here’s what you need to know before you start sewing.
Threading The Serger Machine
When threading a serger machine, following the threading sequence—upper looper, lower looper, right needle, left needle—is key to avoiding error rates and headaches.
Guide each thread through the tension discs, using video tutorials or even self-threading features if your model allows.
For safety, always turn off the power, and keep thread tails long to prevent stitch failure.
Adjusting Tension and Stitch Length
Once you’ve mastered threading, your next friend is fussing with thread tension and stitch length. Tension troubleshooting can make or break your seams—too tight brings fabric puckering, too loose leaves messy loops.
Adjust stitch length for your fabric: shorter for strong seams and fray resistance, longer if you need gathers. Tweak in small steps to prevent thread breakage or skipped stitches.
Setting Cutting Width and Differential Feed
Once you’ve dialed in tension and stitch length, it’s time to look at cutting width and differential feed. Adjusting cutting width is like finding the sweet spot for fabric thickness—too narrow, and your seams unravel; too wide, and they look clunky.
Differential feed helps prevent wavy seams in knit fabrics, giving you better stitch quality and seam durability. Troubleshooting issues? Always test first!
Using Stitch Converters and Adaptors
With a little know-how, stitch converters and adaptors can open up a whole new world of serger stitches on your serger machine. Compatibility matters—always double-check your model before purchase.
The installation process often means pausing to adjust tension and test your settings. These handy devices boost stitch diversity and reflect market trends toward making sergers more adaptable for all sewing adventures.
Applications of Basic Serger Stitches
Basic serger stitches do so much more than just neaten up a seam. Once you know the possibilities, you’ll see why they’re a staple in so many sewing rooms.
Basic serger stitches transform simple seams into essential tools for professional results in every sewing project
Here’s how these stitches show up in the projects you make most.
Finishing Fabric Edges
Ever wonder how professionals keep fabric edges neat and strong? Serger stitches are your secret weapon for fray prevention and edge durability.
Overlocking doesn’t just tidy up—it encapsulates seams, trims excess, and boosts production efficiency in one swoop. Compared to alternative methods like zigzag or pinking shears, sergers deliver lasting seam finishing that stands up to wear and repeated washing.
Sewing Knit Garments
Tackling knit fabrics with a serger feels like unlocking a new level in sewing. The overlock stitch gives you a stretchy seam that moves with the fabric, while adjusting Knit Tension and Differential Feed keeps bulky knits smooth and flat.
Add a generous Seam Allowance and try Stretch Thread—your knit garments will look sharp and last longer.
Creating Decorative Edges and Hems
Did you know serger stitches can turn a simple hem into a showstopper? With the right edge stitching and hem techniques, you’ll master decorative sewing techniques for any project. Here’s what makes it pop:
- Tension balancing for crisp, even finishes
- Smart thread choices—think metallics or wooly nylon
- Matching fabric compatibility for impeccable rolled hems
Seam Construction in Garment Projects
Think of seam construction as the backbone of garment projects—serger stitches make it strong and flexible. With a standard seam allowance of 1.5 cm, the right stitch density boosts seam efficiency and preserves fabric strength.
Professional garment construction relies on precise serger machine setup and testing protocols, ensuring each seam withstands daily wear without fraying or losing shape.
Tips for Quality Serger Stitching
Getting crisp, professional results from your serger takes more than just threading and sewing. There are a few tricks and habits that can make all the difference.
Here’s what you’ll want to keep in mind as you work through your projects.
Managing Serger Tails and Seam Allowances
Did you know weaving serger tails back into seams is like tucking in loose threads for a polished look? At intersecting seam tails, trimming flush is enough, but for decorative finishes, secure those tails with a darning needle or seam sealant.
Seam allowance tools—like tape or templates—keep your lines sharp and accurate. Quality serger seam allowances make all the difference!
Troubleshooting Common Issues
Once your seam allowances are tidy, the real puzzle is solving serger machine hiccups. Threading errors—often from threading with the presser foot down—cause skipped stitches and tension problems. Needle issues, like dull tips or wrong types, mess up your stitch. Feed problems stretch or pucker seams, and blade issues leave jagged edges. Rethreading and adjusting thread tension work wonders!
Maintaining Your Serger Machine
Skipped stitches and tension headaches often stem from neglected serger maintenance. For smooth sewing, keep your machine humming with these habits:
- Monthly cleaning frequency for lint removal
- Oiling practices every 8–10 hours of use
- Watch wear parts like blades and needles
- Budget for servicing costs yearly
- Stick to routine procedures for serger tension control and needle changes
Frequently Asked Questions (FAQs)
Can serger stitches be used for quilting projects?
Yes, serger stitches work beautifully for quilting projects. You can use them for edge finishing to prevent fraying, piecing small quilts quickly, and joining backing pieces. They’re especially helpful for high-use quilts that need durable seams.
What threads work best with serger machines?
Polyester thread works best for sergers—it’s strong, doesn’t shrink, and withstands high speeds beautifully. Choose 40-50 weight for most projects.
Brands like Maxi-Lock and Gutermann offer excellent quality that won’t let you down.
How do you clean and oil a serger?
Remove lint buildup monthly using a small brush or compressed air around the looper, needle plate, and feed dogs.
Oil designated points every 8-10 hours if your serger requires it, following your manual’s guidelines.
Are specialty serger feet necessary for certain stitches?
Most standard serger stitches don’t require special feet, yet certain techniques like rolled hems or elastic application benefit dramatically from specialized attachments. These attachments boost stitch consistency, foot compatibility, and efficiency gains, despite their learning curve and cost justification needs.
Can you use a serger for gathering fabric?
Your serger excels at gathering fabric using differential feed settings, specialized gathering feet, or post-serging adjustments.
These serger gathering methods create beautiful fabric gathering ratios—often reducing material by half—while finishing edges simultaneously.
Conclusion
Once you grasp the power of basic serger sewing machine stitches, your projects take on a whole new level of polish. Each stitch type brings something unique to the table—whether you’re reinforcing seams, finishing edges, or adding decorative flair.
Don’t let the threading intimidate you; with practice, it becomes second nature. Your serger isn’t just another tool—it’s your shortcut to garments that rival anything hanging in a boutique.
- https://www.craftsy.com/post/types-of-serger-stitches
- https://www.threadsmagazine.com/2011/12/01/choose-the-right-serger-stitch-for-your-project
- https://publications.mgcafe.uky.edu/files/fcs2802.pdf
- https://rsisinternational.org/journals/ijriss/articles/impact-of-various-stitch-classes-and-seam-types-on-seam-strength/
- https://madamsew.com/blogs/sewing-blog/serger-versus-sewing-machine

