This site is supported by our readers. We may earn a commission, at no cost to you, if you purchase through links.
First, grab the right bobbin—check your manual; machines can be picky.
Plastic ones pair well with newer models, while metal works for older machines.
Choose a quality thread—no weak, knotty stuff—and match the bobbin thread to your project.
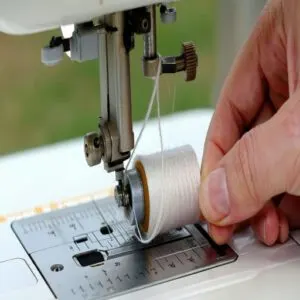
Place the bobbin snugly on the winder spindle, thread it through the guide, and hold the thread tail.
Go slow and steady when winding, watching for even tension.
Don’t overfill; a fat bobbin causes trouble.
Keep your bobbin area clean—no one likes a messy sewing machine.
Happy stitching!
Table Of Contents
Key Takeaways
- Choose the correct bobbin type for your machine and ensure it’s free from scratches or damage to avoid stitching issues.
- Use high-quality thread that matches your fabric and project, and avoid weak or knotty threads.
- Maintain consistent thread tension during winding by properly threading through the tension disk and monitoring even distribution.
- Keep your bobbin area clean by removing lint and debris regularly to prevent tangling or machine malfunctions.
Preparing Bobbin Winding
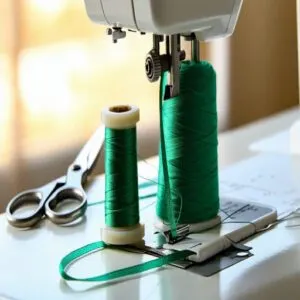
You’ll want to gather your thread, scissors, and a fresh bobbin before starting, just like collecting ingredients for your favorite recipe.
Before you wind that bobbin like a pro, check that you’re using the right type for your machine and that it’s free from any scratches or damage that could mess up your stitching.
Gathering Materials
Ever find yourself racing to gather materials mid-project?
Let’s save you that hassle.
You’ll need quality thread that matches your fabric choice, sharp scissors for clean cuts, and of course, your trusty bobbins.
A reliable bobbin winder purchase can substantially improve your workflow.
Don’t forget a small brush for cleaning and a proper storage container for your bobbins.
Material inspection’s key – check your thread for snags and make sure it’s strong enough for your project.
Inspecting Bobbin Storage
Smart bobbins storage starts with protection from dust and tangles.
Grab a clear plastic box with individual compartments, like those nifty silicone rings that hold 20+ bobbins.
Add labels to track your colors, and keep everything in an airtight container – moisture’s your enemy here.
For bulk storage, those pre-organized manufacturer jars work great, just double-check they match your machine.
Proper thread storage techniques are also essential for maintaining thread quality, so consider organizing your collection with helpful storage solutions.
Choosing Thread Type
Picking the right thread type is like choosing the perfect dance partner – it’s gotta match your fabric’s moves.
Thread weight and fiber selection make a huge difference.
You wouldn’t use thick quilting thread for delicate silk, right?
For everyday sewing, grab all-purpose polyester thread.
A detailed guide to thread type selection offers further insights.
Save those fancy metallic threads and elastic threads for special projects.
Your machine will thank you!
Matching Thread Color
Beyond thread type, check your thread color in natural light for perfect fabric tone matching.
For hue consistency, go one shade darker than your fabric – it’ll hide your stitches like a ninja.
Don’t forget to match your bobbin thread with your top thread unless you’re working with contrasting fabrics.
And watch out for dye lot variation between thread spools, it’s a sneaky troublemaker!
Correct Bobbin Selection
You’ll save yourself from a tangled mess of thread (and a minor meltdown) by choosing the right bobbin that matches your sewing machine’s make and model.
Just like you wouldn’t put diesel in a regular car, you’ll want to stick with the correct bobbin class, whether it’s the popular Class 15 or another type specified in your machine’s manual.
Importance of Bobbin Type
Your sewing machine’s perfect match isn’t just about looks – bodbin types matter more than you’d think.
While metal bobbins were once the go-to choice, modern machines often work best with plastic bobbins for magnetic hook compatibility.
Stick with the bodbin material that came with your machine to avoid stitch problems and guarantee seamless sewing efficiency.
For further information, consult this helpful bobbin compatibility resource.
Just like dating, compatibility is key!
Threading Bobbin Correctly
Now that you’ve got the right bobbin type, let’s master threading like a pro.
Start by sliding the thread through the tension disc – it’s like threading a tiny roller coaster, guide your thread tail through the bobbin’s small hole, following the clockwise direction marked by the arrow.
For additional products, explore resources for correctly threading bobbins.
Keep a gentle hold on the thread to prevent tangles as you prepare for winding.
Bobbin Winder Engagement
Getting your bobbin winder properly engaged is like clicking a puzzle piece into place – it’s all about that satisfying snap.
First, slide your bobbin onto the winder mechanism until you hear a click.
Check that the bobbin’s secure and aligned just right.
When you start the winding process, the thread flow should be smooth and steady.
Understanding bobbin winder engagement is vital for superior sewing performance.
Keep the winding speed moderate for best results, ensuring a successful and efficient winding process.
Winding Bobbin Process
You’ll find that winding your bobbin is like conducting a tiny orchestra, where the thread dances smoothly onto the bobbin with just the right tension and speed.
Once you’ve clicked your empty bobbin onto the winder spindle and guided the thread through the tension disk, you’re ready to start winding at a steady pace for perfect results every time.
Engaging Bobbin Winder
Now that you’ve got the right bobbin in hand, let’s tackle bobbin winding like a pro.
The winder mechanism is your best friend here – just click it into place and listen for that satisfying snap.
For a detailed visual guide, explore this helpful tutorial on winding a bobbin correctly.
Here’s your foolproof game plan:
- Push the bobbin winder tab to the right until it clicks
- Check that your bobbin’s aligned perfectly with the spindle
- Guide the thread tail through any empty hole – don’t sweat which one
Monitoring Winding Tension
Now that you’ve got your bobbinn winder engaged, let’s tackle the fun part – keeping your thread in check.
You’ll want to wrap that thread snugly around the tension disc before you start.
Watch how it winds onto your bobbin – it should glide up and down smoothly.
Don’t be shy about using your finger as a guide to maintain even wrapping, think of it like conducting a tiny thread orchestra!
Adjusting Thread Tension
While setting up your bobbin for winding, thread tension control makes all the difference in your sewing projects.
Think of tension like a dance – too tight and your thread snaps, too loose and you’ll get a messy tangle.
Adjust the tension screw on your machine’s bobbin case until the thread flows smoothly without resistance.
Keep checking the thread balance as you wind to guarantee perfect bobbin calibration.
Hand Winding Techniques
While machine winding is ideal, sometimes you’ll need to wind bobbins by hand.
Here’s how to maintain perfect tension when manually controlling your thread:
- Turn your handwheel clockwise while guiding the thread with your free hand to prevent breakage
- Keep a steady, moderate winding speed – about as fast as you’d stir honey into tea
- Watch for even thread distribution, adjusting your grip if it bunches up
No sewing machine? No problem! Just grab an empty bobbin and slowly twist clockwise, letting the thread naturally guide itself across the surface, which is a simple manual control method for achieving perfect tension with steady speed.
Threading and Spool Setup
You’ll want to set up your spool pin like you’re securing a tiny hat on your sewing machine, making sure it’s snug and ready to hold your thread during the winding process.
Once that’s done, you’ll guide your thread through the tension disc as smoothly as butter on toast, ensuring it flows perfectly into your bobbin’s hole without any tangles or hiccups.
Guiding Thread Smoothly
Now that you’ve got your winding setup ready, let’s focus on smooth thread flow.
Think of guiding thread like steering a boat – you want a steady hand and consistent pressure.
Run your thread through the tension disc with gentle pressure, following your machine’s thread path precisely.
Keep an eye on the thread’s movement, adjusting your grip if you notice any hiccups or resistance in the thread flow.
Ensure you maintain a steady hand to achieve the desired outcome.
Securing Thread on Spool
The three-point approach to perfect thread security starts with placing your spool of thread onto the spool pin like you’re setting up a tiny tower of thread power.
Here’s your fail-proof checklist:
- Pop the spool cap on snugly, but not too tight
- Align your thread with the guide notches
- Check the spool spins freely without wobbling
- Keep tension consistent by avoiding loose thread
- Double-check the spool’s orientation matches your manual’s diagram to ensure perfect thread security.
Threading Bobbin Hole
You’ll want to nail threading that bobbin hole correctly – it’s like threading a needle, but way less fussy.
With your thread in hand, you’ve got two main goals: getting a clean path through the hole and managing that pesky thread tail.
| Common Issue | Quick Fix |
|---|---|
| Thread won’t catch | Double-check hole direction |
| Loose thread tail | Leave 2-inch tail |
| Thread bunching | Guide thread smoothly |
| Uneven tension | Hold thread while starting |
| Threading wrong hole | Follow arrow markers |
Setting Up Spool Pin
Now that your bobbin’s threaded, let’s focus on your spool pin – it’s like a tiny watchtower for your thread.
Place your spool of thread onto the pin so it spins freely.
For superior performance, proper spool pin orientation is essential for maintaining consistent thread tension and preventing tangles.
The thread should flow smoothly through the thread guide without catching.
For perfect thread tension control, make sure your spool’s secure with a spool holder cap – think of it as a tiny helmet keeping everything in place.
Troubleshooting Bobbin Issues
You’ll quickly notice when your bobbin’s acting up, just like a car that’s running on empty and needs a pit stop.
When your thread starts tangling like spaghetti or your stitches look wonky, you’ll need these handy troubleshooting tips to get your sewing machine purring like a kitten again.
Checking Bobbin Tension
You know your thread tension’s off when stitches look like a roller coaster ride.
Perfect bobbins tension feels like butter – smooth and consistent.
Check your bobbin winding speed and watch how the thread lays.
If it’s bunching up or leaving gaps, adjust your tension control dial.
The thread should flow evenly, not too tight or loose, just like Goldilocks would want it.
Inspecting Thread Quality
Thread detectives know the secret: quality thread should glide through your needle like butter.
Run a quick fiber analysis by checking for knots and uneven spots.
Test yarn strength with a gentle tug – good thread won’t snap easily.
Examine color consistency and texture throughout the spool, and always match thread weight to your fabric type, considering the overall thread quality.
Addressing Winder Problems
Let’s tackle bobbin winding problems without losing your cool.
If your winder’s acting stubborn, try these fixes:
- Check for thread tangling in the winding guide.
- Align the bobbin groove with the spring on the winder shaft.
- Replace scratched or cracked bobbins.
- Verify proper bobbin winder engagement—snap it securely!
Smooth bobbin winding saves headaches later!
Maintaining Bobbin Area
Don’t skip bobbin area upkeep—it’s like flossing your machine, clear lint with a small brush, check for stickers or thread stuck in the bobbin case, and keep threads organized to avoid tangling.
A quick dust removal prevents buildup, and it is crucial for maintaining your machine’s performance, store bobbins neatly and lubricate your machine as needed.
Neat bobbin cleaning stops tension headaches later, by ensuring that your machine runs smoothly and efficiently.
| Task | Frequency |
|---|---|
| Lint removal | Every project |
| Bobbin case cleaning | Weekly or as needed |
| Thread organization | Ongoing |
| Machine lubrication | Monthly |
Frequently Asked Questions (FAQs)
How to correctly wind a bobbin?
Think winding a bobbin is boring? Nope, it’s an art!
This process involves a few simple steps: pop your empty bobbin on the winder, thread it snugly through the guide, then let it spin.
Watch for even winding—no gaps allowed!
How do I make sure my bobbin tension is correct?
Check the bobbin tension by gently pulling the thread; it should resist slightly but still flow.
If it’s too loose or tight, adjust the bobbin case screw carefully—just a tiny twist makes a difference!
How should your bobbin look once it is wound correctly?
Think of your bobbin like a tiny roll of perfect sushi—smooth, even, and tidy.
No loose loops, gaps, or bulges.
The thread should wrap consistently edge to edge, with no thread tails sticking out, and have a tiny roll of perfect sushi.
How do I clean the bobbin case properly?
Cleaning the bobbin case is simple—remove it, then gently brush away lint and dust with a small brush or soft cloth.
Avoid water or oils.
A vacuum’s crevice tool works wonders for stubborn debris too!
What causes loud noises during bobbin operation?
Weird clunking or loud noises?
It’s usually loose thread tension, damaged bobbins, or thread tangling inside.
Check for dust bunnies in the bobbin case too—those little troublemakers can cause a racket!
Why does the bobbin thread keep bunching up?
Your bobbin thread’s acting up because it’s either threaded wrong, the bobbin’s tension is off, or lint’s stuck somewhere.
Double-check the threading path, clean the bobbin case, and adjust the tension carefully.
Can different thread weights damage the bobbin?
Using thread weights that don’t match your machine’s specs can mess with tension, causing uneven stitches or jamming.
Too thick? It might strain your bobbin.
Too thin? It tangles like a bad hair day!
How do I store bobbins to prevent tangling?
Tangled bobbins are like tangled earbuds—frustrating and avoidable.
Store them in a clear organizer, thread ends secured with small rubber bands or clips.
Keep them in a dry, dust-free spot to guarantee smooth sewing every time.
Conclusion
Winding a bobbin might feel like threading a needle in a storm, but with the right steps, it’s easy.
Pick the right bobbin, use strong thread, and keep an eye on the tension—it’s like making a smoothie; too much or too little messes it up.
Stick to these best practices for sewing machine bobbin winding, and you’ll dodge thread jams or uneven stitches.
Keep it tidy, go slow, and your sewing projects will thank you!

