This site is supported by our readers. We may earn a commission, at no cost to you, if you purchase through links.
This guide is crafted for those who aim to refine their skills and push the boundaries of what’s possible with fabric.
By exploring the capabilities of a walking foot for zigzag and decorative stitches, you’ll achieve flawless results on thick batting and intricate designs.
Let’s embark on this journey to elevate your sewing mastery.
Table Of Contents
Key Takeaways
- Walking foot machines can accommodate a range of zigzag stitches, but straight stitches are recommended to avoid issues.
- Walking foot machines allow for decorative stitching and custom quilting designs, but may not be compatible with some upholstery presser feet.
- Proper adjustments to stitch length, pressure, and tension are crucial when working with thick batting, and basting is a vital part of the quilting process.
- Foot pressure is a critical factor for successful quilting with a walking foot, especially when working with thick batting.
Can You Sew a Zigzag Stitch With a Walking Foot ?
Yes, you can sew a zigzag stitch with a walking foot, but it depends on the specific walking foot and sewing machine. The walking foot is designed to evenly feed the top and bottom layers of fabric, which can accommodate some zigzag stitching, but the size of the zigzag and the machine’s capabilities may limit its use.
Walking Foot Capabilities
Yes, you can use a walking foot for zigzag stitching. Walking foot machines are designed to handle thicker materials and multiple layers of fabric, making them ideal for quilting and other projects that require a zigzag stitch.
Many walking foot machines come with a multi-zigzag stitch option, which allows you to create different zigzag patterns for your projects.
Additionally, you can use a walking foot with a zigzag foot guide or Hera marker to mark your lines and ensure accurate stitching.
Can Be Used for Zig-zag Stitching
Mastering zigzag stitching with a walking foot opens up a world of possibilities for your quilting projects.
- Zigzag Capabilities: A walking foot can be used for zigzag stitching, allowing you to create unique designs and patterns in your quilting.
- Decorative Stitches: With a walking foot, you can also use many decorative stitches to add texture and visual interest to your quilt.
- Foot Pressure: Adjusting foot pressure is crucial when working with thick batting to ensure smooth stitching and avoid damage to your machine.
- Quilting Recommendations: Walking foot machines are designed to enhance your quilting experience, not only by providing zigzag capabilities but also by offering a range of foot recommendations and adjustments for different materials and projects.
Can Be Used With Many Decorative Stitches
With a walking foot, you can explore a wide range of zigzag patterns, allowing you to add decorative thread and embellishments to your quilting projects.
This versatile tool is designed to enhance your quilting experience, enabling you to create top stitching and custom quilting designs with ease.
Whether you’re embarking on a zigzag walking foot quilting tutorial or simply seeking more than just a basic stitch, the walking foot quilting technique is your gateway to a world of ever-evolving zigzag stitch settings.
Walking Foot Recommendations
When it comes to mastering zigzag stitching with a walking foot, there are several recommendations to consider. First and foremost, forward-only stitches are recommended. This is because the walking foot is designed to move in a forward direction, making it more efficient and effective for stitching.
Additionally, the walking foot can be used for zigzag stitching and many decorative stitches, providing versatility for your quilting projects.
However, there are some limitations to consider. For instance, the walking foot may not be compatible with common upholstery presser feet, which can be a drawback for those looking to use a wide range of presser feet.
Furthermore, walking foot zigzag machines aren’t triple feed like the Singer 111, and they’re more prone to needle breakage and alignment issues.
Despite these limitations, walking foot zigzag machines are designed to enhance your quilting experience, particularly when working with thick batting. To ensure optimal performance, it’s advisable to make adjustments to stitch length, pressure, and tension, and to test your settings on a swatch before starting your project.
By following these recommendations and navigating the complexities of walking foot zigzag stitching, you can unlock the secrets to creating beautiful, even seams in your quilt top, batt, and quilt back, even when working with diagonal seams and uneven feed feet.
Thick Batting Considerations
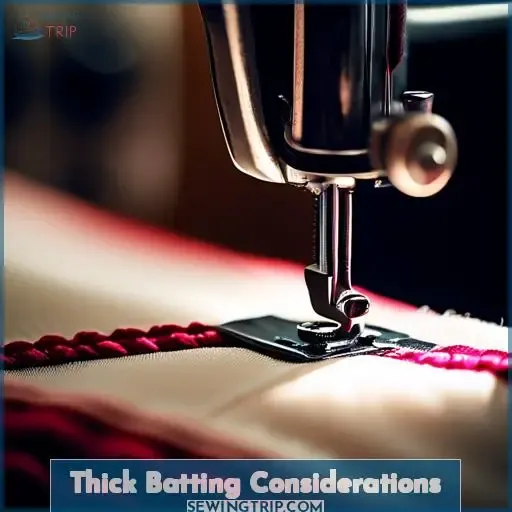
When working with thick batting, you’ll need to adjust stitch length, pressure, and tension.
May Require Adjustments to Stitch Length, Pressure, and Tension
When quilting with a walking foot, you’ll need to make adjustments to your machine settings for optimal results.
Thick batting requires attention to stitch length, pressure, and tension. Adjusting these settings can help prevent needle breakage, alignment issues, and ensure a smooth zig-zag stitch.
It’s not merely about sewing a zigzag stitch with a walking foot; it’s about mastering the art of zigzag walking foot quilting.
Basting Recommended
To prepare your quilt for zig-zag stitching with a walking foot, it’s crucial to baste the layers together.
- Choose a basting stitch type and thread that matches your quilt’s color scheme.
- Sew a basting stitch along the top edge of your quilt sandwich, ensuring the layers are securely held together.
- When it’s time to remove the basting stitches, do so carefully to avoid damaging the quilt layers.
Basting is a vital part of the quilting process, ensuring a smooth and even texture for your quilt.
Initial Machine Settings for Thick Batting
To successfully sew a zigzag stitch with a walking foot, you need to make certain adjustments to your machine’s settings, especially when working with thick batting. Increase your stitch length, reduce presser foot pressure and tension, and adjust these settings individually while testing them.
Increase Stitch Length
To tackle the challenges of quilting with thick batting, adjust your stitch length to accommodate the additional fabric thickness.
A longer stitch length allows for better needle penetration and helps maintain consistent tension settings.
Don’t forget to consider the fabric choice and the ever-evolving realm of quilting problems.
By understanding these factors, you’ll be well on your way to mastering zig-zag walking foot quilting, whether you’re binding quilts or simply navigating the complexities of thick batting.
Reduce Presser Foot Pressure and Tension
After bumping up your stitch length, it’s time to dial down your presser foot pressure and tension.
Think of it as fine-tuning your instrument for a symphony of stitches. Adjusting these settings ensures your fabric isn’t strangled or too loose, especially with thick batting.
It’s like finding the sweet spot for a perfect mitered corner—essential for that crisp, clean finish.
Adjust Settings Individually and Test
To master zigzag stitching with a walking foot, you must fine-tune your machine’s settings.
Start by adjusting the stitch length and width to your preference.
Next, test your stitches on a swatch and make necessary tension adjustments.
Remember to note your stitch settings for future use.
As you work with thick batting, you may need to increase stitch length, reduce presser foot pressure, and tension.
Always test your settings and adjust accordingly.
This meticulous process ensures a successful and robust quilting experience.
Record Settings for Future Use
To ensure consistent stitch quality and future usability, it’s essential to record your walking foot machine’s settings for thick batting. This includes stitch length, presser foot pressure, and tension adjustments. By documenting these settings, you can easily refer back to them for future projects.
Additionally, remember to test your machine’s performance with basting techniques to further optimize your stitching experience.
Frequently Asked Questions (FAQs)
Can a walking foot be used for quilting without a walking foot guide or Hera marker?
Absolutely, you can quilt with a walking foot even without a guide or Hera marker.
What is the recommended tension for zig-zag stitching with a walking foot?
To achieve the recommended tension for zig-zag stitching with a walking foot, you should adjust the stitch length and width settings on your sewing machine.
The stitch length should be set to 0, and the stitch width should be set to
It’s also essential to test the stitches on a swatch to ensure that the tension is correct.
How do you adjust the stitch length and width for zig-zag stitching with a walking foot?
To adjust the stitch length and width for zig-zag stitching with a walking foot, follow these steps:
- Set stitch length to
- Set stitch width to
- Test stitches on a swatch and adjust tension as needed.
- Note stitch settings for later use.
Remember to go slow and steady when quilting with a walking foot, and use a basting stitch along the top edge to secure the layers.
What are the common problems when using a walking foot for zig-zag stitching and how can they be resolved?
Yes, you can sew a zigzag stitch with a walking foot. Walking foot machines are designed to handle zigzag stitches, as they can be used with many decorative stitches and can be used for zigzag stitching.
Uneven zigzag quilting: This can be caused by poor travel of the work through the machine. To solve this, keep the work a bit bunched with only the part you’re sewing flat, and ensure the sewing machine is set down into a table. The bigger the quilt, the harder it’s to move it through the machine for straight line sewing. It’s recommended to use free-motion quilting for this reason, as you’re only moving a small area under the needle at any one time and not the length of the quilt from top to bottom.
Running out of bobbin thread: This can be resolved by refilling the bobbin and starting sewing again a few inches back from where the thread ran out. For a regular seam, you can refill the bobbin and continue sewing without removing the unfinished stitching. For top stitching, you’ll need to carefully cut and remove the stitch that ran out, then start your stitch with the needle going into the holes that you made the first time you started sewing.
Backstitching creates a blobby mess: Instead of backstitching, it’s recommended to bury the threads when starting or stopping. This can be done by using a needle and thread to weave the threads into the quilt.
Burying threads can be tricky: It’s essential to be patient and take your time when burying threads. It’s also advisable to use a needle with a large eye to make the process easier.
Over-stressing about thread burying is unnecessary: While thread burying is important for a neat finish, it isn’t a make-or-break factor in the quilting process. It’s more important to focus on maintaining consistent stitch length and tension.
When using a walking foot for zigzag stitching, it’s essential to adjust the stitch length and width for the specific walking foot you’re using. The stitch length should be set to 0, and the stitch width to Test the stitches on a swatch and adjust the tension as needed.
In conclusion, while there are some challenges when using a walking foot for zigzag stitching, with careful adjustments and attention to detail, you can achieve a beautiful and consistent finish.
Can a walking foot be used for quilting thick batting without any adjustments to the machine settings?
Yes, a walking foot can be used for quilting thick batting without any adjustments to the machine settings. Walking feet are designed to handle thick materials and can be used for quilting projects with thick batting.
However, if the batting is extremely thick, it may be necessary to make some adjustments to the stitch length, pressure, and tension to ensure smooth sewing.
Conclusion
Mastering zigzag stitching with a walking foot opens up a world of possibilities in the realm of sewing.
With a walking foot, you can achieve flawless results on thick batting and intricate designs.
By understanding the capabilities of a walking foot and making necessary adjustments, you can navigate the complexities of sewing with precision and creativity.
It’s not merely a tool, but a bespoke addition designed to enhance your sewing suite, enabling you to unlock the secrets of the ever-evolving world of sewing.

