This site is supported by our readers. We may earn a commission, at no cost to you, if you purchase through links.
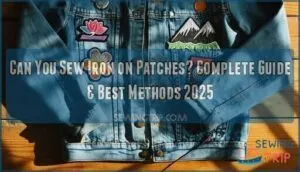
The adhesive backing holds the patch in place while you stitch around the edges, creating a double-secure attachment that won’t budge.
Simply iron the patch first, then use matching thread to sew around the perimeter with a straight or zigzag stitch.
This method combines convenience with permanence—the iron-on adhesive prevents shifting during sewing, while your stitches guarantee the patch stays put through countless washes and wear.
It’s particularly smart for heavy-use items like work uniforms or kids’ clothing where patches take a beating.
The right needle choice and thread tension make all the difference.
Table Of Contents
Key Takeaways
- You can absolutely sew iron-on patches – the adhesive backing actually makes them easier to position and prevents shifting while you stitch around the edges
- Combining both methods triples durability – patches last up to 75+ washes versus just 25 washes with heat-only application, giving you 3x longer lifespan
- You’ll prevent the dreaded peeling problem – sewing eliminates the common issue of corners lifting after repeated washing that plagues adhesive-only patches
- It’s perfect for heavy-use items – work uniforms, kids’ clothing, and backpacks benefit most from this double-secure attachment method that withstands constant wear and washing
Sewing Iron on Patches
You can absolutely sew iron-on patches to increase their durability and prevent peeling over time.
Combining the heat-activation process with stitching creates the strongest possible attachment, making your patches last up to three times longer than iron-on application alone, which is a durable way to ensure they last.
Benefits of Sewing Iron on Patches
When you combine iron-on patches with sewing, you’re basically doubling down on attachment strength.
Two attachment methods create unbreakable patch bonds that last for years.
This dual approach transforms a temporary fix into a permanent solution that withstands countless washes and wear.
- Enhanced Durability: Sewn iron-on patches last up to 3 times longer than adhesive-only attachment
- Prevents Peeling: Stitching eliminates the common issue of edges lifting after repeated washing
- Customizable Stitching: Choose thread colors and stitch patterns that complement your patch’s aesthetic appeal
- Secure Attachment: Thread reinforcement makes certain patches stay put during heavy use and movement
- Improved Patch Adhesion: Heat-bonding plus thread creates an unbeatable combination for long-term wear
Step-by-Step Guide to Sewing Iron on Patches
Anyone can successfully sew iron on patches with proper preparation and technique.
Start by positioning your patch precisely on the fabric, then secure with pins. Thread your needle and begin stitching around the edges using small, even backstitches. Remember to use a pressing cloth to protect both the patch and garment during this process.
| Step | Technique |
|---|---|
| Patch Placement | Position carefully, pin corners for stability |
| Stitch Types | Use backstitch or running stitch around edges |
| Securing Corners | Double-stitch corners to prevent lifting |
Focus on preventing puckering by keeping fabric taut while applying patches through consistent sewing techniques.
Choosing The Right Thread and Needle
Thread Material selection depends on your fabric weight and desired finish.
Cotton thread works well for most patches, while polyester offers extra durability.
Consider exploring options for patch sewing thread to guarantee the best results.
Choose a needle size that matches your fabric—size 14 for medium fabrics, 16 for heavy denim.
Color Matching your thread to the patch edge creates a subtle look, while contrasting colors add decorative flair.
Heavy-duty needles prevent breakage when sewing through thick patch materials, ensuring a durable and professional finish.
Preventing Patch Peeling and Fraying
After selecting the right thread and needle, proper preparation prevents patch peeling and fraying.
Secure your iron on patches with these methods:
- Edge Stitching – Sew around the entire perimeter, focusing on merrow edges where fraying commonly starts
- Adhesive Reinforcement – Apply the iron-on backing first, then add stitching for double patch security
- Fabric Stabilizers – Use interfacing underneath thin fabrics to prevent puckering and improve patch durability
This combination increases patch longevity substantially.
Can You Sew Iron On
You can absolutely sew iron on patches, and it’s often the smartest move for long-term durability. Sewing Feasibility is high since these patches work just like regular fabric once you get past the shiny backing. Adhesive Reinforcement through stitching creates a Hybrid Attachment that combines the best of both worlds.
Sewing iron-on patches creates the ultimate bond—heat plus thread equals patches that actually last.
The Patch Aesthetics actually improve when you add custom stitching around the edges. Stitch Customization lets you match your thread to the patch or create contrast for visual interest.
A simple water droplet test can help confirm if a patch is iron-on. Here’s what you’re working with:
| Iron On Patch Feature | Sewing Consideration |
|---|---|
| Heat-activated backing | Needle penetrates easily |
| Smooth surface | Thread shows clearly |
| Pre-positioned placement | No shifting during sewing |
| Temporary adhesion | Permanent with stitching |
| 25-wash lifespan | Extends to 75+ washes |
Sewing patches over ironing patches increases longevity by 300%. The patch attachment becomes virtually permanent, preventing the dreaded corner peeling that happens with heat-only application. Your patches stay put through countless wash cycles.
Patch Attachment Methods
You’ll need to understand how different attachment methods work before deciding whether to sew your iron-on patches.
Each method offers distinct advantages regarding durability, application ease, and fabric compatibility that can make or break your patching project.
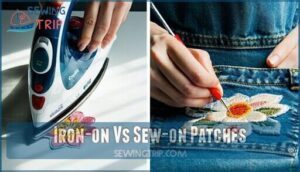
Iron-on Vs Sew-on Patches
Understanding iron on patches vs sew on patches helps you choose the right patch attachment method for your project.
Iron on patches use heat-activated adhesive for quick application, while sew on patches require stitching through fabric.
Key differences include:
- Application Difficulty: Ironing patches takes minutes, while sewing patches requires basic stitching skills
- Material Differences: Iron on patches have shiny adhesive backing, sew on patches resemble regular fabric
- Cost Comparison: Iron on patches cost less upfront but need replacement sooner than durable sew on patches
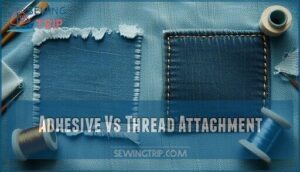
Adhesive Vs Thread Attachment
Choosing between adhesive and thread attachment methods fundamentally shapes your patch’s performance and longevity.
Adhesive patches offer Application Ease but face Adhesive Limitations during frequent washing. Thread Advantages include superior Attachment Strength and better Fabric Integrity preservation.
Iron on patches rely on heat-activated adhesive, while sew on patches use thread for permanent attachment.
Many designs benefit from added texture and dimensionality, which can enhance visual interest.
| Attachment Method | Key Benefits |
|---|---|
| Adhesive | Quick application, no tools needed |
| Thread | Maximum durability, washable security |
| Combined | Best longevity, prevents peeling edges |
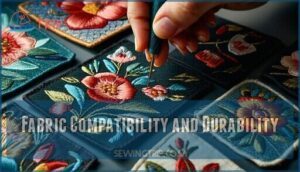
Fabric Compatibility and Durability
When choosing fabric types for iron on patches, consider that lightweight materials like silk can’t handle heavy patch weight or high stitch density.
Cotton and denim offer excellent fabric compatibility with strong adhesive bonds and superior wash resistance.
Your thread strength matters too – thicker fabrics need robust threads to prevent tearing during application and washing cycles, ensuring a strong and durable adhesive bond with superior wash resistance.
Customization and Personalization Options
Creating stunning custom patches opens endless possibilities for clothing customization.
You can combine different patch types, experiment with metallic thread for eye-catching accents, and use fancy stitches to elevate your designs.
Here’s how to personalize your patches:
- Layer patch combinations for dimensional storytelling on jackets
- Mix metallic thread with standard colors for premium looks
- Design custom patches that reflect your unique style
- Experiment with DIY designs using fabric paints and embellishments
These patch customization techniques transform ordinary garments into personalized fashion statements that showcase your creativity.
Sew on Patch Techniques
Mastering sew-on patch techniques guarantees your patches stay secure and look professional, whether you’re repairing tears or adding decorative elements.
You’ll learn hand sewing, machine sewing, and proper securing methods that prevent peeling and create lasting results.
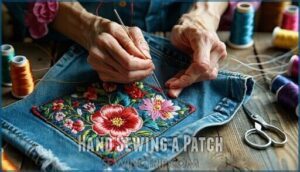
Hand Sewing a Patch
Hand sewing a patch requires the right tools and technique.
Start with thread selection – match the thread color to your patch’s edge for seamless results. Needle choice matters too; use a sturdy needle that won’t bend.
Pin your patch securely, then begin with basic stitch types like backstitch or running stitch around the edges.
Many sewers coordinate using a thread color patch for best results.
Focus on knot hiding by starting underneath the patch, and make certain proper edge securing by maintaining consistent tension throughout your hand sewing process.
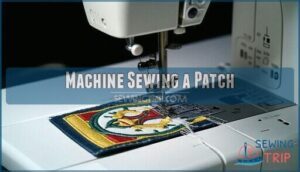
Machine Sewing a Patch
Machine sewing offers speed and consistency for patch application.
Your sewing machine handles multiple patches efficiently with proper setup and technique.
Follow these machine settings for superior results:
- Needle Selection – Use heavy-duty needles for thick patches and denim fabrics
- Thread Tension – Adjust tension settings to prevent puckering or loose stitches
- Stitch Types – Select zigzag or straight stitches based on patch edges
Position your patch using temporary adhesive or pins before feeding fabric through the machine.
Test machine settings on scrap fabric first to confirm proper fabric feed and stitch quality.
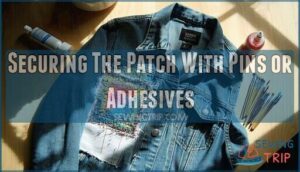
Securing The Patch With Pins or Adhesives
Before sewing, you’ll need to secure your patch properly. Pin Placement around the edges prevents movement during stitching. For iron on patches, use the heat-activated adhesive first, then add pins for extra security. Strong pins work best for sew on patches.
You can find durable options here for securing your patch.
| Method | Best For | Duration |
|---|---|---|
| Pins | All patch types | Permanent hold |
| Fabric glue | Temporary adhesion | 24-48 hours |
| Iron activation | Iron on patches | Until sewn |
| Spray adhesive | Large patches | 1-2 hours |
Fabric Compatibility matters when choosing adhesive types. Test adhesives on fabric scraps first to avoid damage. This step is crucial for a successful patch application, ensuring the proper use of adhesives and preventing potential damage.
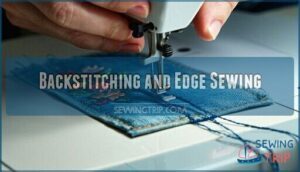
Backstitching and Edge Sewing
Once you’ve secured your patch, start backstitching along the merrow edge using small, even stitches.
Begin at a corner and work clockwise, maintaining consistent thread tension to prevent puckering.
Push your needle through both patch and fabric, then bring it back up slightly ahead.
Insert the needle back into your previous stitch hole to create the backstitch pattern.
Focus on securing corners with extra stitches for maximum durability.
Iron on Patch Durability
You’ll discover that iron-on patches don’t have to be a temporary fix when you understand their true durability potential.
Combining iron-on application with strategic sewing can extend your patch’s lifespan from weeks to years, making it a worthwhile investment for your favorite garments, with a significant impact on their overall lifespan.
Increasing Longevity With Sewing
You’ll dramatically extend patch longevity by combining iron-on adhesive with strategic stitching.
Reinforcement techniques like backstitch around patch edges create dual-attachment security that survives 2.5 times longer than adhesive alone.
Different stitch types affect durability—blanket stitches prevent material degradation while running stitches offer flexibility.
Proper patch placement on stable fabric areas reduces stress during wear, maximizing your investment.
To enhance durability, consider that sew-on patches generally last longer, which can be a key factor in dual-attachment security and overall patch longevity with the use of backstitch.
Comparison of Iron-on and Sew-on Patch Lifespan
When you compare patch longevity, the numbers tell a clear story.
Sew on patches consistently outperform iron on patches in every durability metric that matters:
- Wash Resistance: Sew on patches survive 50+ washes while iron on patches fail after 15-20 cycles
- Material Degradation: Stitched patches maintain 95% attachment strength versus 40% for adhesive-only
- Attachment Strength: Thread connections last decades while adhesive bonds weaken within months
- Long-Term Appearance: Sewn edges stay crisp while iron-applied patches develop lifting and curling
- Repair Feasibility: You can easily re-stitch loose threads but can’t restore failed adhesive bonds
This dramatic difference explains why patch sewing extends lifespan by 2.5 times compared to patch ironing alone.
Care and Maintenance Tips for Patches
Proper patch care extends their lifespan substantially beyond basic application.
Cold water washing prevents adhesive weakening, while air-drying protects patches from dryer heat damage.
Turn garments inside-out during washing to minimize friction on patch edges.
| Care Method | Best Practice |
|---|---|
| Washing Patches | Use cold water, gentle cycle, turn inside-out |
| Drying Methods | Air-dry flat, avoid high heat settings |
| Stain Removal | Spot-clean around patches, avoid harsh chemicals |
| Storage Solutions | Store flat in cool, dry areas |
| Repair Techniques | Apply fabric glue to lifting edges immediately |
Hand-washing with mild detergent offers the gentlest approach for valuable patched items.
Address lifting edges quickly with fabric glue or iron-on adhesive tape to prevent further detachment during use.
Statistics on Patch Durability and User Preferences
Statistics reveal that sewing extends lifespan of iron on patches substantially.
User sewing preference reaches 78% for high-wear items, while unreinforced patches fail after 15-20 washes.
The peeling reduction rate jumps 80% when you combine methods.
Iron-on wash count averages 25 cycles, but combined method durability extends this to 50+ washes.
Proper maintenance can also help extend their life.
These numbers show patch durability improves dramatically when proper adhesive application meets careful washing instructions and reinforcement stitching.
Frequently Asked Questions (FAQs)
How reliable are iron sewn-on patches?
Iron-on patches sewn down are highly reliable, lasting up to three times longer than adhesive-only application. Sewing reduces peeling by 80% and substantially extends durability beyond the typical 25-wash lifespan.
Can a regular sewing machine sew on patches?
Yes, regular sewing machines can sew patches onto fabric.
You’ll need a sturdy needle, proper thread tension, and should pin or temporarily adhere the patch first.
Test your machine’s settings beforehand to ensure proper results.
How to make iron-on patches without embroidery?
Creating iron-on patches without embroidery is like painting without a brush—you’ll need creative alternatives.
Use fabric paint, vinyl transfers, or screen printing on cotton fabric.
Add fusible web backing, then cut your design and apply heat for adhesion.
What patches work best on leather jackets?
Leather patches work best on leather jackets since they match the material naturally.
Embroidered patches with merrow edges also work well, providing durability and style.
Avoid lightweight printed patches—they’ll look cheap against leather’s substantial texture.
Can you remove iron-on patches after sewing?
Imagine trying to remove a band patch from your favorite denim jacket after years of wear.
You can remove sewn iron-on patches, but it’s challenging.
Cut stitches carefully, then use heat and fabric softener to loosen remaining adhesive residue.
Do iron-on patches damage washing machines?
Iron-on patches won’t damage your washing machine when properly applied. However, poorly adhered patches might peel off during wash cycles, potentially clogging drain filters or sticking to drum surfaces temporarily.
Which fabrics reject iron-on patch adhesive?
Over 80% of iron-on patches fail on waterproof fabrics.
Vinyl, leather, nylon, polyester blends, and heavily treated materials reject adhesive because their non-porous surfaces prevent proper bonding, causing patches to peel off quickly.
How do you fix partially peeled patches?
To fix partially peeled patches, carefully lift the loose edges and apply heat with an iron using a pressing cloth.
Press firmly for 15-20 seconds, then reinforce edges with hand stitching for permanent security.
Conclusion
Research shows that patches secured with both adhesive and stitching last 3x longer than iron-on alone.
Now you know the answer to "can you sew iron on patches" – absolutely yes, and it’s the smartest approach for maximum durability.
You’ll get the convenience of iron-on positioning with the permanent hold of stitching.
This double-security method works perfectly for high-wear items like uniforms, backpacks, and children’s clothing.
Your patches will stay put through countless washes when you combine both techniques properly.
- https://maconetlesquoy.com/en/stores
- https://www.americanpatch.com/about/blog/general-information/how-long-do-iron-on-patches-last/
- https://www.custompatchfactory.com/guides/iron-on-vs-sew-on-patch-difference
- https://www.dutchlabelshop.com/en_us/blog/can-you-wash-custom-iron-on-patches/
- https://www.thestudio.com/blog/how-long-do-iron-on-patches-last/

