This site is supported by our readers. We may earn a commission, at no cost to you, if you purchase through links.
Machine stitches speed things up—straight stitch manages most fabrics, zigzag works with stretchy materials, and overcast prevents fraying.
For embellishment, try satin stitch for smooth filling or French knots for texture. Buttonhole stitch creates sturdy openings, and darning repairs worn areas.
Match your stitch to your fabric and purpose: cotton needs different treatment than knits. The secret lies in understanding which technique assists each specific situation best.
Table Of Contents
Key Takeaways
- You’ll build your foundation with four essential hand stitches—running stitch for basic seams, backstitch for strength, slip stitch for invisible hems, and blanket stitch for decorative edges that’ll handle most projects you’ll tackle.
- You’ll speed up your work with key machine stitches like straight stitch for standard fabrics, zigzag for stretchy materials, and overcast for preventing fraying—each one matched to specific fabric types and purposes.
- You’ll add personality to your projects through decorative techniques like satin stitch for smooth filling, French knots for texture, and chain stitch for flowing lines that transform plain fabric into stunning artwork.
- You’ll solve specific challenges with specialized stitches including buttonhole stitch for secure closures, darning for repairs, and ladder stitch for seamless joins that give your work a professional finish.
Essential Hand Sewing Stitches
You’ll master four fundamental hand stitches that form the foundation of all sewing projects.
These basic techniques—running stitch, backstitch, slip stitch, and whipstitch—give you the skills to tackle seams, hems, and edge finishing with confidence.
Running Stitch and Its Uses
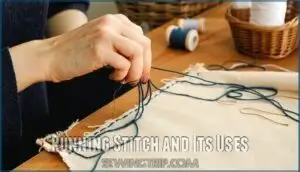
When you’re starting your hand sewing journey, the running stitch becomes your trusty foundation. You’ll create this basic stitch by weaving your needle in and out of fabric in even intervals.
Running Stitch Basics involve maintaining consistent stitch length control—aim for 1/8 to 1/4 inch spacing. This Hand Sewing technique works perfectly for basting, gathering fabric, and simple seams. Adjust your tension to match different fabric types for the best results.
Backstitch for Strong Seams
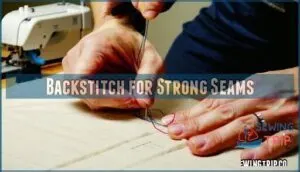
When you need seam reinforcement that won’t budge, backstitch delivers. Unlike straight stitch, this hand sewing technique creates strong seams by overlapping each stitch with the previous one.
Start by inserting your needle one stitch length ahead, then bring it back to meet the end of your last stitch. This creates continuous, durable seams perfect for stress points in garments where fabric selection and proper stitch tension matter most.
Slip Stitch for Invisible Seams
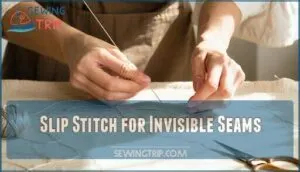
With slip stitch, you’ll create concealed seam construction that’s virtually invisible from the right side. This hidden stitch application works by catching only a few fabric threads at a time, making it perfect for invisible seam techniques.
You’ll love how this hand sewing stitch creates professional-looking hems and seam finishing methods without bulky visible stitching. Mastering the slip stitch technique is essential for achieving a professional finish.
Whipstitch and Blanket Stitch for Edges
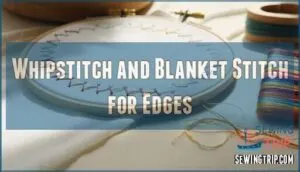
Beyond basic seams, whipstitch and blanket stitch excel at edge finishing and fabric edging. Whipstitch creates diagonal overcast stitches that prevent fraying on raw edges.
You’ll love blanket stitch for decorative border embellishments—it forms neat loops along fabric edges.
These hand sewing stitches offer stitch variations perfect for hemming stitches and seam binding projects.
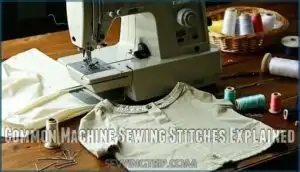
Common Machine Sewing Stitches Explained
You’ll master machine sewing once you understand the core stitches your machine offers. These essential machine stitches form the foundation for every project from simple hemming to complex garment construction.
Straight Stitch for Basic Seams
The straight stitch forms the backbone of machine sewing, delivering reliable seam reinforcement for countless projects. You’ll find this adaptable technique perfect for joining fabric pieces with consistent stitch length and proper thread selection.
To achieve optimal results, follow these steps:
- Set appropriate fabric tension – Adjust upper and lower thread tension to prevent puckering or loose stitches
- Choose correct stitch length – Use 2.5mm for medium-weight fabrics, shorter for delicate materials
- Select quality thread – Match thread weight to fabric type for optimal seam strength
- Maintain steady sewing speed – Consistent pace ensures even stitches and professional results
- Practice proper needle positioning – Keep fabric aligned while guiding material through the machine smoothly
Understanding sewing machine needles is essential for selecting the right tools for your projects.
Zigzag Stitch for Stretch Fabrics
You’ll master zigzag stitch for stretch fabric sewing when working with knits and elastic materials. This adaptable stretch stitch moves with fabric instead of breaking under tension.
Set your sewing machine to a medium-width zigzag for elastic seam finishing. The zig zag stitch prevents puckering while providing fabric stretch control for comfortable, durable seams.
Overcast and Lock Stitch for Seam Finishing
When finishing fabric edges, you’ll reach for two powerful seam finishing techniques. Overcast stitch wraps thread around raw edges to prevent fraying, working perfectly on lightweight fabrics. Lock stitch creates interlocked threads for maximum durability in seams.
These fabric edge management methods offer distinct advantages: overcast provides quick edge sealing while lock stitch delivers professional seam reinforcement methods that withstand repeated washing and wear. For a professional finish, using an overcast stitch guide can help achieve neat and durable seams.
Blind Hem Stitch for Invisible Hems
The blind hem stitch creates professional-looking invisible seams on skirts and pants. This hemming technique produces clean fabric finishing without visible stitching on the garment’s right side.
Your sewing machine folds the fabric edge, catching just a few threads of the front fabric with each stitch. Unlike straight stitch or whip stitch methods, the blind stitch variation hides completely when done correctly.
Decorative and Embroidery Stitch Patterns
You’ll transform your basic stitching skills into beautiful artwork when you master decorative and embroidery patterns that add personality to every project.
These ornamental stitches turn simple fabrics into stunning creations through techniques like satin stitch for smooth fills, chain stitch for flowing lines, and French knots for textured details.
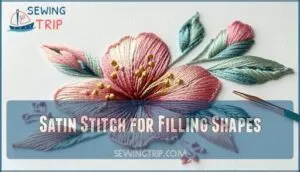
Satin Stitch for Filling Shapes
Achieving smooth, dense filling with satin stitch transforms your embroidery into professional-looking shape embellishments. This decorative stitch creates beautiful dense filling for flowers, leaves, and geometric patterns.
Work closely spaced straight stitches across your design, maintaining consistent tension for smooth edging. Practice padded satin stitch techniques by layering running stitches underneath for raised effects in your embroidery stitches.
Mastering the satin stitch kit techniques requires understanding the stitch kit basics.
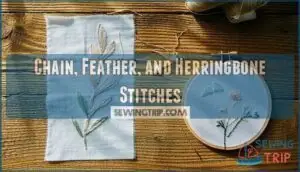
Chain, Feather, and Herringbone Stitches
These three decorative stitches transform ordinary fabric into stunning textile design masterpieces. Chain stitch creates flowing lines perfect for outlining shapes. Feather embroidery adds delicate branching patterns that mimic nature’s beauty. Herringbone borders provide geometric elegance with their distinctive V-shaped formations.
- Chain Stitch – Loop thread under needle for continuous linked appearance
- Feather Stitch – Alternate diagonal stitches creating feather-like branches
- Herringbone Stitch – Cross threads in zigzag pattern for decorative borders
- Stitch Variations – Modify spacing and thread weight for unique effects
These sewing techniques offer endless creative possibilities for embellishing garments, home décor, and craft projects.
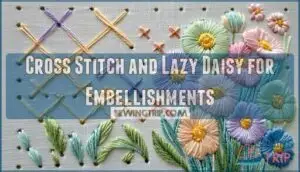
Cross Stitch and Lazy Daisy for Embellishments
Cross stitch basics involve forming X-shaped stitches on fabric grids, while lazy daisy variations create petal-like loops perfect for floral patterns. These decorative stitches transform plain fabric into beautiful embellishments.
| Stitch Type | Best Use |
|---|---|
| Cross stitch | Grid-based designs, samplers |
| Lazy daisy stitch | Flowers, leaves, nature motifs |
| Combination techniques | Complex embroidery projects |
Master cross stitch by keeping tension consistent across all X formations. Lazy daisy stitch requires anchoring each loop with a small straight stitch. Practice stitch combination methods to create dimensional embellishments that pop off your fabric.
French Knots and Bullion Knots for Texture
French Knots and Bullion Knots create stunning textured embellishments that bring your embroidery to life. These raised stitches add remarkable dimensional effects through simple knot techniques.
French Knot involves wrapping thread around your needle once, creating perfect dots for flower centers. Bullion Knot uses multiple wraps for elongated texture, ideal for petals and stems.
Both decorative stitches transform flat fabric into tactile artwork with rich embroidery details. To master these stitches, understanding the embroidery stitch techniques is essential for achieving professional-looking results.
Specialized Stitches for Unique Applications
You’ll master specialized stitches that solve specific sewing challenges and create professional-quality finishes. These sophisticated techniques include buttonhole stitches for secure closures, flawless ladder stitches for smooth joins, darning stitches for repairs, and decorative sashiko patterns that transform your projects from basic to exceptional.
Buttonhole and Pad Stitches for Closures
You’ll master buttonhole techniques and pad stitch applications that transform ordinary closures into professional-grade fastenings. The buttonhole stitch creates sturdy openings that won’t fray or stretch over time. Pad stitches add essential structure to collars and lapels, giving your garments that crisp, polished look that screams quality craftsmanship.
- Liberation from flimsy closures – Your garments deserve secure fastenings that last through countless wears.
- Mastery over structural elements – Transform limp fabric into perfectly shaped collars and cuffs.
- Understanding of stitch reinforcement – Build confidence knowing your closures won’t fail when it matters most.
By mastering hand sewing techniques, you can create durable and long-lasting buttonholes that improve the overall quality of your garments.
Darning and Hemstitch for Repairs and Edges
When faced with holes or frayed edges, darning techniques and hemstitch methods become your fabric’s lifeline. Darning uses running stitch and backstitch patterns to weave new threads across damaged areas, creating strong fabric repair.
Hemstitch provides elegant edge finishing by drawing out horizontal threads and bundling remaining vertical ones with whipstitch. These seam reinforcement techniques transform worn items into treasured pieces again.
Ladder and Invisible Stitches for Seamless Joins
When you need perfect closures without visible stitches, ladder stitch and invisible seam techniques become your secret weapons. The ladder stitch creates flawless joins by alternating between fabric edges, working like a zipper to pull pieces together.
For turning stuffed toys or closing pillow openings, this hidden stitch pattern delivers professional results. Practice these edge finishing tips on scrap fabric first—you’ll master these faultless join methods quickly.
Sashiko and Web Stitch for Advanced Projects
Elevate your textile artistry with two powerhouse techniques that bridge tradition and innovation. Sashiko patterns use traditional Japanese stitching with running stitch precision, while web stitch techniques create dimensional florals through sophisticated embroidery methods.
- Master geometric sashiko motifs for visible mending that transforms worn garments into heirloom pieces
- Create stunning spider web roses using radiating spokes and spiral weaving for dramatic focal points
- Combine both techniques in mixed-media projects that honor crossstitch traditions while pushing creative boundaries
- Layer sashiko reinforcement beneath decorative web elements for projects requiring both strength and beauty
- Experiment with thread weights from heavy sashiko cotton to delicate embroidery floss for varied textural effects
Choosing The Right Stitch for Your Project
You’ll find success when you match your stitch choice to both your fabric type and project goals. Consider whether you need strength for seams, stretch for knits, or decorative appeal for embellishments before picking up your needle.
Matching Stitch Patterns to Fabric Types
Fabric selection drives your stitch choice. Straight stitch works perfectly for nonstretch fabrics like cotton and linen. Stretch stitch manages knits and spandex beautifully. Heavy materials need reinforced stitches, while delicate fabrics require gentle approaches.
Thread choice and stitch tension must match your suitable materials. Texture mixing demands careful consideration during garment construction for professional results. Understanding fabric properties is vital for selecting the right stitch pattern and achieving ideal results.
Functional Vs. Decorative Stitch Selection
When choosing between functional and decorative stitches, consider your project’s purpose. Functional stitches like straight stitch and backstitch prioritize durability for seams and structural elements. Decorative stitches such as satin stitch and French knots augment visual appeal.
Project planning determines whether you need strength, beauty, or both. Hand sewing offers control while machine techniques provide speed.
Tips for Beginners and Advanced Sewers
Mastering Sewing Basics requires patience and practice. Start with Hand Sewing and simple Sewing Techniques before advancing. Sophisticated Techniques come naturally once fundamentals click.
Keep quality Sewing Tools nearby and practice Stitch Variations on scraps. Focus on Fabric Selection matching stitch purpose. Having the right sewing kit tools is essential for completing projects efficiently.
Build confidence through small Sewing Projects using basic Types of Sewing Stitches before exploring Decorative Stitches.
Frequently Asked Questions (FAQs)
How often should I replace my sewing machine needles?
You should replace your sewing machine needle every 6-8 hours of sewing time or after completing 2-3 projects. Dull needles cause skipped stitches, fabric damage, and thread breaks.
What tension settings work best for different fabrics?
One size doesn’t fit all in terms of tension settings. Use 4-5 for medium-weight cotton, 5-5 for denim and heavy fabrics, and 2-5 for silk and delicate materials.
Which presser feet are essential for specialty stitches?
You’ll need a zipper foot for buttonholes and invisible zippers, a buttonhole foot for clean openings, and a walking foot for quilting stitches.
These three essentials handle most specialty techniques beautifully.
How do I prevent thread bunching underneath fabric?
Thread bunching underneath fabric? Your machine’s throwing a tantrum! Check your bobbin tension first—it’s often the culprit.
Rethread your machine completely, ensuring proper threading paths. Clean lint from the bobbin case and use quality thread that matches your needle size.
Conclusion
Like building a house requires different tools for each task, mastering different stitch patterns and uses transforms you from a beginner into a confident sewist. You’ve learned essential hand stitches for precision work and machine stitches for speed.
Decorative techniques add personal flair while specialized stitches solve unique challenges. Each stitch you master opens new creative possibilities for your projects.
Remember that practice makes perfect—start with basic patterns and gradually expand your skills.
- https://selaisourcing.com/a-guide-to-different-types-of-stitching-and-their-use-case/
- https://www.skillshare.com/en/blog/the-right-stitch-types-to-use-no-matter-what-youre-sewing/
- https://sewinginspo.com/hand-stitch/types-of-hand-stitches/
- https://www.studioknitsf.com/stitch-patterns-beginner/
- https://lindehobby.com/difference-between-crochet-and-knit-discovering-the-joy-of-creating-with-lindehobby-2040/

