This site is supported by our readers. We may earn a commission, at no cost to you, if you purchase through links.
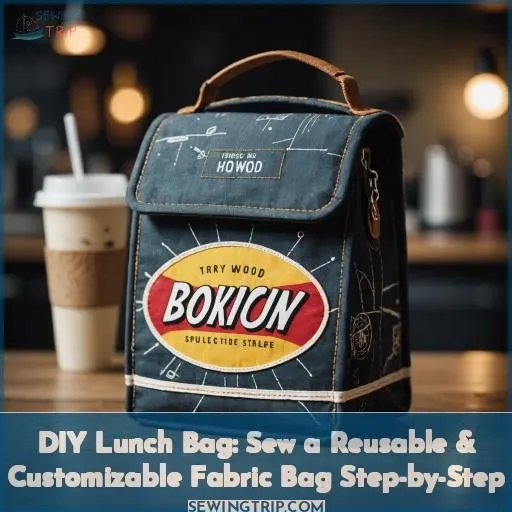
For the napkin wrap, choose a durable 19×19 inch fabric and personalize it with optional embellishments. Assemble the lunch bag by preparing the napkin materials, personalizing the napkin, and inserting your contents.
For an extra touch, learn how to make festive lunch bag snowflakes using vinyl-coated cotton and insulating material. Keep reading to discover all the creative DIY lunch bag possibilities.
Table Of Contents
Key Takeaways
- To craft a customizable and reusable fabric lunch bag, use sturdy materials such as cotton or linen for the bag (35 x 11-12 inches) and a durable fabric for the napkin/wrap (19×19 inches), along with interfacing to reinforce areas like buttonholes.
- Personalize your lunch bag with optional embellishments such as grosgrain ribbon for a name tag, snaps, or Velcro, and consider using an edge-stitch foot for precise stitching and a buttonhole foot for creating buttonholes.
- Assemble the lunch bag by folding and stitching the fabric, pressing the edges for a polished look, creating buttonholes for a drawstring closure, and boxing the corners for extra space; then prepare the napkin materials and personalize it before inserting your lunch contents.
- Enhance your DIY project with festive touches like lunch bag snowflakes made from vinyl-coated cotton, adding insulating material for temperature control, and consider using magnetic snaps for a secure closure and lining fabric for added protection and comfort.
Materials
Gather your materials for sewing a reusable and customizable fabric lunch bag. You’ll need fabric, interfacing, drawstring cord, and a few optional sewing tools like an edgestitch foot and buttonhole foot.
Fabric (bag: 35 X 11-12 Wide; Napkin/wrap: 19×19)
To create a reusable and customizable fabric lunch bag, you’ll need the right materials. Start with a bag made from fabric that’s 35 inches wide and 11-12 inches deep. This size is perfect for storing lunch items securely. For the napkin or wrap, choose a fabric that’s 19 inches by 19 inches. These dimensions will guarantee that your napkin fits comfortably around the lunch box and provides ample coverage.
In addition to the fabric, you’ll also need interfacing for the bag. A small square of interfacing will help reinforce the buttonhole area and add stability to the bag. For the closure, you can use a drawstring cord or materials to make your own. Don’t forget to gather a ruler or seam gauge, a marking tool, and any optional materials like an edgestitch foot, buttonhole foot, fray check, buttonhole cutter, grosgrain ribbon, snaps, or Velcro.
With these materials, you’ll be able to craft a unique and functional lunch bag that can be customized to your liking.
Interfacing (small Square for Bag)
Interfacing is an essential component in sewing projects, especially for creating a sturdy and well-structured lunch bag. It provides reinforcement for areas subject to high stress, such as buttonholes and waistbands, which might otherwise stretch or warp. In the case of a lunch bag, interfacing helps to add durability and prevent fraying around the edges of the bag, as well as providing structure to the corners and box pleats.
To use interfacing for your lunch bag, you’ll need a small square of the material. You can choose between woven, non-woven, or knit interfacing, depending on the weight and type of fabric you’re using for your bag. For a lunch bag, you’ll likely want to use a lightweight, non-woven interfacing, as it’s easy to work with and can be cut in any direction.
When applying the interfacing, you can either sew it onto the wrong side of the fabric or use fusible interfacing, which adheres to the fabric when heated with an iron. If you’re using fusible interfacing, make sure to use a press cloth to protect your iron and prevent any glue from getting on it.
In the context of a lunch bag, interfacing is particularly useful for reinforcing the corners and edges of the bag, as well as the area around the drawstring opening. By using interfacing, you can guarantee that your lunch bag maintains its shape and structure, even when filled with food and containers.
Drawstring Cord (or Materials to Make Your Own)
To create a drawstring bag, you’ll need materials such as vinyl-coated or acrylic-coated cotton, insulating material, a magnetic snap, lining fabric, thread, and scissors. You can also use fishing line, tape, and twinkle lights for decoration. For the actual sewing process, you’ll need a sewing machine, a teflon presser foot if available, and a zipper for added security.
Ruler/seam Gauge
After choosing your drawstring cord, grab your ruler or seam gauge. This reliable companion makes sure every inch of your bento bag is precise. It’s not just about ruler size; it’s your seam allowance guardian, leading you through the measuring fabric maze with the accuracy of a seam guide. Here’s a table to keep those measurements sharp:
| Use Case | Measurement | Tool |
|---|---|---|
| Hemming | 1/2 inch | Seam Gauge |
| Casing | 1 inch | Ruler |
| Corners | 2 inches | Seam Gauge |
| Pleats | 3/8 inch | Ruler |
| Snowflakes | Varied | Ruler |
Master the art of precise measurement and your bento bag will be the envy of the lunchroom.
Marking Tool
Concerning the topic of marking your fabric for sewing projects, there are various alternatives to select from. Washable fabric markers, also referred to as chalk markers**, are a prevalent choice because of their user-friendliness and ability to be erased. These markers are ideal for temporarily drawing precise lines on all your sewing and quilting fabrics, and they can be effortlessly removed when you’re finished.
Another option is chalk pencils, which are specifically designed for marking fabric. These pencils draw consistent erasable lines and perform well on a range of fabrics, including cotton, knit, and suede. Some chalk pencils are heat erasable, meaning they can be removed with heat, while others are water-soluble, requiring a damp cloth to erase the marks.
Frixion pens are another type of marking tool that can be useful for sewing. These pens are specially formulated to erase easily, making them ideal for marking features such as darts, pleats, and pocket placements. They’re available in a variety of colors and can be found at sewing and craft stores, as well as online retailers like Amazon.
Another option for marking fabric is tailor’s chalk, which is available in both pencil and pen form. Tailor’s chalk is designed to create a chalk line on fabric, which can be easily erased with a brush or damp cloth. It’s particularly useful for marking darts, pleats, and other sewing features.
Optional Materials:
Optional materials for your DIY lunch bag project can enhance the functionality and appearance of your bag. Here are four items that can be useful:
- Edgestitch Foot: This foot is designed for stitching in the ditch, edge stitching, and joining two edges together. It guarantees that your stitching stays perfectly straight, making your sewing more professional-looking.
- Buttonhole Foot: This foot is specifically designed for creating buttonholes. It works by guiding the needle to the correct position for the buttonhole. You can choose from automatic, manual, or sliding buttonhole feet depending on your sewing machine.
- Fray Check: This is a seam sealant that prevents fabric from fraying and secures thread ends. It can be used on the raw edges of fabric, ribbon, and trim, as well as on sewing and embroidery projects. It dries clear and is washable and dry cleanable.
- Grosgrain Ribbon and Snaps or Velcro: These materials can be used to add a personal touch to your lunch bag. Grosgrain ribbon can be used to create a name tag, while snaps or Velcro can be used to secure the bag or add extra functionality.
These optional materials can help you create a more durable, functional, and customizable lunch bag.
Edgestitch Foot
The edgestitch foot is a versatile tool that can be used for various sewing projects, including the DIY lunch bag. This foot is designed to create neat and even lines of stitching along the edge of your fabric, making it perfect for topstitching, attaching trims, and sewing in zippers. To use the edgestitch foot for your lunch bag project, follow these steps:
- Fabric Folding: Fold the fabric lengthwise for the bag and twice for the napkin/wrap. Make sure that the edges are even and the fabric isn’t stretched or puckered.
- Interfacing Reinforcement: If you’re using interfacing for the bag, make sure to attach it to the fabric before folding. This will provide extra strength and stability to the seams.
- Stitching with the Edgestitch Foot: Once the fabric is folded, use the edgestitch foot to sew along the edge of the fabric. This will create a professional-looking finish and help to prevent fraying.
- Topstitching: For the napkin/wrap, you can use the edgestitch foot to create topstitching along the folded edges. This will add a decorative touch to your project.
- Buttonhole Foot: If you’re adding buttonholes to your bag, switch to a buttonhole foot for this step. The edgestitch foot isn’t designed for buttonhole stitching.
When using the edgestitch foot, it’s crucial to make sure that it’s compatible with your sewing machine. Not all feet will attach to all machines, so make sure to find one that’s specifically designed for your sewing machine model. Additionally, always follow the manufacturer’s instructions for using the edgestitch foot to achieve the best results.
Buttonhole Foot
To create a customizable and reusable lunch bag, you’ll need a buttonhole foot for your sewing machine. This specialized presser foot makes sewing buttonholes a breeze, allowing you to easily and quickly create buttonholes without the need to mark the size on the fabric.
With a buttonhole foot, you can set the size of your buttonhole on the foot and use the same setting for multiple buttonholes, reducing measuring and marking for a more accurate and consistent result. This foot is compatible with low-shank household sewing machines with snap-on presser feet and mechanical machines with 4-step buttonhole settings.
If your machine doesn’t have buttonhole settings, this foot can still help you sew buttonholes, but you’ll need to manually adjust your stitches after each step.
Fray Check and Buttonhole Cutter
Regarding sewing and crafting, accuracy is crucial. Two essential tools that can assist in achieving this are Fray Check and a Buttonhole Cutter. These tools aim to improve the efficiency and professional appearance of your sewing endeavors.
Fray Check:
Fray Check is a fray stopper that hinders fabric from unraveling and secures thread ends while sewing and serging. It can be washed and dry cleaned, making it compatible with various fabrics. Fray Check is particularly beneficial for buttonholes and button sewing, as it guarantees that buttons remain firmly in place.
Buttonhole Cutter:
A buttonhole cutter is a tool resembling a chisel that’s utilized to create holes in fabric for buttonholes and eyelets. It’s crafted to be more precise than alternative methods like scissors or seam rippers, which carry the risk of cutting through the stitching at the end of the buttonhole. Two primary types of buttonhole cutters exist: straight and circular. The straight cutter typically comes in a standard 12 mm size and possesses a sharp, beveled head for cutting through most fabrics. The circular cutter, usually found in a standard 3mm size, is employed to open the top of keyhole-shaped buttonholes.
Utilizing Fray Check and a Buttonhole Cutter:
To employ Fray Check, simply apply it to the thread ends prior to sewing or serging to prevent fraying. For a buttonhole cutter, either press down on the cutter or employ a compact rubber mallet to execute the cut. It’s imperative to protect your work surface before using the buttonhole cutter to prevent damage.
Fray Check and a buttonhole cutter are adaptable tools that can be utilized in diverse sewing and crafting projects, encompassing the creation of lunch bags, napkin wraps, and even snowflake decorations. These tools enable you to achieve clean, precise cuts and prevent fabric from fraying, ensuring a professional finish for your endeavors.
Grosgrain Ribbon and Snaps or Velcro
Add a personal touch to your DIY lunch bag by incorporating grosgrain ribbon and snaps or Velcro. For a name tag, attach a piece of grosgrain ribbon to the snap and write your child’s name with a permanent marker. Customize your design by choosing matching colors for the ribbon and snap.
These unique features make your bento bag stand out, whether it’s for work, travel, picnics, or as a bento bag for adults.
Steps to Sew the Drawstring Bag
Now that you’ve procured your materials, let’s embark on the creation of your drawstring bag, a bento bag that not merely promotes environmental consciousness but also serves as a fashionable challenge to the prevailing disposable culture. Proceed as follows:
- Fold and stitch the long edge of your fabric along its length, ensuring its longevity.
- Press the upper edge of your bag for a polished finish.
- Make buttonholes on the right side, exploring various buttonhole styles for a personalized touch.
- Box the corners to provide additional capacity, taking into account the fabric’s texture to enhance the bag’s distinctiveness and resilience.
Enjoy the process of sewing!
The Large Napkin Wrap
To create a personalized and functional lunch bag, you can follow these steps:
- Fabric Selection: Choose a durable and easy-to-clean fabric for the bag. The bag should be 35 inches wide and 11-12 inches tall, while the napkin or wrap should be 19 inches square.
- Personalization Options: Add a touch of creativity with optional embellishments such as grosgrain ribbon, snaps, or Velcro. You can also add a buttonhole for a name tag on the napkin or wrap.
- Napkin Size: The napkin size can vary depending on the occasion. For a formal dinner, you may want a larger napkin, while for a casual event, a smaller size might suffice.
- Buttonhole Placement: When creating a buttonhole for the name tag, make sure it’s placed in a visible and accessible location.
- Optional Embellishments: Adding a bento bag to your lunch bag can make it more versatile and useful. You can choose from various styles, including those with flaps, tabs, zippers, or pockets.
How to Put the Lunch Bag Together
Now that you’ve created your drawstring bag and large napkin wrap, it’s time to put everything together. Here’s how:
- Prepare the Napkin Materials: Choose a napkin material that complements your bag’s color and style. You can opt for a coordinating print or a contrasting color for a unique look.
- Personalize the Napkin: Add a touch of personalization by creating a name tag using grosgrain ribbon, snaps, and your child’s name. This will make the bag more special and fun for your child.
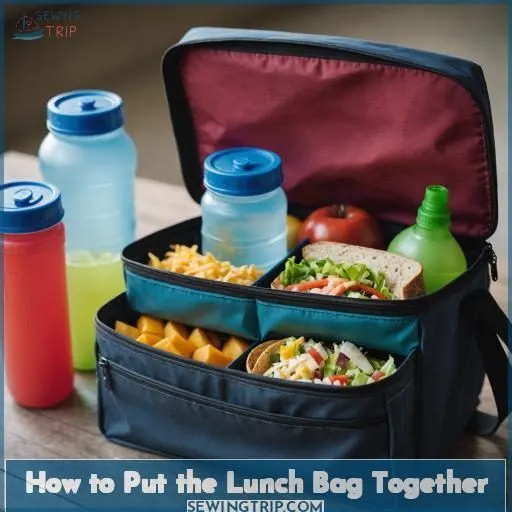
- Assemble the Lunch: Place food in containers and arrange them on the napkin. Tie two diagonally opposite corners of the napkin and tie the other two corners twice to form a knot. This will secure the napkin and keep everything in place.
- Insert Contents into the Bag: Place the tied napkin inside the bag, along with the containers and utensils. Your lunch bag is now ready to use!
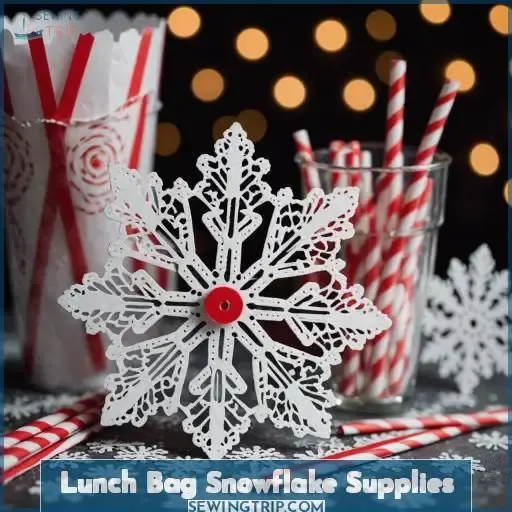
Lunch Bag Snowflake Supplies
With just a few simple supplies like vinyl-coated cotton and fishing line, you can turn an ordinary lunch bag into a stunning snowflake decoration. Get creative by adding twinkle lights or mixing up the designs for a one-of-a-kind look that’s sure to brighten up any space.
Vinyl-coated Cotton or Acrylic-coated Cotton
When considering materials for your DIY lunch bag, there are several vinyl choices and coated fabrics to choose from. Vinyl-coated cotton or acrylic-coated cotton are popular options due to their durability, strength, and cleanability. These fabrics can be used for both indoor and outdoor applications, making them suitable for a variety of environments. Additionally, vinyl-coated polyester fabrics are also available, which are waterproof and have high tear and abrasion resistance.
For insulation options, you can use materials such as insulating foam or batting to keep your lunch bag’s contents at the desired temperature. Magnetic closures, like snaps, can be used to fasten the bag and keep it closed. Lining fabrics, such as cotton or polyester, can be used to provide an additional layer of protection and comfort.
When choosing materials, consider the durability, cleanability, and suitability for outdoor use. Vinyl-coated fabrics are known for their durability and cleanability, making them a popular choice for lunch bags. Additionally, consider the weight and thickness of the fabric to make sure it’s comfortable to carry and easy to store.
Insulating Material
Choosing the right insulating material for your DIY lunch bag is like picking the perfect armor for your food against the dragon of decay. It’s your secret weapon to keep meals fresh and tasty.
- Foam: Your lightweight champion for thermal defense.
- Polyester fibers: The unsung hero in the battle against temperature swings.
- Reflective mylar: Turns away heat like a knight’s shield.
- Thermal batting: The cozy quilt keeping your lunch snug.
- Hollow fibers: The invisible force field around your feast.
With these materials, your lunch bags become fortresses of freshness, ensuring your culinary creations are stored in peak condition until it’s time to feast.
Magnetic Snap
Magnetic snaps are a popular option for closures in various types of bags, including lunch bags and tote bags. They offer convenience and a secure hold, making them a suitable option for a wide range of applications. When choosing magnetic snaps for your DIY lunch bag project, consider the following:
- Durability and strength: Look for snaps made from durable materials like brass or stainless steel, as they provide long-lasting performance and a reliable hold.
- Size: Make sure the snap size is appropriate for your bag design. For lunch bags, a 3/4 (18 mm) snap size is a common choice.
- Invisible installation: Invisible sew-in magnetic snaps are easy to put in and create a cleaner, more professional look for your finished project.
- Ease of use: Magnetic snaps are simple to use, requiring minimal effort to open and close the bag, making them ideal for quick access to essentials.
When using magnetic snaps in your lunch bag project, follow these steps:
- Choose the right snap: Select a magnetic snap that’s suitable for your bag’s size and design.
- Prepare the fabric: Make sure the fabric is clean and free of any debris that might interfere with the snap’s adhesion.
- Install the snap: Follow the manufacturer’s instructions for installing the magnetic snap, typically involving sewing the snap between the layers of fabric.
- Test the snap: Before using the bag, test the snap to make sure it holds securely and functions as intended.
Magnetic snaps can enhance the functionality and appeal of your DIY lunch bag, providing a modern touch and added convenience.
Lining Fabric
Selecting the ideal lining fabric for your handmade lunch bag is analogous to choosing the ultimate companion for a superhero. Here are some key factors to contemplate:
- Lining Fabric Color: Harmonize or juxtapose with the external layer for a delightful contrast.
- Fabric Texture: Smooth for effortless cleaning, robust for enduring daily confrontations with spills.
- Lining Fabric Weight: Seek a material that’s both lightweight and resilient, ensuring your lunch bag remains agile.
Thread
Choose the right thread color and type for your lunch bag snowflake project. Opt for a strong thread and consider using a needle with an appropriate thread tension. Select a thread that complements your chosen fabric and insulating material. Remember, the right thread can make all the difference in the durability and appearance of your snowflake design.
Scissors
For tailoring the fabric for your DIY lunch bag, you’ll want to secure you have a good pair of scissors. The appropriate scissors can make the procedure less demanding and more productive. Seek a pair that’s sharp, has a comfortable grip, and can handle a variety of materials, including fabric, paper, and cardboard.
For optimal results, contemplate utilizing a pair of scissors specifically crafted for crafting or sewing. These scissors are frequently made with top-notch blades that retain their sharpness for an extended period and are simple to sharpen when necessary. Some sought-after choices include the Fiskars Amplify shears, renowned for their capability to cut through a variety of materials, and the Kai 5210 8-inch Dressmaking Shears, lauded for their lightweight yet sharp blades.
When cutting the fabric for your lunch bag, make sure to use a ruler and marking tool to attain precise measurements. This will help you achieve the desired dimensions for your bag and napkin wrap. If you’re working with a pattern or template, use it as a guide to secure that your cuts are even and symmetrical.
Fishing Line
Fishing line is a versatile material that can be used for both storage and decoration in various DIY projects, including the creation of paper bag snowflakes. It’s an excellent choice for hanging these intricate designs due to its nearly invisible appearance, which allows the snowflakes to stand out without being overshadowed by the hanging material.
To incorporate fishing line into your paper bag snowflake project, follow these steps:
- Cut a piece of fishing line: Measure the length of fishing line needed for hanging your snowflakes. Typically, a length of 8 to 12 inches is sufficient.
- Attach the fishing line to the snowflake: Punch a hole in the top of each snowflake using a hole punch or an exacto knife. Thread the fishing line through the hole and tie a knot to secure it in place.
- Hang the snowflakes: Attach the other end of the fishing line to a hook or a clear Command hook for hanging the snowflakes on walls, windows, or other surfaces.
In addition to hanging the snowflakes, you can also use fishing line to create a unique storage solution. For example, you can use it to hang a reusable lunch bag or a set of bento boxes, allowing you to easily access and organize your food items.
Tape
Regarding lunch bag decoration, tape serves as a multifunctional and indispensable tool. Here are four methods by which tape can improve your lunch bag:
- Securing Adornments: Employ tape to affix stickers, badges, or other enhancements to your lunch bag. Select an adhesive tape with sufficient strength to keep the decorations firmly in place.
- Crafting Custom Designs: Tape can be utilized to create original designs on your lunch bag. For instance, you can employ washi tape to form stripes, patterns, or even a customized message.
- Sealing Containers: If you’re packing food in containers, secure them with tape. This precaution will prevent spills or leaks during transit.
- Suspending Decorations: If you’re constructing a snowflake design with lunch bags, use tape to hang the snowflake from a ceiling or wall. Fishing line and tape are frequently combined for this purpose.
Remember to select a tape that’s safe for contact with food, such as cellulose tape, which is commonly used in food packaging. Always verify that the tape you choose is compatible with the materials you’re using and the conditions to which it will be subjected, such as temperature fluctuations.
Twinkle Lights (optional)
Twinkle lights can add a festive touch to your lunch bag, making it more appealing and fun. Here are some ideas on how to incorporate twinkle lights into your lunch bag snowflake project:
- Color Choices: Select twinkle lights in various colors to match your lunch bag’s design. You can choose from warm white, cool white, or multicolored lights to create a unique look.
- Festive Patterns: Opt for twinkle lights with festive patterns, such as stars, snowflakes, or leaves, to enhance the overall appearance of your lunch bag.
- Reusable Options: Consider using reusable twinkle lights made of LED or solar-powered materials. These options are more eco-friendly and can be used multiple times, saving you money in the long run.
- Decoration Placement: Decide where to place the twinkle lights on your lunch bag. You can wrap them around the edges of the snowflake design or create a centerpiece for the snowflake by placing the lights in the middle.
- Battery-powered Lights: If you’re concerned about battery life, opt for battery-powered twinkle lights. These lights are designed to last for a long time and can be easily replaced when needed.
To incorporate twinkle lights into your lunch bag snowflake project, you’ll need to follow these steps:
- Design the Snowflake: Create your snowflake design using brown paper lunch bags. You can choose simple cuts like triangles, half circles, or half hearts to make the snowflake shape.
- Cut the Snowflake: Once you have your snowflake design, cut it out using scissors. Be sure to cut through all the layers of the paper bags.
- Assemble the Snowflake: Hot glue the two ends of the snowflake together to create a 3D shape. Allow the glue to dry completely before moving on to the next step.
- Add Twinkle Lights: Carefully insert the twinkle lights into the snowflake design. You can wrap them around the edges or place them in the center, depending on your preference.
- Hang the Snowflake: Attach a string or ribbon to the top of the snowflake, and hang it up in your desired location. You can hang it over the bed, on stair railings, or from a curtain rod in front of a window.
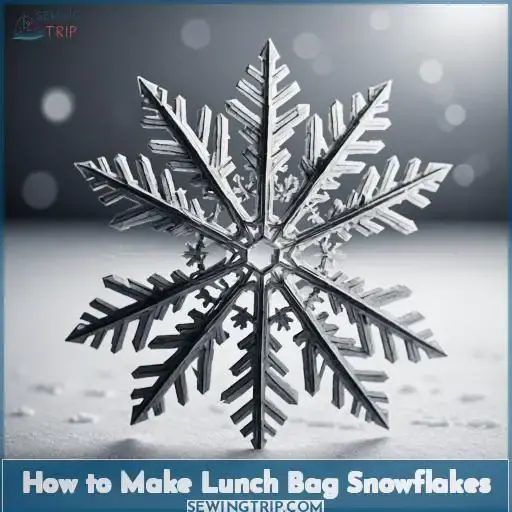
How to Make Lunch Bag Snowflakes
To make lunch bag snowflakes, you’ll need the following materials:
- Glue 9 lunch bags together in an upside-down T pattern.
- Cut from the top opening of the lunch bag to create a snowflake design.
- Unfold and glue the final bags together after cutting out the snowflake pattern.
- Hole punch and loop fishing line through to hang.
- Add twinkle lights (optional)
You can hang your snowflakes in various places, such as over the bed, on stair railings, from curtain rods in front of a window, or mix designs for a unique look. You can also create different size snowflakes by cutting down the bag size.
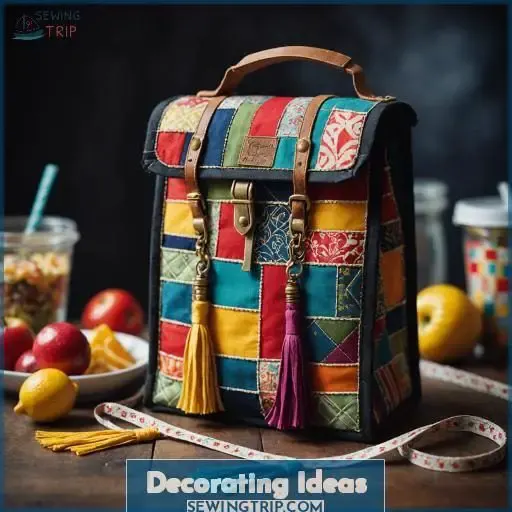
Decorating Ideas
Why not hang your DIY lunch bag snowflakes over your bed for a whimsical touch? You could also suspend them from stair railings or a curtain rod in front of a window to mix up the designs and create a one-of-a-kind display.
Hang Over the Bed
After crafting your unique snowflake decorations from vinyl lunch bags, why not elevate your bedroom’s ambiance by hanging them over the bed? This simple yet innovative touch transforms your sleeping space into a whimsical winter wonderland every night.
Imagine drifting off under a canopy of delicate snowflakes, a serene escape that showcases your mastery in DIY and flair for creative, personalized decor.
Hang on Stair Railings
Transform your staircase into a festive display with these easy steps:
- Choose a garland: Select a garland that complements your holiday decor. You can opt for a traditional pinecone wreath or a modern LED light garland.
- Measure the length: Measure the length of your stair railing to determine the appropriate length of your garland.
- Secure the garland: Use command hooks or other adhesive strips to attach the garland to the railing. Make sure to follow the manufacturer’s instructions for removal to avoid damaging your railing.
- Add decorative accents: Enhance your garland with seasonal elements such as pine cones, berries, or ornaments.
- Light it up: For a cozy glow, add battery-operated fairy lights or LED lights to your garland.
Your stair railing will now serve as a beautiful and festive decoration for your home.
Hang From Curtain Rod in Front of a Window
Hang your DIY lunch bag from a curtain rod in front of a window to add a touch of whimsy to your space.
Create a light snowflake by cutting your bag into a snowflake pattern and hanging it from the rod with fishing line.
Add twinkle lights for an extra sparkle.
This is a great way to showcase your creativity and make your lunch bag a decorative piece.
Mix Designs for a Unique Look
Mixing and matching different sizes, unique patterns, mixed fabrics, and creative designs can help you create personalized styles for your DIY lunch bag. Here are some ideas to inspire your unique look:
- Different Sizes: Create a set of lunch bags with varying sizes to accommodate different types of food or preferences. For example, a smaller bag for sandwiches or a larger one for salads and leftovers.
- Unique Patterns: Incorporate different patterns, such as stripes, polka dots, or floral prints, to add visual interest to your bag. You could also try a mix of solid and patterned fabrics for a more eclectic look.
- Mixed Fabrics: Experiment with different textures and materials, like cotton, linen, or even denim, to create a unique combination in your bag. This can add depth and dimension to your design.
- Creative Designs: Consider adding embellishments like buttons, snaps, or even a pocket to your bag for added functionality and style. You could also try a unique closure method, like a drawstring or a magnetic snap, to make your bag stand out.
- Personalized Styles: Add a touch of personalization to your bag by incorporating your child’s name or initials into the design. This could be done with a name tag, a monogrammed snap, or even a custom-made label.
Products
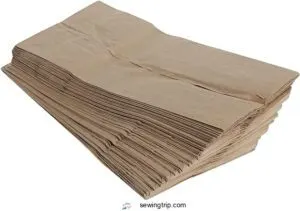
Looking for a fun and colorful bento-style lunch box? Check out the Vivo Kids Bento Lunch Box in orange and pink. For a more classic option, the AJM Brown Paper Lunch Bags offer a simple and eco-friendly solution.
1. Vivo Kids Bento Lunch Box Orange Pink
To create a reusable and customizable fabric lunch bag, you’ll need a variety of materials and tools. Here’s a list of what you’ll need:
Materials:
- Fabric (bag: 35 x 11-12 wide; napkin/wrap: 19×19)
- Interfacing (small square for bag)
- Drawstring cord (or materials to make your own)
- Ruler/seam gauge
- Marking tool
Optional Materials:
- Edgestitch foot
- Buttonhole foot
- Fray check and buttonhole cutter
- Grosgrain ribbon and snaps or Velcro
Steps to Sew the Drawstring Bag:
- Fold and stitch long edge of fabric lengthwise.
- Fold and press top edge of bag.
- Create buttonholes on the right side of the bag.
- Close up the casing with edgestitch foot.
- Box the corners of the bag.
The Large Napkin Wrap:
- Fold and stitch edges of fabric twice.
- Add a buttonhole for name tag (optional).
- Create name tag with grosgrain ribbon, snap, and child’s name.
How to Put the Lunch Bag Together:
- Place food in containers.
- Place containers on napkin.
- Tie two diagonally opposite corners of napkin.
- Tie the other two corners twice to form a knot.
- Insert utensils and place inside bag.
Additional Tips:
- Use interfacing to reinforce buttonhole area.
- Box the corners of the bag for extra space.
- Add a name tag for personalization.
- Use a variety of fabrics and colors to create unique designs.
2. AJM Brown Paper Lunch Bags
To create a DIY lunch bag, you’ll need a variety of materials and tools. Here’s a list of the materials you’ll need:
- Fabric for the bag (35 x 11-12 wide)
- Interfacing for the bag (small square)
- Drawstring cord or materials to make your own
- Ruler or seam gauge
- Marking tool
- Optional materials:
- Edgestitch foot
- Buttonhole foot
- Fray check and buttonhole cutter
- Grosgrain ribbon and snaps or Velcro
For the drawstring bag, follow these steps:
- Fold and stitch the long edge of the fabric lengthwise.
- Fold and press the top edge of the bag.
- Create buttonholes on the right side of the bag.
- Close up the casing with an edgestitch foot.
- Box the corners of the bag for extra space.
For the large napkin wrap, you’ll need:
- Fabric for the wrap (19×19)
- Optional materials:
- Buttonhole for a name tag
- Grosgrain ribbon, snap, and child’s name for the name tag
To put the lunch bag together, follow these steps:
- Place food in containers.
- Place containers on the napkin.
- Tie two diagonally opposite corners of the napkin.
- Tie the other two corners twice to form a knot.
- Insert utensils and place inside the bag.
Additional tips for your DIY lunch bag include:
- Use interfacing to reinforce the buttonhole area.
- Box the corners of the bag for extra space.
- Add a name tag for personalization.
- Use a variety of fabrics and colors to create unique designs.
Frequently Asked Questions (FAQs)
Can I use different fabrics for the bag and napkin?
Feel free to mix and match fabrics for the bag and napkin. The possibilities are endless – get creative with different textures, patterns, and colors to make your lunch set unique and personalized.
How do I finish the edges of the drawstring bag?
To finish the edges with a polished touch, simply fold and press the top edge twice, then stitch it down – easy as pie! This clean approach will have your bag looking sharp as a tack.
Can I add pockets or other features to the napkin wrap?
The 19×19 napkin wrap is a blank canvas. Try adding a simple patch pocket for utensils, or a decorative applique to make it truly one-of-a-kind. Get creative and have fun personalizing your wrap!
What type of containers work best for the lunch bag?
Choosing the right containers is key for a well-packed lunch bag. Opt for leak-proof, stackable options that maximize space and keep your meal fresh. Glass or stainless steel containers are both eco-friendly and durable choices.
Can I use the snowflake design on other types of bags?
The snowflake design works wonderfully on all sorts of bags – shopping totes, gym bags, even diaper bags. Get creative and let your inner designer shine through. The possibilities are endless!
Conclusion
Imagine your morning routine transformed, with a personalized DIY lunch bag as your trusty companion. No more drab, forgettable bags – this one is a canvas for your creativity, a reflection of your unique style.
Whether you opt for a simple drawstring design or venture into the realm of festive snowflakes, the joy of crafting your own lunch tote is in the details. Embrace the DIY lunch bag and let it inspire you to bring a touch of whimsy to your daily routine.

