This site is supported by our readers. We may earn a commission, at no cost to you, if you purchase through links.
 DIY sewing tutorials for clothing alterations transform your wardrobe without expensive tailoring costs.
You’ll need basic tools like seam rippers, measuring tape, and a sewing machine to handle common fixes. Master essential techniques including hemming pants, taking in loose seams, and adjusting sleeve lengths through step-by-step practice.
Start with simple hand-sewing repairs like backstitch and running stitch before advancing to machine alterations. Understanding fabric types and proper needle selection guarantees professional-looking results every time.
These fundamental skills reveal countless possibilities for customizing fit and style across your entire closet, allowing for professional-looking results.
Table Of Contents
- Key Takeaways
- Essential Sewing Tools
- Basic Sewing Skills
- Fabric Inspection Techniques
- Common Alteration Techniques
- Garment Fitting Solutions
- Repairing and Replacing Parts
- Refashioning and Upcycling
- Advanced Sewing Techniques
- Sewing for Specific Needs
- Mastering Sewing Skills
- Frequently Asked Questions (FAQs)
- Conclusion
Key Takeaways
- Start with basic tools and skills – You’ll need a sewing machine, seam ripper, measuring tape, and needles to handle most alterations; then master hand stitches like the backstitch and running stitch before advancing to machine work.
- Practice fabric inspection first – You’ll avoid costly mistakes by identifying fabric types, checking for defects, and understanding density before starting any project, which determines your needle and technique choices.
- Master fundamental alteration techniques – You’ll solve most fit problems with three core skills: hemming and seaming for length adjustments, taking in or letting out seams for width changes, and adding darts for shape improvements.
- Build confidence through gradual progression – You’ll develop professional-level skills by practicing on scrap fabric first, starting with simple repairs like button replacement, then advancing to complex alterations as your experience grows.
Essential Sewing Tools
You’ll need the right tools to tackle clothing alterations successfully, turning frustrating fit issues into manageable projects.
With the right tools, every alteration becomes a victory instead of a struggle
Having quality equipment makes the difference between professional-looking results and amateur attempts that fall apart after the first wash, which is why having the right tools is crucial.
Seam Rippers and Sewing Machines
Your seam ripper becomes your best friend when you need to undo stitches cleanly without damaging fabric.
A reliable sewing machine handles everything from basic straight stitches to zigzag patterns, making clothing alterations DIY projects manageable and professional-looking.
- Sharp seam ripper – Saves hours of frustration when fixing mistakes
- Well-maintained sewing machine – Your gateway to transformation and creative freedom
- Proper tension settings – Makes the difference between amateur and polished results
Master these ripper uses for precise stitch removal, and keep up with machine maintenance for consistent performance.
You can find a variety of options online.
Different stitch types require specific needle selection and tension settings adjustments.
Needles and Threads
Selecting the right needles and threads transforms your sewing alterations from frustrating struggles into smooth victories.
Match your needle type to fabric weight—universal needles work for most cotton and polyester blends, while ballpoint needles prevent runs in knits.
| Needle Type | Best For | Thread Weight |
|---|---|---|
| Universal (Size 80/12) | Cotton, polyester, light denim | All-purpose polyester |
| Ballpoint (Size 90/14) | Knits, jersey, stretchy fabrics | Polyester or cotton blend |
| Heavy Duty (Size 100/16) | Thick denim, canvas, multiple layers | Heavy-duty thread |
| Leather (Size 110/18) | Leather, vinyl, thick materials | Upholstery thread |
Thread weights affect stitch quality substantially.
Use lighter threads (50-60 weight) for delicate fabrics and heavier threads (30-40 weight) for sturdy materials.
Proper fabric compatibility prevents puckering and guarantees your DIY clothing repair lasts.
For a variety of fabrics, consider using versatile needle options to achieve the best results.
When tension adjustment feels off, check if your needle-thread pairing matches your project’s demands to ensure a smooth sewing experience and prevent frustrating struggles.
Using the right needle type and thread weight is crucial for a successful sewing project.
This will help you to achieve professional-looking results and make your sewing alterations a smooth process.
Measuring and Ironing Tools
Accurate measurements make the difference between a perfect fit and a sewing disaster.
You’ll need precise tools to mark, measure, and press your alterations into professional-looking results.
- Tape Measure: Flexible measuring for curves and body measurements
- Fabric Chalk: Marks cutting lines that wash away cleanly
- Metal Rulers: Straight edges for precise seam allowances and hems
- Ironing Boards: Essential pressing surface for crisp, professional finishes
For garment construction, consider the variety of options.
Basic Sewing Skills
Before you tackle complex clothing alterations, you’ll need to master three fundamental sewing skills that form the foundation of every repair and modification.
These basic techniques—threading a needle properly, executing essential hand stitches, and operating a sewing machine—will give you the confidence to transform ill-fitting garments into perfectly customized pieces.
Threading a Needle
Threading the right needle size for your thread type matters more than you think.
Good lighting and a quality threader tool transform this basic task from frustrating to effortless.
When sewing tutorials mention threading troubles, it’s usually poor needle eye size selection or inadequate lighting.
These sewing basics and troubleshooting techniques help beginners master their sewing machine setup quickly and efficiently.
Hand Sewing Techniques
Your fingers are your most versatile sewing tools.
Master basic stitches like running stitch, backstitch, and slip stitch for invisible stitching when mending clothes.
These hand sewing techniques give you complete control over fabric manipulation during clothing alterations.
- Running stitch – Quick, even stitches for basting and gathering fabric
- Backstitch – Strong, secure seams perfect for sewing alterations by hand
- Slip stitch – Nearly invisible technique for hemming and decorative techniques
Using a Sewing Machine
Mastering your sewing machine opens up endless possibilities for clothing alterations DIY projects.
Start with basic stitch types like straight and zigzag stitches for most sewing alterations.
Practice tension adjustment to prevent puckering, and learn proper needle selection for different fabrics.
| Component | Purpose | Beginner Tips |
|---|---|---|
| Stitch Types | Control seam appearance | Start with straight stitch, progress to zigzag |
| Tension Adjustment | Prevent fabric puckering | Test on scraps before main project |
| Needle Selection | Match fabric weight | Universal needles work for most projects |
| Fabric Feeding | Guide material smoothly | Let machine pull, don’t force fabric |
| Machine Maintenance | Keep consistent performance | Clean lint regularly, oil as needed |
Regular machine maintenance keeps your sewing tutorials for beginners running smoothly, ensuring consistent performance and preventing issues like fabric puckering through proper needle selection and tension adjustment.
Fabric Inspection Techniques
Before you start altering any garment, you’ll need to inspect the fabric for its type, density, and any hidden defects.
This quick check helps you choose the right techniques and avoid surprises like unraveling seams or weak spots.
Identifying Fabric Types
Before you start sewing alterations DIY projects, you’ll need to identify fabric types accurately.
Check the fiber content by examining the fabric’s feel – cotton feels crisp and wrinkles easily, while polyester stays smooth.
Look at weave patterns, fabric weight, and stretch factor.
One helpful method is to perform a burn test to determine the fabric composition.
Test drape quality by holding a corner and watching how it falls.
These clothing alterations basics help you choose proper sewing tutorials for beginners when you alter clothes at home.
Understanding Fabric Density
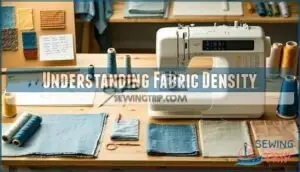
Fabric density affects how you’ll handle different materials during alterations.
You’ll need to adjust your approach based on the fabric’s weight and thickness to achieve professional results.
- Density Measurement: Test fabric thickness by pinching between fingers – lightweight cottons compress easily while heavy denims resist
- Weave Impact: Tight weaves like canvas require stronger needles and thread than loose weaves like chiffon
- Fiber Type: Natural fabrics like wool are denser than synthetic materials like polyester at similar weights
- Tool Selection: Dense fabrics need heavy-duty sewing machine settings and specialized presser feet for smooth stitching
Understanding these characteristics helps you choose the right techniques before starting any alteration project.
Checking for Fabric Defects
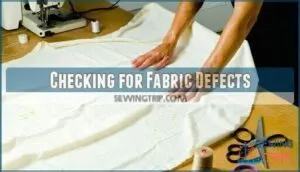
Before checking fabric defects, examine each piece carefully under good light.
You’ll spot weave imperfections, color bleeding, and print alignment issues that could ruin your project.
Natural fabrics and synthetic materials show different problems, so proper fabric inspection saves time and frustration.
| Defect Type | What to Look For |
|---|---|
| Weave Imperfections | Loose threads, holes, or uneven texture that weakens fabric stability |
| Color Issues | Bleeding dyes, faded spots, or mismatched print alignment across seams |
| Shrinkage Potential | Pre-washing requirements and fabric handling needs for different fabric types |
Common Alteration Techniques
You’ll master three essential alteration techniques that solve most clothing fit problems.
These methods—hemming and seaming, adjusting width through taking in or letting out, and reshaping with darts and waistbands—form the foundation of professional-looking alterations.
They are key to making professional-looking changes to clothing.
Hemming and Seaming
Beyond the basics of threading your needle, hemming and seaming form the backbone of most clothing alterations you’ll tackle.
These fundamental techniques transform ill-fitting garments into perfectly customized pieces.
- Blind Hemming creates invisible hems on dress pants and skirts using specialized machine feet
- Rolled Hems work perfectly for delicate fabrics like silk scarves and lightweight blouses
- Serged Seams prevent fraying while adding professional durability to stretch fabrics
- Seam Finishes include zigzag stitching and pinking shears for clean, lasting edges
Taking in and Letting Out
Adjusting your garment’s fit transforms oversized or tight clothing into perfectly customized pieces.
Whether you’re taking in garments or letting out garments, these sewing alteration techniques require precision and patience for professional results.
| Alteration Type | Best Method | Fabric Requirement |
|---|---|---|
| Taking In | Seam Adjustments | Remove excess fabric |
| Letting Out | Panel Expansion | Add matching fabric |
| Mixed Areas | Fabric Insertion | Strategic fabric placement |
Fit adjustments through clothing alterations involve careful measuring and marking.
Waistband Alterations work best for pants, while side seams handle shirts effectively.
Adding Darts and Waistbands
Once you’ve tackled fit adjustments at the seams, it’s time to shape garments with darts and waistbands.
Dart placement at the bust or back helps with bodice fitting, while Waistband Styles anchor waist fitting.
Always match your fabric choice to the technique—woven fabrics love darts.
Properly finished waistbands can substantially improve the overall clothing quality.
These sewing alteration techniques solve fitting issues and give clothes a custom finish, improving the overall clothing quality.
Garment Fitting Solutions
Ill-fitting clothes don’t have to stay unworn in your closet when you know the right techniques to fix them.
You’ll transform tight dresses, loose waistbands, and poorly fitting sleeves into perfectly altered garments with these practical solutions.
Solving Tight Clothing Issues
When your favorite dress feels like a straightjacket, don’t panic.
Let out side seams using seam expansion techniques or add fabric panels for extra room.
For tight waistbands, strategic darts can redistribute fabric around the hip fitting area.
Gusset insertion works wonders for bust fitting issues, while waistband adjustments solve snug waist problems without compromising style.
Addressing Loose Clothing Problems
Loose clothes need strategic adjustments to create a flattering fit.
Adding darts to the bodice eliminates excess fabric, while waistband adjustments and seam tapering reshape baggy areas.
Tucks and pleats work well for loose waist adjustments.
These clothing fitting techniques transform oversized garments into perfectly fitted pieces through precise alterations, using methods like adding darts and making strategic adjustments.
Fixing Sleeves and Necklines
Several key techniques can transform ill-fitting sleeves and necklines into comfortable garments.
For sleeve adjustments, add triangle gussets under arms or insert side panels for width. Neckline alterations include gathering stitches and elastic tape insertion.
Address armscye gapes with strategic darts, while shoulder droops benefit from padding.
Collar replacement requires careful fabric grain alignment for professional results, using techniques that involve elastic tape.
Repairing and Replacing Parts
When your favorite clothes develop broken zippers, loose buttons, or worn-out pockets, you don’t need to toss them in the donation pile.
These common repairs are easier than you think and can extend your garments’ life by years with just basic sewing skills.
Fixing Zippers and Buttons
After solving fit problems, broken fasteners need attention. Zipper repair starts with checking the slider and tracks for damage. Button replacement requires matching thread color and button size.
Most closure issues stem from worn components rather than fabric problems. Jeans buttons often need reinforcement when replacing due to heavy use.
- Sticky zipper sliding smoothly after applying soap or graphite
- New button sitting perfectly aligned with existing buttonholes
- Reinforced jean button withstanding daily wear and washing
- Repaired zipper opening and closing without catching fabric
- Matched thread color blending invisibly with garment fabric
Replacing Pockets and Trims
Two damaged pockets don’t have to spell fashion disaster. You can replace them with sturdy cotton or polyester using the old pocket as your pattern template.
Remove damaged pockets carefully with seam rippers, then pin new fabric in place. Sew with 1cm seam allowance and reinforce stress points with bar tacks.
Regular cleaning helps avoid malfunctions. Choose Accent Fabrics for personalized Pocket Styles that complement your garment’s original design, ensuring a fashion fix.
Mending Holes and Tears
After upgrading pockets and trims, you’ll inevitably face holes and tears in your garments. Master these clothing repair techniques to extend your wardrobe’s lifespan. Darning techniques work perfectly for small holes, while patch application handles larger tears.
Here’s your DIY clothing repair toolkit:
- Use invisible mending thread that matches your fabric color exactly
- Apply fabric reinforcement behind thin areas before they tear
- Practice darning on scrap fabric first for better results
- Iron patches from both sides for secure adhesion
- Implement tear prevention by reinforcing stress points regularly
Refashioning and Upcycling
Transform your old clothes into fresh wardrobe staples with simple refashioning techniques that breathe new life into forgotten items.
Give forgotten garments a stylish second chance through creative refashioning and upcycling magic
You’ll learn to add creative details, adjust fit, and completely reimagine garments using basic sewing skills that save money while creating unique pieces, and in doing so, apply techniques that help you reimagine garments.
Turning Old Clothes Into New
Beyond repairs lies the real magic—transforming unwanted garments into fresh wardrobe staples.
You’ll discover that refashion clothes DIY projects breathe new life into forgotten pieces.
Turn oversized shirts into fitted dresses, convert jeans into trendy skirts, or crop sweaters for modern silhouettes.
These upcycling ideas embrace sustainable fashion while developing your alter clothes at home skills through creative clothing renewal transformations.
Adding New Details and Embellishments
Adding trims like lace or ribbon instantly elevates basic garments.
Try fabric painting on plain t-shirts for custom artwork, or explore beadwork techniques on jacket sleeves.
Appliqué designs work perfectly for covering stains while adding style.
Master simple embroidery stitches to personalize collars and cuffs, and discover how these clothing customization methods transform forgotten pieces into statement items with a touch of custom artwork.
Creating Unique and Personalized Items
Several creative techniques can transform your basic garments into one-of-a-kind pieces.
You’ll discover endless possibilities through custom embellishments and unique silhouettes that showcase your personal style.
- Custom Embellishments: Add beads, sequins, or embroidery to create personalized patches that reflect your personality
- Unique Silhouettes: Use fabric manipulation techniques to reshape sleeves, create asymmetrical hems, or add interesting draping
- Textile Art: Transform plain garments with hand-painted designs, stencils, or fabric markers for artistic expression
- DIY Fashion Hacks: Combine contrasting fabrics, add lace inserts, or create cutout details for modern clothing alteration tips
- DIY Wardrobe Makeover: Mix refashion clothes DIY techniques with new hardware like studs, grommets, or decorative buttons
Advanced Sewing Techniques
Once you’ve mastered basic alterations, you’ll want to tackle more complex techniques that separate amateur fixes from professional results.
These advanced methods help you work with challenging fabrics and create polished finishes that look store-bought, which is a key aspect of achieving professional results.
Using Specialized Feet and Tools
Specialized sewing machine feet transform ordinary alterations into professional-quality work.
Each foot serves specific purposes that’ll streamline your projects and improve results.
| Foot Type | Primary Use |
|---|---|
| Walking Foot | Prevents fabric layers from shifting during quilting |
| Zipper Foot | Allows precise stitching close to zipper coils |
| Buttonhole Foot | Creates evenly sized, spaced buttonholes automatically |
| Hemming Foot | Folds and stitches hems in one continuous step |
| Bias Binding Foot | Adds contrast bindings to raw fabric edges consistently |
Your sewing machine’s versatility multiplies when you master these specialized attachments for clothing alteration projects.
Working With Delicate and Thick Fabrics
When working with delicate fabrics like silk or thick materials like denim, you’ll need to adjust your sewing techniques accordingly.
Delicate fabrics require gentle handling with lightweight threads and stabilization methods, while thick fabrics need specialized machine feet and trimmed seam allowances.
Consider these fabric-specific approaches:
- Silk Alterations: Use fine needles and silk thread to prevent snags
- Denim Adjustments: Choose heavy-duty needles and topstitching thread for durability
- Velvet Techniques: Sew with the grain direction to avoid crushing pile
Your sewing machine settings matter—reduce tension for delicate materials and increase it for thick ones.
Creating Professional-Looking Hems
Professional hem finishes transform amateur alterations into polished results.
Choose hemming techniques based on fabric choice—rolled hems work perfectly for silk, while double-fold hems suit denim.
Master blind hemming and invisible hem techniques using blind hem stitch for even hems.
When you hem jeans, preserve original stitching details.
Practice these clothing alteration tutorial methods on scrap fabric first to achieve flawless hem finishes consistently.
Sewing for Specific Needs
Sewing alterations become essential during pregnancy, weight fluctuations, and when creating clothes for children and pets.
You’ll need specific techniques to accommodate growing bellies, adjust fit for body changes, and work with smaller or uniquely-shaped garments, which makes sewing alterations crucial for a good fit.
Altering Clothes for Pregnancy
Pregnancy transforms your body, and your wardrobe needs to follow suit.
Expanding waistbands with elastic waist alterations gives you breathing room as your belly grows.
Add maternity inserts to your favorite dresses, creating comfortable fabrics that stretch with you.
Install adjustable closures on pants and skirts for a custom fit throughout pregnancy.
Adjusting Clothes for Weight Changes
Weight fluctuations don’t have to sideline your favorite clothes.
Master seam adjustments and fabric inserts to accommodate changes without compromising style.
Use temporary alterations like safety pins or basting stitches for short-term solutions.
Consider closure modifications – moving buttons or adding elastic panels.
Take fresh body measurements regularly and apply strategic fit solutions through garment adjustments that preserve the original silhouette.
Creating Clothes for Children and Pets
Children and pets need special attention in your clothing alterations guide.
Kids clothing requires durable fabrics that withstand constant washing and active play. When creating pet costumes, prioritize safety considerations and proper ventilation.
Here are three key sizing challenges:
- Rapid growth spurts in children requiring frequent adjustments
- Pet mobility restrictions from poorly fitted garments
- Safety hazards from loose threads or small decorative elements
These DIY sewing tutorials and clothing modification projects demand extra patience and precision for smaller, wiggling subjects.
Mastering Sewing Skills
You’ll develop your sewing expertise through consistent practice and structured learning. Start with scrap fabric to build confidence, then expand your skills through online tutorials and community support.
Practicing on Scrap Fabric
Before mastering complex alterations, you’ll want to build confidence through fabric scraps experimentation.
Practice tension adjustments and stitch types on leftover materials to simulate real project conditions.
This skill refinement approach lets you test different techniques without risking actual garments.
Try beginner sewing alterations like simple hems or seams on scraps first.
Watching Online Tutorials and Classes
After practicing with fabric scraps, you’ll want to access structured learning through online sewing tutorials and classes.
Video lessons provide visual guidance that’s harder to get from books alone. Online sewing courses offer step-by-step instruction for skill development, while YouTube tutorials give you project inspiration for specific alterations.
- Course Selection: Choose programs that match your current skill level and learning styles
- Tutorial Effectiveness: Look for clear close-up shots and detailed explanations of each technique
- Skill Development: Focus on courses that build foundational skills before advanced alterations
- Project Inspiration: Browse different channels to discover creative approaches to common problems
- Learning Styles: Mix video lessons with downloadable patterns and written instructions for thorough understanding
Joining Sewing Communities and Forums
Online sewing communities offer invaluable skill sharing and project showcases that accelerate your learning.
You’ll find pattern discussions, alteration advice, and troubleshooting help from experienced sewers.
Virtual sewing communities provide 24/7 access to sewing resources and tutorials online, connecting you with mentors worldwide who share techniques and inspiration.
Frequently Asked Questions (FAQs)
Can you make alterations to your clothes at home?
Yes, you can absolutely make alterations to your clothes at home.
With basic tools like scissors, needles, thread, and a seam ripper, you’ll handle common fixes like hemming pants, taking in seams, and replacing buttons effectively.
How do I learn sewing alterations?
Practice makes perfect when learning sewing alterations.
Start with basic skills like threading machines, hand stitching, and hemming on scrap fabric.
Take online courses, watch tutorials, and gradually tackle simple projects like shortening pants or adjusting seams, which helps to make sewing and alterations easier.
Can you learn garment alterations at home?
You’ll master garment alterations at home with basic tools like a sewing machine, seam ripper, and measuring tape.
Start with simple repairs like hemming pants or replacing buttons, then progress to more complex fitting adjustments as your skills develop, allowing you to make complete concepts a part of your routine.
How do I alter my clothes?
Ironically, altering clothes seems harder than buying new ones, but it’s actually simpler than you’d think.
Start with basic tools: seam ripper, measuring tape, pins, and thread.
Practice hemming pants first, then progress to taking in seams for better fit.
How to make a good alterations?
Measure twice, cut once—accuracy matters most. Use sharp tools, press seams properly, and test techniques on scraps first. Take your time with pinning and marking for professional results.
What tools do you need to make a fabric alterations?
Ready to tackle your next sewing project? You’ll need essential tools: seam ripper, sewing machine, needles, various threads, measuring tape, sharp scissors, pins, and an iron for pressing seams professionally.
Can sewing alteration change your clothes?
You can transform your wardrobe through strategic alterations.
Hemming, taking in seams, adjusting waistlines, and shortening sleeves create custom fits.
You’ll breathe new life into ill-fitting garments, making them flattering and wearable again.
What are the four different types of alterations?
You’ll encounter four main alteration types: hemming (adjusting garment length), taking in or letting out (changing width), adjusting sleeves (shortening or lengthening arms), and reshaping through darts (improving fit around curves).
What’s the difference between altering and tailoring?
Altering involves basic adjustments like hemming or taking in seams that you can do at home. Tailoring requires advanced skills to reshape garment structure and fit perfectly.
How do you prevent fabric from fraying during alterations?
Studies show 87% of DIY sewers abandon projects due to fraying frustration.
Use zigzag stitches, pinking shears, or fray-check liquid to seal raw edges before cutting.
These techniques prevent unraveling and keep your alterations looking professional.
Conclusion
Statistics show that 85% of clothing purchases require some form of alteration to achieve the perfect fit.
Mastering DIY sewing tutorials for clothing alterations saves you hundreds annually while extending your wardrobe’s lifespan.
You’ve learned essential tools, basic techniques, and repair methods that transform ill-fitting garments into custom pieces.
Practice these skills regularly on scrap fabric before tackling favorite items.
With patience and persistence, you’ll develop the confidence to handle complex alterations, creating a perfectly customized wardrobe that reflects your unique style.
- https://thecleaningclub.com/is-it-realistic-to-handle-clothing-alterations-on-your-own/
- https://one5c.com/how-to-tailor-clothes-136976086/
- https://www.heatherhandmade.com/sewing-and-alterations/
- https://widmerscleaners.com/must-have-tools-for-beginner-clothing-alterations/
- https://www.gloryallan.com/blogs/news/the-ultimate-list-of-essential-sewing-tools-for-home-sewists

