This site is supported by our readers. We may earn a commission, at no cost to you, if you purchase through links.
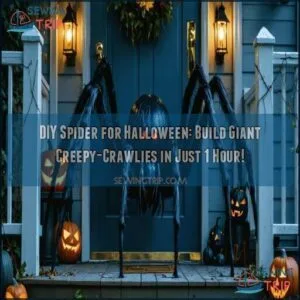
Cover it with stretchy faux fur for a creepy texture. For legs, use sturdy wire or PVC pipes wrapped in foam tubing, then bend them into spindly shapes.
Attach the legs to the body with hot glue or zip ties. Add details like glowing LED eyes or fake cobwebs made from stretchy twine.
Place your spider on a porch, tree, or wall for maximum scares. Want it even spookier? Texturing tricks are just the beginning! Use fake cobwebs and stretchy twine to create a spooky effect.
Table Of Contents
Key Takeaways
- Use foam balls for the body, pipe insulation for legs, and faux fur for texture to make a realistic DIY spider.
- Secure legs and fur with hot glue, and attach glowing LED eyes for an extra spooky effect.
- Create webs using sturdy twine, knotting techniques, and hang them between trees or doorways for a creepy vibe.
- Display your spider with strong adhesive strips or fishing line, and add lighting for a chilling nighttime look.
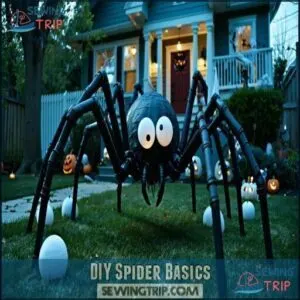
DIY Spider Basics
You’ll transform simple materials like foam balls and pipe insulation into a giant eight-legged nightmare that will make your neighbors do a double-take.
Turn foam balls and pipe insulation into a creepy, eight-legged monstrosity that’ll leave your neighbors shivering with Halloween terror!
With just $20-30 worth of supplies and one hour of your time, you can create a spooky spider decoration that’s perfect for scaring trick-or-treaters.
Working Time and Cost
You’ll be spinning your DIY Halloween spider in just 1 hour while keeping your wallet happy at $15-30 total.
Project budgeting is simple with these cost-effective creepy-crawlies:
- Basic foam ball spider: $15
- Wire basket design: $20
- Pool noodle giant: $25
- Milk jug mini-spider: $10
- LED-enhanced night crawler: $30
Time management is key—gather materials ahead of time to guarantee your Halloween DIY flows smoothly from start to finish, and remember to keep your wallet happy with these cost-effective ideas.
Skill Level and Yield
Don’t worry about budget constraints—now let’s talk about who can make these spooky decorations.
This Beginner Project requires minimal craft experience, making it perfect for first-timers.
You’ll create one large spider per hour of Time Investment, though you can easily scale up for multiple Halloween DIY creations.
Kids can join in too, making this spider Halloween decoration a family-friendly activity—just supervise the hot glue portions for younger helpers.
Essential Materials and Tools
Now you’ll need to gather your spider-building supplies before creating your spooky masterpiece. The right materials and tools make all the difference between a floppy arachnid and a sturdy statement piece.
- Cutting tools: Sharp scissors and wire cutters for precise shaping
- Frame materials: Sturdy wire, foam balls (2-inch and 4-inch sizes), and pipe insulation for legs
- Fastening methods: Hot glue gun, adhesive strips, and zip ties
For sewing the spider’s components together, consider using durable steel needles for longevity.
Building Spider Body
You’ll bring your spider to life by connecting foam half-balls for the head and body, then covering them with faux fur for a realistic, hairy texture.
The body creates the foundation for your creepy crawler, so make sure it’s large enough to support all eight legs while still looking proportional.
Choosing Body Shape and Size
Start by deciding how big your giant spider will be.
Size considerations matter—larger spiders need sturdy materials for weight distribution, while smaller ones are easier to move.
For shape realism, use lightweight foam for a rounded spider body, keeping portability options in mind.
Accurate scaling requires precise body measurements to guarantee realism.
Guarantee proportions match the spider legs for balanced spider scaling, helping your overall spider design look natural and creepy.
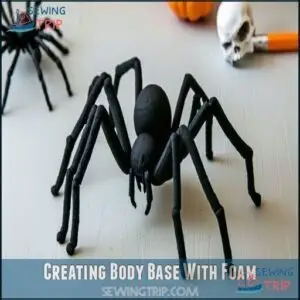
Creating Body Base With Foam
How do you create a sturdy spider body from foam? First, choose foam with medium density for easy shaping but lasting structural integrity.
Attach a 2-inch foam sphere to a 4-inch one using hot glue for the head and body. Use carving techniques for a rounded, smooth look.
For alternative materials, try hollow plastic balls. Consider foam sphere options for various sizes.
This step keeps your giant spider DIY lightweight yet durable—perfect for any spider prop DIY, and helps create a giant spider with a rounded, smooth look.
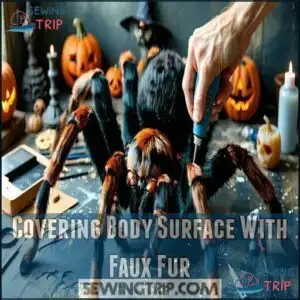
Covering Body Surface With Faux Fur
Faux fur transforms your spider body into a realistic masterpiece! Choose a pattern design that matches your spider decoration ideas, then cut the faux fur to fit the shape.
Faux fur brings your creepy crawler to life, creating a spine-chilling masterpiece that’s perfectly Halloween-ready!
Use hot glue or other glue types for securing fur, ensuring it stays snug. For weatherproofing, add a clear spray to protect from rain.
This fur texture enhances your DIY spider, making it Halloween-ready!
Making Spider Legs
To make your spider look realistic, you’ll start by cutting and shaping the legs.
Using wire and foam tubing, you can create sturdy, flexible leg frames that are easy to attach to the body, which helps to make your spider look realistic.
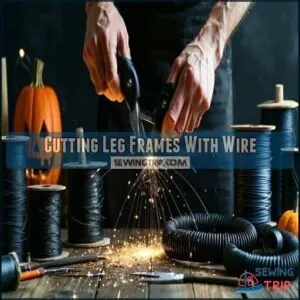
Cutting Leg Frames With Wire
To shape your DIY Halloween spider, focus on cutting 16-gauge wire for durable, realistic legs.
Use these steps:
- Cut eight 4-foot wire pieces with wire cutters for frame durability.
- Slide each wire into a 3-foot pipe insulation to boost joint stability.
- Bend carefully for shaping realism, adding craft wire for finer details.
Proper cutting techniques guarantee your spider legs look spook-tacular. For superior results, consider the various cutter types available.
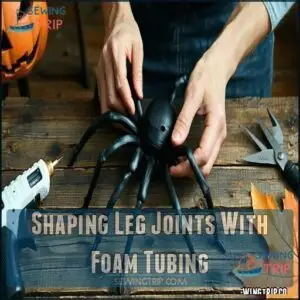
Shaping Leg Joints With Foam Tubing
Once your wire frames are ready, it’s time to bring them to life!
Slide foam tubing over each wire, using small bends to mimic spider leg joints. Experiment with positioning for realistic bending and adjust for joint flexibility.
Secure tubing tightly with hot glue to avoid movement. For outdoor displays, choose foam tubing types designed for weather resistance to guarantee durability.
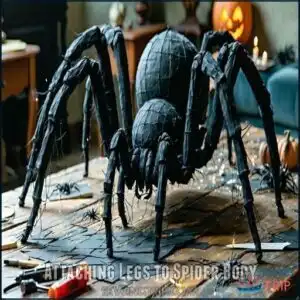
Attaching Legs to Spider Body
After shaping the leg joints with foam tubing, it’s time for spider leg attachment.
Poke holes into the body base for each leg, ensuring weight distribution stays even.
Insert the wire legs, secure them with hot glue, and check joint stability, keeping material compatibility in mind for a snug fit.
For aesthetic considerations, adjust the angle to perfect your realistic spider legs. Spider assembly complete!
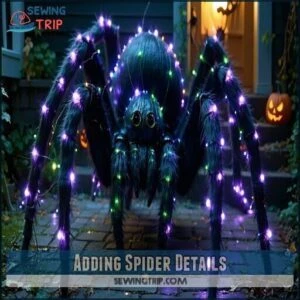
Adding Spider Details
Now it’s time to make your spider stand out by adding some creepy details.
With some webbing, glowing lights, and a touch of faux fur, you’ll create a spooky masterpiece that’s sure to impress!
Creating Webbing Effects With Twine
Twine thickness matters—choose sturdy twine for durability. Start by knotting techniques like the basic square knot to create a classic spider web decoration.
Web placement is key; hang it between trees or doorways for maximum effect. Secure with Spider Attachment knots, ensuring weather resistance.
Consider using the blanket stitch to add a decorative edge to your spider webs. Your spooky spider webs will wow everyone, showcasing great Halloween decorations that turn twine into lasting pieces, thanks to proper knotting techniques.
Installing LED Lights for Night Visibility
Lighting brings your DIY spider to life! Start with LED placement—outline legs or webbing for spooky effects.
Use battery packs or solar power as versatile power sources. Weatherproofing lights is key for outdoor Halloween decorations.
Light color matters; orange or purple amps up eerie vibes! Consider timer options for hassle-free operation.
For a spooky glow, consider UV LED strip lights to illuminate your spider. This Halloween spider tutorial shines day or night, enhancing your spider decoration ideas.
Adding Faux Fur Texture for Realism
After lighting up your DIY spider, it’s time to elevate its creepy factor with faux fur.
Choose fur types with a shaggy texture for a spooky, lifelike look.
Use hot glue—your best friend here—for blending seams seamlessly.
Layer fur over the body and legs, creating realistic patterns for that organic feel.
Focus on fur durability to guarantee your Halloween spider tutorial ends up a hit!
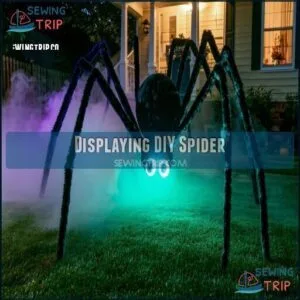
Displaying DIY Spider
Pick a spot that’ll make your spider stand out, like a corner of your yard or perched above a doorway.
Secure it with strong adhesive strips or wire, and add lighting to make it eerie after dark.
Choosing Display Location and Height
When choosing a display location for your Halloween spider decoration, think about visibility factors like lighting and foot traffic.
For outdoor spider decor, your front yard or porch decor offers high impact, but consider weather conditions. If it’s indoor spider decor, prioritize accessibility and safety precautions.
Aesthetic balance matters, so match the spider to other Halloween decorations, ensuring it draws attention without overwhelming your setup, and consider aesthetic balance and the overall impact of the Halloween spider decoration.
Securing Spider With Adhesive Strips
You’ve picked the perfect spot, now secure your DIY spider using adhesive strips. Verify surface compatibility and press firmly for a long-term hold. Keep weight limitations in mind—don’t overload the strips!
Here’s how to optimize attachment:
- Clean the surface for better grip.
- Press and hold each strip for 30 seconds.
- Combine with hooks for heavy spiders.
- Use strip alternatives for flexibility.
- Check removal process to avoid damage.
To ensure a secure and long-term hold, follow these guidelines carefully and consider the weight and size of your DIY spider when choosing your attachment method.
Enhancing Night Visibility With Lighting
Don’t underestimate the power of spooky shadows—perfect light placement turns your DIY spider decorations into a creepy spectacle.
Use weatherproofing lights for outdoor durability, especially for a scary spider decoration. Try LED strips or spotlights to create dynamic lighting effects.
Power source matters too—portable batteries work great. To further enhance the ambiance, consider how star fairy string lights could add a magical touch.
Your spider Halloween project can leave a lasting impression as the star of your Halloween decor lineup!
Frequently Asked Questions (FAQs)
How do you make a giant spider for Halloween?
Whip up a creepy-crawly masterpiece by shaping foam balls for the body, bending pool noodles for legs, and adding faux fur for realism.
Secure everything with hot glue, then suspend it with fishing line—you’ll wow everyone!
How to make Spider Potion for Halloween?
Mix green food coloring with tonic water for a glowing effect under blacklight.
Add gummy spiders, dry ice for fog, and sparkling cider.
Serve in a cauldron—it’s spooky, fun, and irresistibly festive!
Do you need a giant spider at Halloween?
A giant spider adds instant Halloween magic, turning your space into a creepy-crawly scene stealer.
It’s perfect for scaring trick-or-treaters or wowing party guests.
Plus, building one makes an unforgettable DIY experience!
How do you make the smallest Halloween Spider?
To make the smallest Halloween spider, grab a styrofoam ball, pipe cleaners, and googly eyes.
Cut pipe cleaners into eight legs, glue them to the ball, then stick on eyes.
Quick, cute, and budget-friendly!
How to make a homemade spider web for Halloween?
Start by stretching spooky strands with simple supplies like yarn or string.
Twist and tie into a crisscross pattern for a creepy, crafty web.
Add plastic spiders for flair, and anchor everything with tape or hooks.
What is the best material for Halloween spider webs?
The best material for Halloween spider webs is stretchy cotton batting or polyester webbing.
It’s easy to pull apart for a realistic look, clings to surfaces, and creates an eerie effect for both indoor and outdoor setups.
How to make a DIY spider for Halloween?
Think of crafting your spider like weaving a tale – start with foam balls for the body, faux fur for texture, and wire for legs.
Shape, glue, and suspend it for a spooky Halloween centerpiece!
How to make a hanging spider?
Grab foam balls for the body, faux fur for a creepy touch, and wire for bendable legs.
Attach everything with glue, then suspend it with fishing line or twine.
Instant eerie, dangling spider decor!
How to make a simple pipe cleaner spider?
Who knew bending pipe cleaners could make magic?
Twist four into an “X” for legs, wrap another as the body, and glue on googly eyes.
Boom—your eight-legged buddy’s ready to creep around!
How do I make a Halloween spider?
Start with foam balls for the body, cover them in faux fur, and attach wire legs wrapped in foam tubing.
Add creative touches like glowing eyes or fangs, then display it suspended or on the ground!
Conclusion
Who knew building a DIY spider for Halloween could be so simple, yet so chilling?
With foam, faux fur, and a little creativity, your creepy-crawly masterpiece can come to life in under an hour.
The glowing LED eyes and spindly legs will make it the talk of the neighborhood—or the cause of some startled screams.
Placed in just the right spot, it’s sure to amp up the Halloween thrills.
Ready? Get crafting, and scare away!
- https://www.tiktok.com/discover/how-to-put-some-light-on-spider-web-decorations
- https://www.superbrightleds.com/blog/easy-diy-halloween-lighting-ideas.html
- https://www.youtube.com/watch?v=bm7WSSJRzas
- https://www.halloweenforum.com/threads/making-dark-objects-visible-at-night.206084/
- https://www.instructables.com/Halloween-cheap-and-easy-dropping-spider-silhouet/

