This site is supported by our readers. We may earn a commission, at no cost to you, if you purchase through links.

You’ll want to inspect needles regularly for burr, bends, or dull points that cause thread breaks and skipped stitches.
Clean needles with fine-grit sandpaper to remove fabric residue, and always match needle size to your thread weight and fabric type.
Store unused needles in their original packaging to prevent damage, and handle them gently during installation – forcing a bent needle will only create bigger problems.
Master these basics and you’ll discover advanced techniques that can double your needle lifespan.
Table Of Contents
Key Takeaways
- You’ll need to replace your embroidery machine needles every 8-10 hours of stitching time to maintain quality and prevent thread breaks or skipped stitches.
- You should inspect needles regularly for burrs, bends, or dull points, and clean them with high-grit sandpaper to remove fabric residue that causes stitching problems.
- You must match your needle size and type to your thread weight and fabric type, while storing unused needles in their original packaging to prevent damage.
- You can’t actually sharpen embroidery needles since they’re designed for single use, so don’t force bent needles through fabric as this only creates bigger problems.
Needle Maintenance Basics
Caring for your embroidery machine needles is essential for smooth, high-quality stitching.
By regularly replacing and inspecting them, you’ll prevent wear and tear that could damage both your projects and your machine.
Replacing Needles Regularly
Regularly replacing your embroidery machine needle is the golden rule of embroidery needle care.
Your embroidery machine needle is only as good as your last replacement—make it count!
Needles wear down faster than you think, and hanging onto old ones can compromise stitching quality.
Swap needles every 8 hours of stitching to maintain quality, prevent breakage, and extend the machine’s life.
Think of it as a quick tune-up—small effort, big impact!
Monitoring Needle Usage Patterns
Tracking needle usage can save you headaches later.
Note hours stitched, as predicting breakage helps maintain stitch quality.
A simple usage log keeps performance tracking easy and preserves needle lifespan.
If your needles start “singing” or shredding thread, it’s time to act.
Smart embroidery needle care means knowing when to replace before your embroidery machine needle lets you down, which is crucial for stitch quality.
Inspecting Needles for Wear
Spotting wear indicators on embroidery machine needles is essential for smooth stitching.
Check for point dullness, eye damage, or bent needles—signs your needle’s lifespan is over.
Burred needles shred threads and harm fabric, so inspect them often.
Effective needle maintenance tips include using bright light for reviews.
Catching issues early saves effort and guarantees precise, clean embroidery.
It’s also important to regard needle and fabric compatibility, ensuring proper maintenance and needle care.
Choosing Right Needles
Choosing the right needle for your embroidery machine can make all the difference in your sewing results.
By selecting high-quality needles that match your fabric and thread, you’ll guarantee smoother stitches and prevent unnecessary wear on your machine, which is crucial for achieving smoother stitches.
Selecting High-Quality Needles
High-quality embroidery machine needles can make or break your projects.
Quality needles are the foundation of flawless embroidery—invest wisely, stitch brilliantly.
Look for trusted brands with strong reputations and materials that suit your machine. While cost matters, cheap needles often compromise results.
User reviews and a reliable needle type guide can help. Schmetz needles are often regarded as the gold standard.
Prioritize needle quality over quick savings to avoid frustration and guarantee smooth stitching that lasts.
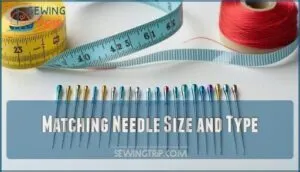
Matching Needle Size and Type
Choosing the right needle isn’t just guesswork—it’s about matching the needle to your project requirements and fabric compatibility.
Use a needle size guide to pair properly with your threads and materials.
For embroidery, consult a reliable needle type guide to explore specialty needles and specific needle systems.
Selecting the right embroidery needle size is vital for project success.
Smart needle care guarantees smooth stitching and crisp designs every time.
Storing Unused Needles Properly
Keep your unused needles rust-free and organized with needle cases. Simple needle storage solutions, like labeled containers, facilitate quick access.
Adopt inventory management by grouping sizes and types, so you’re not left guessing mid-project. For needle longevity, prioritize clear labeling and proper organization methods.
Trust these needle care tips to protect your tools and save time!
Preventing Needle Damage
Protecting your embroidery machine needles starts with gentle handling and proper care.
Don’t force them through tough fabrics or expose them to moisture, as even small mishaps can cause lasting damage.
Handling Needles Gently
Gentle handling isn’t just a needle care tip—it’s a game-changer.
A relaxed Needle Grip prevents bending and reduces Hand Fatigue.
Light Pressure Control while threading or stitching preserves the needle’s precision, especially on delicate fabrics.
Avoid harsh movements during adjustments.
Mastering these needle care techniques guarantees better embroidery results and protects your machine from unnecessary wear or damage, making gentle handling a crucial aspect of overall needle care and machine protection.
Avoiding Forced Needle Insertion
Pushing too hard during embroidery machine needle insertion can cause embroidery machine needle bending and misalignment.
Let the machine’s design guide you, ensuring proper alignment with the needle plate.
If stubborn resistance occurs, check for hoop tension issues or thread thickness mismatches.
Following your machine’s needle replacement guide prevents damage and keeps performance smooth—forcing things only invites trouble.
Safe sewing practices, such as those found at Safe sewing practices, help prevent accidents.
This is crucial for maintaining a smooth performance and preventing damage to your machine.
Keeping Needles Away From Moisture
Storing needles properly is essential for needle durability and rust prevention.
Use airtight containers or silica gel packets to combat humid environments and material degradation. If needles get damp, drying techniques like wiping with a soft cloth preserve their condition.
These needle care essentials guarantee longevity, protecting your embroidery machine and keeping every stitch flawless. Smart storage is key in needle care practices, ensuring needle durability and overall rust prevention.
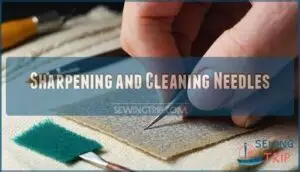
Sharpening and Cleaning Needles
Keeping your embroidery machine needles sharp and clean guarantees smooth stitching and prevents fabric snags.
Simple tools like high grit paper and emery can help you maintain needle quality with minimal effort.
Using High Grit Paper to Clean Needles
High grit paper transforms dull needles into precision tools.
Use 1500+ grit sandpaper folded in half, gently rubbing while turning the needle.
This needle cleaning method removes burrs and prevents rust buildup that causes thread breaks.
Paper grit levels of 400+ work effectively, especially when combined with soapy water.
Regular cleaning extends needle longevity substantially, and you can also use emery-filled pincushions for needle maintenance to improve overall performance with regular cleaning.
Sharpening Needles With Emery
When your needle hits fabric like a dull butter knife, it’s time for the emery strawberry attached to your pincushion.
Push the needle tip through emery in one direction—never back and forth—to avoid wearing off gold plating.
This traditional needle sharpening method removes rust while polishing needles.
An easy way to make one is to create a self-standing pincushion.
Choose fine emery grit selection to prevent over-sharpening and maintain your needle’s precision with a simple and effective traditional method.
Smoothing Needle Burrs
Examine your needle under good light to spot tiny metal burrs that catch thread like sandpaper.
Use high-grit paper (400+ grit) at the correct needle angle, moving in one emery direction only.
These burr causes include fabric friction and repeated punctures.
You can purchase various paper products for this purpose.
Proper needle cleaning methods and polishing tools prevent needle dullness, ensuring smooth stitching.
Burr prevention starts with gentle handling during needle maintenance and sharpening methods.
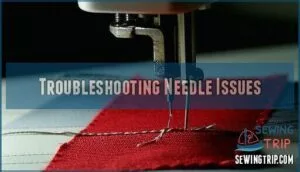
Troubleshooting Needle Issues
When your embroidery machine starts producing skipped stitches, breaking threads frequently, or creating uneven tension, you’re likely dealing with needle-related problems that need immediate attention.
Recognizing these warning signs early and knowing how to address them will save you from costly repairs and keep your projects running smoothly.
Identifying Signs of Needle Wear
Worn needles sabotage your embroidery before you even notice.
Check your needles regularly to catch problems early and maintain consistent stitch quality.
- Bent Needles – Look for subtle curves or obvious kinks that affect needle alignment
- Dull Points – Test sharpness by gently touching the tip to fabric
- Burred Needles – Feel for rough spots or jagged edges around the point
- Eye Damage – Inspect threading holes for cracks or enlarged openings
Resolving Skipped Stitches and Thread Breaks
When skipped stitches and thread breakage plague your embroidery, start with tension adjustments—lower your top thread tension first.
Check thread quality and inspect your bobbin for burrs or improper winding.
Machine timing issues often stem from worn needles, so replace them immediately.
Proper stabilizer usage prevents fabric movement that causes stitching problems during embroidery machine troubleshooting.
Recognizing Need for Professional Maintenance
Some problems go beyond simple needle fixes and require professional expertise.
When your embroidery machine displays persistent error messages or makes unusual noises despite fresh needles, it’s time to call a technician. Don’t risk costly downtime costs by ignoring warning signs.
Here are five red flags demanding professional attention:
- Grinding or squealing sounds during operation
- Repeated error messages after troubleshooting attempts
- Visible physical damage to machine housing or components
- Frequent thread breaks despite proper needle maintenance
- Mechanical breakdowns affecting stitch quality or timing
Professional embroidery machine servicing prevents minor issues from becoming major repairs. Certified technicians can diagnose problems you can’t see and perform embroidery machine maintenance that keeps your equipment running smoothly.
Schedule annual check-ups to avoid unexpected mechanical breakdowns.
Frequently Asked Questions (FAQs)
How often should I change my embroidery machine needle?
Like a pencil that dulls with use, your embroidery needle needs regular replacement.
Change it every 8 hours of stitching or when you notice declining stitch quality, thread breaks, or fabric damage, as this will help maintain the quality of your work.
How to keep embroidery needles sharp?
You can’t actually sharpen embroidery needles—they’re designed for single use. Instead, replace them every 8 hours of stitching to maintain peak performance and prevent fabric damage or thread breaks.
Do I need to oil my embroidery machine?
Think of your embroidery machine as a finely tuned engine—it needs regular lubrication to purr smoothly.
Yes, you’ll need to oil specific metal-on-metal parts every 4-8 hours of use to prevent grinding damage.
How to clean embroidery needles?
You can’t really "clean" embroidery needles effectively. Instead, replace them regularly after 8 hours of stitching or when they show wear, bending, or damage to maintain quality embroidery results.
Can bent needles be repurposed for other tasks?
Why toss bent needles when they’ve got life left?
You can repurpose them for hand-basting fabric layers or marking placement points.
Just avoid forcing them through thick materials to prevent further damage.
How often should needle felt storage be replaced?
Replace needle felt storage when it becomes compacted, loses its grip, or shows signs of rust stains.
Fresh felt every six months keeps your needles sharp and rust-free, especially in humid conditions.
What causes needles to develop rust during storage?
Moisture exposure during storage causes needle rust.
You’ll notice corrosion when needles contact humid air, wet surfaces, or damp storage containers.
Keep needles dry and store them in moisture-free environments to prevent oxidation.
Should different needle brands be mixed in projects?
Picture a perfectly stitched design suddenly marred by inconsistent tension—that’s what happens when you mix needle brands.
Different manufacturers have varying specifications, so stick with one brand per project for consistent results.
When do worn needles require professional disposal methods?
Most worn needles don’t need special disposal.
You’ll only require professional methods for industrial needles with hazardous coatings or contaminated medical/research needles.
Regular home embroidery needles go in household trash safely.
Conclusion
Mastering embroidery machine needle care transforms you from a frustrated stitcher into an embroidery wizard who conquers every fabric challenge.
You’ve learned that replacing needles every 8-10 hours, proper cleaning techniques, and gentle handling aren’t just suggestions—they’re your ticket to flawless stitching.
When you implement these straightforward maintenance practices, you’ll eliminate thread breaks, prevent skipped stitches, and achieve professional results.
Your needles will reward your attention with consistent performance that makes every project shine, demonstrating the importance of proper needle care.


