This site is supported by our readers. We may earn a commission, at no cost to you, if you purchase through links.
Your first embroidery project probably didn’t turn out quite like the picture. Maybe the fabric puckered, the thread tangled into a bird’s nest, or your stitches looked more like a kindergarten art project than the elegant design you imagined. That’s completely normal—embroidery has a learning curve that trips up everyone at first.
The difference between frustrating failures and beautiful work often comes down to knowing a few key embroidery tips and tricks that experienced stitchers use without thinking. Small adjustments to your fabric choice, thread management, and stitching technique can transform your results from “what happened here” to “I actually made this myself.”
Whether you’re just starting out or looking to improve skills you’ve already built, the right guidance helps you skip past common mistakes and start creating pieces you’re genuinely proud to display.
Table Of Contents
Key Takeaways
- Choosing the right fabric, needle size, and thread count from the start prevents common frustrations like puckering and uneven stitches that trip up most beginners.
- Mastering tension control—keeping fabric drum-tight in your hoop and pulling thread steadily rather than jerking—makes the biggest difference between messy and polished embroidery work.
- Starting with simple stitches like running stitch and backstitch, then practicing them consistently in short sessions, builds the foundation you need before tackling complex techniques.
- Using quality tools like mercerized cotton floss, proper embroidery scissors, and beginner kits saves you time and frustration while helping you create pieces you’re actually proud to display.
Essential Embroidery Tips for Beginners
Starting your embroidery journey doesn’t have to feel overwhelming when you focus on the fundamentals. Getting the basics right from day one will save you frustration and help you build skills that last.
Here are the core tips that will set you up for success as a beginner.
Choosing The Best Fabric for Embroidery
Your fabric selection can make or break your embroidery project. Natural fabrics like cotton and linen are beginner favorites—breathable and needle-friendly—while polyester blends resist shrinking and hold up better over time. Proper washing and drying techniques can enhance fabric durability.
Consider these key factors when choosing embroidery fabric:
- Thread count and weave density affect stitch detail and stability
- Fabric weight determines whether you’ll need stabilizers
- Fiber durability and cost balance quality with your budget
Sustainability factors matter too if you’re sourcing organic options.
Picking The Right Needle Size
Once you’ve selected your fabric, choosing the right needle size becomes your next priority. Hand embroidery needles range from size 1 (largest) to 12 (smallest), while machine needles use dual numbers like 75/11 or 80/12.
Match your needle to both fabric weight and thread thickness—a size 5 hand needle works beautifully with 3–4 strands of floss on medium cotton, preventing frustrating snags and visible holes. To avoid thread breakage, selecting the correct needle size is also essential.
Starting With Simple Stitches and Patterns
Your needle is ready—now build your skills by practicing a few foundational embroidery techniques on beginner-friendly patterns. Most beginner embroidery starts with running stitch, backstitch, and satin stitch, which you can master in just a couple of hours.
Kit recommendations often include sampler projects with pattern transfer guides that help you practice these embroidery tips through short, focused sessions three times weekly for stitch mastery.
Managing Fabric Tension in The Hoop
Once you’ve learned your basic stitches, hoop tension control becomes your secret weapon. Tap your hooped fabric—it should sound like a small drum. That tautness adjustment keeps stitches even and prevents puckering.
Wooden embroidery hoops can loosen over time, so check your fabric tension mid-project and re-tighten when needed. Different embroidery frame types hold differently, so experiment to find what works best for stitch distortion prevention.
Practicing Consistent Stitching Techniques
Pulling your thread steadily through fabric—not in sudden jerks—keeps tension regulation balanced and stitches uniform. Practice exercises like parallel running-stitch rows train your eye to match lengths naturally. Use the stabbing method for precise needle placement, entering vertically to reduce diagonal drift. Short practice sessions prevent hand fatigue that undermines control.
These embroidery stitch techniques help you overlap your stitches evenly, creating neat stitches that weave fabric considerations and ergonomic factors into every project.
Must-Have Embroidery Tools and Supplies
Having the right tools makes all the difference when you’re working on embroidery projects. You don’t need to spend a fortune to get started, but investing in quality supplies will save you frustration and help you create beautiful work.
Let’s look at the essential tools and supplies that will set you up for success.
Selecting High-Quality Embroidery Floss
When shopping for embroidery floss, fiber composition matters. Look for 100% long-staple cotton threads that won’t fuzz or break easily.
Mercerization benefits include stronger threads with better dye performance and colorfastness. Premium brands undergo colorfastness tests and hold safety certifications like OEKO-TEX.
You’ll also find floss strand counts ranging from two to six strands, letting you adjust thread weight for different effects.
Choosing Between Plastic, Wood, and Bamboo Hoops
With countless embroidery hoops crowding craft aisles, which material truly delivers? Plastic hoops dominate 50% of 2024 market share thanks to tension consistency and durability—they withstand 32 pounds of pressure without warping. Beechwood hoops offer 5.6-year lifespans and premium user preference ratings of 8.2 out of 10. Bamboo options? They’re budget-friendly at $2.40 but fail stress tests at just 17 pounds, explaining their 2.3-year average lifespan.
Consider these embroidery tips when selecting your hoop:
- Plastic hoops maintain fabric tension within 18-22 grams on 95% of textiles
- Wood hoops prevent sliding on silk, maintaining 85% surface tautness
- Bamboo experiences 70% of all reported hoop breakages due to splitting
- Pricing trends show plastic costs dropped 13% from 2023 to 2025
- Beginner embroiderers prefer plastic (62%) for reliable tension and ease of use
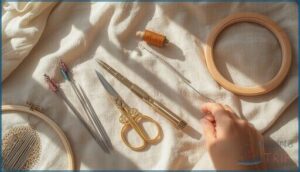
Investing in Good Scissors and Accessories
Why settle for dull blades when precision embroidery scissors can transform your thread management? Curved-tip models enable closer cuts without damaging fabric, while ergonomic benefits reduce wrist strain during long sessions.
Though premium scissors cost $15-$30, their longevity value outshines budget options that dull quickly. Tool specialization matters—dedicated embroidery supplies like micro-serrated shears deliver cutting precision that household scissors can’t match. Your needlework deserves better.
Finding Beginner-Friendly Embroidery Kits
Beginner embroidery kits pack everything you need into one box—no guesswork required. Most include pre-printed fabric, hoops, needles, and DMC floss, with prices between $12 and $20, making them perfect starter investments.
Top-rated beginner projects worth exploring:
- ETSPIL’s all-inclusive kit teaches foundational stitches with clear instructions
- Picoey’s four-design flower collection builds confidence through repetition
- Hawthorn Handmade’s cat motif introduces 15 key stitches simultaneously
- CYANFOUR’s progressive stages guide skill-building naturally
- Bradove’s practice fabric lets you experiment risk-free
Sourcing Unique Fabrics for Projects
Thrift shops hide vintage fabric treasures, but online platforms like Etsy reveal global artisan sellers offering one-of-a-kind linen and muslin. For sustainable sourcing, check textile fairs showcasing regional textiles—Asia Pacific leads with traditional craftsmanship, while Europe emphasizes eco-friendly options.
| Source Type | Best For |
|---|---|
| Online platforms | Rare vintage fabric, customization |
| Artisan fairs | Sustainable sourcing, quality inspection |
| Thrift stores | Affordable quilting cotton discoveries |
| Specialty shops | Professional-grade linen |
| Direct importers | Bulk regional textiles |
Finding fabric sources takes exploration, but mixing channels builds your stash.
Mastering Embroidery Techniques and Stitches
Once you’ve gathered your supplies, it’s time to focus on the actual stitching. Getting comfortable with basic techniques and learning how to control your thread will make every project easier and more enjoyable.
Here’s what you need to know to build a strong foundation in embroidery.
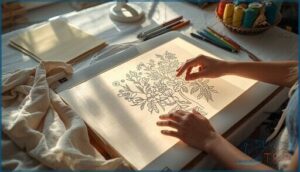
Transferring Patterns to Fabric Accurately
You’ve picked your design patterns—now let’s get them onto fabric. Lightbox limitations mean this transfer method won’t work well on darker materials, while carbon testing on scrap fabric first prevents surprises.
Heat reappearance can bring Frixion lines back in cold weather, so keep that in mind.
For tricky fabrics, stabilizer drawing on water-soluble Stick n Stitch gives you clean, accurate embroidery patterns every time. Test your pen removal method before stitching.
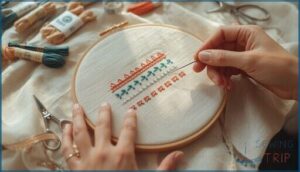
Practicing Basic Stitches (Running, Backstitch, Etc.)
Once your pattern is on the fabric, you’re ready to build your foundation. Start with running stitch and backstitch—about 64% of new embroiderers begin here.
These two stitches form the backbone of most designs, helping you master needle size selection, stitch tension, and proper thread length (around 50–80cm works best).
Practice on sampler projects to avoid common errors like pulling too tight, which causes puckering.
Adjusting Floss Strand Count for Effect
Now that you’ve got the basics down, adjusting floss strand counts opens up creative possibilities. Embroidery thread length stays at 50–80 cm, but splitting threads changes everything—you control texture, dimension, and coverage efficiency.
How Strand Count Effects Work:
- 1–2 strands for delicate details and color blending
- 3 strands for balanced coverage on 14-count fabric type
- 4–6 strands for bold outlines and textured stitching
- Fewer strands smooth shading transitions beautifully
- Mixed counts create depth in one design
Experiment with embroidery techniques—you’ll discover what brings your vision to life.
Avoiding Common Stitching Mistakes
Even with careful strand work, beginner mistakes still happen—and they’re easier to fix when you catch them early. Tension Control makes the biggest difference: too tight causes puckering in nearly 18% of projects, while loose stitches appear loopy.
Watch your Needle Selection too—oversized needles damage fine fabrics 23% more often.
Thread Management prevents tangling, Hooping Errors stop distortion, and proper Design Density avoids gaps. Small adjustments protect your embroidery techniques beautifully.
Creating Texture and Shading With Overlapping Stitches
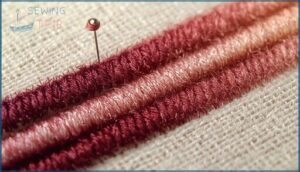
Layered shading brings your embroidery to life by stacking color combinations for depth. Start with your darkest shade at about one-third density, then overlap medium tones before adding highlights—this builds smooth color blending without harsh lines.
- Use three adjacent shades (light, medium, dark) for gradual color palette transitions
- Offset stitch entry points by 1–2 mm between layers for fluid blending
- Vary stitch angles 10–20 degrees to create textured stitching
- Adjust directional stitching to follow your imagined light source
- Keep each colored band 2–4 mm wide in small motifs
Thread and Fabric Management Tricks
Good thread and fabric management can save you hours of frustration and help your projects turn out cleaner. Small adjustments in how you handle materials make a real difference in both the stitching process and your final results.
Here are some practical tricks to keep everything running smoothly from start to finish.
Using Thread Stands and Nets for Smooth Feeding
Thread stands and nets are game-changers for smooth embroidery thread management. They reduce thread breakage by up to 35% and keep tension consistency rock-solid. You’ll notice fewer machine vibration issues and better workflow organization too.
Slippery threads like rayon behave beautifully with nets, while stands improve thread conditioning and feeding.
These simple embroidery tips deliver real material savings and cleaner stitching every time.
Preventing Thread Tangles and Breakage
When thread conditioning and floss separation work together, you’ll see up to 40% fewer tangles in your projects. Splitting embroidery threads carefully means you’re avoiding unpicking stitches later, saving time and frustration.
Quality threads paired with proper needle maintenance prevent breakage before it starts.
Adjusting tension settings makes a real difference too—embroidery thread management becomes second nature once you master these basics.
Maintaining Optimal Thread Length
Getting your thread length right feels like finding the sweet spot between control and efficiency. Most beginners do best with 20–45 cm working lengths, while experienced stitchers stretch to 50 cm by folding longer cuts in half.
Tension and length go hand in hand. When you’re splitting embroidery threads, keeping them shorter means better embroidery thread management and avoiding unpicking stitches caused by tangles. Thread length effects show up quickly—anything past 50 cm working length gets twisted and worn during pulls through fabric. Securing embroidery threads becomes easier too, since you’re handling less material at once.
Practical measurement and cutting practices that work:
- Measure fingertip-to-elbow (roughly 40 cm) for consistent cuts
- Cotton threads need shorter lengths than polyester to prevent fuzzing
- Fold 60 cm strands in half for a manageable 30 cm working length
- Match thread type to length—metallics break easily when too long
- Longer pulls increase friction, dulling your floss faster
Pre-Trimming and Securing Appliqué Fabrics
Precutting your applique shapes with a Cricut or similar machine hits about 1 mm cutting tolerances, which means your placement stitches line up beautifully. Back your fabric with fusible webs or stabilizer types like cut-away for knits before you cut—this stops fraying cold.
Hooping techniques matter too: keep everything taut but not stretched. Edge finishing with satin stitches about 1 mm from the edge locks down loose threads for durable, professional results.
Keeping Embroidery Projects Organized
You’ll finish more pieces when your workspace mirrors your brain. Project-based storage keeps each design’s threads, fabric, and pattern in one labeled container—no treasure hunts mid-stitch.
Drawer organizers with thread segmentation by color family, plus a floss bobbin organizer for active work, transform chaos into flow.
Physical layout matters: clear surfaces after sessions so your finished product doesn’t vanish under tomorrow’s supplies.
Top 4 Recommended Embroidery Products
Having the right tools can make all the difference in your embroidery journey, whether you’re just starting out or building on your skills. Quality products help you avoid frustration and actually enjoy the stitching process.
Here are four items that consistently make embroidery easier and more enjoyable for crafters at every level.
1. DMC Embroidery Floss Popular Colors Pack
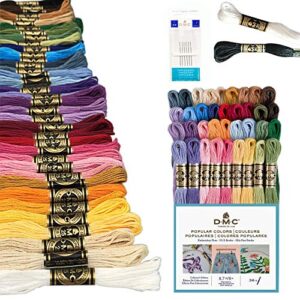
When you’re ready to build your starter stash, the DMC Popular Colors Floss Pack delivers serious economic value. This 36-skein bundle gives you a wide-ranging color palette—think rich reds, soft pinks, and essential dark neutrals—at roughly half the per-skein retail cost.
The 100% mercerized cotton floss quality makes it perfect for beginner projects, and since DMC is the brand most patterns reference, you won’t waste time hunting down color combinations.
You’ll get about 313 yards total to explore different color schemes across various embroidery techniques.
Best For: Beginners building their first embroidery collection or crafters who want a solid color foundation without paying full retail for individual skeins.
- You get 36 popular shades for about half the cost of buying them separately—roughly $0.36–$0.50 per skein versus $0.75–$0.80 retail.
- The color range covers most beginner patterns with versatile reds, blues, greens, and dark neutrals, so you won’t need to make multiple trips to the craft store.
- 100% mercerized cotton gives you smooth, colorfast thread that works well across cross-stitch, embroidery, and friendship bracelets.
- Some packs arrive with missing items like needles or the wrong color count (35 instead of 36), suggesting inconsistent quality control.
- The price can still feel steep if you’re only planning one or two small projects and don’t need this many colors yet.
- Recent production changes reduced strand count from 8 to 6 per skein, which might disappoint crafters expecting the older format.
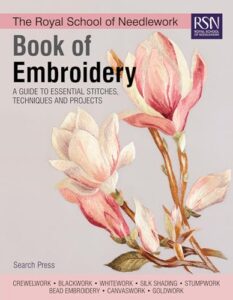
2. Royal School of Needlework Embroidery Guide
Once you’ve picked up your floss, the Royal School of Needlework Embroidery Guide becomes your next smart investment. This 400-page reference covers eight major embroidery techniques—from crewelwork to silk shading—with step-by-step photos that break down each stitch clearly.
You’ll appreciate the historical context woven throughout, showing how hand embroidery tradition connects to contemporary education. The book integrates RSN’s Essential Stitch Guide series and pairs naturally with their free online Stitch Bank featuring 400+ stitches.
It’s particularly valuable for mastering embroidery stitch variations and understanding proper learning pedagogy.
Best For: Embroiderers who want a comprehensive reference for traditional hand techniques and prefer structured, historically-informed instruction over quick project tutorials.
- Covers eight distinct embroidery disciplines with step-by-step photos and clear diagrams, making complex stitches approachable
- Integrates beautifully with RSN’s free online Stitch Bank (400 stitches), giving you both book and digital resources
- Includes historical context and archive examples that show how techniques evolved and why they’re stitched certain ways
- At 400 pages, it can feel overwhelming if you’re completely new to needlework and just want to start stitching
- Small text size makes some instructions harder to read, especially in detailed stitch diagrams
- More technique-focused than project-based, so you won’t find many finished patterns to work from start to finish
3. Sock Easy Embroidery Hooping Aid
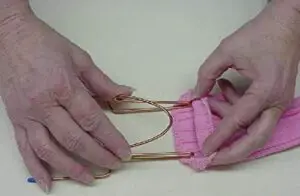
If you’re exploring embroidery techniques beyond flat fabric, the Sock Easy Embroidery Hooping Aid opens up small projects with impressive machine compatibility across 100+ brands. This ABS tool delivers tension consistency that cuts your hooping time from 30+ minutes to around 5–10 minutes per sock.
While some find the instructions vague and the embroidery area limited, market adoption keeps climbing—hooping aids now represent part of a $150 million segment growing at 7% annually, driven by beginner embroidery enthusiasts tackling stretchy fabrics with standard embroidery hoops.
Best For: Embroidery hobbyists and small business owners who regularly work with socks and small items on standard embroidery machines and want to save setup time without investing in specialized equipment.
- Cuts hooping time by up to 90%, reducing setup from 30 minutes to just 5–10 minutes per sock
- Works with over 100 embroidery machine brands including Brother and Baby Lock
- Helps maintain even tension automatically, reducing defects by up to 15% and minimizing fabric shifting
- Instructions are often vague and unclear for first-time users
- Limited embroidery area restricts design size and placement options
- Some users report socks don’t stay securely in place, leading to stability issues during stitching
4. Dime Hoop Guard for Embroidery Hoops
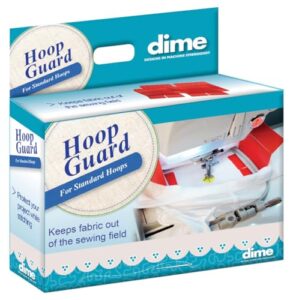
If you work with large or awkward pieces like quilts or blankets, the Dime Hoop Guard keeps excess fabric out of your embroidery field without tape or constant hovering. This lightweight stainless steel tool snaps onto Snap Hoop or Monster Snap Hoop frames for single-needle machines, offering snap hoop compatibility and stainless steel durability.
At 1.8 ounces, it won’t strain your setup, and you can attach multiple guards for full coverage. The hoop guard benefits include fabric wrinkle prevention and hands-free operation, making multi-guard usage practical for professionals tackling bags, towels, and pillowcases with confidence.
Best For: Embroiderers working with bulky or oversized projects like quilts, blankets, and towels who need a hands-free way to keep excess fabric out of the stitching area.
- Snaps on quickly without tools and works with multiple guards for full fabric coverage
- Lightweight stainless steel won’t add strain to your hoop or leave marks on fabric
- Eliminates the need for tape or constant supervision during embroidery runs
- Only compatible with Dime Snap Hoop and Monster Snap Hoop systems on single-needle machines
- Each package includes just one guard, so larger projects may require buying extras
- Limited usefulness for smaller, flat projects where fabric management isn’t an issue
Frequently Asked Questions (FAQs)
Is machine embroidery difficult for beginners?
Machine embroidery isn’t as hard as you might think, though there’s a Setup Learning Curve. Most beginners master basic machine operation in three months, but those with sewing machine experience often progress faster.
How can I Make my embroidery look better?
Improving embroidery skills starts with stitch consistency and tension control. Choose quality thread and fabric, transfer patterns accurately, and practice basic stitching techniques regularly. Adjust your floss strand count to create neat stitches with beautiful textured effects.
How do I learn embroidery?
Think of learning embroidery like planting a garden—you’ll need patience, the right tools, and steady practice three times weekly.
Begin with beginner embroidery kits, master simple hand embroidery tips, then watch your skills blossom through consistent project work.
What’s a good topic to learn about embroidery?
Focus on basic stitch mastery and pattern design basics first. These embroidery techniques for beginners build your foundation for hand embroidery success.
Then explore fabric selection guide, hoop tension control, and thread management tips.
How to get really good at embroidery?
Progress beyond excellence by practicing consistently, mastering tension control, experimenting with colors, and exploring learning resources.
Thread control and design complexity improve through detailed embroidery projects, creating textured stitching using developed stitching techniques.
How do I make my embroidery neater?
Creating neat stitches starts with consistent direction—align every stitch the same way.
Work with single threads, practice your stitching techniques on scrap fabric, and maintain steady thread tension.
Outline edges to improve definition while avoiding mistakes.
How do you neatly finish embroidery?
Neat finishing starts with secure backstitch anchoring and weaving tail threads beneath existing stitches—avoiding visible knots.
Use magnetic hoops for consistent tension, proper backing removal techniques, and smart stitch sequencing.
Consider washability requirements before framing or mounting your finished piece.
What is the stabbing method of embroidery?
The stabbing method involves pushing your needle straight down through fabric, then bringing it back up in two separate motions.
This technique delivers superb stitch neatness, especially on thick fabrics held drum-tight in hoops.
How to transfer designs for large, complex projects?
When your design won’t fit in one hoop, you’re in for a wild ride. Multi-hooping alignment and washaway stabilizers save the day.
Lightbox tracing tips, prick-and-pounce, and heat-transfer degradation matter for embroidery project planning success.
Which printable transfer papers work best for embroidery?
Sulky Fabri-Solvy and DMC Magic Paper stand out for their complete water solubility and transfer accuracy on non-stretchy fabric.
Both minimize residue visibility around stitches, with strong user reviews supporting reliable pattern transfers for hand embroidery design projects.
Conclusion
The most complicated embroidery tips and tricks turn out to be surprisingly simple once you actually try them. You’ve learned about fabric choices, tension management, thread handling, and stitch techniques that separate messy projects from polished work.
Now the real learning begins—through practice, mistakes, and those satisfying moments when everything clicks. Pick up your needle and start stitching. Each project teaches you something new, and that hands-on experience matters more than memorizing every technique perfectly.
- https://gwenstellamade.com/tutorials/making-the-best-adjustable-sewing-and-cutting-table
- https://pubmed.ncbi.nlm.nih.gov/39957561/
- https://insightsjhr.com/index.php/home/article/view/503
- https://www.ageberry.com/cotton-polyester-blends-fabrics-for-everyday-use/
- https://printify.com/blog/guide-to-polyester-cotton-and-blended-fabrics/

