This site is supported by our readers. We may earn a commission, at no cost to you, if you purchase through links.
 Fabric bias is the diagonal direction of threads at a 45-degree angle to the selvage.
It’s the key to realizing your fabric’s full potential, offering maximum stretch and drape.
You’ll find true bias cuts create fluid silhouettes that hug curves like a dream, while partial bias cuts provide a balance of flexibility and stability.
Warp threads run lengthwise, giving strength, and weft threads weave horizontally, creating width and patterns.
Understanding bias is important for achieving the perfect fit and flow in your sewing projects.
It’s not just about cutting fabric; it’s about mastering the art of movement and shape.
Ready to take your sewing skills to the next level?
Table Of Contents
- Key Takeaways
- What is Fabric Bias?
- Types of Bias Cuts in Fabric
- Why Cut Fabric on The Bias?
- Common Uses for Bias-Cut Fabric
- Working With Different Fabrics on Bias
- Essential Tools for Bias Cutting
- Mastering Bias Cutting Techniques
- Sewing With Bias-Cut Fabric
- Troubleshooting Bias-Cut Projects
- Frequently Asked Questions (FAQs)
- Conclusion
Key Takeaways
- You’ll find true bias at a 45-degree angle to the selvage, offering maximum stretch and drape for your fabric projects.
- Cutting on the bias transforms your garments, creating fluid silhouettes that hug curves and move gracefully with the body.
- You’ll need specific tools and techniques for bias cutting, including sharp rotary cutters, careful pinning, and adjusted machine settings.
- When working with bias-cut fabric, you’ll face unique challenges like fabric distortion, but proper stay-stitching and pressing methods will help you achieve professional results.
What is Fabric Bias?
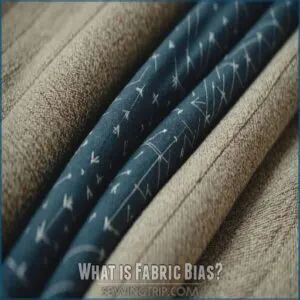
Understanding fabric bias is important for achieving desired drape, stretch, and fit in your sewing projects.
This is because it greatly impacts how the fabric behaves when cut and sewn.
The 45-Degree Angle Explained
When you’re learning about fabric bias, you’ll quickly encounter the magic of the 45-degree angle.
This key angle forms the true bias, where fabric stretches most and drapes beautifully.
Imagine your fabric as a map:
- Lengthwise grain: the north-south highway
- Crosswise grain: the east-west route
- True bias: the diagonal shortcut at 45 degrees
Using tools and products from online stores like fabric bias sewing, you can create stunning garments and home decor items that showcase this diagonal path.
This diagonal path reveals fabric’s hidden potential, offering maximum flexibility for your sewing adventures.
Warp and Weft Threads
Ever wondered about the invisible dance happening in your fabric?
Let’s unravel the mystery of warp and weft threads.
These two key players form the backbone of your fabric’s structure.
Warp threads run lengthwise, providing strength and stability, while weft threads weave horizontally, creating the fabric’s width and patterns.
When working with fabrics, you need to know how to identify the right and wrong side of your fabric, which can greatly impact your sewing experience; for instance, the right side often has a more finished, smoother selvage edge Check the Selvage Edge.
Together, they determine your fabric’s durability, drape, and even how it’ll behave when cut on the bias.
True Vs Partial Bias
The bias-cut fabric world is split into two camps: true bias and partial bias. You’ll find true bias at a perfect 45-degree angle to the selvage, offering maximum stretch and drape. Partial bias, on the other hand, cuts corners.
- True bias: The fabric flexibility champion
- Partial bias: The less-stretchy cousin
- Right angle ruler: Your true bias finder
- Rotary cutter: Your precision bias-cutting tool
How Bias Affects Fabric Behavior
Understanding fabric bias revolutionizes your sewing game.
It’s the 45-degree angle that transforms fabric behavior, offering unique properties for your projects.
Let’s explore how bias affects different aspects of fabric:
| Property | On Grain | On Bias |
|---|---|---|
| Drape | Structured | Fluid |
| Stretch | Limited | Increased |
| Stability | High | Lower |
| Recovery | Quick | Slower |
Bias-cut fabric drapes beautifully, hugs curves, and adds a touch of magic to your creations.
It’s your secret weapon for everything from elegant dresses to creative home decor.
Types of Bias Cuts in Fabric
Fabric bias cuts come in various types, each offering unique properties for your sewing projects.
You’ll discover the differences between true bias, cross-grain, and straight grain cuts.
You’ll also learn how to identify and utilize the bias direction for the best results in your garments and accessories.
True Bias Cut Methods
These techniques unleash fabric’s full potential, creating garments that drape beautifully and hug your curves.
Here’s how to master true bias cutting:
- Find the 45-degree angle to the selvage
- Cut pattern pieces on a single layer
- Align front and back biases perpendicularly
- Stay-stitch cut edges 1/8" from seam allowance
With these steps, you’ll harness fabric’s natural stretch and fluidity, elevating your sewing game.
Cross-grain Cutting Techniques
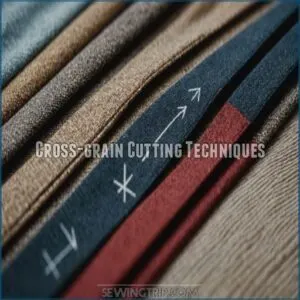
While true bias cuts give maximum stretch, cross-grain techniques provide a balanced approach.
You’ll find increased flexibility without sacrificing stability.
Let’s explore some key cross-grain methods:
| Technique | Effect | Best For |
|---|---|---|
| 45° Angle | Moderate drape | Casual wear |
| 60° Angle | Enhanced flow | Flowy dresses |
| 30° Angle | Subtle stretch | Fitted tops |
Remember, your rotary cutter is your best friend for precise cuts along the grain line.
Straight Grain Vs Bias
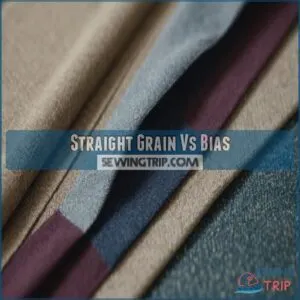
Consider these key differences:
- Fabric stability: Straight grain resists stretching, while bias stretches diagonally
- Pattern placement: Straight cuts align with selvage, bias cuts diagonally
- Project suitability: Choose based on desired silhouette and fabric movement
Finding The Bias Direction
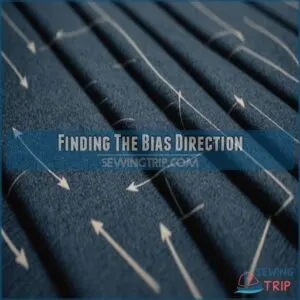
You’ll need to fold your fabric diagonally, aligning selvage edges with the grain line.
This creates a 45-degree angle, revealing the true bias.
Let’s break down the process:
| Step | Action |
|---|---|
| 1 | Identify selvage |
| 2 | Fold diagonally |
| 3 | Align edges |
| 4 | Check for 45° angle |
| 5 | Mark bias line |
This technique lets you take advantage of the fabric’s potential for stretch and drape, giving you control over your creations.
Why Cut Fabric on The Bias?
You’ll discover how this 45-degree angle technique transforms ordinary fabric into fluid, curve-hugging garments that flow with grace and offer unparalleled stretch and visual appeal.
This technique allows you to create garments that flow with grace and offer unparalleled stretch and visual appeal.
Enhanced Drape and Flow
Bias-cut fabric opens up a world of elegance in your sewing projects.
When you cut at a 45-degree angle to the grainline, you’re tapping into the fabric’s hidden superpowers of drape and flow.
This diagonal cut allows the fabric to gracefully cascade and mold to the body’s contours, creating a fluid silhouette that’s simply breathtaking.
It’s like giving your garment wings, letting it dance with every movement you make.
Better Fit Around Curves
When you’re aiming for a silhouette that hugs your curves like a glove, cutting fabric on the bias is your secret weapon.
This 45-degree angle technique allows the material to mold around bodices, sleeves, and necklines with ease.
You’ll notice the difference immediately – bias-cut garments skim over your body’s contours, creating a flattering fit that’s both comfortable and elegant.
It’s like giving your fabric superpowers to embrace every curve!
Stretch and Movement Benefits
You’ll love how bias-cut fabric moves with you.
The diagonal grain creates natural stretch, allowing garments to mold to your body’s curves.
This flexibility is perfect for dancewear and activewear, giving you freedom to bend and twist without restriction.
Imagine a dress that flows like water as you walk, or a top that hugs your figure just right.
That’s the magic of bias cutting.
Visual Effects of Bias Cuts
Fabric cut on the bias transforms like magic, creating a visual symphony of drape and flow.
It accentuates your body’s natural curves, enhancing silhouettes with unparalleled elegance (Source).
The diagonal grain allows patterns to dance across your garment, producing stunning visual effects and unique design possibilities (Source).
This technique flatters your figure but also adds a touch of timeless sophistication to your creations, making every piece a work of art.
Common Uses for Bias-Cut Fabric
You’ll encounter this versatile technique in creating flowing dresses, adding professional-looking bindings and trims, enhancing quilting projects with flexibility, and crafting uniquely draped curtains or tablecloths for your living spaces.
Evening Wear and Dresses
Imagine slipping into a gown that flows like liquid silk.
That’s the magic of bias-cut fabric in evening wear.
This technique, pioneered by Madeleine Vionnet in the 1930s, revolutionized dress design.
Bias-cut evening gowns offer:
- Unparalleled drape and fluidity
- Figure-flattering silhouettes
- Enhanced comfort and movement
Master this technique to create stunning dresses that hug curves and move gracefully.
Whether crafting a red-carpet-worthy gown or a chic cocktail dress, bias cutting elevates your evening wear game.
Binding and Trim Applications
Bias-cut fabric isn’t just for flowing gowns; it’s a game-changer for binding and trim applications too.
Let’s explore how this versatile technique can elevate your sewing projects.
From reinforcing seams to adding decorative flair, bias binding opens up a world of possibilities.
Application
By mastering how to sew bias tape, you can achieve clean joins and a smooth, continuous length of tape. Mastering bias binding techniques will transform your sewing, giving you control over every detail and the freedom to experiment with fabric choices and decorative trims. Quilting ProjectsQuilters, you’ve got a secret weapon in your arsenal: bias-cut fabric. It’s not just for binding anymore! Let’s explore how this versatile technique can elevate your quilting game:
Master these skills, and you’ll transform your quilts from flat to fabulous. Remember, a little stretch goes a long way in creating eye-catching, professional-looking projects. Don’t fear the bias – embrace it! Home Décor ItemsHome décor takes on a whole new dimension when you master bias-cut fabric techniques. You’ll tackle slipcover challenges with ease, creating smooth curves around furniture corners. Bias-cut curtains drape elegantly, while pillow cover techniques yield professional results. For unique designs, consider incorporating upholstery fabric for clothes, which can add a touch of luxury to your living spaces. The fabric choice impact is important; consider how bias affects upholstery projects. You’ll find that bias-cut items hang beautifully, wrinkle less, and add a touch of luxury to your living spaces. Working With Different Fabrics on Bias
You’ll need to adjust your techniques based on the fabric type, weight, and texture to achieve the best results in your bias-cut projects. Woven Fabric ConsiderationsWorking with woven fabrics on bias requires careful consideration of grain direction and fabric weight. You’ll find that different weave types behave uniquely when cut on the bias. Here are key points to remember:
Handle these fabrics with care, adjusting your techniques based on their specific characteristics to achieve professional results in your bias-cut projects. Knit Fabric TechniquesNow let’s focus on knit fabrics. Unlike wovens, knits offer unique challenges and opportunities when working on the bias. You’ll need to adjust your techniques to accommodate their stretchy nature. Here’s a quick guide to help you master knit fabric bias:
Remember, knits can be your best friend when you understand their behavior on the bias. Specialty Fabric HandlingDiving into specialty fabrics on bias can be tricky, but you’ll soon master it. Lace and chiffon flow beautifully when cut diagonally, enhancing their delicate nature. For velvet and leather, use a rotary cutter for clean edges. Sequins require extra care; consider removing them along seam lines. Remember, each fabric behaves differently on bias, so experiment and adjust your techniques accordingly. You’ll be creating stunning bias-cut garments in no time! Fabric Weight and Texture ImpactFabric weight and texture play a starring role in your bias-cut creations. Lightweight fabrics like chiffon or silk dance gracefully on the bias, perfect for flowing dresses that make you feel like a Hollywood starlet. Heavier fabrics like wool or denim, when cut on the bias, shed their bulky reputation and embrace movement, giving fitted garments a comfortable, fitted edge. Remember, fabric stability and drape control are your secret weapons for bias success. Essential Tools for Bias Cutting
From precision rotary cutters and self-healing mats to sturdy pattern weights and bias tape makers, these essential implements will guarantee your bias-cut projects are accurate, efficient, and professionally finished. Cutting Tools and Equipment When it comes to bias cutting, your toolkit is your secret weapon. Here’s what you should have at the ready:
These tools will help you slice through fabric like a hot knife through butter. Marking and Measuring ToolsNow that you’ve got your cutting tools ready, let’s talk about the unsung heroes of bias cutting: marking and measuring tools. You’ll need these to make sure your fabric is marked accurately for that perfect 45-degree angle. Here’s a quick rundown of some must-have items for your sewing arsenal:
These tools will help you mark like a pro, giving you the control you crave in your sewing projects. Stabilizing ProductsBeyond marking tools, you’ll want to harness the power of stabilizing products for bias cutting. Interfacing and fusible web are your secret weapons, providing much-needed support to slippery fabrics. Stay stitching and stabilizing stitches keep edges from stretching out of shape. Don’t forget bias tape – it’s not just for finishing, but can reinforce tricky areas too. These tools will have you cutting on the bias like a seasoned pro in no time! Storage SolutionsProper storage solutions protect your bias-cut fabric and maintain its quality. You’ll want to keep your projects organized and your materials in top shape. Let’s explore some smart storage options:
These tools will help you manage your bias-cut projects efficiently, ensuring your fabric stays pristine and ready for your next creation. Mastering Bias Cutting TechniquesYou’ll discover the full potential of bias-cut fabric with these expert techniques, transforming your sewing projects into professional-quality creations. From precise pattern layout to avoiding common cutting pitfalls, mastering these methods will elevate your bias work to new heights of sophistication and style. Pattern Layout MethodsYou’re ready to tackle pattern layout methods like a pro! Start by checking your guidesheet – it’s your sewing GPS. Align your fabric grain carefully, then strategically place pattern pieces for the best cutting efficiency. For symmetry and fabric conservation, try double-layer cutting. Single-layer works wonders for tricky prints or precise pattern matching. Remember, consistency is key – keep interfacing and lining grains aligned with your main fabric for flawless drape. Pinning and Cutting Steps While pinning and cutting bias fabric, precision is your secret weapon. Understanding the grain line is essential for accurate pattern placement and cutting, as it determines the direction of the warp and weft threads what is sewing on the bias. Place pins perpendicular to the bias edge, spacing them 4-6 inches apart to prevent shifting. When using your rotary cutter, make long, smooth strokes for clean edges. For bias stabilization, consider these emotional touchpoints:
Grain Line IdentificationIdentifying grain lines is like finding your fabric’s true north. Start by locating the selvage edge, which runs parallel to the warp threads. To perform a straight grain test, gently tug the fabric in different directions. The lengthwise grain offers resistance, while the crosswise grain stretches slightly. For a foolproof method, use a tape measure to make sure the distance from the grain line arrow to the selvage is consistent. Common Cutting MistakesNow that you’ve mastered grain line identification, let’s tackle common cutting mistakes. Even seasoned sewers can slip up, but knowledge is power. Watch out for these fabric-cutting pitfalls:
Remember, precision is key. Sharpen those scissors, double-check your measurements, and align your patterns carefully. Your future self will thank you when your project comes together seamlessly. Sewing With Bias-Cut FabricSewing with bias-cut fabric requires specific techniques to harness its unique properties and achieve professional results. You’ll need to adjust your machine settings, handle the fabric carefully, and employ specialized seaming and pressing methods to create garments that showcase the fluid drape and elegant fit characteristic of bias-cut designs. Machine Settings and AdjustmentsYou’ve mastered cutting bias fabric, but the journey doesn’t end there. Let’s fine-tune your machine settings for sewing success. Adjusting your sewing machine is like finding the perfect dance partner for your bias-cut fabric – it’s all about harmony and balance.
Remember, a gentle touch goes a long way. Your bias-cut fabric will thank you for the TLC. Hand Sewing ConsiderationsWhen tackling bias-cut fabric by hand, you’re in for a silky adventure. Choose a fine needle and lightweight thread to maintain fabric stability. Control tension by using shorter stitches and avoid pulling the fabric as you sew. Pin generously to prevent shifting, and consider basting critical seams first. Remember, patience is your best friend – treat the fabric like a delicate dance partner, guiding it gently through each stitch. Seam and Hem TechniquesMastering bias-cut hems and seams can be tricky, but it’s like taming a wild fabric beast. Let’s wrangle those slippery edges together! Bias-cut fabrics mold to your body’s curves, creating a sinuous line that’ll make you feel like a 1930s movie star. Here’s how to tame that stretchy beast:
Pressing MethodsProper pressing techniques are the secret sauce for bias-cut fabric success. Use an up-and-down motion with your iron to avoid distorting the fabric’s grain. For delicate fabrics, a press cloth is your best friend. Sometimes, steam alone can work wonders without risking fabric damage. Remember, different fabric types require specific ironing temperatures and pressing tools. Embrace the tailor’s ham for those tricky curved areas. Troubleshooting Bias-Cut ProjectsBias-cut projects can present unique challenges. By mastering techniques like staystitching for curved edges, you can prevent fabric from stretching out of shape learn more about staystitching curved edges. With the right techniques, you’ll overcome common issues like fabric distortion and uneven seams. In this section, you’ll learn how to troubleshoot these problems. From preventing stretching during cutting to achieving professional-looking finishes that showcase the beauty of bias-cut fabric. Preventing Fabric DistortionThe battle against fabric distortion begins with stay-stitching. This important technique stabilizes your fabric, preventing stretching and maintaining shape. Consider using additional techniques such as stabilizing knit fabric. You’ll want to focus on necklines, armholes, and curved waistlines. Set your machine to a 1.5 stitch length and sew 1/8 inch from the seam line. For curves, start from the outer edge and move inward, ensuring even stitching. Remember, an ounce of prevention is worth a pound of cure! Fixing Common ProblemsWhen bias-cut projects go awry, don’t throw in the towel just yet. You’ve got this! Even seasoned sewers face hiccups, but with a few tricks up your sleeve, you’ll be back on track in no time. Let’s tackle some common issues:
Storage and Care TipsIn light of bias-cut fabric’s delicate nature, proper storage is super important. Fold your creations carefully, placing acid-free tissue between layers to prevent creasing. For hanging, use padded hangers to maintain shape. When it comes to washing, treat your bias-cut projects like prima donnas – hand wash in cold water with gentle detergent. Iron on low heat, and you’ll keep your fabric’s fluid drape intact for years to come. Professional Finishing TechniquesMastering professional finishing techniques elevates your bias-cut projects from homemade to haute couture. You’ll achieve polished results by focusing on:
Don’t let your hard work unravel at the finish line – these methods will have you sewing like a pro in no time! Frequently Asked Questions (FAQs)What is bias in fabric? Fabric bias refers to the diagonal direction at a 45-degree angle to the selvage. It’s the line of maximum stretch in woven materials, offering flexibility and drape. You’ll find it really important for creating flowing garments and bias tape. What is the true bias of a woven fabric? Like a diamond in the rough, true bias reveals fabric’s hidden potential. You’ll find it at a precise 45-degree angle to the selvage, maximizing stretch and flexibility. This diagonal cut transforms woven materials, enhancing drape and allowing garments to hug curves effortlessly. How do you know if a fabric has a bias? To identify fabric bias, stretch it diagonally. You’ll feel maximum flexibility at a 45-degree angle to the selvage. Use a right-angle ruler to mark 6 inches up and across, then connect the points for true bias. What is the bias cut in fabric? You’ll find bias cut in fabric when it’s sliced diagonally at a 45-degree angle to the grain. This technique creates a fluid drape, contouring your body’s curves and adding a touch of glamour to your garments. How to determine the bias of fabric? Determining fabric bias is a breeze. Fold your fabric diagonally, matching selvages. The fold line’s your true bias. For a quick test, stretch the fabric; it’ll have maximum give on the bias. Use a right-angle ruler for precision. What is the true bias of fabric? Did you know fabric bias can increase stretch by up to 50%? The true bias of fabric runs at a 45-degree angle to the warp and weft threads. It’s the diagonal cut that gives fabric maximum flexibility and drape. What does fabric cut on the bias mean? Cutting fabric on the bias means slicing diagonally at a 45-degree angle to the straight grain. This technique allows the fabric’s natural stretch to come out, allowing it to drape gracefully and mold to your body’s curves. What are the 4 things to consider when choosing fabric? Fabric choices can make or break your project. You’ll want to think about purpose, quality, care, and feel. Think durability for upholstery, breathability for clothing. Touch the fabric, check the label, and don’t shy away from asking questions. Your perfect match awaits! How does fabric bias affect pattern matching? When matching patterns, bias-cut fabric creates slanted designs. You’ll need extra material to align stripes or plaids, especially for chevron effects. Prioritize matching at center front, back, and waistline for a polished look (Source). It’s a challenging but rewarding technique. Can bias-cut garments be altered easily? Altering bias-cut garments can be tricky. You’ll find these pieces stretch unpredictably and require special handling. Let the garment hang for 24 hours before hemming. With patience and skill, you can make minor adjustments, but major alterations aren’t recommended. Whats the impact of bias on fabric consumption? Like a hungry beast, bias devours more fabric. You’ll need extra yardage when cutting on the bias, as it requires wider pattern pieces. This increases consumption but yields garments with superior drape and stretch. Are there alternatives to cutting fabric on bias? You’ve got options beyond bias cutting. Try pre-cut strips for speed, straight-grain binding for structure, or purchased double-fold tape for convenience. Each alternative has pros and cons, so choose based on your project’s needs and your personal preferences. How does bias affect different fabric weights? Did you know that fabric bias can increase stretch by up to 50%? Bias affects lightweight fabrics differently than heavyweights. In chiffon or silk, it enhances fluidity, perfect for flowing dresses. For heavier fabrics like denim, it improves movement and reduces bulk. ConclusionMastering fabric bias is no longer a needle in a haystack. You’ve now got everything you need to know about the bias of fabric at your fingertips. From understanding the 45-degree angle to troubleshooting bias-cut projects, you’re equipped to sew like a pro. Remember, whether you’re working with true bias or partial cuts, each technique offers unique benefits for drape, stretch, and visual appeal. By applying these insights, you’ll elevate your sewing projects, creating garments and items that truly stand out. Happy sewing! |
|---|

 Working with different fabrics on bias requires specific approaches to maximize their unique properties.
 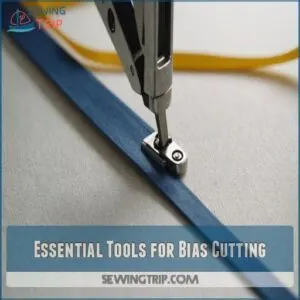 To master bias cutting, you’ll need a well-equipped arsenal of specialized tools.


