This site is supported by our readers. We may earn a commission, at no cost to you, if you purchase through links.
Use sharp fabric scissors or a rotary cutter for clean, precise edges. Pre-wash your fabric to avoid surprises like shrinkage later.
Keep your workspace tidy and use a cutting mat to protect surfaces. Always measure twice and cut once to prevent mistakes.
Line up your fabric edges carefully, ensuring everything’s square. For tricky patterns, pin or weight them down before cutting. Master these basics, and you’re building the foundation for accurate, stress-free fabric cutting!
Table Of Contents
- Key Takeaways
- Essential Tools for Fabric Cutting
- Mastering Fabric Cutting Techniques for Beginners
- Choosing The Right Fabric for Your Project
- Setting Up Your Workspace for Efficient Cutting
- Safety Tips for Cutting Fabric
- Understanding Fabric Cutting Methods
- Cutting Fabric With Precision and Accuracy
- Working With Different Fabric Types and Textures
- Common Mistakes to Avoid in Fabric Cutting
- Tips for Improving Your Fabric Cutting Skills
- Frequently Asked Questions (FAQs)
- Conclusion
Key Takeaways
- Use sharp tools like rotary cutters or fabric scissors for clean, precise cuts, and replace blades regularly.
- Always pre-wash, iron, and square your fabric before cutting to avoid shrinkage and ensure accuracy.
- Set up a clean, well-lit workspace with a cutting mat, acrylic ruler, and pattern weights for stability and precision.
- Cut fabric parallel to the selvage and follow the grainline to maintain proper alignment and avoid twisting.
Essential Tools for Fabric Cutting
You’ll need a few essential tools to make fabric cutting smooth and accurate.
A quality cutting mat, sharp rotary cutter, and sturdy acrylic ruler will set you up for success.
They are essential for achieving professional results in your fabric cutting projects.
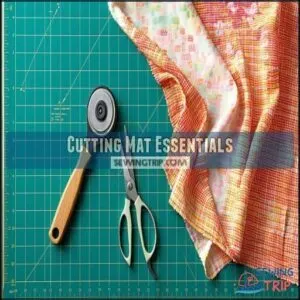
Cutting Mat Essentials
A good cutting mat is essential for fabric cutting.
It protects your workspace, guarantees precision, and keeps blades sharp.
Here’s what to evaluate:
- Mat Size: Choose one large enough for your projects—it’s a game-changer.
- Material Type: Opt for self-healing cutting mats; they last longer and handle rotary cutter safety perfectly. You can buy a self-healing cutting mat online.
- Mat Care: Clean regularly and store flat to maintain surface grip and durability for a consistent workspace.
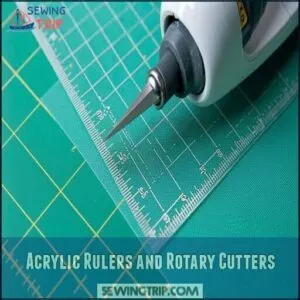
Acrylic Rulers and Rotary Cutters
Acrylic rulers and rotary cutters are the dream team in fabric cutting, ensuring clean, accurate cuts. For ideal results, consider using quilting rulers to enhance your cutting experience.
Acrylic rulers, especially quilting ones, offer clear measurements for precise alignment.
Pair them with rotary cutter basics like sharp blades for smooth, straight lines. Replace rotary cutter blades regularly for clean results.
Always use a self-healing cutting mat for compatibility and surface protection. Safe handling techniques, like cutting away from your fingers, reduce accidents. Precision starts with the right tools.
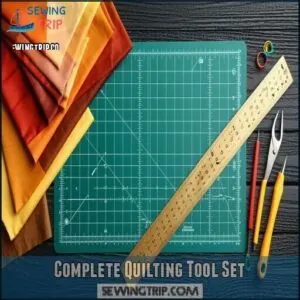
Complete Quilting Tool Set
A complete quilting tool set is your ultimate toolkit for fabric cutting and beginner quilting success.
It simplifies tasks like cutting quilting fabric, guaranteeing precision and ease. A quality quilting tool set is a worthwhile investment.
- Rotary cutter: Choose sharp blades for clean cuts.
- Cutting mat: Use the right size for your workspace.
- Rulers: Opt for versatile shapes.
- Scissors: Different types for detailed trims.
- Seam allowance gauge: Guarantees perfect alignment.
Mastering Fabric Cutting Techniques for Beginners
Got your tools? Let’s put them to work with these fabric cutting basics.
Start by smoothing your fabric on a cutting mat, aligning to the fabric grain. Use sharp tools like a rotary cutter for quick, accurate cuts.
For layouts, plan your pattern placement to minimize waste. Slow, steady strokes are key—don’t rush!
If tackling practice projects, measure twice, cut once, and aim for even pressure. Keep lighting bright and your workspace clear for smooth, easy fabric cutting every time, using slow, steady strokes.
Choosing The Right Fabric for Your Project
Picking the right fabric sets the foundation for a successful project, so match your fabric choice to what you’re making.
Start with simple cotton if you’re new, as it’s easy to cut and sew.
Selecting Quilt Patterns for Beginners
Starting quilting can feel like piecing together a puzzle, but it doesn’t have to be tricky. Simple quilt patterns are your best friend when you’re just beginning! Look for beginner-friendly designs that focus on basic shapes like squares or rectangles.
Here’s how to choose with confidence:
- Focus on small projects, like baby quilts or placemats, to build skills.
- Pick patterns labeled beginner-friendly, which often include clear fabric requirements.
- Use pre-cut fabrics, such as fat quarters or charm packs, for ease.
These patterns help simplify the process, keeping sewing stress-free while you improve your quilting skills. When selecting fabrics, consider the fabric projects guidelines to guarantee the best results.
Preparing Quilting Fabric for Cutting
Now that you’ve selected your pattern, let’s get your fabric ready for cutting.
Before your scissors touch the fabric, proper preparation is key. Align the selvages (not cut edges) to confirm correct grain direction. This prevents wonky seams later on.
Press your fabric with plenty of steam to banish every wrinkle. A flat fabric means accurate cuts.
For quilting fabrics, squaring the edges guarantees everything lines up perfectly. Position your fabric on the cutting mat with the grain running parallel to the mat’s grid.
Remember: well-prepared fabric makes cutting a breeze!
Pre-washing and Treating Quilting Cottons
Many quilters debate whether to pre-wash quilting cottons, but it’s often essential for preventing shrinkage and ensuring colorfastness.
Cotton fabric can shrink up to 5% after washing, potentially distorting your carefully measured pieces.
For delicate fabrics, consider pre-washing best practices to avoid damage.
Before cutting, test a small swatch for color bleeding. For easier handling, try Best Press or other starch alternatives—they’ll give your fabric crisp stability without the stiffness of traditional starch.
Setting Up Your Workspace for Efficient Cutting
You’ll save time and prevent mistakes by setting up a clean, well-lit workspace with all your cutting tools within arm’s reach.
A flat, uncluttered surface with a self-healing cutting mat will protect your table and help you make precise cuts every time.
Positioning Your Ruler and Fabric
Your fabric cutting success begins with proper ruler and fabric alignment.
Position your ruler parallel to the fabric edge—where they meet is where magic happens.
Position your acrylic rulers parallel to the fabric’s edge, ensuring the ruler’s gridlines match the fabric’s weave pattern. Apply gentle pressure with your non-dominant hand to keep everything secure—no slipping allowed!
Maintain a 45° cutting angle for clean cuts. Watch those notches and decimal markings for precision that’ll make your quilter’s rule the most valuable tool in your kit, with proper ruler and fabric alignment being key.
Using a Cutting Mat for Protection
A good cutting mat serves as the unsung hero of your fabric cutting setup, protecting both your workspace and tools from damage.
Think of it as armor for your table and blade guardians all in one.
- Choose self-healing mats that close up after cuts for maximum blade longevity
- Look for non-slip backing that grips fabric securely during cutting
- Select mats with clear grid lines to improve accuracy in measurements
- Go for a size that extends 2-3 inches beyond your typical fabric width
- Store flat (not leaning against walls) to prevent warping and extend mat life
Regular cutting mat care guarantees surface protection and keeps your workspace organization intact, making every project more efficient and precise.
Maintaining a Clean and Clear Workspace
While you focus on precise cuts, a pristine workspace becomes your silent partner in success.
Keep your cutting area organized with designated spots for tools and clear surfaces free of fabric scraps.
Ample lighting prevents eyestrain and helps you see grid lines on your self-healing cutting mat.
Don’t forget proper waste management—a small bin nearby catches threads and trimmings instantly.
Regularly clean your fabric cutting mat with gentle soap to maintain those visible grid lines.
A quick wipe-down after each project guarantees your cutting mat care routine preserves accuracy for years to come.
Safety Tips for Cutting Fabric
You’ll need to protect your fingers and maintain control of your tools when cutting fabric to guarantee both safety and precision.
Always cut away from your body and keep your non-cutting hand clear of the blade’s path to prevent accidents that could ruin both your project and your day, ensuring precision in the process.
Handling Rotary Cutters and Blades
With your workspace set up properly, let’s talk about mastering your rotary cutter—your best friend for clean, precise fabric cuts.
Proper handling of your rotary cutter isn’t just about getting perfect cuts; it’s about keeping all ten fingers intact! When using your cutter, apply firm but comfortable pressure while keeping the blade perpendicular to your fabric and ruler guidance. For ideal results, consider using ergonomic rotary cutter handles.
Keep your rotary cutter sharp and your fingers safe—precision starts with steady hands and the right tools!
Always close the blade guard immediately after each cut—no exceptions! Replace dull blades promptly; they cause jagged edges and require dangerous extra pressure.
Store cutters in stands or holders, never tossed in drawers where they can open unexpectedly. Clean blades regularly with rubbing alcohol to remove lint and adhesive buildup.
Remember: changing your rotary cutter blade is cheaper than a trip to the emergency room!
Preventing Accidents and Injuries
Five essential safety practices prevent most cutting accidents. Always keep your workspace clutter-free and well-lit.
Store sharp blades with guards attached when not in use. Position your hands safely away from cutting paths.
Never rush—precision beats speed every time, as it ensures proper handling and safe working conditions.
Understanding Fabric Cutting Methods
You’ll find that choosing the right cutting method can make your sewing projects much easier and more precise.
Whether you’re using simple scissors for small projects or trying a rotary cutter for straight lines, each technique has its own strengths for different fabrics and patterns.
Manual Cutting With Scissors and Rotary Cutters
Your fabric cutting arsenal has two essential warriors: scissors and rotary cutters, each with unique strengths.
When cutting fabric manually:
- Choose scissors for curved edges, following the fabric grain with steady pressure control
- Select rotary cutters for straight lines on a proper cutting surface
- Maintain sharpness through regular blade replacement for clean cuts
- Apply consistent pressure while cutting to prevent jagged edges
Remember, dull tools create frustration! Sharp scissors grip fabric precisely, while rotary cutter blades glide through layers with minimal effort, and it’s crucial to maintain sharpness for the best results, as clean cuts are essential for a professional finish.
Automated Cutting Technologies for Fabric
Beyond scissors and rotary cutters, the industry now offers automated fabric cutting technologies that can transform your workflow.
The following table outlines some of the key technologies available:
CAD software pairs with these systems for perfect pattern placement. Water jet and die cutting machines are also popular for specific materials. While pricey for hobbyists, these automated fabric cutting machines deliver unmatched speed and accuracy.
Cutting Fabric With Precision and Accuracy
You’ll achieve professional results when you master the art of precise fabric cutting, using sharp tools and steady hands for clean edges.
Making accurate cuts now will save you hours of frustration later, as even small mistakes can lead to misaligned seams and distorted finished projects.
Straight Fabric Cutting Techniques
Precise cuts make the difference between sloppy and professional projects.
Master straight fabric cutting with these simple techniques:
- Place your ruler firmly along the grain alignment, pressing down with your non-cutting hand
- Stand directly over your work for the clearest view of cutting lines
- Move your rotary cutter in one smooth motion, maintaining consistent pressure
- Secure your fabric with pattern weights to prevent shifting during cuts
Keep your cutting mat clean and positioned at a comfortable height.
Remember to change your rotary blade regularly—dull blades cause jagged edges and require more pressure, reducing accuracy.
Curved Fabric Cutting Methods
While straight cuts form the foundation of sewing projects, mastering curved fabric cutting techniques elevates your creations.
When approaching curves, position your sharp scissors or rotary cutter at a 45° angle to maintain fabric grain integrity.
For gentle curves, use continuous motions; for tight curves, make small, controlled cuts to prevent puckering.
Keep your fabric flat on the cutting mat and remember that your dominant hand guides the tool while your other hand stabilizes the material to ensure fabric grain integrity.
Notch Cutting and Pattern Tracing
Successfully mastering notch cutting and pattern tracing requires careful attention to detail.
Mark notch locations clearly using tailor’s chalk or washable fabric markers.
Secure your pattern with weights rather than pins to prevent shifting during tracing.
When transferring patterns, use proper tracing tools like tracing wheels or fine pencils.
Accurate notch marking guarantees pieces align perfectly during assembly, saving frustration later.
Remember, precise pattern transfer is the foundation of professional-looking finished projects, which requires accurate techniques.
Working With Different Fabric Types and Textures
You’ll need different tools and techniques when cutting various fabric types, from slippery silks to stretchy knits.
Each fabric behaves uniquely under your scissors or rotary cutter, so understanding these differences will help you achieve clean, accurate cuts every time.
Cutting Stretchy and Versatile Fabrics
Stretchy fabrics can be tricky – they wiggle, stretch and refuse to behave!
With sharp tools and these fabric cutting tips, you’ll master them in no time: For additional guidance, explore these stretchy fabric cutting tips.
- Use pattern weights instead of pins to prevent distortion when working with stretchy knits
- Cut slippery fabrics in a single layer with a rotary cutter for cleaner edges
- Test tension before cutting – hold fabric gently but don’t pull, respecting the grain direction
Draping and Fit Enhancement Techniques
Draping transforms ordinary fabric into garments that flatter your body’s unique curves.
When cutting fabric for draping, you’ll need to understand how material flows:
Bias cut drape
Dart manipulation
Ease control
Always cut deliberately along the proper grain for superior drape results.
Common Mistakes to Avoid in Fabric Cutting
You’ll save yourself a lot of frustration by avoiding common cutting mistakes that can ruin your fabric and projects.
Even the most experienced sewers sometimes lift scissors off the table or use dull blades, but you can get clean, accurate cuts by keeping your tools sharp and your fabric flat on the cutting surface, which helps prevent mistakes and ensures accurate results are achieved consistently.
Over-Cutting and Under-Cutting Fabric
Beginners often fall into the twin traps of over-cutting and under-cutting fabric.
Over-cutting happens when you slice beyond pattern lines, creating fabric waste and pieces that don’t match your pattern’s intended size. Under-cutting leaves insufficient seam allowance, making pieces too small to join properly.
Both errors can force recutting fabric or compromise your project’s quality.
To avoid these cutting errors, measure twice before making any cuts, maintain proper seam allowance, and confirm pattern accuracy by using sharp tools and steady, controlled movements to ensure proper seam allowance.
Inaccurate Notch Placement and Alignment
Beyond avoiding over-cutting, mastering notch placement will save your projects from disaster. Notches are your fabric’s GPS system—they guide perfect alignment at every step.
When marking notches, always:
- Use sharp scissors to make small 1/8-inch cuts perpendicular to the seam allowance
- Place notches exactly as shown on your pattern for proper seam matching
- Double-check placement before cutting to prevent fabric distortion
Your notches determine how pieces fit together, so accuracy here pays off tenfold later.
Tips for Improving Your Fabric Cutting Skills
You’ll improve your fabric cutting skills faster by practicing with patience and keeping your tools sharp.
Small changes like taking your time and maintaining your scissors or rotary cutters can make a big difference in your results.
Practicing Patience and Focus
Fixing fabric mistakes often starts with your mindset. Take deep breaths when you feel rushed—precision beats speed every time.
For mindful practice, focus solely on your current cut, not the entire project. Many beginners find counting breaths helps steady their hands.
Try tackling small projects first to build confidence. Remember, even experts make mistakes—they’ve just learned that patience creates cleaner lines and fewer do-overs.
Maintaining Sharp Cutting Tools and Blades
While patience builds skill, your tools need attention too. Sharp blades are your secret weapon for clean fabric cuts!
Keep your cutting tools in top shape with these simple steps:
- Replace rotary cutter blades every 3-4 projects or when you notice skipped threads
- Wipe blades clean after each use to remove fabric fibers
- Store tools properly—hang scissors and keep rotary cutters locked
A dull blade will frustrate you and damage your fabric. Schedule professional sharpening for scissors annually, or invest in a sharpening stone. You’ll save money by extending your tool lifespan and enjoy better results. Understanding cutting tools essentials is vital for maintaining sharp blades and achieving professional-looking cuts.
Frequently Asked Questions (FAQs)
How to cut fabrics for beginners?
Start with pre-washed, ironed fabric on a cutting mat.
Use sharp scissors or a rotary cutter with an acrylic ruler.
Smooth fabric flat, measure twice, and cut confidently in single layers for precision.
What are the three 3 things to do before cutting the fabric?
Think of cutting fabric like painting a masterpiece—you need prep.
First, pre-wash and iron the fabric to remove creases.
Second, square it properly.
Third, double-check print direction and patterns for precise alignment to ensure precise results.
What is the most precise way to cut fabric?
To cut fabric precisely, use a rotary cutter with a self-healing cutting mat and acrylic ruler.
Smooth your fabric flat, align edges carefully, and cut with steady pressure.
Measure twice, cut once for accuracy.
Do you cut fabric parallel to selvage?
Yes, cutting fabric parallel to the selvage guarantees the fabric stays on-grain, making your projects look polished.
Align your pattern pieces along the grainline markings for accurate cuts and avoid twisting or uneven seams, ensuring your work is of high quality with polished finishes.
How to cut fabric effectively?
Did you know crooked cuts can shrink success by 30%?
For straight, clean lines, use a rotary cutter with a self-healing mat.
Align fabric edges perfectly, secure with weights, and cut confidently!
What tools do you need to cut fabric straight?
You’ll need a sharp rotary cutter, a self-healing cutting mat, and an acrylic quilting ruler.
These tools work together to keep your cuts precise, straight, and professional-looking, saving you frustration and time.
How do you cut fabric straight?
Position your fabric flat on a cutting mat, smooth out wrinkles, and align selvedges.
Use a ruler to guide your cuts, and firmly press a rotary cutter along the edge for precise, straight lines.
How do you accurately cut woven fabrics?
Wield woven fabrics wisely by washing, drying, and ironing them flat first.
Use a rotary cutter, ruler, and self-healing mat for precision.
Align the grain, measure twice, and cut in smooth, steady strokes, this will help you wield woven fabrics wisely.
How do you cut a fabric with a rotary cutter?
Grab your rotary cutter, align your fabric on a cutting mat, and use a ruler for straight edges.
Apply firm pressure, cutting in one smooth motion.
Always cut away from yourself for safety.
How do you cut a knit fabric?
Cutting knit fabric is like slicing through butter with a hot knife—smooth and intentional.
Use sharp scissors or a rotary cutter, cut single layers, and stabilize the fabric to prevent stretching or curling.
Conclusion
Ready to transform fabric into creations you’ll love?
With these fabric cutting tips for beginners, you’ve got the tools, techniques, and safety know-how to get started confidently.
Keep your blades sharp, your workspace tidy, and always measure twice—precision is key.
Mistakes happen, so take your time and learn as you go.
Mastering fabric cutting lays the foundation for any project, and with practice, you’ll only get better.
Now, grab your tools and start cutting with confidence!
- https://blog.megannielsen.com/2015/08/tips-and-tricks-for-cutting-fabric/
- https://www.spencerogg.com/a-beginners-guide-to-accurately-cutting-fabrics/
- https://inthefolds.com/q-a-series/2024/how-to-cut-fabric-straight
- https://www.tillyandthebuttons.com/2022/07/cut-fabric-accurately.html
- https://www.blueprintsforsewing.com/blog/lwjhhzf59ye4469q3ye1h37rwa6b3l

