This site is supported by our readers. We may earn a commission, at no cost to you, if you purchase through links.
 Get ready to elevate your sewing skills with these pro tips for accurate cutting and layout.
Fabric grain and pattern placement are essential for a perfect fit and drape in your garments.
Before cutting, confirm your pattern pieces are on-grain and positioned correctly on the fabric. Learn to identify different types of grain lines and align them with the fabric grain.
Discover the best practices for laying out pattern pieces and cutting methods to ensure your creation hangs beautifully.
With these techniques, you’ll achieve professional-looking results and take your sewing projects to the next level.
Table Of Contents
- Key Takeaways
- Understanding Fabric Grainlines
- Importance of Pattern Placement
- Types of Fabric Grainlines
- Positioning the Pattern Grainline
- Aligning Grainline With Fabric Grain
- Pattern Layout Techniques
- Identifying Pieces Cut on the Fold
- Proper Fabric Cutting Methods
- Maintaining Grainline Integrity
- Transferring Pattern Markings
- Frequently Asked Questions (FAQs)
- Conclusion
Key Takeaways
- Fabric grain lines are the backbone of your fabric, so treat them like royalty and align them right!
- Pattern placement is like setting the stage for a play; get it wrong, and the actors (threads) won’t perform as expected.
- When identifying pieces cut on the fold, precision is key; it’s like a puzzle where every piece has its perfect spot.
- Maintaining grain line integrity requires accuracy; think of yourself as a seamstress surgeon—take your time and be precise.
Understanding Fabric Grainlines
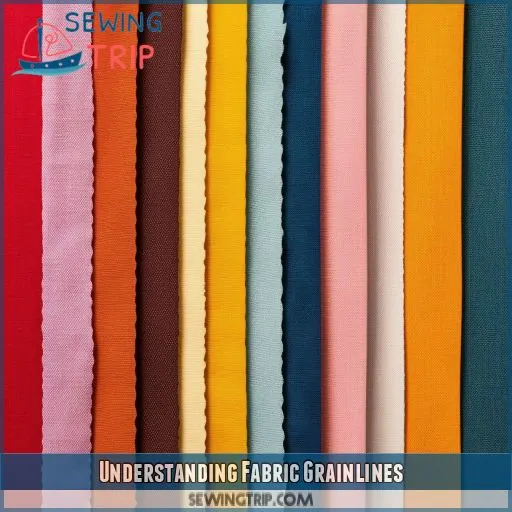
Regarding sewing, comprehending fabric grainlines is comparable to understanding traffic regulations. It forms the basis for accuracy and command in your craft. Envision the grainline as the fabric’s backbone, dictating the direction of the threads and the fabric’s behavior.
The fabric grainline affects the drape, elasticity, and overall appearance of your finished garment. Cutting along the grain guarantees that your fabric won’t stretch or distort, preserving the integrity of your design. It’s akin to setting the stage for a play, ensuring that all the actors (or in this case, the threads) are in their designated positions.
Grain alignment is vital when pinning patterns onto your fabric. Proper grain alignment prevents fabric distortion, guaranteeing that your seams lie flat and your curved edge stitching is precise. It’s similar to setting the rhythm for a song, ensuring that the stitches flow smoothly and your project takes shape seamlessly.
Fabric alignment is a delicate dance, and understanding the fabric grain is your first step toward mastering it. It’s like learning the fundamentals of any craft—the key to realizing your creative potential and guaranteeing the success of your projects.
Importance of Pattern Placement
Now that you understand fabric grainlines, let’s examine the critical nature of pattern positioning. This step is essential for guaranteeing the accuracy of your fabric layout and the intended fit and drape of your finished garment.
Pattern positioning involves precisely placing the pattern pieces on the fabric, taking into account fabric alignment, grainline orientation, and fabric compatibility. Correct pattern placement prevents distorted seams, distorted fabric, and misaligned designs. It guarantees that your garment hangs evenly and drapes properly.
When positioning your pattern, align the grainline arrow on each pattern piece with the fabric’s straight grain or cross-grain, depending on the fabric type and pattern instructions. Precise placement along the grainlines ensures that the fabric’s inherent stretch and drape are utilized effectively.
Additionally, pay close attention to pattern markings such as notches and grainlines. These markings guide you in positioning the pattern pieces correctly on the fabric layout. They ensure that the design details of your garment align properly, such as matching stripes or aligning plaid patterns.
Investing time in pattern placement lays the foundation for a successful sewing project. It may seem laborious, but it empowers you to master your fabric and create garments that drape beautifully.
Types of Fabric Grainlines
The fabric grainline is essential for ensuring your pattern pieces are cut accurately and your final garment hangs properly.
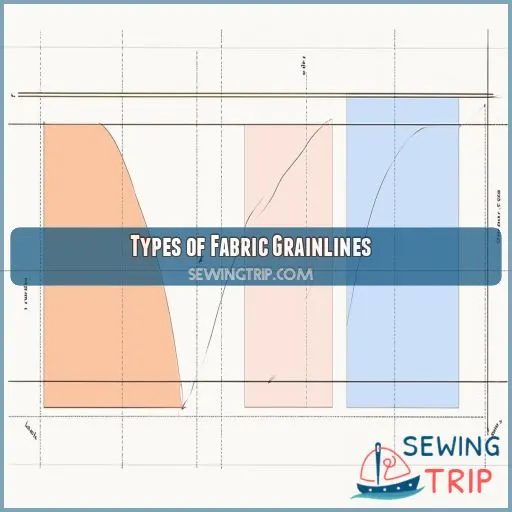
There are three main types of fabric grainlines: straight grain, cross grain, and bias grain.
The straight grain, also known as the warp, runs parallel to the selvage edge and has minimal stretch. It is vital for the stability of your fabric and often serves as a reference point for cutting pattern pieces.
The cross grain, or weft, runs perpendicular to the straight grain and offers a bit more give. This grain ensures your fabric hangs correctly and is commonly used for hemlines.
The bias grain is positioned at a 45-degree angle to the straight and cross grains, providing the most stretch and flexibility. It is typically employed for binding, piping, and curved pattern pieces to achieve a smooth finish.
Understanding these fabric grainlines will enable you to cut your pattern pieces with precision, resulting in a professional-looking garment.
Positioning the Pattern Grainline
When positioning the pattern grainline, accuracy is key. You need to make sure that the grainline direction is parallel to the selvage edge for woven fabrics and the stretch line is parallel to the cross grain for knit fabrics. This might sound obvious, but getting this step correct is essential for the final garment’s drape and overall appearance.
Imagine spending hours cutting and sewing your project, only to find that the fabric grain is askew, causing nap distortion and a poor drape. This would be not only frustrating, but it would also waste precious fabric. So, take your time to get it right!
For optimal cutting accuracy and fabric conservation, carefully lay out your pattern pieces, ensuring the grainline is aligned with the fabric grain. This simple step will ensure your project starts on the right track and sets the foundation for a professional-looking final product.
Aligning Grainline With Fabric Grain
Getting the grainline direction right is key to fabric manipulation. Here are some tips for aligning the grainline with the fabric grain:
- Establish the cross-grain edge by tearing or trimming the fabric. This gives you a clear reference point.
- Match the pattern piece grainline to the fabric grain. Imagine the grain as a straight arrow, and make sure your pattern piece is aligned with it.
- Avoid askew grain cuts. These can mess up the drape and distort the nap. Keep everything straight and parallel.
- Use the same grain direction for interfacing and lining. Consistency is key to maintaining the integrity of your fabric layout and ensuring cutting accuracy.
Pattern Layout Techniques
Now that you’ve mastered aligning the grainline with the fabric grain, it’s time to explore the intricacies of pattern layout techniques. These techniques are essential in ensuring accurate cutting and efficient fabric usage. Let’s explore the various methods you can employ to achieve precision in your pattern layout:
| Technique | Description |
|---|---|
| Double-layer cutting | Fold fabric lengthwise, creating two layers for cutting. This technique conserves fabric and ensures symmetry in your project. |
| Single-layer cutting | Ideal for asymmetrical prints or when precise pattern matching is required. Cut each piece individually, focusing on fabric grain and pattern placement. |
| Interfacing and lining grain | Maintain consistency by using the same grain direction for interfacing and lining as the garment fabric. This ensures stability and drape. |
| Fabric consumption | Before cutting, lay out all pattern pieces to optimize fabric usage and minimize waste. This step is vital for efficient sewing. |
These pattern layout techniques empower you to tackle diverse projects, from those requiring precise pattern matching to those focused on fabric conservation. Choose thoughtfully, and sewing success is within your grasp!
Identifying Pieces Cut on the Fold
When identifying pieces cut on the fold, precision is paramount. You need to pinpoint the exact fold placement, ensuring impeccable pattern alignment and fabric matching. This careful process involves scrutinizing the grainline matching, as any deviation can compromise the accurate layout. It’s like a puzzle where each piece has its designated spot, and shears must be wielded with surgical precision.
Imagine unfolding a map and finding that perfect spot where everything aligns. That’s what you’re aiming for with fold placement. It’s a delicate dance, ensuring each piece falls gracefully into place, with the foldline as your trusted partner. No room for errors here—it’s all about precise grainline matching.
You’re the maestro of this fabric symphony, orchestrating the perfect harmony of pattern and cloth. Every fold, every cut, every placement is a note in your composition. And when it all comes together, it’s not just a garment—it’s a masterpiece.
Proper Fabric Cutting Methods
Now that you’ve identified the pieces that need to be cut on the fold, it’s time to explore the proper fabric cutting methods. Cutting fabric may seem simple, but there are a few techniques to guarantee accuracy and precision.
First, let’s address fabric folding. When you’re ready to cut, fold your fabric right sides together, aligning with the grainlines you’ve carefully established. This ensures that your pattern pieces will align correctly, and your garment will hang properly.
Next up is marking notches and seam allowances. Notches are those little triangles on your pattern pieces that help you match up seams and ensure everything aligns perfectly. Transfer these notches to your fabric with a fabric marker or chalk. seam allowances are equally important; they provide the extra fabric needed to sew seams without affecting the final garment size.
Choosing the right cutting tools is essential. Rotary cutters or fabric scissors are the go-to options. If you’re using a rotary cutter, practice the technique on scrap fabric first to get a feel for it. Fabric shears or scissors should be sharp and comfortable in your hand.
When cutting, always consider the fabric grain and pattern placement. Cut along the pattern’s cutting line, being extra careful with notches and markings. Cut smoothly and confidently, but take your time—accuracy is more important than speed.
Lastly, remember to stay focused on seam matching. When you’re cutting, think about where the seams will come together. This will help you cut more accurately and make sewing a breeze.
Maintaining Grainline Integrity
Maintaining grainline integrity is essential for achieving a professional finish in your garment construction. Here are three key tips to guarantee success:
- Mind the Grain Direction: Always be mindful of the grain direction when cutting fabric. The grain refers to the direction of the threads in the fabric, and cutting on the grain is necessary to prevent stretching or distortion.
- Double-Layer Layout: When working with double-layer layouts, fold your fabric lengthwise, ensuring that the right sides are together. This technique provides stability and accuracy during cutting, especially when matching plaids or stripes.
- Paper Technique: Consider using the paper technique by placing brown paper under your fabric. This not only provides a stable cutting surface but also safeguards the right side of your fabric from soil. It also makes pattern marking easier, ensuring accurate grainline placement.
Transferring Pattern Markings
Now that you’ve mastered maintaining grainline integrity, it’s time to discuss transferring pattern markings—a critical step toward guaranteeing accuracy in seam alignment and stitch placement.
Transfer Pattern Markings:
Before cutting your fabric, transfer all pattern markings, including notches, darts, pleats, and buttonholes. This ensures that you have a clear guide for sewing.
Transfer Techniques:
Use tracing wheels, dressmaker’s carbon paper, or washable fabric markers to transfer markings. These tools provide clear and accurate indications for sewing.
Working with Fabric Folds and Selvages:
When working with fabric folds or selvages, ensure that your pattern markings are transferred to both layers of fabric accurately and clearly. This consistency is key to achieving professional results.
Test Your Transfer Method:
Always test your chosen transfer method on a scrap of fabric first. This precaution avoids potential staining or marks that may not wash out, ensuring your fabric remains pristine.
Taking the time to carefully transfer pattern markings sets the foundation for a smooth sewing process and professional-looking results.
Frequently Asked Questions (FAQs)
Where to put grainline on pattern?
Place the pattern grainline parallel to the fabric’s selvedge edge. This is usually marked with arrows on the pattern. The arrows indicate the direction the pattern should be laid on the fabric.
Where do you position the pattern pieces on the fabric?
The position of power. That’s where you want your pattern pieces. You’re the commander, so lay ’em out on the fabric with authority, following the grain or stretch lines on your pattern pieces. Keep those pieces in line, and you’ll be golden.
Which grain of fabric should the pattern grainline be placed on and why?
The pattern grainline should be placed on the straight grain of the fabric. This is because the straight grain runs down the length of the fabric, ensuring consistent stretch and minimizing distortion. The fabric will drape well and fit the body correctly.
How to align pattern pieces on fabric?
When aligning pattern pieces on fabric, start by identifying the grain lines on your pattern.
Next, position your pieces as indicated, then measure from the grainline to the selvedge or fold of the fabric. Make adjustments as needed.
To secure your pattern, use pins or weights.
Feel free to experiment with different layouts if you want to add a creative touch. Try cutting collars, cuffs, or pockets on a different grain.
What is the difference between a single and double fold hem?
A single fold hem is a simple fold-and-stitch method, perfect for thicker fabrics like wool, where a double fold would be too bulky. A double fold hem, on the other hand, is a superhero that saves the day by neatly encasing the raw edge of the fabric, preventing fraying, and giving your project a professional finish.
What is the best way to match stripes and plaids?
To match stripes and plaids, use the lengthen/shorten lines on the pattern.
Before cutting:
Smooth out the paper and place it on the fabric.
Match the sides of the paper with the corresponding pattern pieces to verify alignment.
Draw match lines on your pattern pieces.
Align the match stripes with a prominent line on the fabric.
How do you prepare fabric with a nap?
When preparing fabric with a nap, remember: it’s not Tetris. Place the top of each piece facing the same direction, like pointing all the arrows in a single direction. Use sharp scissors or a rotary cutter for short-napped fabric, and an X-acto knife for long-haired nap.
How do you cut fabric with a rotary cutter?
Place your fabric on a large cutting mat, ensuring it’s lined up carefully with the grain running the same way. Use a ruler to guide your cut, then grip the rotary cutter firmly and push it away from yourself.
What is the difference between notches and seamlines?
Notches are cut within the seam allowance to provide a guide to the seam allowance along each edge. Seamlines are the lines along which you sew.
Conclusion
You’re now equipped with the knowledge of fabric grain and pattern placement, ready to elevate your sewing skills. With this understanding, your creations won’t only fit well but also hang gracefully, showcasing your attention to detail.
Imagine crafting a fitted blazer. By recognizing fabric grainlines and aligning them with the fabric grain, you achieve a sleek, polished look. Your pattern placement skills are key, impacting the final fit and drape.
You’ve learned to lay out patterns efficiently, identify pieces cut on the fold, and maintain grainline integrity. With these techniques, your sewing projects will shine, reflecting your craftsmanship and attention to detail.

