This site is supported by our readers. We may earn a commission, at no cost to you, if you purchase through links.
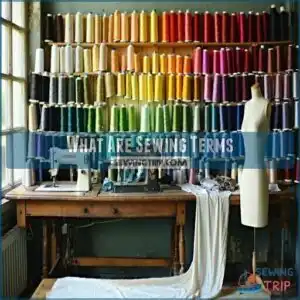 Sewing terms are special words and phrases used in the craft of sewing.
You’ll encounter terms like "baste" (temporary stitching), "seam allowance" (fabric beyond the stitching line), and "bias" (diagonal direction of fabric).
These words aren’t just fancy talk—they’re essential communication tools when following patterns or discussing projects.
Understanding terms like "dart" (folded pinch for shaping) and "selvage" (finished fabric edge) will help you translate instructions and improve your skills.
Once you grasp these key sewing terms, you’ll gain access to techniques that transform flat fabric into professional-looking creations that fit perfectly, using concepts like "baste" and understanding the importance of "bias".
Table Of Contents
Key Takeaways
- Learn sewing terms to understand patterns, follow instructions right, and achieve professional results.
- Know your stitches—like basting, running, or zigzag—to handle different sewing needs confidently.
- Master fabric grain, seam finishes, and fabric prep to create polished, durable projects.
- Use the right tools like presser feet, seam rippers, and needles for fabric-specific tasks.
Sewing Terms Defined
You’ll need to understand these essential sewing terms to read patterns and follow tutorials correctly.
These definitions will help you navigate the sometimes confusing world of stitches, seams, and fabric terminology without getting stuck.
Basic Stitches
Several basic stitches form the foundation of your sewing journey. Learning these fundamental techniques will help you tackle any project with confidence.
- Straight stitch: The workhorse of sewing with adjustable stitch length
- Backstitch: Secures thread ends to prevent unraveling
- Basting stitch: Temporary long stitches for holding pieces together
- Zigzag stitch: Prevents fraying and accommodates stretch
- Running stitch: The hand-sewing equivalent of a straight stitch, which is a key part of your sewing skills and helps with confidence.
Seam Finishes
Now that you’ve mastered basic stitches, let’s look at seam finishes that prevent your fabric edges from fraying.
Seam finishes are techniques used to secure raw edges, reduce bulk, and add durability to your projects. They’re essential for preventing fraying and creating professional-looking garments.
For delicate fabrics, consider Hong Kong seams to reduce bulk.
| Finish Type | Best For | Difficulty |
|---|---|---|
| French Seam | Lightweight fabrics | Moderate |
| Flat-Felled | Durable items (jeans) | Advanced |
| Hong Kong | Decorative interiors | Moderate |
Fabric Grain
Understanding fabric grain is like mastering a secret code of sewing. It’s the direction of woven threads that determines how your fabric behaves.
Master fabric grain to unlock the secret code of sewing—achieve flawless drape and professional results every time.
- Warp threads run parallel to selvedge edges, creating lengthwise grain with minimal stretch
- Crossgrain (weft) runs perpendicular, with slightly more give
- Bias (45° angle) offers maximum stretch, perfect for curved applications
Proper grainline alignment guarantees your finished projects hang correctly and maintain their shape, which is crucial for achieving a professional finish with minimal stretch.
What Are Sewing Terms
Sewing terms function as the alphabet of your crafting journey. They’re the specialized vocabulary that seamstresses, tailors, and hobbyists use to communicate techniques, tools, and processes.
When you hear sewists talking about "stitch in the ditch" or "bias binding," they’re using sewing jargon that might sound like a foreign language at first.
Your sewing dictionary will grow as you practice. The sewing glossary includes common abbreviations like RST (right sides together) and WOF (width of fabric) that save time in pattern instructions.
Many terminology origins date back centuries, with regional terms varying between countries—British sewists say "tacking" while Americans say "basting." Understanding proper fabric selection is key to avoiding tension issues.
Some obsolete terms have faded from modern sewing vocabulary, but understanding this specialized language connects you to a rich tradition of makers throughout history. Think of sewing definitions as your crafting roadmap!
Sewing Techniques Explained
You’ll need these essential sewing techniques to transform flat fabric into professional-looking projects.
From basic hand stitches to machine settings, these methods will help you join, finish, and embellish your creations with confidence.
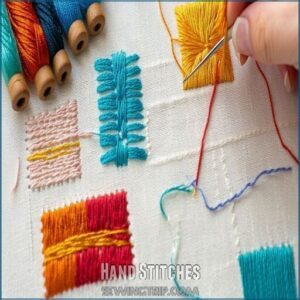
Hand Stitches
Now that you’ve learned what sewing terms are, let’s talk about hand stitches—your sewing toolkit’s foundation.
Running stitch creates a simple dashed line, perfect for basting or decorative work.
Ladder stitch joins fabric seamlessly, while basting stitches temporarily hold pieces together.
The appliqué stitch secures decorative elements to your fabric.
You’ll find these in any sewing glossary because they’re essential vocabulary for your hand sewing journey.
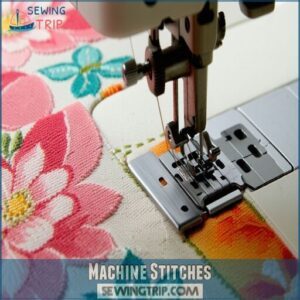
Machine Stitches
While hand stitching has its place, modern sewing machines offer a variety of machine stitches that can transform your projects with precision and efficiency.
Your sewing machine’s capabilities depend on its model and features. Many sewers find inspiration for their projects by exploring different machine stitch options.
- Straight stitch: The workhorse stitch with adjustable stitch length from 0-6mm
- Zigzag stitch: Perfect for stretch fabrics and preventing edge fraying
- Decorative stitches: Add personality with floral, scallop, and geometric patterns to create a unique project.
Seam Construction
The heart of any sewing project lies in seam construction.
You’ll encounter various seam types from basic straight seams to French seams that encase raw edges.
For curved seams, clipping is essential to prevent puckering.
Reinforced seams add durability to high-stress areas, while seam grading reduces bulk.
Don’t forget your seam allowance—typically 5/8 inch for garments but varies for industrial seams.
Fabric Preparation
Now that you’ve built your seams properly, it’s time to prepare your fabric before cutting.
Pre-washing fabrics prevents future shrinkage surprises. Ironing techniques guarantee smooth cutting while proper grain alignment maintains your garment’s shape.
Use fabric marking tools for transferring pattern details, then create an efficient cutting layout. Understanding fabric properties helps you determine the best preparation methods for cotton, wool, or synthetic materials, which is crucial for a successful project with proper grain alignment.
Essential Sewing Vocabulary
You’ll need to learn these key sewing terms to understand patterns and instructions correctly.
Mastering this vocabulary will help you communicate with other sewists and tackle more complex projects with confidence.
You will be rewarded if you follow the directions correctly.
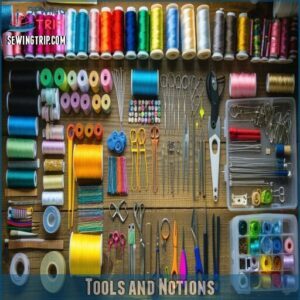
Tools and Notions
Tools and notions are the essential sewing supplies you’ll need for any project. Understanding your equipment helps prevent costly mistakes and frustration.
Here are three must-have sewing accessories:
- Presser foot types vary by project—zigzag for general work, zipper foot for closures
- Needle selection depends on fabric weight—ballpoint for knits, sharp for wovens
- Seam ripper uses extend beyond fixing mistakes to removing basting stitches
Many projects require a specific sewing presser foot.
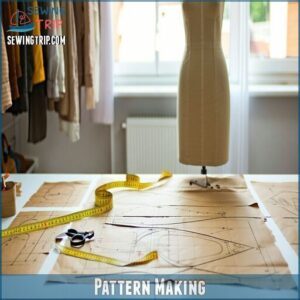
Pattern Making
The language of pattern making opens doors to creating perfectly fitted garments.
Pattern pieces serve as your blueprint, with special sewing terms like grain line (showing fabric alignment) and cut on fold (indicating placement on fabric’s fold).
Drafting basics involve translating measurements to paper, while pattern alterations customize fit.
Digital patterning has revolutionized design elements, making grading patterns for different sizes more accessible than ever.
Garment Construction
Garment construction forms the backbone of sewing projects.
You’ll need to understand bodice and sleeve attachment, dart placement for shaping, and proper seam allowance for professional results.
Fitting techniques guarantee your creations hug in all the right places, while pattern adjustments accommodate unique body shapes.
Draping methods create flowing designs, interfacing adds structure, and closure options (like zippers or buttons) complete your handmade masterpieces.
Textile Types
Now that you understand garment assembly, let’s look at what those garments are made from.
Textile types fall into two main categories: natural fibers (cotton, wool, silk) and man-made fibers (polyester, nylon, acrylic).
Fabric properties depend on the weave structure (woven fabric) or knit type (stretch fabric).
Understanding textile blends helps you choose the right material for your project’s needs.
Consider how fabric weight influences drape when selecting your materials.
Mastering Sewing Terminology
You’ll find your sewing projects easier to complete when you understand the specific terms used in patterns and tutorials.
Learning these key sewing words will help you follow instructions correctly and achieve professional-looking results without confusion.
You can achieve professional-looking results by following the instructions correctly, and understanding the terms will make it easier.
Advanced Stitches
Once you’ve mastered basic sewing techniques, advanced stitches will elevate your projects from homemade to professional.
Topstitching adds decorative stitching that creates visual interest while securing seams. Edge stitching, done very close to fabric edges, creates flawless finishes.
Stay stitching prevents fabric stretching on curved edges. Understitching keeps facings in place, invisible from the outside.
These stitch types create professional results that make your handmade items truly special, with techniques like topstitching being key to their success.
Specialty Seams
Beyond basic stitches, specialty seams elevate your sewing projects from homemade to professional-looking.
French seams hide raw edges inside, perfect for sheer fabrics.
Bound seams use bias tape to encase raw edges elegantly.
Piped and corded seams add decorative elements along seam lines.
Welt seams create raised textures, while lapped seams overlap fabric pieces for strength and visual interest.
Each requires different seam allowance considerations.
For polished results, consider using bias bound seams on unlined jackets to achieve a professional-looking finish with elegant results.
Fabric Manipulation
Fabric manipulation takes your sewing projects from flat to fabulous.
These dimensional techniques transform ordinary fabrics through deliberate shaping and texture creation.
When you gather fabric along a bias cut or create fullness with tucks and smocking, you’re adding visual interest and structure.
Draping directly on mannequins allows for custom silhouettes, while ruches and surface design techniques create artistic fabric collages that elevate your work.
Easing in fabric guarantees smooth, professional results.
Sewing Machine Accessories
While fabric manipulation gives your projects unique texture, your sewing machine’s accessories are the real workhorses of your sewing room.
Presser feet keep fabric in check during sewing, with different types for specific tasks. Bobbins hold thread in various sizes depending on your machine model.
Using the right needle types prevents fabric damage. Regular machine maintenance with proper tools keeps everything running smoothly—just like maintaining good relationships with your fellow sewists.
Many sewers find that specialty presser feet enhance their projects, which is a key part of sewing room efficiency and proper tools.
Frequently Asked Questions (FAQs)
What do you call sewing pattern?
A sewing pattern is your blueprint for creating garments or projects.
It’s the paper template with cutting lines, instructions, and markings that you’ll follow to transform flat fabric into a finished item.
What are sewing items called?
Needles and thread, fabric and shears, bobbins and pins – you’ll need these essential notions for your sewing projects.
Your toolkit might also include rulers, thimbles, seam rippers, and presser feet.
What is the cradle in sewing terms?
The cradle in sewing refers to the way you hold an embroidery hoop in your non-dominant hand, keeping fabric taut.
This steady positioning helps with needle control, ensuring smooth, precise stitching.
What is the sewing term for gathering?
Gathering is when you sew loose stitches, then pull the thread to bunch fabric together.
It’s great for ruffles, skirts, or puff sleeves.
Use it to add texture or fit fabric to smaller sections.
What tools do I need to start sewing?
Starting from scratch?
All you need is a sewing machine, needles, thread, fabric, scissors, a seam ripper, pins, a measuring tape, and an iron.
These basics cover nearly every beginner project.
How do I know which type of fabric is best for my project?
Choose fabric based on your project’s purpose—lightweight cotton works for summer clothes, while sturdy denim suits durable items.
Match fabric drape and stretch to your pattern.
Always check fabric care instructions, too!
How do I use a seam ripper?
They say practice makes perfect!
Hold your seam ripper like a pencil, gently insert the pointed end under stitches, and push forward to cut threads.
Use the ball end to avoid tearing fabric.
How do I know when to use a presser foot?
You’ll use a presser foot anytime you sew with a machine.
It holds your fabric steady, guiding it smoothly under the needle.
Different presser feet work for tasks like zippers, quilting, or decorative stitching.
What are the differences between woven and knit fabrics?
Woven fabrics are like tight lattices—firm, with little stretch, perfect for structured projects.
Knit fabrics, on the other hand, feel stretchy like rubber bands, offering flexibility and comfort, making them great for casual, fitted garments.
What is stitch length and tension?
Stitch length controls how long each stitch is, affecting appearance and strength.
Tension balances thread tightness, ensuring smooth, even stitches.
Too tight or loose tension can cause puckering, uneven stitching, or thread breakage, and proper tension is crucial for preventing breakage.
Conclusion
Picture yourself at your sewing table, fabric stretched before you, and every term making sense.
That’s the power of understanding sewing terms—they guide you through patterns, stitches, and projects with ease.
Whether you’re basting for practice or adjusting seam allowances for a perfect fit, these words reveal skills that transform your creations.
Now you know what sewing terms are and why they matter, you’re ready to elevate your craft and bring your fabric ideas to life.

