This site is supported by our readers. We may earn a commission, at no cost to you, if you purchase through links.
Next, it’s all about precision cutting. Straighten those edges, grab the right ruler for the job, and make sure your rotary cutting blade is nice and sharp. Now, choosing the right fabric. Go for something durable with a higher thread count. cotton blends are a popular pick, especially 100% cotton. Keep an eye out for something smooth and soft, and don’t be afraid to play with fabric scales and colours to add some va-va-voom to your quilt.
Table Of Contents
Key Takeaways
- Prep your fabric like a pro: Pre-wash to banish shrinkage and color bleeding, smooth out creases with a good ol’ iron, and get those edges straight before cutting.
- Choose quality fabric: Go for higher thread counts and smooth, soft blends like 100% cotton. It’s an investment that’ll pay off in the long run.
- Visual interest is key: Play with fabric scales and colors to add some va-va-voom to your quilt. Think of it like the icing on the cake.
- Starch is your friend: It adds stability, makes cutting and stitching easier, and prevents fraying. Go on, give it a spritz!
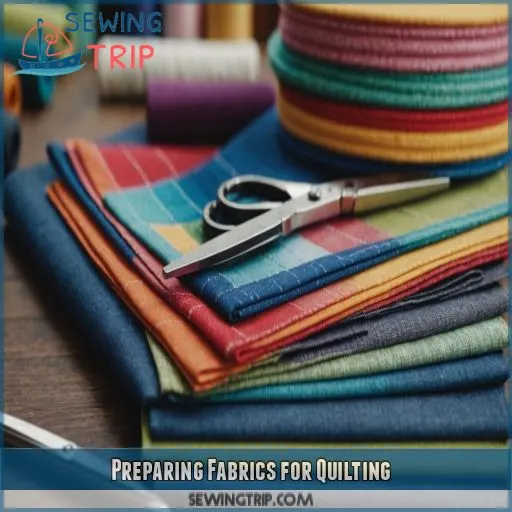
Preparing Fabrics for Quilting
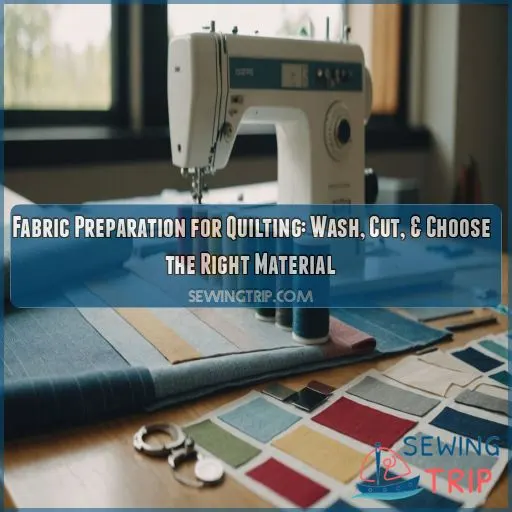
Preparing your fabrics is an essential step in quilting. You’ll learn how to get your fabric ready for quilting, from prewashing and starching to cutting and choosing the right tools for precision.
Do I Need to Wash My Fabric Before Quilting?
Washing your fabric before quilting is a personal preference, but it’s a good idea to think about the benefits. Here’s why:
- Fabric shrinkage: Prewashing prevents unwanted shrinkage, ensuring your quilt pieces stay true to size.
- Color bleeding: Some fabrics, especially reds and purples, may bleed dye and stain other fabrics. Prewashing helps remove excess dye.
- Fabric feel: Manufacturers treat fabrics with chemicals for an appealing feel in stores, but these can affect the fabric’s stability and your ability to piece it together.
- Dye removal: Excess dye in fabrics can lead to discoloration over time, impacting your quilt’s longevity.
- Fabric stability: Prewashing helps create a more stable fabric, making it easier to work with and ensuring your quilt maintains its shape.
How to Prewash Fabric for Quilting by Hand?
- Fill a tub or large sink with cold water.
- Add a splash of mild detergent and a cup of vinegar to prevent dye bleeding and remove manufacturing chemicals.
- Gently swish your fabric in the water. Avoid twisting or wringing, which can lead to tangles and stretching.
- Rinse the fabric under running water until it runs clear, making sure all the soap and vinegar are gone.
- Hang the fabric to dry. Avoid direct sunlight, which can cause fading and discoloration.
What Are the Steps in Preparing Fabric Before Construction?
There are a few key steps to fabric prep that’ll make sure your quilting journey starts off right. First up, decide if you wanna pre-wash your fabric. Some quilters like to give their fabric a quick rinse to prevent shrinkage and colour bleeding down the line. If you’re going this route, hang the fabric to dry—no need to hit it with heat just yet.
Next, it’s time to wave goodbye to lint. Use a lint roller or pop your fabric in the dryer on an air-only cycle to keep things smooth. If you’re working with fat quarters or factory bundles, give ’em a quick once-over with an iron to get those creases out.
Now, it’s all about precision. Trim and straighten those fabric edges before you get cutting. A sharp rotary cutting blade will give you crisp, clean lines.
How Do You Care for Quilting Fabric?
Caring for your quilting fabric is like maintaining a healthy relationship: it takes a bit of effort, but it’s worth it for the long-term benefits. Here are some tips to keep your fabric happy and healthy:
- Fabric Storage: Keep your fabric stash organised and wrinkle-free. Store fabric flat or on bolts to prevent creases and make it easier to cut and piece together.
- Ironing Techniques: A quick press with a steam iron can work wonders. It smooths out wrinkles, ensuring your fabric is ready for cutting and sewing.
- Fabric Testing: Test new techniques on scrap fabric first. This way, you can perfect your skills without risking your precious project fabric.
- Lint Removal: Use a lint roller to keep your fabric lint-free and avoid any unwanted fluff on your final quilt.
- Color Bleeding: Always be cautious of colour bleeding, especially with reds and purples. A quick soak in cold water and vinegar can help prevent this.
The Best Way to Prepare Fat Quarters for Quilting
Fat quarters are a quilter’s delight, offering versatility and convenience. They’re like the chocolate chips in your cookie dough—ready to be mixed and matched for a tasty treat.
But before you jump into your stash, here’s the lowdown on prepping fat quarters like a pro:
- Starch and Press: Give your fat quarters a crisp foundation with a spritz of starch. Press with a hot iron to smooth out any wrinkles and create a stable base for cutting.
- Fold and Store: Fold fat quarters into long, straight strips. This makes them easy to manage and keeps them ready for action when inspiration strikes.
- Cutting Tips: When it’s time to cut, break out your rotary cutter and ruler. Precision is key, so take your time and cut along the grain for straight, true strips.
Can I Use Starch Instead of Water?
You might be tempted to reach for the starch when preparing your fabrics, but it’s not necessary. Starch can help with fabric stability and creating crisp creases, but it’s not a must-have. A light spray of water will do the trick just fine.
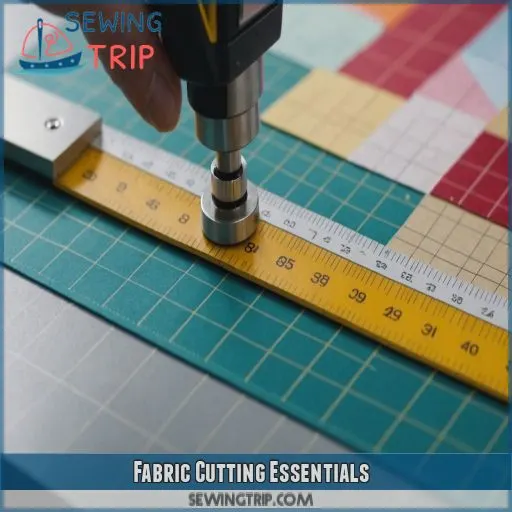
Fabric Cutting Essentials
Whether you’re a quilting newbie or a seasoned pro, fabric cutting is a key step in bringing your vision to life. This section will give you the knowledge to make precise cuts, choose the right ruler, and keep those blades sharp for quilting success.
Achieving Precision in Fabric Cutting
Precision is key when cutting fabric for quilting. Here are some tips to make sure your edges are straight and your cuts are accurate:
- Trim and straighten the edges of your fabric before cutting.
- Use a smaller ruler for trimming smaller pieces and a longer ruler for yardage.
- Employ a sharp rotary cutting blade for precise cuts.
Ruler Choice for Accurate Cutting
Ruler size and markings are important when choosing the right one. A smaller ruler is easier to handle when trimming smaller pieces. For working with yardage, a longer ruler is your go-to.
But wait, there’s more! The lines on your ruler are key to accuracy, so make sure they’re visible. If they’re a bit faded, use tape to highlight those lines and bring them back to life.
Utilizing Ruler Lines for Accuracy
When cutting fabric for quilting, ruler lines are your best friend for getting accurate cuts. Here’s how to make the most of them:
- Choose the right ruler: Opt for a smaller ruler for trimming smaller pieces and a longer ruler for yardage.
- Line it up: Utilize the lines on your ruler to guide your cuts. This helps you get straight and precise cuts.
- Mark your spot: If the lines on your ruler are hard to see, use tape to highlight the key lines. This simple trick improves visibility and helps you cut with confidence.
- Keep it sharp: A sharp rotary cutting blade is key to precise cuts. Dull blades can lead to frayed edges and uneven cuts, so be sure to replace blades regularly.
- Practice makes perfect: Don’t be discouraged if your cuts aren’t perfect the first time. With practice, your accuracy will improve, and you’ll be a fabric-cutting pro in no time!
Tape for Visibility on Ruler Lines
Ever tried quilting with a ruler that’s got lines fainter than a whisper? It’s a recipe for crooked cuts and uneven edges. But don’t toss that ruler out just yet! A simple hack to boost those lines’ visibility is to use tape.
Not just any tape will do, though. You need something that’ll stick firmly to the ruler and provide a clear, contrasting line to guide your cuts. Here’s a quick rundown of the types of tape you can use and some tips for getting the most out of this handy trick:
| Tape Type | Advantages | Considerations |
|---|---|---|
| Transparent Tape | Clear and inconspicuous | May not provide enough contrast |
| Washi Tape | Comes in various colors and patterns | Make sure it’s not too thick, which can affect blade movement |
| Painter’s Tape | Easy to remove without residue | May not be as durable as other options |
| Electrical Tape | Strong adhesive, comes in various colors | Can leave residue if not removed carefully |
| Masking Tape | Affordable and readily available | May not be as durable as electrical tape |
When applying the tape, line it up carefully with the ruler’s markings to maintain accuracy in your cuts. Choose a color that contrasts well with your ruler and fabric for the clearest visibility.
Sharp Blade for Precise Cuts
A sharp blade is key to achieving crisp, clean cuts and preventing fabric fraying. Dull blades can chew up your fabric, leaving you with uneven edges and frayed threads. Opt for a fresh rotary cutting blade and swap it out regularly for the smoothest cuts.
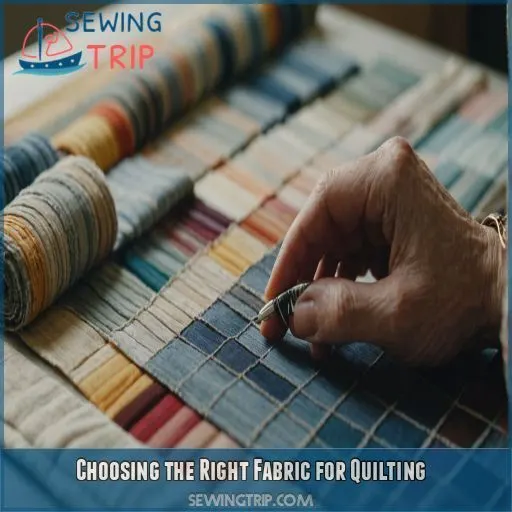
Choosing the Right Fabric for Quilting
Choosing the right fabric is essential to achieving the desired look and feel for your quilt. In this section, we’ll guide you through selecting fabrics with the right colour, contrast, and scale to bring your quilting vision to life.
Quality Fabric for Quilting
When choosing fabric for quilting, you want to make sure you’re using quality materials that will make your project a success. Here are some key considerations:
- Fabric weight and thread count: Go for a higher thread count, as this generally indicates a more durable fabric that’s less prone to raveling and fraying.
- Fabric feel: Higher-quality fabrics often feel smoother and softer to the touch.
- Cotton blends: Cotton, especially 100% cotton with a thread count of 68 x 68 threads per square inch, is a popular choice for quilting due to its durability and ease of use.
Comparing Fabrics for Quilting
When comparing fabrics for quilting, there are several things to keep in mind, including fabric weight, cotton blends, print scale, drape, and texture. These elements influence the overall look and feel of your quilt, so it’s important to choose wisely.
| Fabric Attribute | Considerations |
|---|---|
| Fabric Weight | Lighter fabrics may ravel more, while heavier fabrics offer durability. |
| Cotton Blends | 100% cotton is common, but blends can add unique qualities. |
| Print Scale | From small to large, different scales create visual interest. |
| Fabric Drape | Some fabrics drape more gracefully, impacting the quilt’s overall flow. |
| Texture Comparison | Fabric textures vary, affecting the quilt’s tactile experience. |
Creating Visual Contrast in Quilt Designs
Creating visual contrast in your quilt designs is essential to making your shapes pop and your overall design shine. Here are some tips to help you choose the right fabric for quilting and create stunning visual contrast:
- Light and Dark Fabrics: Use light fabrics on dark backgrounds to create strong contrast, making your shapes stand out. Avoid using dark fabrics on dark backgrounds as this can make your design appear flat and dull.
- Black and White Test: To assess the contrast in your fabric selections, try using a black and white photo or photocopy. This will help you visualize the value and contrast of your fabrics more easily.
- Variety is Key: Aim for a balanced assortment of light, medium, and dark fabrics in your quilt. This variety will add depth and visual interest to your design.
- Fabric Scale: Play with different fabric scales, from small to large prints. This will create a sense of balance and keep your quilt visually engaging. Pre-cuts are a great way to easily incorporate a variety of fabric scales into your project.
Understanding Color Relationships in Quilting
When choosing fabrics for your quilt, you really want to understand color relationships to create a harmonious design. Color theory is your friend here, and you’ll want to familiarize yourself with some basic color concepts.
| Color Theory | Example | Quilting Application |
|---|---|---|
| Complementary Colors | Red and Green | Use complementary colors to make a shape stand out on a quilt. |
| Analogous Colors | Blue, Violet, and Purple | These colors create a cohesive, unified background. |
| Color Harmony | Monochromatic, Analogous, Complementary | Using colors in harmony with each other creates a visually pleasing quilt. |
Complementary colors, which are opposite each other on the color wheel, create high contrast and make shapes pop. Analogous colors, on the other hand, share similar tones and work well together to create a cohesive look. Play around with different color combinations to find what speaks to you and brings your quilt to life!
Incorporating Fabric Scale in Quilt Designs
Fabric scale is like the secret ingredient that takes your quilt from meh to marvelous. It’s all about choosing the right size prints to create visual interest and balance in your design. Think of it like a recipe—you need a mix of ingredients to make it tasty.
Pre-cuts are a lifesaver when it comes to fabric scale. They offer a variety of prints in different sizes, so you can easily play with scale without buying tons of fabric. Fat quarters, for example, give you room to cut various shapes, while charm packs are perfect for patchwork or testing new fabrics.
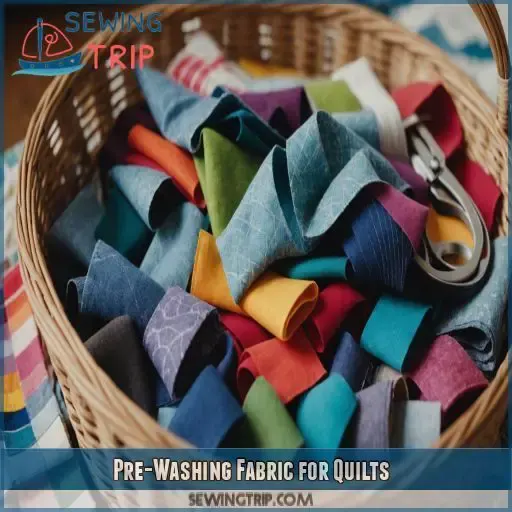
Pre-Washing Fabric for Quilts
Pre-washing your fabric is a key step to make sure your quilt keeps its original colors. This process stops dye bleeding, removes extra chemicals, and helps keep colors bright and fabric strong.
Why Pre-Washing Fabric Matters
Pre-washing fabric is a really important step in the quilting process. It might seem like a chore, but it’s worth the effort to make sure your quilt lasts a long time and keeps its bright colors. You definitely don’t want dye bleeding or fabric shrinkage ruining all your hard work!
Pre-Washing Fabric to Prevent Dye Bleeding
Pre-washing fabric is super important to stop dye from bleeding and ruining your quilt. Here are some tips to prevent this:
- Focus on batik fabrics: These tend to bleed more than solid or print fabrics, so they need extra attention.
- Catch excess dye: Use a dye grabber in the wash water to prevent discoloration of other fabrics.
- Wash until water runs clear: Keep washing until the water is clear, ensuring all excess dye is gone.
- Preserve color vibrancy: Pre-washing helps your quilt stay vibrant and colorful for longer.
Pre-Washing Fabric to Remove Excess Chemicals
It’s not just about preventing dye bleeding, pre-washing fabric also removes excess chemicals from manufacturing. These chemicals can impact the feel and stability of your fabric, making it tricky to piece together and sew. You don’t want your fabric to feel like it’s been pumped full of artificial stuff, do you?
Imagine trying to quilt with fabric that’s unstable and hard to handle. It’s like trying to quilt with a slippery fish! Pre-washing makes sure your fabric is ready to be worked into a quilt, and nothing’s going to slip through the net.
Pre-Washing Fabric to Preserve Color Vibrancy
Pre-washing your fabric is a must if you want to preserve the vibrancy of your colors.
No one wants their colors to fade, so make sure you wash your fabric until the water runs clear.
This makes sure that all excess dye is gone.
A dye grabber in the wash water will catch any excess dye and prevent it from staining other fabrics.
Pre-Washing Fabric for Better Fabric Stability
Pre-washing fabric is a must if you want to avoid a wonky quilt. It’s like baking a cake without leveling the layers—you’re gonna end up with a lopsided mess. Pre-washing prevents shrinkage, so your quilt blocks stay nice and straight. No more wonky quilts for you!
But let’s be real, pre-washing is a chore. It’s like doing laundry before you’ve even started quilting. But it’s worth it to avoid that sinking feeling when your quilt goes from straight to crooked in the wash.
Starching and Pressing Fabric for Quilts
Getting your fabric ready for quilting is a really important step in the whole process. This section will focus on why starching and pressing your fabric before you start quilting is a good idea.
Starching Fabric for Quilting
Starching fabric for quilting is a personal choice, but it can offer several benefits. Here are some reasons why you might want to give it a go:
- Stabilizes the fabric, making it easier to cut and piece together.
- Adds stiffness, giving you more control when cutting and stitching.
- Helps maintain accuracy, especially when working with tiny pieces.
- Keeps bias edges under control, preventing stretching and shifting.
To apply starch, fully saturate your fabric, either by dipping it in a basin of starch or using spray starch, then air dry it.
Pressing Fabric for Quilting
Now that you’ve starched your fabric, it’s time to press it. This is a key step to make sure your fabric is smooth and ready for quilting.
Use a pressing tool, like an iron, to get those creases out. Ironing techniques vary, but a common method is to use a back-and-forth motion, lifting the iron between strokes. Focus on the fabric grain, and don’t forget to finish those seams!
Removing Excess Chemicals From Fabric
You mightn’t realize it, but fabric manufacturers often add chemicals to make their products look and feel good on store shelves. These chemicals can affect how your fabric handles, so it’s important to remove them before quilting. Here’s why:
- Fabric Safety and Health: You don’t want those chemicals near your skin or affecting your health. It’s like removing the plastic smell from a new shower curtain—you want to breathe easy and know your quilt is safe.
- Fabric Stability: The chemicals can impact the fabric’s stability, making it harder to piece together and potentially leading to uneven stitching. You don’t want your quilt to end up lopsided!
- Eco-Friendly Fabric: Removing these excess chemicals is a step in the direction of being eco-friendly. It’s like washing off the wax coating on apples—you want your fabric natural and chemical-free.
Creating a Uniform Surface for Quilting
Starching your fabric is a great way to create a uniform surface for quilting. It gives your fabric a more consistent feel and makes it easier to piece together. Starch also helps to prevent stretching, which is key for keeping those seams smooth and even.
You can use starch to press your fabric before quilting. This will make it easier to match seams and create a professional finish. It’s a simple step, but it makes a big difference in the final look of your quilt.
Preventing Fabric Fraying With Starch
Starching your fabric is a great way to prevent fraying, especially when working with delicate materials. It gives your fabric a crisp, uniform feel, making it easier to piece together. Plus, it helps to remove any unwanted chemicals left over from manufacturing. Go for it!
You can use starch on its own or as a pre-treatment before pressing. There are different types of starch available, from sprays to gels, so choose one that suits your project. A light application of starch will do the trick—no need to go overboard!
Frequently Asked Questions (FAQs)
Do I need to wash my fabric before quilting?
Do you need to wash fabric before quilting? Well, it’s not mandatory, but it can be a good idea. Pre-washing prevents shrinkage and colour bleeding, especially with reds and purples. So, if you’re a quilting newbie, it’s a safe bet.
How to prewash fabric for quilting by hand?
Soak your fabric in cool, soapy water. If it bleeds dye, it’s not safe to use. If it doesn’t, lay it flat to dry. Always prewash fabric to prevent shrinkage and dye bleeding.
What are the steps in preparing fabric before construction?
First things first: Do you wanna pre-wash your fabric? If you do, it’s a simple soak-and-hang situation. Next, grab a lint roller to banish any fuzz. Wrinkles? Time to iron ’em out. Finish up by cutting and straightening those edges.
How do you care for quilting fabric?
You’ve crafted a quilt with care, but how do you keep it looking its best? Here’s the lowdown on quilt care: Wash darks and brights separately, use a mild detergent, and avoid wringing or twisting to prevent thread damage.
How do I choose the right colours for my quilt?
Choosing the right colours for your quilt is all about contrast. Use light fabrics on dark backgrounds to make shapes pop. Avoid dark fabrics on dark backgrounds, as this will make your design look flat.
Do I need to cut my fabric before I wash it?
Should you cut your fabric before or after washing? It’s a quilting conundrum.
There’s no one-size-fits-all answer, but here’s the lowdown: Cutting after washing can save you from wonky shapes, but cutting before washing avoids fraying. So, it’s a trade-off between precision and tidiness.
Whats the best way to cut fabric for a quilt?
The best way to cut fabric for a quilt is with a ruler and rotary cutter. For beginners, this is the simplest, cheapest, and most versatile method. However, the best method is the one that suits your needs.
Why should I starch fabric before quilting?
Starching fabric gives you more control over the quilting process by creating a consistent feel and stability. It’s like giving your fabric superpowers – making it easier to piece together, less likely to stretch, and creating a smooth, even finish.
How do I stop my quilt from fading?
To stop your quilt from fading, air-dry it out of direct sunlight and add salt to the wash. If you’re dry cleaning, discuss colour fade concerns with your cleaner.
Conclusion
Think of fabric preparation as the foundation of your quilting house.
Without a sturdy base, your quilt might end up a little wonky.
You’ve got the lowdown on pre-washing to prevent color bleeding and shrinkage, precision cutting, and choosing fabrics that’ll make your quilt pop.
Now that you know the deal on fabric prep, you’re all set to jump into quilting with confidence.

