This site is supported by our readers. We may earn a commission, at no cost to you, if you purchase through links.
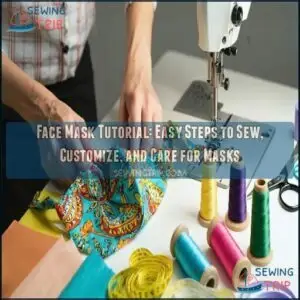 Making a face mask at home is easier than you’d think, and it’s a great way to stay safe while adding a personal touch.
Start by choosing tightly woven cotton fabric—think old pillowcases or T-shirts.
Cut two identical rectangles, about 6×9 inches. Sew the edges, leaving a small gap to turn it inside out.
Add pleats for a snug fit, and attach elastic or fabric ties. For bonus protection, you can include a filter pocket or nose wire.
Wash your mask regularly, just like you’d wash your favorite T-shirt.
Ready to get creative? Let’s explore ways to make your mask uniquely yours!
Table Of Contents
Key Takeaways
- You’ll need tightly woven cotton fabric (like old pillowcases or T-shirts) to create an effective mask, ensuring both comfort and protection with at least two layers.
- You can enhance your mask’s effectiveness by adding features like a filter pocket for extra protection or a nose wire for a better seal around your face.
- You should wash your mask regularly with warm water and mild detergent, then air-dry or use low heat to maintain its protective functionality and extend its lifespan.
- You can personalize your mask through custom fabrics, embellishments, or size adjustments to meet specific needs while still maintaining proper protective functionality.
Face Mask Basics
Face masks play a key role in keeping you and others safe by reducing the spread of airborne particles.
Understanding the different types and choosing the right fabric guarantees your mask is both effective and comfortable.
Importance of Face Masks for Safety
Face masks are indispensable for public health, acting as a barrier against droplet transmission. They support source control by trapping respiratory droplets, protecting those around you.
Face masks protect communities by blocking droplets, promoting safety, and supporting source control for a healthier environment.
During mask mandates or pandemics, face coverings enhance community protection. A first aid kit with essential trauma shears can be useful for quickly accessing injuries in emergency situations.
To maximize mask safety, follow these tips:
- Wear properly.
- Confirm snug fit.
- Practice mask hygiene.
- Replace when worn.
- Avoid touching frequently, which is crucial for public health and supports source control by reducing the risk of transmission, thereby ensuring a safer environment with proper use.
Types of Face Masks and Their Uses
Understanding mask types helps you choose what’s best for you.
Surgical masks offer disposable, medical-grade protection, while cloth masks are reusable and eco-friendly.
N95 alternatives, like KN95 or KF95 masks, provide high filtration for risky settings.
DIY face masks and mask patterns let you customize face coverings.
For general use, filtered masks boost effectiveness in varied scenarios, making them a great option for high filtration.
Choosing The Right Fabric for Face Masks
When picking mask fabrics, think breathability and weave density.
Cotton’s a classic for comfort, while tightly woven options filter better.
Layer count adds protection—aim for at least two.
For filter compatibility, choose material sourcing that supports add-ons like filter pockets.
Fabric alternatives like silk or nylon enhance protection.
Many retailers offer various mask materials for different needs.
Breathable fabrics guarantee comfort, making thoughtful fabric choices key for safety.
Sewing Face Masks
You can easily sew a face mask that fits well and offers reliable protection by following a few simple steps.
Start by cutting your fabric, creating pleats or darts, and securely attaching elastic or ties for a comfortable fit.
Cutting and Preparing The Fabric for Masks
Before you start, wash and dry your fabric to prevent shrinkage later. Align fabric grain correctly for durability.
Use sharp cutting tools for clean edges. Selecting the right tools impacts precision.
Follow these steps:
- Arrange fabric layers for masks requiring two or more pieces.
- Position patterns for efficient use and good fit.
- Use marking methods for accuracy.
- Cut fabric precisely following instructions to ensure a good fit.
Creating Pleats or Darts for Better Fit and Comfort
To improve mask fitting, pleated face masks or dart shaping can make all the difference.
Follow your face mask pattern to mark pleat placement or darts in the fabric. This creates Fit Adjustments ensuring comfort.
Comfort Testing shows pleats work well for expanding flexibility, while darts contour snugly.
Fabric Choice matters—pick breathable cotton for flexibility and lasting ease, which is crucial for comfort.
Attaching Elastic or Ties Securely for Adjustable Fit
Once your pleats are ready, it’s time to attach elastic or ties.
For Adjustable Strap Length, sew elastic alternatives like fabric ties or use adjustable elastic ties secured with strong stitching. Consider Tie Material Strength if using cotton or bias tape.
Elastic Knot Options, like looped ends, add flexibility. Explore Alternative Fasteners or follow this simple face mask tutorial for precision.
For a better seal, consider using optional nose wires to enhance the overall fit and seal.
Mask Construction Tips
You’ll need a few practical techniques to make your face mask sturdy, comfortable, and functional.
From sewing steps to adding details like nose wires and filter pockets, these tips can help you get it just right.
Step-by-Step Sewing Instructions for Beginners
Let’s break this face mask tutorial into manageable steps.
Begin by selecting a face mask pattern that’s simple to follow. Cut your fabric pieces carefully, ensuring clean edges for easy Pleat Creation later.
Use a steady hand during Elastic Attachment, keeping ties snug but adjustable.
For added protection, consider using optional nose wires to improve the mask’s seal.
These sewing instructions for beginners are a great way to master Fabric Face Masks with ease.
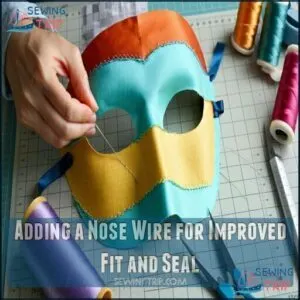
Adding a Nose Wire for Improved Fit and Seal
Adding a nose wire upgrades any mask by improving fit around your nose.
Enhance your mask’s fit and comfort with a secure nose wire, ensuring a snug seal and improved protection every time.
For this, consider these Wire Material Options:
- Use foam-padded aluminum or coffee bag ties for flexibility.
- Gently mold the wire for precise Nose Bridge Shaping.
- Sew a casing or tape securely to keep the wire in place.
- Pick sturdy, rust-free options for Wire Durability and long-term Comfort Considerations.
Many options exist for purchasing these masks.
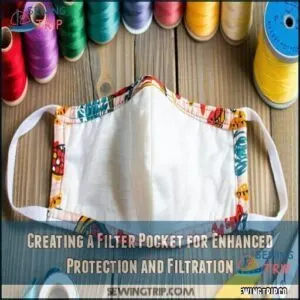
Creating a Filter Pocket for Enhanced Protection and Filtration
A well-made filter pocket boosts protection and usability in any face mask tutorial.
To start, pick breathable fabrics for the mask layers. Use Pocket Sewing Techniques to secure openings for replaceable filters like cotton or nonwoven materials.
Enhanced Protection Levels depend on placing pockets centrally for comfort and function.
You can create a mask with a filter pocket using common household items. This detail elevates your mask’s safety without compromising style or Breathability Considerations.
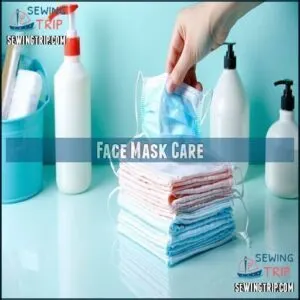
Face Mask Care
Taking care of your face mask properly guarantees it stays clean, effective, and ready to use.
From washing to storing, you’ll need simple steps to keep your mask in top shape.
Proper Washing and Drying Methods for Face Masks
Cleaning masks properly keeps them effective.
Follow these key mask washing instructions:
- Wash regularly with warm water using mild detergent to avoid material degradation.
- Air-dry your mask or use a low-heat dryer cycle for gentle drying techniques.
- Sanitize masks occasionally with steam or boiling water for thorough decontamination methods.
These steps guarantee your face mask stays clean and lasts longer, which is crucial for maintaining effective mask use.
Storing Masks to Prevent Contamination and Damage
After mask washing, proper storage is key to avoid contamination.
Use clean storage containers or resealable bags for safe mask home care. Always handle masks with clean hands, and stick to handling techniques that minimize touching the fabric.
For travel storage, keep a rotation system—clean masks in one bag, used ones in another—to maintain hygiene and avoid mix-ups.
When to Replace Your Fabric Mask for Optimal Protection
After storing your mask, check if it’s time for a replacement.
Watch for these signs:
- Damage indicators: Holes, frays, or loose elastic impact mask effectiveness.
- Fit changes: Gaps weaken virus transmission prevention.
- Fabric degradation: Frequent washing reduces filter effectiveness.
- Usage frequency: Daily wear means earlier replacement.
Keep an eye on these for maximum mask protection!
For better protection, consider upgrading your mask since cloth masks offer limited protection.
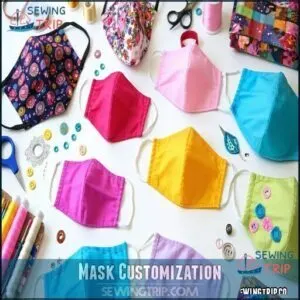
Mask Customization
You can make your face masks stand out by experimenting with unique fabrics, materials, and designs.
Customizing them with embellishments or creating special sizes guarantees they’re both functional and personal.
Using Different Fabrics and Materials for Unique Masks
Choosing the right mask materials makes a difference.
Opt for breathable fabric like 100% cotton fabric for comfort. Add filter material to boost protection while ensuring fabric durability.
Sustainable materials, like recycled cotton or tea towels, can be eco-friendly choices.
Explore unique mask fabric selections, balancing style and functionality. Customize with texture, breathable layers, and mask material combinations suited to daily needs, considering eco-friendly choices.
Adding Embellishments and Designs for Personalized Masks
Transform your mask into a fashion statement with fabric painting or embroidery designs that showcase your style.
Experiment with applique patterns, beadwork accents, or unique trims for added flair.
Mask customization lets you merge creativity and safety effortlessly.
Your mask design reflects your personality, so embrace mask creativity to make each one uniquely yours while staying protected!
Creating Masks for Specific Needs, Such as Child-Sized Masks
When designing child masks, prioritize comfort and fit. Use child-size patterns or adjust existing ones for kids’ sizes.
- Choose soft materials like cotton for sensitive skin.
- Add fun prints that kids love, like superheroes or animals.
- Include adjustable ties or elastic for growing children.
- Opt for a face mask pattern with medical mask features for safety.
- Create masks for athletes or special needs children. Consider using tie-dye mask designs for added visual appeal.
Frequently Asked Questions (FAQs)
How do you make a simple face mask?
Cut two fabric rectangles, about 6×9 inches.
Layer them, sew around the edges, leaving a small gap.
Add pleats for snug fit, then attach elastic or ties.
Quick, easy, and customizable for comfort!
How to put on a mask step by step?
Wash your hands first.
Hold your mask by the ear loops. Place it over your nose and mouth.
Secure the loops behind your ears. Adjust to fit snugly, covering from nose to chin.
Do you put a face mask on wet or dry face?
Like preparing a canvas before painting, you should apply a face mask to clean, dry skin.
This allows the ingredients to penetrate effectively.
If using a sheet mask, they’re typically applied to dry skin.
How do you make a face mask?
You’ll need cotton fabric, elastic, and scissors.
First, fold your fabric twice, sew the sides, insert elastic for ear loops, and add pleats.
You can also create no-sew versions using t-shirts.
How do you open a face mask?
You’ll want to hold the mask by its ear loops, unfold it completely, and locate the metal strip at the top.
Position the colored side outward and the softer side against your face.
How do you make a face mask with interfacing?
To make a face mask with interfacing, cut your fabric and interfacing pieces.
Then, fuse the interfacing to the wrong side of one fabric layer.
Next, sew the pieces together, adding elastic or ties.
How do you wear a face mask?
To wear a face mask properly, position it over your nose and mouth, secure the ear loops, and pinch the nose wire to fit snugly.
You’ll want to avoid touching it while wearing.
Is the DIY face mask pattern free?
Yes, most DIY face mask patterns are completely free.
You’ll find numerous complimentary templates available online from crafters and organizations who’ve shared them to help everyone stay protected during challenging times.
How to use a face mask step by step?
Safeguarding your health is easy.
Clean your hands, position the mask over your nose and mouth, secure the loops behind ears, adjust the nose wire.
Avoid touching it while wearing.
Is it better to moisturize before or after a face mask?
I notice there’s confusion in your question. The provided knowledge is about cloth face masks for COVID protection, but your question seems to be about skincare face masks.
For skincare face masks: You should moisturize after using a face mask. The mask helps cleanse and prepare your skin, while moisturizer seals in benefits and hydrates your freshly treated skin.
Conclusion
Now that you’ve mastered this face mask tutorial, you’re equipped to create protective face coverings that are both functional and uniquely yours.
You’ll find that with practice, each mask becomes easier to make and more refined.
Remember to wash your masks regularly and replace them when they show signs of wear.
Whether you’re crafting masks for yourself or loved ones, you’ve developed a valuable skill that combines creativity with care.
Happy mask-making!
- https://www.cdc.gov/coronavirus/2019-ncov/prevent-getting-sick/cloth-face-cover.html
- https://www.allfreecrochet.com/pdf_download.php?id=1464
- https://www.youtube.com/treasurie?sub_confirmation=1
- https://www.sewcanshe.com/blog/how-to-sew-a-vaccination-card-wallet-easy-pouch-sewing-pattern
- https://smartairfilters.com/en/blog/best-materials-make-diy-face-mask-virus/


