This site is supported by our readers. We may earn a commission, at no cost to you, if you purchase through links.
 When your sewing machine starts jamming threads, you’re dealing with a fixable problem that usually stems from tension issues, needle problems, or debris buildup.
Start by checking your thread tension settings—both upper and lower need to work in harmony. Next, examine your needle for damage or incorrect sizing for your fabric.
Remove any lint or thread bits from the bobbin area and thread path. Check that your bobbin is inserted correctly and your thread is properly seated in all tension discs.
Quality thread makes a real difference too—cheap thread breaks easily and creates more jams. Most thread jams disappear once you address these basic maintenance steps.
But there are specific techniques that can save you hours of frustration.
Table Of Contents
Key Takeaways
- Check your threading path and tension settings – you’ll fix 80% of jams by re-threading properly with the presser foot up and adjusting tension gradually on scrap fabric.
- Replace your needle every 8-12 hours of sewing time or when you notice bent tips, fabric snags, or thread breakage, since damaged needles cause immediate jamming.
- Clean lint from your bobbin area weekly and remove accumulated debris from thread paths to prevent clogs that block smooth thread flow.
- Invest in quality thread that matches your fabric weight – cheap thread breaks easily and creates more tangles than premium options designed for your specific project needs.
Common Causes of Sewing Machine Thread Jamming
Thread jams happen when your sewing machine gets tangled up, and knowing the main culprits can save you hours of frustration.
The most common causes include wrong thread tension, poorly inserted bobbins, damaged needles, cheap thread, and lint buildup in your machine’s threading path.
These issues can be prevented by understanding and addressing the root causes, such as cheap thread, to ensure smooth sewing operations.
Incorrect Thread Tension
When thread tension goes wrong, your sewing machine becomes a tangled nightmare.
Incorrect tension creates uneven stitches, thread breakage, and frustrating jams that halt your projects.
- Upper thread tension that’s too tight snaps threads and puckers fabric
- Loose tension creates bird’s nests of tangled thread underneath your work
- Mismatched thread thickness between upper and bobbin threads disrupts balance
Proper tension adjustment transforms chaotic stitching into smooth, professional seams.
To achieve this, understanding tension settings is essential for resolving common sewing issues.
Bobbin Insertion Errors
Bobbin insertion problems can jam your machine instantly, but they’re usually simple fixes.
Check your bobbin alignment first – it should sit flat without wobbling.
Thread wrapping around the bobbin case means incorrect seating. You’ll hear a click when it’s properly placed.
Bobbin tension affects how smoothly thread feeds through. Clean lint from the case regularly to prevent thread jamming.
Wrong bobbin threading direction causes tangles, so follow your manual’s threading path exactly.
Needle Issues and Mismatches
Your needle can sabotage your entire project without warning.
Needle damage from bending or nicks creates thread breakage and jamming against bobbin parts. Wrong needle size causes thread alignment issues.
Bent needles from heavy fabrics stress your machine. Check for needle wear by laying it flat—any bends mean replacement time.
Fresh needles prevent most needle issues.
Low-Quality or Incompatible Thread
Your sewing machine fights back when you feed it cheap threads that weren’t meant for the job. Poor thread quality leads to fraying, breaking, and jamming as inferior fibers catch on machine parts. Thread compatibility matters just as much – using the wrong thread material for your project creates tension problems.
Here’s what causes thread-related jams:
- Fiber types that don’t match your fabric weight
- Yarn weight too thick or thin for your needle size
- Thread stretch properties incompatible with your fabric match
Quality threads from trusted brands reduce jamming risks substantially compared to bargain alternatives.
Debris Accumulation in Thread Path
Your machine collects lint and debris like a magnet. Lint buildup in the thread path blocks smooth operation, causing jams.
Focus on lint removal around the bobbin area and needle plate weekly. Debris cleaning prevents crystallized clogs that freeze mechanisms.
Machine maintenance includes brushing away accumulated fibers from tension discs. Regular bobbin care stops thread jam issues before they start.
Cleaning frequency matters—monthly deep cleaning keeps your thread jam fix simple.
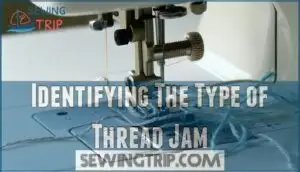
Identifying The Type of Thread Jam
Before you can fix anything, you need to know what you’re dealing with. Thread jams don’t all look the same, and spotting the differences will save you time and frustration.
Start by examining where the jam happened. Look closely at your fabric, bobbin area, and needle plate. Thread Tangles under the fabric usually mean bobbin tension problems. If you see Thread Breakage above the fabric, check your upper threading path. Machine Malfunctions often create unusual knots or loops that seem impossible.
Listen to your machine too. Different Jam Types make distinct sounds that reveal their location and cause.
Here are the main jam patterns to watch for:
- Bird’s nest jams – Messy thread clumps under your fabric from unbalanced tension
- Needle area tangles – Thread wrapped around the needle bar or take-up lever
- Bobbin case clogs – Thread wound tightly in the bobbin compartment
Identifying the specific problem guides your thread jam troubleshooting approach. Each type needs different Sewing Errors fixes, so don’t skip this detective work before jumping into solutions. Regular maintenance, including checking for needle damage issues, is vital to prevent future thread jams and guarantee smooth sewing operation.
Step-by-Step Troubleshooting for Thread Jams
When your sewing machine starts jamming, you need a systematic approach to find and fix the problem quickly.
Start with these four key troubleshooting steps to identify what’s causing your thread to tangle and stop your project cold, using a troubleshooting method.
Visual Inspection Techniques
Once you’ve identified the thread jam type, grab good lighting for your Machine Check.
Start your Visual Exam by scanning these key areas for Sewing Errors:
- Thread Path inspection: Look for frayed thread, missed guides, or "caterpillar" buildup around the needle – clear signs your thread jam troubleshooting needs attention.
- Bobbin area examination: Check for bird’s nests, tangled thread, or debris accumulation that creates thread jam issues.
- Needle alignment verification: Inspect for bent needles or misaligned positioning using your thread jam fix guide approach.
- Feed dog assessment: Look for lint blocking smooth fabric movement – essential Maintenance Tips for thread jam solution success.
The sewing machine requires regular maintenance to avoid thread tension problems.
Listening for Unusual Noises
Beyond the visual clues, Grinding Sounds and Squealing Noises tell you what’s happening inside your machine.
When you hear Motor Humming paired with Thread Snapping, stop immediately.
These Machine Whirring changes signal thread snags or needle problems.
Trust your ears during sewing machine troubleshooting – odd sounds mean trouble brewing, and catching issues early prevents major thread jamming headaches.
Identifying the root cause often involves understanding thread tension issues to address the problem effectively.
Testing Different Stitch Patterns
Now you’ll switch gears to test different stitch patterns on scrap fabric.
Start with a basic straight stitch, then try zigzag and decorative stitches.
If thread jamming occurs on specific patterns, you’ve likely found a tension settings mismatch or wrong stitch length for your fabric types.
Adjust thread thickness compatibility and sewing speed accordingly for smooth operation.
Consulting Machine Manual for Specific Guidance
Your sewing machine manual holds the key to solving stubborn thread jams. This goldmine contains manual troubleshooting steps, thread guides diagrams, and tension settings specific to your model.
When basic fixes fail, your manual becomes your best friend for sewing machine troubleshooting guide solutions.
Check these manual sections first:
- Troubleshooting charts with thread jam removal steps
- Thread guides threading diagrams for proper setup
- Maintenance schedules and sewing techniques recommendations
Fixing Thread Tension Problems
Thread tension problems cause most sewing machine jams, but you can fix them with simple adjustments.
Getting your upper and lower tension balanced properly will stop those frustrating thread nests and keep your stitches smooth.
You can achieve this balance by making a few simple adjustments to your sewing machine.
Upper Thread Tension Adjustment
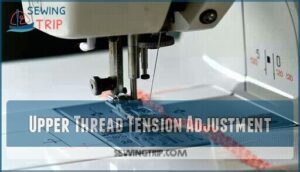
Upper thread tension adjustment fixes most jamming headaches fast.
Your tension dial sits on top of your machine with numbers—start at 4 or 5 for regular fabric.
Turn clockwise to tighten when stitches look loose underneath. Turn counterclockwise to loosen when fabric puckers or bobbin thread shows on top.
Test each tension tweak on scrap fabric first.
Perfect thread balance means both threads lock inside the fabric with no visible loops.
Lower Thread (Bobbin) Tension Adjustment
When your bobbin thread tension acts up, you’re dealing with the hidden culprit behind many thread jams.
The bobbin case houses your bobbin thread and controls its flow through a small tension spring screw. Turn this screw clockwise to tighten tension settings or counterclockwise to loosen them—make tiny quarter-turns only.
Bird’s nests under your fabric signal tight bobbin tension, while loose stitches mean it’s too slack. Before adjusting, check for lint removal needs around the bobbin case and make certain of proper bobbin insertion.
Test your thread tension adjustment on scrap fabric after each change. The thread path through thread guides must stay clear for smooth operation, preventing sewing machine thread jam issues.
Understanding proper thread tension is vital for achieving balanced stitches and preventing further problems.
Balancing Upper and Lower Tension
Getting your tension settings right means no more bird’s nests or wonky stitches. Once you’ve adjusted your upper threading and bobbin, it’s time to find that perfect balance.
Here’s how to nail machine calibration:
- Test first: Always run a sample stitch on scrap fabric that matches your project’s fabric thickness
- Make tiny moves: Adjust tension settings in small increments – big changes create new tension issues
- Check stitch balance: Perfect tension shows identical stitches on both fabric sides with good thread quality visible
Different fabrics need different settings, so don’t expect one-size-fits-all solutions. Heavy denim requires looser tension than silk. Keep tweaking until your thread tension creates even, balanced stitches without thread jamming problems.
Needle Maintenance to Prevent Thread Jamming
Your needle choice can make or break your sewing project, and using the wrong one is a fast track to thread jams.
A damaged or dull needle will snag your thread and create tangles that’ll have you pulling your hair out.
Choosing The Right Needle Type
Needle materials and thread compatibility work hand-in-hand to prevent jams.
Universal needles handle most woven fabrics, while ballpoint needles slip between knit fibers without snagging.
Sharp needles pierce dense materials cleanly, and denim needles tackle heavy fabric types without bending.
Match your needle sizes to fabric weight—thin needles for delicate materials, thick for sturdy ones, which is crucial for superior performance and understanding the correct sewing machine needle types.
Proper Needle Installation
Perfect installation starts with turning off your machine and raising the presser foot.
Insert the needle with the flat side facing back—needle alignment matters here. Push it up until it stops, then tighten the screw firmly but don’t overdo it.
Check needle depth by gently tugging—it shouldn’t budge. The thread direction flows from front to back through the eye.
These installation tips guarantee needle security and prevent wobbling that causes jams.
Signs of Worn or Damaged Needles
Your machine starts acting up when needles go bad. Watch for these telltale signs that scream "replace me now!"
- Bent tips or visible breaks: Lay your needle on a flat surface – any deviation from straight means it’s toast
- Scratches, nicks, or rust spots: Run your finger along the shaft to feel rough patches that’ll snag thread
- Fabric snags and thread breakage: When your needle starts creating pulls in fabric or constantly breaks thread, it’s done
Bent needles and needle damage cause thread jamming faster than you’d think. Needle wear happens gradually, but sewing errors pile up when you ignore worn needles.
Don’t let needle issues derail your project – thread breakage and jamming aren’t worth the frustration of using damaged tools. Proper needle maintenance techniques can help prevent these issues and guarantee smooth sewing operation.
Needle Replacement Frequency
Replace your needle every 8-12 hours of active sewing time, but don’t stick to this rule blindly.
Heavy fabrics like denim or canvas will dull your needle faster, requiring replacement after just 4-6 hours.
Quality needles last longer than cheap ones.
Watch your stitches—when they start looking rough or skipping, it’s time for a fresh needle regardless of sewing hours.
Preventive Measures for Future Thread Jams
Preventing thread jams starts with consistent maintenance habits that keep your machine running smoothly.
You’ll save hours of frustration by following these simple practices that address the root causes before they become major problems, which is key to preventing thread jams and ensuring smoothly running machines.
Regular Machine Cleaning and Oiling
Your machine’s longevity depends on consistent care and attention. Think of cleaning and machine oil as your sewing buddy’s daily vitamins—skip them, and problems multiply fast.
Essential maintenance steps:
- Daily maintenance: Brush lint from bobbin area after each project using proper cleaning tools
- Weekly oiling: Apply machine oil to designated points following your manual’s guidance
- Deep cleaning: Remove needle plate monthly for thorough lint removal and bobbin care
Quality sewing machine cleaning prevents 80% of thread jamming issues. Use only clear sewing machine oil—never substitutes that gum up moving parts. Regular needle lubrication keeps stitches smooth and your machine humming happily for years.
Proper Thread Storage and Handling
Keep your thread spools in airtight storage containers away from dust and sunlight.
Store similar thread types together with clear labels for easy identification.
This Thread Organization prevents moisture damage and maintains Thread Quality.
Proper Storage Tips and Handling Techniques help your thread stay strong, reducing thread jams and improving stitch performance when you need it most.
Fabric-Specific Sewing Techniques
Different fabrics demand unique approaches to prevent thread jams. Fabric choice directly impacts your sewing success, so match your technique accordingly.
- Heavy fabrics like denim: Use fabric-compatible thread and a size 16 needle. Slow your stitching speed and consider a walking foot for even fabric feeding through thick layers.
- Delicate silks and chiffons: Choose fine thread matching fabric thickness. Reduce presser foot pressure and use shorter stitch lengths to prevent fabric puckering or thread breakage.
- Stretchy knits: Select ballpoint needles and stretch-specific thread. Adjust stitch selection to zigzag or stretch stitches that move with the fabric’s natural give.
Importance of Quality Thread Selection
Quality threads prevent most thread jamming issues before they start.
Thread material and fiber types directly impact machine performance – polyester offers durability while cotton provides natural breathability.
Check yarn weight matches your fabric thickness, and verify thread finish feels smooth to touch.
Color consistency indicates manufacturing quality.
Invest in quality threads from trusted brands.
Your sewing machine thread choice determines whether you’ll battle thread tension problems or enjoy smooth stitching sessions.
Understanding sewing machine threads is vital for superior sewing performance.
Frequently Asked Questions (FAQs)
How do you fix a thread Jam on a sewing machine?
Stop sewing immediately and turn off your machine. Raise the presser foot, cut threads above the jam, then gently remove fabric. Re-thread the machine completely with the presser foot up.
What causes a thread Jam in a sewing machine?
Thread jams happen when you use wrong needles, poor-quality thread, incorrect threading, improper tension settings, dirty feed dogs, or accumulated lint in your machine’s bobbin area blocking smooth operation.
How to fix a sewing machine jamming?
Your machine’s basically staging a textile rebellion because you’ve ignored the basics.
First, raise that presser foot and re-thread everything properly—tension discs need engagement.
Clean out lint from the bobbin area, replace your needle, and adjust tension gradually while testing on scrap fabric to ensure a proper fix for your machine’s issues, which can be considered a form of rebellion.
What happens if a sewing machine jams?
When your sewing machine jams, stitches pile up creating thread tangles, the needle gets stuck, and fabric won’t move forward properly, forcing you to stop sewing immediately.
How do you fix a bobbin Jam on a sewing machine?
Like untangling a fishing line, you’ll need patience to clear the snag.
Turn off your machine, remove the needle plate, and carefully pull out tangled threads using tweezers or small scissors.
What causes a jammed sewing machine?
Poor threading causes most jams when you skip tension discs or guides. Wrong needles, damaged parts, lint buildup, incorrect tension settings, and using low-quality thread also jam your machine quickly.
How to fix thread stuck in sewing machine?
Turn off your machine and raise the presser foot. Remove the needle plate and bobbin case, then carefully pull out tangled threads with tweezers. Clean lint buildup and rethread properly.
Why does my sewing machine keep jamming the thread?
Your machine jams because you’re likely skipping threading steps, using wrong needle sizes, or dealing with tension issues.
Check your threading path, replace bent needles, and clean accumulated lint from the bobbin area regularly.
Why is sewing machine thread bunching up?
Something’s gone wrong with your thread tension, and it’s creating those frustrating bird’s nests under your fabric. Check your threading first—missed guides cause bunching instantly.
Why is my thread getting tangled in my sewing machine?
Your thread’s tangling because you’ve likely missed threading guides, have incorrect tension settings, or need to clean lint from your bobbin area.
Conclusion
Mastering thread jams transforms you from frustrated sewist into confident creator.
When you fix sewing machine thread jamming issues using these six solutions, you’ll spend more time creating beautiful projects and less time troubleshooting problems.
Regular maintenance, proper threading techniques, and quality materials prevent most jams before they start.
Remember that patience during troubleshooting saves time in the long run, and your sewing machine will thank you with smooth, consistent stitches for years to come.
- https://sewandvac.com/blogs/news/sewing-machine-jammed-heres-how-to-fix-it-or-let-us-help
- https://www.youtube.com/watch?v=sf6oPMbLPzo
- https://support.brother.com/g/b/faqend.aspx?c=us&lang=en&prod=hf_ult2001eus&faqid=faqh00000027_000
- https://www.reddit.com/r/sewing/comments/gamz6o/machine_keeps_jamming/
- https://www.fortheloveofthread.com/blog/solving-tension-issues-on-your-sewing-machine

