This site is supported by our readers. We may earn a commission, at no cost to you, if you purchase through links.
 You can tackle most sewing machine fix at home tasks with simple troubleshooting. First, unplug your machine for safety.
Check for thread jams in the bobbin area—this is often the culprit behind that frustrating grinding noise. Clean lint buildup with a small brush, and oil moving parts according to your manual.
If stitches skip, try replacing your needle; they dull faster than you’d think. Adjust tension dials gradually when threads bunch up—think of it as finding the sweet spot between too tight and too loose.
With these basics mastered, those more complex repairs won’t seem so intimidating after all.
Table Of Contents
Key Takeaways
- You can solve most sewing machine problems yourself by checking for thread jams in the bobbin area, cleaning lint buildup, and oiling moving parts according to your manual.
- When you experience thread bunching or breakage, completely re-thread your machine, clean the bobbin area thoroughly, and adjust tension settings gradually to find the right balance.
- You’ll prevent many issues with regular maintenance—replace needles every 8-10 hours of sewing, use the right needle type for your fabric, and keep moving parts properly lubricated.
- If your machine makes noise or stitches incorrectly, start with simple fixes like checking power connections, inspecting the bobbin case, and tightening loose screws before considering professional repair.
Common Sewing Issues
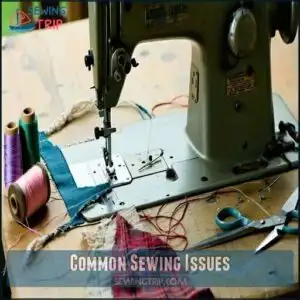
You’ll spot common sewing machine problems like thread bunching, needle breakage, and tension issues long before they become major headaches.
With simple troubleshooting steps, you can fix these issues at home and get back to your projects without the frustration of a machine that won’t cooperate.
Thread Bunching and Breakage
When thread bunching (that dreaded "bird’s nest" under your fabric) or breakage occurs, it’s often a cry for help from your machine.
Thread bunching isn’t just annoying—it’s your machine’s SOS signal begging for maintenance and proper threading.
- Thread tangles typically result from incorrect threading or a dirty bobbin area
- Upper tension problems cause threads to break repeatedly mid-stitch
- Bobbin issues like improper insertion lead to thread jamming
- Fabric snags happen when thread tension is severely imbalanced
Simple sewing machine troubleshooting guide: re-thread completely, clean thoroughly, then adjust tensions gradually.
Needle Breakage and Replacement
Regarding needle breakage, your sewing machine might be telling you something’s wrong.
Bent or dull needles can snap while sewing through thick fabrics.
Check your needle’s sharpness and replace it every 8-10 hours of sewing.
Different needle types suit various materials—ballpoint for knits, sharp for wovens.
Always turn off your machine before replacement to avoid accidents.
Proper maintenance includes understanding needle breakage causes to prevent future issues.
Machine Jamming and Tension Issues
Now that you’ve mastered needle care, let’s tackle those frustrating jams. Your machine binding up means something’s wrong with tension adjustment or thread flow.
When your sewing machine troubleshooting leads to jam clearance:
- Check for thread snagging around the bobbin issues first
- Remove all thread and re-thread completely
- Test tension with scrap fabric before returning to your project
Small tension tweaks often fix big problems.
Basic Repair Techniques
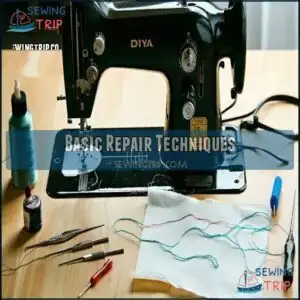
With a few simple tools, you can tackle common sewing machine repairs without calling a professional. Keep a small screwdriver, tweezers, lint brush, and machine oil nearby for quick DIY solutions.
When your machine starts acting up, first check the basics: Is it properly threaded? Is the needle inserted correctly? These sewing hacks solve 90% of problems.
For machine fixing, always unplug before attempting repairs. Remove the needle plate to clear thread jams—a common fix technique that works wonders.
If stitches look wonky, adjust tension dials gradually, testing on scrap fabric between changes. Sewing machine troubleshooting becomes easier with practice.
Regular cleaning of the machine can prevent thread breakage and skipped stitches. Remember: most issues stem from improper threading, dull needles, or lint buildup. Master these repair tools and basic fix techniques, and you’ll save time and money.
Cleaning and Maintenance
Keeping your sewing machine clean and well-maintained prevents frustrating issues and keeps your stitches smooth.
A clean, well-maintained sewing machine delivers smooth stitches and prevents frustrating mid-project breakdowns.
By removing lint, oiling moving parts, and checking the needle regularly, you’ll keep your machine running like a pro.
Regular Cleaning of Lint and Dust
Keeping up with sewing machine cleaning is easier than you think.
Regular cleaning prevents lint and dust from clogging your machine, ensuring smooth operation.
Use a cleaning brush or a soft cloth to remove debris from the bobbin area, feed dogs, and needle plate. A thorough sewing machine maintenance checklist can guide you through the process.
This basic sewing machine maintenance improves sewing hygiene, fabric care, and extends your machine’s life effortlessly!
Lubricating Moving Parts and Oil
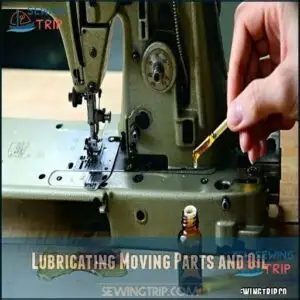
Think of sewing machine oil as the lifeblood of your machine.
Lubricating moving parts prevents rust, reduces friction, and guarantees smooth operation.
Always clean before oiling, use the right oil viscosity, and apply sparingly.
Proper sewing machine maintenance involves checking the recommended oil types regularly.
- Add 1-2 drops of sewing machine oil to joints and gears.
- Follow your manual’s lubrication schedule.
- Avoid over-oiling to prevent fabric stains.
Checking and Replacing Needles
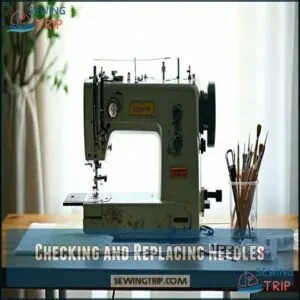
Needle problems can ruin your work, but regular inspection avoids headaches. Check for bends, dullness, or damage often. Replace broken needles immediately for better stitches.
Make certain proper alignment and use the right needle size for fabric. Store spares safely to prevent damage. Using the correct sewing needle types is vital for achieving professional results.
Here’s a quick guide:
Using the correct sewing needle types will help you avoid common issues and ensure your work looks its best.
Troubleshooting Tips
You can solve most sewing machine issues with a little observation and patience.
Simple adjustments to thread tension, bobbin settings, or fabric feed can often get your machine running smoothly again, which involves complete concepts such as understanding how these elements interact to affect the machine’s performance.
Identifying and Fixing Thread Tension
Thread tension troubles can ruin your sewing flow!
Start with your sewing machine’s manual to spot misplaced settings.
Adjust the tension dial gradually, testing on scraps.
If thread breakage persists, check bobbins tension and thread control.
Keep your top thread smooth, not too loose or tight.
This sewing machine troubleshooting guide can end frustration and bring back balanced stitches!
Resolving Fabric Feed Issues
If fabric feed issues are ruining your stitches, don’t sweat it—it’s a simple fix!
- Check if feed dogs are raised to grip fabric properly.
- Adjust presser foot pressure to keep fabric feeding evenly.
- Clean lint buildup under the needle plate.
- Verify that thread tension and bobbin tension are balanced.
- Avoid fabric puckering by matching needle size to fabric type.
Adjusting Bobbin and Thread Tension
Getting your tension settings just right can feel like a balancing act, but it’s key to stitch quality.
Start by checking both thread tension and bobbin tension.
A loose bobbin requires adjustment with its screw. For thread control, set upper tension according to your manual.
Regular sewing machine maintenance keeps fabric tension consistent, ensuring a smoother sewing experience every time, which is crucial for maintaining the right tension settings.
Advanced Repair Methods
When basic fixes aren’t enough, it’s time to explore advanced repair methods.
You’ll focus on re-threading, adjusting tension settings, and using specialized tools to replace or inspect machine parts with precision.
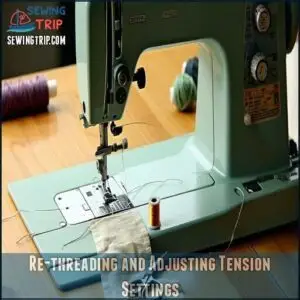
Re-threading and Adjusting Tension Settings
If your stitches look uneven or sloppy, it’s time to check thread tension or re-thread your machine. Uneven stitches often indicate sewing machine tension problems.
Follow your sewing machine troubleshooting guide to unthread everything, then thread again carefully.
Don’t skip the bobbin tension—ensure it’s tight but not restrictive. Fine-tune the tension adjustment knobs for balanced stitches.
Proper sewing machine calibration solves these frustrating issues quickly!
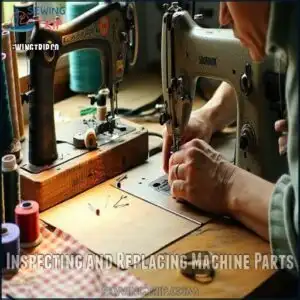
Inspecting and Replacing Machine Parts
Spotting damaged sewing machine parts is straightforward. Check for bent needles, loose gears, or a wobbly bobbin case.
Use a sewing machine repair kit for simple fixes like gear alignment or bobbin adjustment. Replace worn-out parts promptly—like that squeaky motor giving off odd vibes.
Preventative maintenance with proper sewing machine tools keeps everything humming neatly for smoother sewing sessions. Familiarizing yourself with machine sewing machine parts is essential for effective repairs and preventative maintenance with proper sewing machine tools and understanding of sewing machine parts.
Using Specialized Tools and Equipment
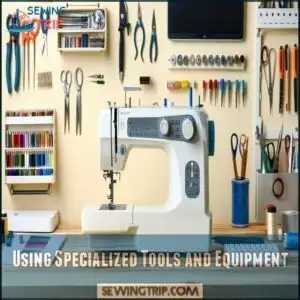
Specialized sewing machine tools simplify repairs.
A sewing machine repair kit, complete with screwdrivers, needlenose pliers, tweezers, and bobbin winders, provides precision and ease.
Use machine oilers to lubricate moving parts carefully.
Needle threaders save time, while Sewing Aids like thread clippers streamline tasks.
Investing in quality tool kits empowers you to handle complex fixes confidently and extend your sewing machine’s lifespan with the help of sewing machine repair kit.
Frequently Asked Questions (FAQs)
Can I fix my own sewing machine?
Like a gardener tending to plants, you can fix many common sewing machine issues yourself.
Regular cleaning, re-threading, and tension adjustments solve most problems.
Though complex repairs may require professional help.
What is the most common problem of the sewing machine?
Thread bunching underneath your fabric (bird’s nesting) is likely your sewing machine’s most common problem. You’ll also frequently encounter tension issues, skipped stitches, and needle breakage during regular use.
What to do with a sewing machine that doesn’t work?
Your non-working sewing machine isn’t dead yet.
Check power connections, rethread completely, clean lint buildup, oil moving parts, and inspect the bobbin case.
Small adjustments often bring these temperamental tools back to life.
Is it worth it to fix a sewing machine?
Yes, fixing your sewing machine is often worthwhile—especially for minor issues.
You’ll save money, extend its lifespan, and gain satisfaction from DIY repairs.
For complex problems, weigh repair costs against replacement value.
How to fix noisy sewing machine?
Clean, oil, and tighten your noisy sewing machine.
Dust the bobbin area, lubricate moving parts, and check for loose screws.
Regular maintenance keeps your trusty machine humming smoothly instead of screaming for attention.
Fixing computerized sewing machine display issues?
Try resetting your computerized sewing machine by turning it off for 30 seconds. If your display remains blank, check connections or update firmware. Contact manufacturer support if these steps don’t work.
Can I repair electrical cord damage?
Frayed electrical cords expose dangerous wires beneath their protective coating.
For minor damage, you can use electrical tape or heat-shrink tubing.
For severe damage, you’ll need to replace the entire cord for safety.
Repairing foot pedal responsiveness problems?
To fix foot pedal responsiveness, check for dust under the pedal, inspect wiring connections, and lubricate moving parts.
You’ll notice immediate improvement when dirt is removed and electrical contacts are cleaned with isopropyl alcohol.
How to recalibrate automatic buttonhole feature?
To recalibrate your automatic buttonhole feature, consult your manual first.
You’ll need to reset the buttonhole foot position, adjust tension settings, and run a test on scrap fabric before tackling your project.
Conclusion
Did you know that 80% of sewing machine issues can be solved at home with basic tools?
You’ve now got the skills for sewing machine fix at home success.
Remember, regular maintenance prevents major breakdowns.
When problems arise, start with the simplest solution—clean, re-thread, replace the needle—before assuming the worst. With patience and these troubleshooting techniques, you’ll keep your faithful stitching companion running smoothly for years to come.

