This site is supported by our readers. We may earn a commission, at no cost to you, if you purchase through links.

First, remove the needle plate and bobbin case.
Turn the handwheel slowly and watch if the hook point passes close to the needle (about 1mm away) when the needle rises 2-3mm from its lowest position.
If timing is off, loosen the screws on the hook assembly, adjust its position, then retighten.
You’ll need a screwdriver and patience—this job requires steady hands but saves repair costs.
Regular maintenance prevents timing issues, but knowing when the machine needs professional attention is equally important.
Table Of Contents
Key Takeaways
- You’ll know your sewing machine has timing issues when you notice skipped stitches, thread bunching underneath fabric, unusual noises during operation, or frequent needle breakage.
- To fix timing problems, you need to check if the hook point passes about 1mm away from the needle when it rises 2.4mm from its lowest position, which requires removing the needle plate and bobbin case first.
- When adjusting timing, you’ll need to loosen the screws on the hook assembly, carefully position it to achieve the correct synchronization with the needle, then retighten the screws securely.
- You can prevent most timing issues with regular maintenance that includes cleaning lint buildup, oiling moving parts according to your machine’s manual, and using the correct needle and thread for your fabric type.
Identifying Timing Issues
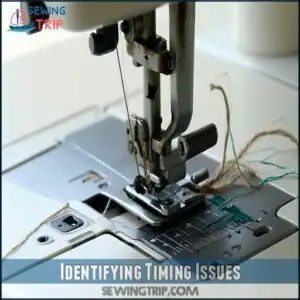
You’ll quickly notice timing issues when your machine produces skipped stitches, thread bunching underneath fabric, or makes unusual noises during operation.
Proper timing guarantees your needle and hook are synchronized correctly, allowing them to meet at the exact moment needed to form perfect stitches, which is crucial for the overall quality of the output, and proper synchronization is key to achieving this.
Common Signs of Timing Problems
Your sewing machine sends four clear distress signals when timing problems occur:
- Skipped stitches creating frustrating gaps in your seams
- Thread bunching or "bird nesting" underneath your fabric
- Unusual noises like clicking or grinding during operation
- Frequent needle breakage even with proper needle installation
These warning signs indicate the synchronization between your needle and bobbin hook has fallen out of alignment.
A visual inspection often reveals the timing issues before they worsen.
Don’t ignore these symptoms—they signal your machine’s components aren’t meeting at the right moment to form perfect stitches.
Addressing timing problems promptly prevents further damage.
Skipped Stitches and Thread Jams
Now that you know the warning signs, let’s look at missing stitches. When your fabric shows gaps where stitches should be, timing issues are often to blame.
Thread jams and frustrating "bird’s nests" underneath your work are equally telling signs.
Your sewing machine timing issues typically manifest as:
- Needle descends but fails to catch the bobbin thread
- Thread bunches form under fabric despite correct tension
- Bobbin issues persist even after checking thread quality
Before attempting timing adjustment, verify your needle type matches your fabric feed requirements. Incorrect settings can cause sewing machine skipping stitches.
Poor Stitch Quality and Machine Noise
While skipped stitches point to timing issues, your machine reveals additional clues through stitch quality and unusual sounds.
When timing is off, you’ll notice your sewing machine’s performance deteriorate. That synchronized dance between needle and hook becomes awkward, resulting in uneven stitches and concerning noises. Your machine isn’t just being temperamental—it’s signaling a mechanical problem.
Pay attention when your machine exhibits:
- Loud clunking or grinding that wasn’t there before
- Vibrating machine body during normal operation
- Uneven stitches despite proper threading
- Consistent thread breaks with new, quality thread
Every stitch should form smoothly without resistance. If your machine sounds like it’s struggling or fighting against itself, the hook timing likely needs adjustment.
Address these sewing machine timing problems promptly. Quick troubleshooting prevents more extensive damage and costly repairs. Think of it as preventative maintenance—fixing minor issues now saves significant headaches later.
Checking The Needle and Thread Compatibility
Before assuming timing issues, verify your needle and thread compatibility, as mismatched pairs often mimic timing problems.
When needle size and thread type work together correctly, you’ll avoid frustrating skipped stitches and bent needles. Check your tension settings too – they must be balanced for proper stitch formation.
| Fabric Weight | Recommended Needle Size | Suitable Thread Type |
|---|---|---|
| Lightweight | 9-11 | Fine (60-80 wt) |
| Medium | 12-14 | All-purpose (50 wt) |
| Heavy | 14-16 | Heavy-duty (40 wt) |
| Stretch | Ballpoint/Jersey | Polyester core |
| Denim/Canvas | 16-18 | Heavy-duty/Topstitch |
Use this compatibility chart to match components properly. The correct combination prevents tension issues that can be mistaken for sewing machine timing problems.
Remember: fabric weight determines needle size, which determines thread type. This three-way relationship is essential for maintaining stitch quality and preventing damage to your machine’s timing mechanism.
Preparing for Timing Adjustment
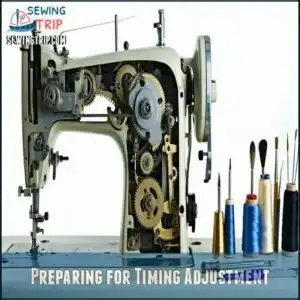
Before fixing your sewing machine’s timing, you’ll need to unplug the machine and remove the base cover, bobbin case, and switch plate for proper access to the timing mechanism.
You’ll also want to verify that your needle isn’t bent or damaged and that you’re using the correct thread and needle combination for your fabric type.
Removing Base Cover, Bobbin Case, and Switch Plate
Now that you’ve spotted those timing issues, let’s get inside your machine. Before starting any component removal, unplug your machine completely—safety first!
Select the right screwdriver for accessing mechanisms in your specific model. Most machines require a medium Phillips-head, but check your manual for exact tool selection requirements.
Start by removing the switch plate—the metal cover near your needle. Place screws in a small container (an empty mint tin works perfectly). Next, carefully lift out the bobbins case, taking note of its orientation for reinstallation later. Understanding proper bobbin removal is essential for maintenance.
For base covers, locate and remove all visible screws. Some models like Singer or Brother may have hidden fasteners under rubber feet. During this visual inspection, watch for any obvious damage or debris.
Handle all components gently—you’re performing delicate surgery on your sewing companion!
Verifying Thread, Needle, and Fabric Compatibility
With your machine disassembled, let’s make sure you’re working with compatible materials before adjusting any timing mechanisms.
Proper thread, needle, and fabric compatibility often resolves apparent timing issues without touching internal components.
Match these elements carefully:
- Needle Size: Use 70/10 for lightweight fabrics, 90/14 for medium weights, and 100/16 for heavy materials
- Thread Type: Select weight appropriate for your fabric (40wt for everyday sewing, 30wt for topstitching)
- Fabric Weight: Heavier fabrics require stronger thread and larger needles
- Tension Settings: Verify balanced thread tension between top thread and bobbin tension
- Special Materials: Stretch, leather, or metallic fabrics need specialty needles and threads
I’ve seen countless sewists convinced they’d timing problems when simply switching to the correct needle size instantly fixed their stitch quality issues.
This verification step saves hours of unnecessary adjustments.
Regular maintenance can help prevent future timing problems.
Ensuring The Needle is Not Bent or Damaged
After matching your thread and fabric, your next step is checking the needle, often the hidden culprit behind sewing machine timing issues.
Here’s how to perform a thorough needle inspection:
| Issue | Signs | Action |
|---|---|---|
| Bent needle | Wobbles when rolled on flat surface | Replace immediately |
| Blunt tip | Fabric pulls or snags | Install new needle |
| Tiny cracks | Thread breaking frequently | Change needle |
| Burrs | Thread fraying or shredding | Replace needle |
| Loose needlebar | Needle moves side-to-side | Tighten connection |
Even slightly damaged needles can disrupt needle alignment and throw off your machine’s timing. You wouldn’t drive with a flat tire, so don’t sew with a broken needle!
For proper needle storage, use a pincushion or original packaging. Remember different needle types suit different fabrics. Regular needle replacement is one of the simplest preventative measures against needle breakage and timing problems.
Performing a Timing Test
You’ll need to check if your sewing machine’s needle and hook are properly synchronized by turning the handwheel slowly and watching how they interact.
The needle should rise about 2.4mm from its lowest position when the hook point passes near the needle, creating the perfect timing for stitch formation.
Rotating The Hand Wheel and Observing The Hook
Now that you’ve prepared your machine, it’s time to watch how the parts work together.
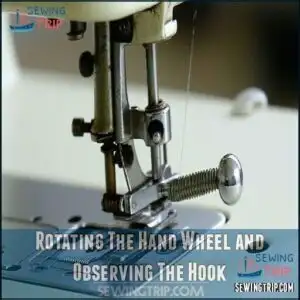
Turn the hand wheel slowly and observe the hook’s movement:
- Rotate the wheel toward you, noting when the needle reaches its lowest position
- Watch how the shuttle hook passes near or catches the needle eye
- Listen for unusual clicking or grinding noises that signal timing problems
- Observe if the hook catches the thread loop properly
- Check if the hook rotation matches your manual’s timing marks
Measuring The Distance Between The Needle and Hook
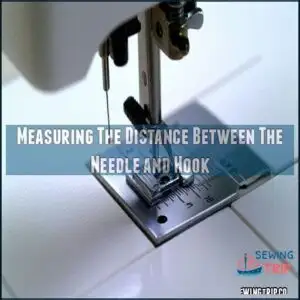
With your hand wheel turned to align the hook and needle, the next vital step is measuring their separation. The ideal distance between these components should be precisely 0.04-0.1mm (with some machines requiring 2.4mm).
This specific tolerance level guarantees proper hook timing for catching thread loops consistently. For accurate calibration, use specialized measurement tools like feeler gauges or small rulers.
The impact on stitching is significant—incorrect spacing causes needle timing problems that lead to skipped stitches or breakage. Check your shuttle hook clearance by slowly rotating the hand wheel.
This measurement isn’t just a technicality—it’s the difference between perfect seams and frustrating sewing sessions.
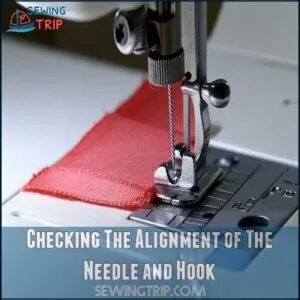
Checking The Alignment of The Needle and Hook
Now that you’ve measured the distance between components, it’s time to verify proper alignment. Slowly rotate the hand wheel and observe how your needle and hook interact during operation.
For perfect alignment, watch for:
- Your needle passing smoothly without striking the shuttle hook
- The hook tip catching the thread loop consistently without skips
- Timing marks on the needlebar lining up with manufacturer specifications
- A clean, precise hook position about 1-2mm above the needle eye
When properly aligned, the shuttle hook should glide past your needle just above its eye, perfectly positioned to catch the thread loop. This synchronization guarantees smooth operation and prevents common issues like skipped stitches or thread breakage during your sewing machine timing adjustment.
Adjusting The Timing
You’ll need to carefully adjust the needle and hook timing to fix your sewing machine, which requires loosening specific components and realigning timing marks according to your machine’s manual.
This technical process involves measuring precise distances, adjusting the needlebar position, and ensuring the hook catches thread at exactly the right moment for perfect stitches, which is crucial for achieving perfect stitches.
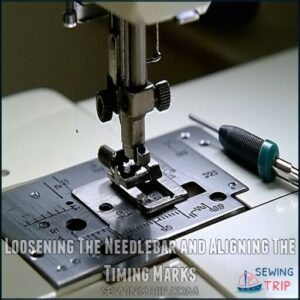
Loosening The Needlebar and Aligning The Timing Marks
Work your way slowly as you loosen the needlebar screw with your screwdriver.
You’ll need to align those timing marks with precision, like matching puzzle pieces.
Without visible marks, lower your needle to the bottom, then raise it exactly 2.4mm.
| Step | Tool | Purpose |
|---|---|---|
| Loosen needlebar | Flathead screwdriver | Enable height adjustment |
| Align marks | Ruler or gauge | Perfect bushing alignment |
| Check needle position | Measuring tool | Verify correct timing |
Don’t rush this needlebar adjustment—proper alignment precision guarantees your sewing machine timing runs smoothly without skipped stitches, ensuring complete concepts are applied correctly.
Lowering The Needlebar and Loosening Machine Base Components
You’re ready for some serious gear adjustment. Lower the needlebar carefully until it hits its lowest point.
Now loosen those base screws to access the timing mechanism. The goal? Getting that needle eye positioned exactly 2.4mm below the hook point.
For superior performance, consider proper needlebar alignment.
- Your machine’s heart beats in perfect time once you nail this
- Skipped stitches become ancient history
- Friends might just think you’re a sewing wizard
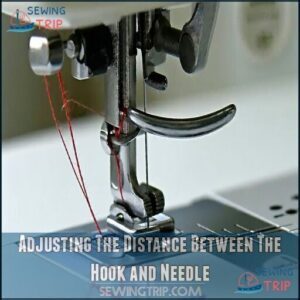
Adjusting The Distance Between The Hook and Needle
Looking at the hook-needle gap, precise measurements make all the difference for smooth operation. A typical ideal clearance ranges from 0.04 to 0.1mm – about as thin as a single sheet of paper.
For accurate sewing machine timing adjustment, follow these steps:
- Position your needle at its lowest point for measurement
- Check timing marks on both the hook and needle bar
- Adjust shuttle alignment until the hook tip barely clears the needle’s eye
- Turn the handwheel slowly to test movement between parts
- Verify proper stitch formation by watching the thread path
When you adjust sewing timing correctly, the hook passes behind the needle at the perfect moment. Skipped stitches indicate problems with your machine’s timing. This tiny gap prevents common issues like broken needles and missed stitches while ensuring reliable stitch formation.
Referencing The Sewing Machine Manual for Specific Instructions
After setting your hook distance correctly, the next step depends entirely on your machine’s specific instructions. Before making any adjustments, consult your sewing machine manual—it’s packed with essential information unique to your model.
Different machines have different needs. Your manual contains Model Variations details and precise Manual Diagrams showing where components should align. These visuals are gold for proper sewing machine repair.
| Information Type | Where to Find | Why It Matters |
|---|---|---|
| Timing marks | Diagrams section | Shows proper alignment |
| Specifications | Technical pages | Gives exact measurements |
| Warnings | Safety section | Prevents damage |
The Troubleshooting Guide helps identify common issues, while the Part Identification section ensures you’re working on the right components. Pay special attention to Safety Precautions—rushing could damage expensive parts. These model-specific instructions prevent guesswork during your timing adjustment and guarantee successful sewing machine troubleshooting.
Testing and Troubleshooting
You’ll need to test your timing adjustments by slowly rotating the handwheel and watching how smoothly the hook catches the thread.
If you notice persistent skipped stitches or unusual sounds, you can troubleshoot by rechecking alignment, cleaning the mechanism, and making small adjustments until your machine sews perfectly.
Rotating The Hand Wheel to Ensure Smooth Hook Movement
Test your sewing machine timing repair work by carefully rotating the hand wheel in the proper handwheel direction.
Watch four key components during this process:
- The needle synchronization with the rotary hook
- The smooth rotation quality of all parts
- The hook assembly’s precise timing observation
- Any resistance that shouldn’t exist
As you turn the hand wheel, listen for subtle catching sounds or feel for irregular resistance.
Your hook movement should glide like a well-oiled clock mechanism, catching the thread loop exactly when the needle rises.
Pay attention to the timing marks – they should align perfectly at the designated points during rotation.
If you encounter grinding sensations or hear unusual noises, check your timing adjustment again.
A properly timed machine produces a quiet, consistent hum.
Remember that smooth rotation indicates successful calibration, while resistance suggests lingering alignment issues with your hook assembly that need immediate attention.
Cleaning and Oiling The Sewing Machine
Proper maintenance keeps your machine’s timing spot-on and prevents costly repairs.
Clean lint from feed dogs and bobbin areas weekly with specialized brushes or tweezers.
Establish a monthly lubrication routine for peak performance.
Many users purchase specialized sewing lubricants for this purpose.
| Component | Oil Type | Cleaning Frequency |
|---|---|---|
| Bobbin area | Sewing machine oil | Weekly |
| Feed dogs | Oil sparingly | Monthly |
| Moving parts | Special lubricant | Per manual |
Always consult your manual for component lubrication guidelines to maintain precise timing and smooth operation, ensuring your machine runs with optimal performance and smooth operation.
Reassembling The Machine and Testing The Timing Adjustment
Carefully reassemble your machine after timing adjustments, ensuring proper part replacement of all components.
Tighten each screw securely without overtightening.
Once assembled, perform a thorough final inspection of all moving parts.
Test your timing adjustment by turning the handwheel manually to verify smooth operation between needle and hook.
Next, run a stitch testing sequence on scrap fabric, checking fabric tension and stitch quality.
Perfect, even stitches confirm your correct sewing timing adjustment was successful.
If imperfections persist, consult a sewing machine timing tutorial for additional troubleshooting or adjust sewing timing again following your machine’s specific timing adjustment guide.
Identifying and Resolving Persistent Issues
When your timing adjustments don’t solve persistent issues, you’ll need to dig deeper. Lingering problems often have hidden causes that require systematic troubleshooting.
- Check feed dog alignment – misaligned feed dogs cause fabric to bunch and create recurring skips
- Examine hook race for microscopic nicks causing thread snapping
- Test with different thread weights to identify possible tension imbalance
- Consider professional help if timing errors continue despite your best efforts
Try cleaning lint from hard-to-reach areas that affect hook timing. Adjust thread tension if stitches remain uneven. Remember that some sewing machine timing problems require specialized tools beyond DIY solutions, especially with computerized models. This may involve identifying a tension imbalance and using the right techniques to fix it, ultimately leading to a successful repair.
Specific Timing Issues and Solutions
You’ll encounter specific timing problems depending on your machine’s make and model, requiring targeted solutions for issues like hook timing misalignment or drive shaft bushing wear.
Each machine displays unique symptoms when timing is off, from birds’ nests under fabric in computerized models to consistent thread breaks in mechanical ones, often indicating timing problems.
Hook Timing Issues and Solutions
Now that you’ve confirmed timing issues through testing, let’s address hook timing problems head-on.
Hook timing issues are the #1 culprit behind:
- Skipped stitches that waste your fabric and time
- Thread breakage that tests your patience
- Needle damage that costs you money
For proper hook alignment, position your shuttle hook just 0.04-0.1mm from the needle. Adjust the needle bar height so the needle eye sits 2.4mm below the hook point. Finally, check that timing gears are synchronized, ensuring the needle and hook mechanism move together in perfect harmony.
Adjusting The Drive Shaft Bushing on Singer Machines
When tackling Singer machines, the drive shaft bushing often causes timing troubles. This small but mighty component needs regular inspection.
| Issue | Symptom | Solution |
|---|---|---|
| Bushing Wear | Oval holes, shaft play | Replace bushing |
| Misalignment | Irregular stitching | Realign timing marks |
| Locked Bushing | Machine won’t turn | Apply Kroll Oil |
To fix timing issues, loosen the set screw that holds the bushing in place. If it’s stubborn, try a rust breaker like BB blaster. You’ll need to verify the take-up lever sits at the top position while aligning the arrows on the bottom shaft for proper sewing machine timing synchronization.
Tools and Materials Needed for Timing Adjustments
While Singer machines have their own timing quirks, you’ll need specific tools for any timing adjustment task.
For proper sewing machine timing maintenance, gather these essentials:
- Set of straight screwdrivers (#1-3) for accessing internal components
- Hex keys (Allen wrenches) – most machines use metric sizes
- Torx drivers (8, 10, 20) especially for Bernina, Viking, or Pfaff models
- New needles (80/12 or 90/14) for testing
- Quality thread and scrap fabric for verification
- Flashlight or work light for better visibility
Don’t forget a soft surface to place your machine during adjustments. Correct timing prevents skipped stitches, ensuring smooth operation.
Disassembling The Machine for Timing Adjustments
Now that you’ve gathered your tools, it’s time to open up your machine. Unplug it first for safety precautions.
Remove the bottom cover by loosening screws and nuts to access the timing mechanism. Next, take off the feed plate by carefully leveraging it out.
For proper component removal, unscrew the T25 star screws to swivel out the metal base. Be gentle with plastic snaps during sewing machine disassembly to avoid breaking parts.
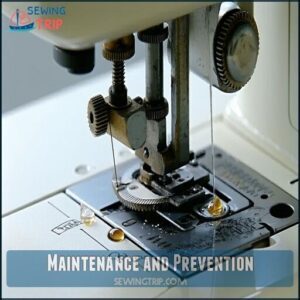
Maintenance and Prevention
You’ll prevent most timing issues by establishing a regular maintenance routine that includes cleaning lint buildup and oiling moving parts according to your machine’s manual.
Proper needle and thread selection for your fabric type, combined with gentle handling of your machine, will substantially extend the time between professional tune-ups.
Regular Cleaning and Maintenance Schedule
With proper timing adjustments behind us, let’s look at how regular maintenance keeps your machine running smoothly.
Your sewing machine needs consistent care to maintain perfect timing.
Follow this simple maintenance schedule:
- Weekly Lint Removal: Clean feed dogs and bobbin areas to prevent buildup that affects timing
- Monthly Oiling Frequency: Apply 1-2 drops of sewing machine oil to moving parts per your manual
- Quarterly Part Inspection: Check for loose screws or worn components that might affect alignment
- Bi-annual Scheduled Servicing: Consider professional maintenance for deep cleaning
- Annual Timing Check: Verify timing hasn’t shifted, especially after heavy use
Dust and thread particles can work their way into tight spaces, gradually affecting your machine’s timing.
A quick cleaning after every 8-10 hours of sewing prevents most timing problems.
Remember: Regular maintenance is much easier than fixing timing issues later.
Tips for Preventing Timing Issues
Regularly prevent timing issues with these straightforward maintenance practices.
Always verify Proper Threading before starting any project. Check Needle Condition weekly and replace bent or dull needles promptly.
Perform Regular Oiling according to your manual’s schedule. Practice Gentle Sewing rather than forcing fabric through.
Avoid Forcing thick materials that strain your machine’s mechanisms. Clean lint and debris monthly from feed dogs and bobbin area.
These sewing machine timing maintenance habits will substantially extend your machine’s lifespan.
Importance of Proper Thread, Needle, and Fabric Compatibility
Now that you know how to prevent timing issues, let’s talk about choosing compatible materials – a cornerstone of timing maintenance.
The right combination of thread, needle, and fabric prevents many timing problems before they start.
When these elements don’t work together, your machine faces unnecessary strain.
Here’s what creates perfect harmony in your sewing machine:
- Needle Size – Match to fabric weight; use size 9-11 for silk, 14-16 for denim
- Thread Weight – Should complement your needle; thinner threads for finer needles
- Fabric Type – Different materials need specific handling; lightweight fabrics need gentle tension
- Tension Balance – Adjust based on your material combination to prevent stress on timing components
- Thread Path – Make certain of proper threading to avoid resistance that strains timing mechanisms
Testing combinations on scrap fabric before starting projects helps you identify potential issues that could affect stitch quality and machine performance.
Benefits of Regular Sewing Machine Tune-Ups
While proper thread and needle choices matter, your machine needs regular care too.
A professional tune-up offers key benefits for your sewing companion:
- Performance longevity: Preventative maintenance removes dust and lint before they cause damage
- Cost savings: Catching minor issues early prevents expensive repairs later
- Smooth operation: Properly calibrated timing maintains consistent stitch formation
- Quality stitching: Regular service maintains proper tension and alignment for professional-looking results
Frequently Asked Questions (FAQs)
How do I get my sewing machine timing right?
Like a conductor leading an orchestra, you’ll need to unplug your machine.
Remove covers, align the needle 4mm above lowest position, and adjust until the hook meets the needle just above the eye, which is a critical step to ensure proper functioning.
How does timing affect the working of a sewing machine?
Timing in your sewing machine coordinates needle movement with bobbin hook rotation.
When perfectly synchronized, you’ll get even stitches. If misaligned, you’ll experience skipped stitches, thread bunching, and potential machine damage, which can be prevented by ensuring proper synchronization.
What if my sewing machine timing is off?
You’ll notice skipped stitches, thread bunching, or needle breakage when timing is off.
Check your manual, unplug the machine, and adjust the needle-hook synchronization by aligning timing marks or measuring the proper distance.
When should I adjust my sewing machine timing?
When red flags like skipped stitches or thread bunching appear, you should adjust your timing.
You’ll also need to realign timing after needle strikes, major repairs, or if your machine makes unusual noises during operation.
How do I know if my sewing machine has a timing issue?
You’ll spot timing issues when your machine skips stitches, breaks needles frequently, makes unusual noises, or creates thread bunching underneath fabric.
Thread breakage and poor stitch quality are also common indicators.
How to fix timing on sewing machine thread?
Perfectly pinpoint problems by checking your needle position and hook timing.
You’ll need to adjust the timing mechanism by loosening gears, aligning the hook with the needle at 4mm above its lowest position, then tightening screws.
What does it mean when the timing is off on a sewing machine?
When your sewing machine’s timing is off, the needle and bobbin hook aren’t synchronized properly. You’ll notice skipped stitches, thread bunching underneath fabric, needle breakage, or strange noises during operation.
Can a sewing machine get out of time?
You’d think machines would stay perfectly aligned forever, but yes, your sewing machine can get out of time.
Heavy use, accidental knocks, or dropping the machine can disrupt those precise factory settings.
How to keep a sewing machine straight?
To keep your sewing machine running straight, regularly clean lint buildup.
Use the correct needle for your fabric, maintain proper tension settings.
And make certain your fabric guide is properly aligned when sewing.
How to fix a sewing machine timing?
To fix sewing machine timing, first unplug your machine, remove covers and bobbin case.
Adjust the hook timing by aligning it with the needle when raised 4mm from lowest position.
Tighten screws securely afterward.
Conclusion
Remember Sarah’s vintage Singer that kept skipping stitches?
She learned to fix sewing machine timing herself and saved $120 on repairs.
You can do it too! With patience and practice, you’ll master this essential skill, preventing future issues and extending your machine’s life.
Don’t be intimidated—just follow these steps carefully, and you’ll soon enjoy perfect stitches again.
When in doubt, consult your manual or consider professional help for complex machines, which requires professional help.
- https://www.wikihow.com/Adjust-Sewing-Machine-Timing
- https://sewing-machine-service-and-repair.com/sewing-machine-timing-hook-timing
- https://archaicarcane.com/perfect-timing/
- https://www.justanswer.com/small-appliance/fnc0m-think-it-s-bobbin-hook-timing-moved-machine-across.html
- https://www.reddit.com/r/sewhelp/comments/1b3chnj/need_help_with_sewing_machine_timing/

