This site is supported by our readers. We may earn a commission, at no cost to you, if you purchase through links.

For projects that are too small, add contrasting fabric panels, decorative trim, or convert them into accessories.
If something’s too big, take in seams strategically or add darts for shape.
Machine holes can become decorative elements with patches, embroidery, or appliqué.
Wonky seams hide beautifully under ribbon, bias tape, or contrasting topstitching.
Failed zippers become invisible with strategic fabric placement or decorative overlays.
Buttonhole disasters transform into design features with hand-sewn alternatives or decorative buttons.
The key is embracing creative solutions that make mistakes look intentional, and sometimes your biggest "oops" becomes your project’s most unique feature, making it essential to consider decorative elements and strategic fabric placement to achieve a desired look with contrasting topstitching.
Table Of Contents
Key Takeaways
- Embrace strategic additions – When your project is too small, add contrasting fabric panels, decorative trim, or convert it into accessories instead of scrapping it.
- Transform holes into features – Turn machine-made holes into design elements using patches, embroidery, or appliqué rather than viewing them as failures.
- Cover wonky seams creatively – Hide uneven stitching with ribbon, bias tape, or contrasting topstitching to make mistakes look intentional.
- Think embellishment over perfection – Use decorative buttons, lace, or fabric flowers to camouflage errors and turn your biggest "oops" into your project’s most unique feature.
Project is Too Small
When your sewing project turns out too small, don’t panic – this common sewing mistake has several practical sewing fixes.
You can tackle size adjustment through fabric addition techniques like panel insertion along side seams or adding contrasting fabric strips.
Seam letting works if you left generous seam allowances, while dart techniques can redistribute fabric for better fit.
Consider creative garment alterations like adding lace extenders to sleeves or inserting gussets under arms.
For fabric repairs that feel intentional, try adding coordinating panels as design elements rather than obvious fixes.
Sometimes embracing the smaller size works too – transform that too-tight top into a cropped style or repurpose sleeves into accessories.
The key is viewing these sewing errors as opportunities for creative problem-solving rather than failures.
To achieve a perfect fit, understanding pattern resizing techniques is essential for making adjustments to your sewing projects.
Project is Too Big
If squeezing into a too-small project felt like stuffing a pillow into a teacup, then swimming in an oversized piece is a whole different adventure.
You don’t need a tailor’s license to tackle size reduction—just a bit of patience and a steady hand.
Start by taking it in at the side seams or underarms, working half an inch at a time for better control.
Don’t be shy about altering seams on the front and back if you’re still lost in fabric.
Fitting adjustments like lifting shoulder seams can help nix the droopy look.
If darts are making your bodice balloon, shrink those cup sizes.
And hey, if your sewing mistakes are too much to wrangle, repurpose that fabric into a skirt or tote.
Understanding skirt resizing techniques can also help in altering garments.
With these sewing fixes, you’ll hide sewing mistakes and turn sewing errors into clever sewing repairs.
Machine Chewed a Hole
If your last project felt a bit oversized, you’re probably ready for a new challenge—like fixing a machine-chewed hole. It happens to everyone: your needle snags, tension’s off, and suddenly you’re staring at a tear.
Don’t sweat it. Hole Repair is all about smart Sewing Hacks. Start by cleaning up any loose threads, then reach for a no-sew fusible web or iron-on Fabric Patch—these blend right in and make sewing repairs easy.
If you’re feeling creative, cover up with ruffly flowers, lace, or a cluster of buttons. Grandma always said, “Add more ruffles and nobody’ll notice.” You can also try a darning stitch or ladder stitch for small holes.
Machine Errors might seem scary, but every Fixing Tear is a chance to show off your mending clothes skills. Understanding buttonhole techniques can also help in preventing such mistakes. With a little patience, you’ll hide sewing mistakes and turn fabric repair into a fun, stylish upgrade.
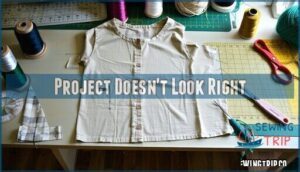
Project Doesn’t Look Right
Every now and then, right in the middle of a project, you step back and realize something’s off—maybe the fabric’s twisted, the seams aren’t lining up, or the pattern looks like it’s doing the cha-cha. When you spot these sewing mistakes, don’t panic.
Grab your seam ripper and unpick the trouble spots. Double-check your grainline, measure pieces carefully, and keep those seam allowances consistent. You’d be surprised how much a little attention to detail can fix sewing errors, Fabric Issues, or Pattern Errors.
Understanding common sewing mistakes is essential to avoiding project failures. Try these quick fixes:
- Use topstitching or applique to cover uneven seams and Color Mistakes.
- Hide awkward spots with lace or fabric patches—no one will know.
- Re-cut pieces if the pattern’s way off; it’s better than forcing a fit.
- Take a breath, stay patient, and treat sewing troubleshooting like a puzzle.
Remember, every sewing imperfection is just a chance to get creative!
Zipper Went Wrong
Don’t sweat it if your zipper’s gone rogue—misaligned, teeth issues, or a stubborn slider can make anyone want to toss their project.
Instead, grab a lace zipper for a creative fix. Lace zippers hide sewing mistakes like fabric catching or uneven Zipper Alignment, and also turn zipper repair into a style upgrade.
Pick a width that fits your vibe—narrow for subtle, wide for drama. Match or contrast colors for extra flair.
If teeth issues or slider problems pop up, lace zippers cover imperfections and add personality. It’s sewing troubleshooting with a twist—embrace zipper fixes and let your garment show off its new look.
Understanding zipper anatomy is key to solving common zipper repair issues.
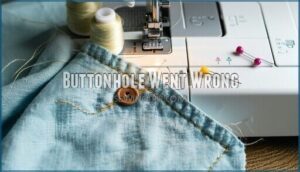
Buttonhole Went Wrong
When your buttonhole’s edges look more frayed than your patience after a long sewing session, don’t toss the project. Even experienced sewers face buttonhole disasters—you’re not alone in this struggle.
Start by stabilizing loose threads with fabric glue to prevent further unraveling. Hand-stitch over frayed edges using matching embroidery thread for a cleaner appearance. If the opening’s too large or uneven, try recutting it slightly bigger for a fresh start.
Here are quick buttonhole repair solutions:
- Apply small fabric patches inside the opening to reinforce weak spots
- Use dense zigzag stitches to correct gaping areas
- Cover damaged sections with decorative buttons or small trims
- Add contrasting thread colors intentionally to create a design element
Understanding buttonhole mechanisms is key to preventing common issues. These sewing hacks transform thread issues into creative opportunities. Remember, fabric fixers and stitch solutions often work better than starting over. Your buttonhole mistakes become invisible with the right sewing corrections and a little patience.
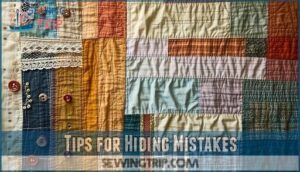
Tips for Hiding Mistakes
Mistakes happen to everyone, but they don’t have to ruin your project. When something goes wrong, pause and think through your options before deciding on the best fix.
Fabric Repair Strategies:
- Camouflage techniques — Position appliques, ribbons, lace, or embroidery over holes, uneven seams, or other sewing imperfections
- Creative embellishments — Add decorative buttons, rosettes, or flowers to transform mistakes into design features
- Fabric coloring — Use fabric markers or coordinating paints for mistake camouflage on visible errors
- Seam conceal methods — Apply bias tape, ribbon strips, or lace to hide uneven seams
Quick Solutions for Common Problems:
- Iron-on patches work great for damage fixing small holes
- Decorative stitching can turn sewing corrections into intentional design elements
- Strategic button placement covers most sewing mistakes to avoid
- Contrasting trim transforms error correction into creative flair
Remember, many "mistakes" become your project’s most interesting features. What starts as damage fixing often ends up being the detail everyone compliments. For example, you can try to add extra pieces to salvage too-small projects.
Mistakes That Look Homemade
Nobody wants their handmade creations to scream "homemade disaster." You can spot these sewing imperfections from across the room – crooked hems, puckered seams, and mismatched patterns that announce beginner sewing loud and clear.
Understanding fabric cutting mistakes is essential to achieving professional-looking results.
| Problem | Quick Fix | Prevention |
|---|---|---|
| Fabric Errors | Use fabric markers to disguise | Follow grain lines carefully |
| Seam Issues | Add decorative trim | Press seams as you sew |
| Thread Breaks | Re-stitch with matching thread | Check machine tension |
| Puckering Fixes | Steam and re-press gently | Use correct presser foot |
| Crooked Hems | Apply bias tape or lace | Measure twice, cut once |
Transform sewing mistakes into design features with strategic embellishments. Ironing tips alone can save many projects from looking amateur.
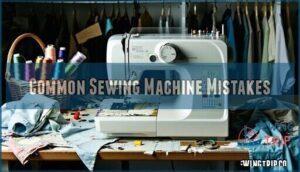
Common Sewing Machine Mistakes
Your sewing machine can turn from helpful friend to fabric-eating monster when something goes wrong. Understanding thread tension prevents half your headaches—when it’s too tight, fabric puckers; too loose creates messy loops underneath.
Here are five sewing machine issues that’ll make you want to throw your project out the window:
- Fabric bunching happens when you forget to lower the presser foot before sewing
- Thread snapping often means you’re using old, brittle thread or incorrect needle size
- Uneven stitches signal tension problems or a dull needle that needs replacing
- Machine skipping stitches indicates wrong needle type for your fabric weight
- Feed dog issues cause fabric to bunch or move unevenly during sewing
Regular machine maintenance prevents most sewing errors. Clean lint from the bobbin area after each project and oil moving parts monthly. Test stitch quality on fabric scraps before starting your real project.
When sewing mishaps occur, stop immediately—continuing usually makes things worse. The bobbin case needs to be cleaned regularly to avoid common malfunctions that affect stitch quality.
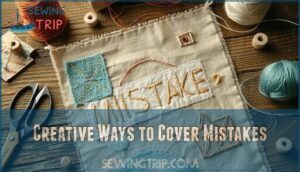
Creative Ways to Cover Mistakes
When creativity meets catastrophe, your sewing mistakes transform into design opportunities.
Turn your worst sewing disasters into your project’s best design features.
Turn those fabric failures into stunning features with smart creative fixes.
Strategic Embellishments
- Creative Patches & Appliqué – Iron-on decorative patches instantly cover holes and tears while adding personality to plain garments
- Seam Conceal Solutions – Layer lace trim or bias tape over crooked seams to mistake embellish problem areas into elegant details
- Error Camouflage Techniques – Cluster decorative buttons or fabric flowers strategically to draw attention away from imperfections
- Fabric Repair Art – Use textile markers or fabric paint to turn stains into intentional patterns or motifs
Smart sewing corrections don’t just hide problems—they enhance your project’s character.
That accidental hole becomes a perfect spot for embroidered flowers. Uneven hems disappear under decorative ribbon. Every mishap offers a chance to add unique touches that mass-produced items can’t match.
Mastering preventative measures like sewing mistake fixes can substantially improve the overall quality of your projects.
Frequently Asked Questions (FAQs)
How to hide sewing mistakes?
Like a magician’s sleight of hand, you can make errors vanish using appliques, decorative buttons, or embroidered patches.
Add lace trim, ribbons, or bias tape over crooked seams, turning mistakes into design features.
How do I fix puckered seams?
Check your machine’s tension settings and test on fabric scraps first. Press seams while sewing, use proper needle size, and make certain you’re not stretching fabric as you stitch.
What about crooked or uneven hems?
Wonky hems can turn your masterpiece into a disaster, but don’t panic! Use bias tape or fusible hem tape to straighten things out, or embrace the imperfection with decorative trim.
Can I salvage fabric cutting mistakes?
Yes, you can salvage cutting mistakes.
Repurpose miscut fabric into smaller projects like accessories or embellishments.
Add fabric panels, ruffles, or bias tape to enlarge pieces, or use creative appliques to cover errors.
How to handle thread tension problems?
Your machine’s acting up again, isn’t it?
Start by testing tension on scrap fabric before your project.
Adjust the tension dial and check bobbin threading.
Heavy fabrics need higher tension than lightweight ones.
What if my pattern pieces dont align?
When pattern pieces don’t line up, realign them with your fabric’s grain lines on a flat surface.
Pin carefully around each piece, ensuring you’re following the pattern’s directional arrows for proper fit.
Conclusion
Every cloud has a silver lining when you learn to hide sewing mistakes creatively.
These seven fixes transform your biggest blunders into stunning design features that’ll make people think you planned them all along.
Don’t throw away imperfect projects—embrace the unexpected and turn mishaps into masterpieces.
With practice, you’ll develop an eye for spotting opportunities to disguise errors before they become problems, and even experienced sewists make mistakes, so keep these tricks handy for your next project to create a masterpiece.


