This site is supported by our readers. We may earn a commission, at no cost to you, if you purchase through links.
A crooked buttonhole can unravel your best sewing work faster than you can thread a needle. The difference between a garment that looks homemade and one that looks professionally made often comes down to this single detail—those neat, precisely stitched openings that hold everything together.
Mastering buttonholes isn’t just about following your machine’s settings or mimicking hand-sewn techniques from a century ago. It’s about understanding how needle size, thread weight, and interfacing work together to create openings that won’t pucker, fray, or fail after the first wearing.
Whether you’re working with delicate silk or heavy denim, the right approach transforms this intimidating step into a straightforward process that elevates every project.
Table Of Contents
- Key Takeaways
- Essential Tools and Materials for Buttonholes
- Preparing Fabric and Marking Buttonholes
- How Do I Sew a Buttonhole by Machine?
- Step-by-Step Guide to Hand-Sewing Buttonholes
- Opening and Finishing Buttonholes Safely
- Tips for Perfect Buttonholes Every Time
- Frequently Asked Questions (FAQs)
- Conclusion
Key Takeaways
- Buttonhole success depends on matching three elements together: needle size to thread weight, interfacing weight to fabric type, and buttonhole length to button diameter plus 1/8 inch for ease.
- Interfacing prevents puckering and stretching in buttonholes, with fusible types working best for wovens and knit interfacing moving naturally with stretch fabrics.
- Machine buttonholes use automatic feet for speed and consistency, while hand-sewn buttonholes create tighter knots along edges that resist fraying better through dense, closely-spaced stitches.
- Testing on scrap fabric reduces errors by over half and lets you verify tension settings, stitch width, and cutting techniques before working on your actual garment.
Essential Tools and Materials for Buttonholes
You can’t build a strong buttonhole without the right foundation. The tools and materials you choose directly affect how your buttonhole looks and holds up over time.
Here’s what you need to gather before you start sewing.
Choosing The Right Needle and Thread
Needle point sharpness matters. You need a sharp needle for woven fabrics and ballpoint for knits. Match needle size to your thread—aim for thread diameter about 40% of the needle size. Lower numbers indicate finer needles.
Here’s what works:
- Cotton thread fills stitches beautifully on wovens
- Polyester thread stretches with knit fabrics
- Silk thread adds strength for hand-sewn work
Test different combinations on scrap fabric first for durability.
Selecting Interfacing for Stability
Interfacing types—woven, non-woven, and knit—keep your buttonholes from stretching or puckering. Weight matching matters: choose interfacing slightly lighter than your fabric to maintain drape while adding stability. Fusible interfacing bonds quickly with heat, while sew-in options suit delicate materials.
Cut interfacing strips along the grainline, about 1 inch long, covering the buttonhole area. For best results, remember that buttonhole length matters for the final fit. This preparing fabric step is your foundation for buttonhole construction that lasts.
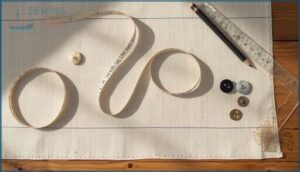
Marking Tools and Measuring Devices
Once you’ve stabilized your fabric, accurate marking becomes your next priority. Tailor’s chalk marks disappear easily, while water-soluble pens vanish after washing—choose what suits your workflow.
Measuring the button determines buttonhole size: add 1/8 inch to its diameter for buttonhole length. Buttonhole gauges maintain spacing consistency between holes.
Mark on scrap fabric first to verify placement, then transfer measurements to your garment using rulers or digital markers for precision.
Buttonhole Foot and Machine Attachments
Your sewing machine needs the right buttonhole foot to deliver consistent results. Modern automatic feet sense button size and adjust length instantly, while vintage attachments use metal templates requiring manual positioning. The foot mechanisms—cogs, gears, and sensor bars—guide fabric smoothly and maintain stitch placement throughout each buttonhole.
- Automatic feet complete buttonholes in one programmed step without stopping
- Manual step feet require you to pause between stitching phases
- Sensor technology reduces measuring errors by detecting button dimensions directly
Preparing Fabric and Marking Buttonholes
Measuring and marking your buttonholes properly is like drawing the blueprint before you build—it saves time and prevents costly mistakes. You’ll need to think about button size, fabric type, and spacing before you ever touch the sewing machine.
Measuring buttonholes before sewing is like drawing a blueprint—it prevents mistakes and saves time
Let’s walk through the essential prep steps that set you up for clean, professional buttonholes every time.
Measuring and Marking Buttonhole Placement
Before you stitch, get your buttonhole placement right—accuracy here means your garment won’t gap or pull. Mark buttonholes on the fabric’s right side, spacing them 2 to 3 1/2 inches apart using a seam gauge and fabric marker. Placing buttonholes at the bra line prevents gaposis on fitted styles.
Use pins and marking tools for even distribution before making permanent marks.
| Spacing Guidelines | Horizontal Placement | Vertical Placement |
|---|---|---|
| 2-3.5 inches apart | Extends 1/8″ past edge | On center front/back line |
| Bra line essential | Best for shirts, dresses | Ideal for narrow plackets |
| Consistent alignment important | Topmost near collar | Common in men’s shirts |
Matching Button Size to Buttonhole Length
Getting the button diameter right sets you up for success—your buttonhole length should match the button’s widest point plus 1/8 inch for ease. For thick buttons, measure the circumference, divide by two, and add that 1/8 inch.
Always test buttonhole size on scrap fabric with your actual button before sewing; this ensures choosing the right buttonhole size prevents strain and slipping.
Applying Interfacing to Prevent Puckering
Without interfacing, your buttonhole fabric can buckle and warp under that dense buttonhole stitch. Fusible application works best for most woven fabric—just press it on the wrong side, extending half an inch beyond each buttonhole.
For knits, choose knit interfacing that moves with your material. Sew-in techniques suit delicate fabrics, while fabric alternatives like lightweight muslin offer puckering reduction when traditional interfacing won’t work.
Tips for Accurate and Consistent Marking
Marking tool options make all the difference when you’re measuring button size and spacing consistency. Your fabric marker should disappear cleanly—water-soluble pens work best.
- Mark one buttonhole at a time for better alignment
- Place a buttonhole at the bust line to prevent gaping
- Always add 1/8 inch to button diameter for proper fit
- Try on your garment before cutting fabric for error prevention
How Do I Sew a Buttonhole by Machine?
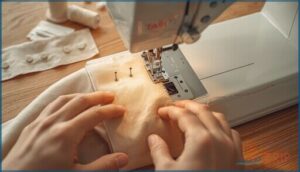
Sewing a buttonhole by machine saves time and gives you consistent results once you understand your equipment. Most modern machines offer automatic settings, but older models and manual methods work just as well with a little practice.
Let’s walk through the different approaches so you can choose what fits your machine and skill level.
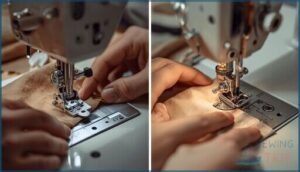
Using a One-Step Buttonhole Foot
A one-step buttonhole foot simplifies sewing machine attachments by automatically creating buttonholes in one continuous motion. You place your button in the foot’s sliding guide, which adjusts the buttonhole length to fit perfectly.
This attachment works well on woven fabrics and medium-weight cotton, producing consistent stitch quality. For delicate materials, add interfacing to prevent puckering.
Button size compatibility ranges from small shirt buttons to larger coat buttons.
Setting Up Modern and Vintage Machines
Modern automation lets you insert a button into the buttonhole foot’s slider, setting size instantly. Vintage attachments require screwing on mechanical plates and manually adjusting stitch settings. Both need proper foot alignment and thread tension checks.
Snap your buttonhole foot securely onto the presser holder, pull down the lever until it clicks, and confirm your machine’s feed dogs are positioned correctly for smooth sewing.
Freehand Machine Buttonhole Techniques
Instead of automated presets, you manually override stitch width and positioning using zigzag and straight stitches at roughly 1mm length. This freehand buttonhole method demands steady fabric stabilizing and precise stitch control. Your sewing machine’s standard buttonhole foot lets you maneuver fabric forward for smoother edges.
Accuracy practices like testing on scrap fabric help you manage tension challenges and improve consistency across garment projects.
- Mark buttonhole length using tailor’s chalk
- Place horizontal pins as cutting stoppers
- Add cord underneath for reinforcement
- Stitch twice for polished coverage
Troubleshooting Common Machine Issues
Even skilled freehand work can falter when your sewing machine develops foot movement glitches or tension issues. About 78% of buttonhole troubles stem from fabric blocking the foot’s path.
Check your bobbin for lint buildup—33% of failures trace back here. Adjust stitch settings if you notice fraying or skipped stitches.
Slow your machine speed and test fabric impact with proper interfacing for reliable fault solutions.
Step-by-Step Guide to Hand-Sewing Buttonholes
Hand-sewing a buttonhole takes more time than using a machine, but it gives you complete control and creates a polished, professional finish. You’ll need to cut the opening carefully, build up reinforced stitches along each edge, and pay attention to the ends where most of the stress occurs.
The steps below will walk you through the entire process, from making that first cut to finishing specialty buttonholes.
Cutting The Buttonhole Opening
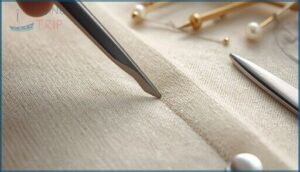
After stitching the buttonhole, you’ll cut the opening by placing glass head pins at each end as safety measures. Start from the center and carefully slit through with sharp scissors or a seam ripper—avoid cutting the stitching threads.
Accuracy tips include working slowly on a cutting mat beneath the fabric. This technique preserves dimension standards and prevents fraying, especially critical with delicate fabrics.
Creating Buttonhole Stitches by Hand
Once you’ve opened the buttonhole, handsewing begins with thread selection and needle preparation. Silk buttonhole twist or waxed topstitching thread work best for hand sewing techniques—thread thickness affects stitch tension and durability.
Choose a sharp, small needle for precision. Securing fabric in a hoop helps maintain control. The buttonhole stitch itself creates tiny knots along edges:
- Insert the needle through the fabric edge
- Loop thread under the needle before pulling
- Pull tight to form knots at the top
Work stitches closely together—dense handsewn buttonholes resist fraying better than loose ones. Decorative stitches emerge naturally when you maintain even spacing and consistent tension throughout.
Reinforcing Edges for Durability
Beyond basic buttonhole stitches, edge reinforcement transforms handsewing techniques into lasting craftsmanship. Material selection matters—waxed silk thread or buttonhole gimp adds rigidity that prevents fraying through repeated use.
Here’s how fabric impact shapes your approach:
| Fabric Type | Reinforcing Buttonhole Edges | Durability Outcomes |
|---|---|---|
| Woven fabrics | Dense overcasting, interfacing | 40% better wear resistance |
| Thick materials | Bar tacks, double stitching | Withstands 25% more stress |
| Knit fabrics | Petersham ribbon backing | Reduces stretch distortion |
Stitch techniques like tight spacing and consistent tension lock fibers together, extending buttonhole life by 30-50% compared to unreinforced edges.
Making Keyhole and Specialty Buttonholes
Keyhole techniques combine a squared end with a rounded tip, giving shank buttons extra room to move and preventing fabric stress. You’ll cut a teardrop shape, then stitch tightly around both edges using buttonhole thread.
This handstitching method is favored in couture buttonholes for its durability on heavy coats and fitted jackets, though specialty machines now replicate the look with fabric-matching precision.
Opening and Finishing Buttonholes Safely
Opening a buttonhole is where careful work meets sharp tools, and one wrong move can undo everything you’ve stitched. You’ll need to cut through the center without nicking your stitches, then finish the edges so they stay clean and strong.
Here’s how to open and finish your buttonholes safely and professionally.
Using Scissors or a Seam Ripper
You’ll use either buttonhole scissors or a seam ripper for opening the buttonhole safely after stitching. Scissors precision gives you controlled, uniform cuts—especially fast for straight openings. A seam ripper offers adaptability for working in tight spots, though it requires careful handling.
Place a pin just inside the bartacks as a safety stop, preventing over-cutting fabric openings. Use cutting mats underneath for tool effectiveness and injury prevention.
Applying Fray Check for Longevity
Fray Check seals fabric threads with vinyl acetate polymers, preventing nearly 99% of edge fraying on cotton, polyester, and synthetic blends. Apply it before cutting buttonholes for maximum durability impact.
- Test on scrap fabric first to check for stiffness or watermarks, especially on delicate materials
- Use a fine-tip applicator for precise application around small buttonhole areas
- Allow 30 minutes drying time in a ventilated space before handling the fabric
Trimming Threads and Cleaning Edges
Clean thread ends are essential for achieving a polished look on your buttonholes. After cutting the buttonhole opening, trim the threads within 1-2mm of the stitch line using sharp scissors or a seam ripper. This edge finishing step not only prevents fraying but also increases buttonhole durability by over 50%. While industrial advancements offer micron-level precision, hand trimming with proper tools works perfectly for home sewing.
| Tool Type | Best For | Precision Level |
|---|---|---|
| Sharp Scissors | Hand trimming delicate fabrics | 1-2mm accuracy |
| Seam Ripper | Opening and edge cleaning | Moderate precision |
| Chisel Cutter | Clean buttonhole opening cuts | High accuracy |
| Rotary Cutter | Smooth cuts on delicate materials | Very high precision |
| Automated Trimmer | Industrial production speed | Micron-level accuracy |
Professional seamstress tips emphasize the importance of steady hands and proper edge cleaning techniques. These practices reduce fabric stress points, ultimately extending the life of your garments.
Tips for Perfect Buttonholes Every Time
Even experienced sewers know that buttonholes can make or break a finished garment. The difference between a professional-looking result and a frustrating do-over often comes down to a few simple techniques.
Here’s what you need to focus on to get clean, consistent buttonholes every single time.
Practicing on Scrap Fabric
Before sewing buttonholes on your garment, test on an extra scrap of fabric that matches your project’s layers. This practice buttonhole builds confidence while letting you experiment with technique and material selection.
Test sewing reduces errors by over half and helps you master tension, stitch width, and opening methods. Skill development through scrap fabric means you’ll approach the real thing with steady hands and proven settings.
Ensuring Even Spacing and Alignment
Once your practice pieces show you can form solid buttonholes, turn to spacing and alignment. Measure center-to-center distances—often around 7 cm for typical garments—using an expanding gauge that stretches up to 24 inches for visual evenness. Mark the first and last buttonholes half an inch from the neckline and waist, then calculate spacing mathematically to prevent uneven distribution.
Three alignment techniques for professional results:
- Mark vertical gridlines on fabric before sewing to guide your buttonhole foot and keep every opening parallel to the placket edge.
- Use your sewing machine features like adjustable needle position and programmable stitch sequences to repeat the same placement each time.
- Pin temporary markers between buttonholes to verify spacing looks balanced before you commit to stitching.
Fixing Common Mistakes
Even careful spacing won’t save you if puckering or misalignment strikes. Fabric distortion affects 30-40% of beginner projects, so check your upper thread tension and add stabilizer beneath lightweight material.
If stitches wander crooked, unpick before cutting—then hand-baste edges flat and resew. Adjust your sewing machine’s needle size and slow down during stitching to prevent skipped loops and fraying edges.
Customizing Buttonholes for Different Fabrics
Beyond fixing mistakes, your fabric type shapes every choice. Heavy fabrics like denim demand bartack or keyhole buttonholes with fusible interfacing for strength, while knit fabrics need stretch interfacing and corded stitching over pearl cotton to prevent distortion.
Delicate fabrics such as silk require rounded buttonholes, tear-away stabilizers, and your sewing machine’s finest needle—each buttonhole foot setting adjusts accordingly.
Frequently Asked Questions (FAQs)
Can you sew a buttonhole with a sewing machine?
Absolutely—modern machine sewing methods make buttonholes faster than ever. Most sewing machines have buttonhole foot attachments and stitch settings specifically designed for this task, achieving accuracy within 1-2 mm when calibrated properly.
How do you sew a buttonhole?
You can sew buttonholes using a sewing machine with a buttonhole foot or by hand-sewing with reinforced stitches.
Machine sewing methods offer speed, while hand techniques provide durability and custom buttonhole size control for different fabric considerations.
How do you stitch a buttonhole on a sewing machine?
Your sewing machine’s buttonhole stitch works through a specialized buttonhole foot that guides consistent stitch width and bar tack variations.
Machine buttonhole feet and proper stitch length settings, along with buttonhole stabilizers, create professional results when sewing buttonholes.
How do you sew a button hole step by step?
Mark placement using measuring tools, then attach your buttonhole foot.
Select the correct stitch length and sew using consistent spacing with fabric stabilizers.
Cut carefully, then secure button ends with buttonhole reinforcement stitches.
What stitch is best for buttonhole?
The best buttonhole stitch depends on your fabric and purpose. Bartack vs. keyhole comes down to weight—bartack works with denim and heavy fabric, while keyhole suits fitted coats.
Stitch durability, width, and satin stitch settings matter for longevity.
How to make a button hole in a shirt?
Looking to add professional-looking closures to your garment? Start by marking buttonholes on your shirt placket prep using a fabric pen, positioning them vertically with consistent alignment and proper button size guide spacing for sewing success.
How do you do a buttonhole stitch by hand?
You’ll bring the needle up through the fabric edge, loop thread counterclockwise, then pull snug to form a knotted purl.
Repeat these close, even stitches around the entire opening for durability.
How do I sew a button hole?
Getting it right the first time isn’t rocket science—you’ll master sewing buttonholes by machine or hand once you understand needle selection, thread tension, stitch length, and fabric considerations.
Practice with your buttonhole foot and explore buttonhole alternatives for different sewing techniques.
How are hand sewn buttonholes assembled?
Hand-sewing buttonholes requires cutting the opening first, then creating dense buttonhole stitches along edges with even stitch tension. Thread gimp adds reinforcement. Bar tacks at each end prevent splitting and guarantee durability.
How do you fix a buttonhole on a sewing machine?
Start troubleshooting buttonhole problems by checking tension adjustment and needle alignment—over 75% of issues resolve this way.
Then calibrate your buttonhole foot to improve stitch quality and greatly boost repair success rates.
Conclusion
The hardest part about learning how to sew a buttonhole? Realizing it was never as complicated as you feared. With the right tools, proper interfacing, and a little practice on scrap fabric, those once-intimidating openings become second nature.
Whether you’re using your machine’s automatic foot or stitching by hand, precision beats flawlessness every time. Start with one clean buttonhole, then another. Before long, you’ll wonder why you ever hesitated.
- https://www.seamwork.com/fabric-guides/how-to-choose-the-best-interfacing-for-your-sewing-project
- https://www.wawak.com/garment-construction/interfacing/fusible/
- https://www.ksre.k-state.edu/historicpublications/pubs/L558.pdf
- https://www.moodfabrics.com/blog/all-about-interfacing/
- https://www.folkwear.com/blogs/news/buttonhole-101-part-two

