This site is supported by our readers. We may earn a commission, at no cost to you, if you purchase through links.
 Do you ever feel like the knot in your quilting thread is an eyesore? It can be so frustrating to spend hours carefully stitching your quilt, only to have the knot ruin the overall look.
In this step-by-step guide, we’ll show you how to hide the knot in your quilting thread so that it’s virtually invisible.
Table Of Contents
Key Takeaways
- Use a quilter’s knot to start and end your quilting thread, ensuring the knot is small enough to be buried within the fabric layers for a professional look.
- After tying off, insert the needle close to the knot and travel through the batting layer to hide the knot, pulling the thread through and snipping it close to the fabric for an invisible finish.
- Practice the technique of forming a quilter’s knot and burying it as these skills are essential for achieving a clean, professional appearance in quilting projects.
- Develop hand dexterity for quick and efficient knotting and burying, as this will enhance the overall quality and finish of your quilting work.
How Do You Hide the Knot When Quilting
To hide the knot when quilting, tie a quilter’s knot at the thread’s end and sink it into the fabric so it’s invisible. This technique impresses others and is used in hand quilting and appliqué stitching.
Starting a Quilting Thread
Embark on a creative adventure with hand quilting, where the thread becomes your artistic paintbrush. To start, select a thread that complements your fabric, like a harmonious dance of colors. Choose a needle that gracefully glides through the fabric’s embrace, creating a seamless union.
As you prepare your canvas, remember that fabric choice influences the thread’s journey. Delicate fabrics call for a gentle touch, while sturdy ones can withstand a bolder stroke. Stitch size and thread tension are the rhythmic beat that guides your needle’s dance, creating a harmonious composition.
Now, let’s unravel the secret of the quilter’s knot, a hidden gem that conceals the thread’s beginning. With a deft hand, form a loop knot, like a tiny lasso, and gently pull the thread through its embrace.
Like a magician’s trick, the knot vanishes into the fabric’s depths, leaving no trace of its existence.
With the thread securely anchored, you’re ready to embark on your hand stitching adventure, where each stitch becomes a brushstroke in the tapestry of your creation.
Finishing a Quilting Thread
Now, let’s delve into the art of finishing a quilting thread. It’s like the grand finale of your stitching symphony, where you want to leave no trace of the knot’s existence.
- Knot strength: A sturdy knot is the foundation of a well-finished thread. Make sure it’s strong enough to withstand the tension of quilting, but not so tight that it damages the fabric.
- Thread quality: Choose a thread that’s both strong and thin. A thin thread will create a smaller knot, making it easier to hide.
- Quilt batt density: The density of the quilt batt will affect how easily you can hide the knot. A denser batt will make it harder to pull the knot into the layers.
- Needle size: A smaller needle will create a smaller hole, making it easier to hide the knot.
- Hand dexterity: With practice, you’ll develop the hand dexterity to tie a knot quickly and easily. Don’t worry if it takes a few tries at first.
Once you’ve mastered these factors, finishing a quilting thread will become second nature. You’ll be able to create beautiful, knot-free quilts that will impress everyone who sees them.
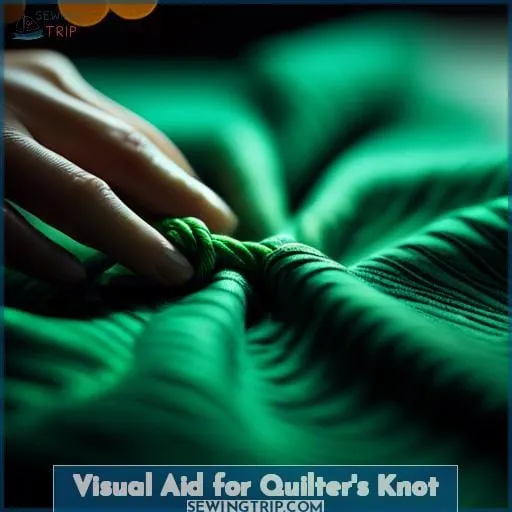
Visual Aid for Quilter’s Knot
Let’s take a visual tour of the quilter’s knot, shall we? Here’s a diagram drawn by a non-quilter named Rob. Don’t let that deter you; Rob’s diagram is a stroke of genius, capturing the essence of this knot used in hand quilting.
See how the thread loops around the needle shaft? That’s the secret to starting your quilting thread with a quilter’s knot. And when it’s time to finish off, the knot is cleverly tucked away, hidden within the quilt layers.
So, whether you’re a seasoned quilter or just starting your hand sewing journey, this visual aid will help you master the art of the quilter’s knot. It’s a small step that makes a big difference, giving your quilts that professional, polished look.
Burying Knot at End of Hand Quilting
Now, let’s talk about burying the thread at the end of hand quilting. This technique ensures your stitches have a clean finish and the knot remains hidden within the quilt layers.
First, keep the needle threaded while you work. Sink the knot into the batting by giving the thread a firm pull until the knot pops and the needle comes up a short distance away. Finally, pull the thread through and snip it off close to the fabric. That’s it! The knot and thread will be concealed once you straighten the piece.
This simple technique creates a secure and invisible finish for your quilting. It’s like a magic trick – the knot disappears, leaving behind a beautiful, seamless stitch.
Tying Off Line of Quilting
- Hold the quilting thread a couple of inches above the quilt top.
- Wrap the thread 2 times around the needle.
- Pull the needle and tighten the knot about 1/4 from the quilt top.
- Insert the needle back into the hole made by the last stitch.
- Travel in the batting layer about 1/2 away.
These steps will help you to tie off the line of quilting securely and invisibly.
- Quilting thread types: Use a thread that’s strong and durable, such as cotton or polyester.
- Needle size selection: The size of the needle you use will depend on the thickness of the fabric and batting.
- Quilting stitch techniques: There are many different quilting stitch techniques that you can use to create different looks.
- Batt material comparison: The type of batt you use will affect the warmth and loft of your quilt.
- Quilt top finishing: Once you have finished quilting the top of your quilt, you’ll need to bind it to finish it off.
Tugging and Popping Knot
Now, let’s tackle the art of knot-tugging and popping. It’s like a magic trick that makes your knot vanish into thin air.
Hold the thread a couple of inches from the quilt top. Bring the needle up through the top layer, pulling the knot snug against it. Now, get ready for the popping part: gently tug on the thread, and like a mischievous rabbit, the knot will hop right into the batting layer, leaving no trace behind.
It’s a bit like playing hide-and-seek with your knot, isn’t it? And just like in the game, the key is to keep your knot small and hidden. So, use a fine thread and a small needle, and don’t wrap the thread around the needle too many times.
Cutting Thread
Snip that thread with precision, my dear quilter! The final touch, a clean cut, completes your masterpiece. Trim it close to the fabric’s embrace, but beware of nicking the delicate threads.
- Imagine the satisfaction as the excess thread vanishes, leaving only the perfect stitches.
- Feel the pride as you admire your handiwork, free from any unsightly knots.
- Embrace the artistry of thread trimming, where precision meets beauty.
- Let the snipped threads be a testament to your patience and skill.
Thread trimming isn’t just a chore; it’s an art form. It’s the finishing touch that transforms a quilt from ordinary to extraordinary.
Frequently Asked Questions (FAQs)
What is the minimum thread length for starting a knot?
To start your knot, thread your needle with a generous 24-inch length.
You’ll have plenty of room to maneuver and create a tidy knot that will stay hidden beneath the fabric’s surface.
How far should the needle travel in the batting layer when tying off?
When tying off, let your needle dive about half an inch into the batting layer to hide that knot like a pro.
When should the knot be popped into the batting layer?
Pop the knot into the batting layer right after you’ve made your final stitch and before cutting the thread.
This sneaky move hides your knot in the quilt’s layers, making it vanish like a magician’s coin.
It’s your secret stitch, tucked away, never to be seen again.
How close to the quilt top should the knot be tied off?
You might worry tying a knot close to the quilt top could be tricky or noticeable, but fear not! Aim for about 1/4 from the quilt top to keep it secure yet discreet.
This little secret ensures your masterpiece remains both sturdy and elegant, like a well-kept garden with its roots hidden beneath the surface.
What precaution should be taken when cutting the thread close to the fabric?
When snipping thread near the quilt top, be careful not to cut the fabric itself; a slip of the scissors could lead to a stitch-uation you’d rather avoid.
Conclusion
Like a tiny seed hidden within the earth, the knot in your quilting thread can be concealed with a touch of patience and artistry.
By following these steps, you’ve gained the skill to make your quilting threads vanish, leaving your creations as seamless as a whispered secret.

