This site is supported by our readers. We may earn a commission, at no cost to you, if you purchase through links.
To use Sulky Sticky Fabri Solvy, print or trace your design onto it, then peel and position it sticky-side down on your fabric.
Hoop the sandwich, keeping the fabric taut, and embroider through the stabilizer.
Once finished, rinse away the stabilizer with cold water, ensuring proper dissolving.
You’ll soon master techniques like handling sticky needles, minimizing shifting, and prepping for problem fabrics.
Uncover the secrets to flawless embroidery by exploring its versatile applications and addressing common concerns.
Discover creative possibilities that await…
Table Of Contents
Key Takeaways
- Printable Wash-Away Embroidery Pattern Transfer and Stabilizer: Sulky Sticky Fabri-Solvy is a versatile product that serves as both a pattern transfer and stabilizer, eliminating the need for separate products.
- Stick-On Application: The fabric layer of the product has a sticky back, allowing you to simply peel it away from the paper backing and press it onto your fabric for embroidering.
- Water-Soluble Stabilizer: Once you’ve finished stitching, the product dissolves in cold water, leaving your design intact.
- Versatile Applications: Sulky Sticky Fabri-Solvy can be used on a wide range of fabrics, including dark, napped, plastic, thick, and stretchy fabrics, making it a valuable tool for embroiderers.
How Do You Use Sulky Sticky Fabri Solvy?
To use Sulky Sticky Fabri-Solvy, follow these steps:
- Prepare your fabric: Make sure your fabric is clean and dry before using the Fabri-Solvy.
- Print or trace your pattern: You can print your pattern directly onto the Fabri-Solvy using a laser or inkjet printer, trace it with a pencil or fabric pen/pencil, or use it as-is to stabilize your fabric while you’re stitching.
- Cut around the design: Be sure to leave a small margin for easier placement and stitching.
- Apply the pattern to your fabric: Peel the design from the backing and stick it to your fabric. The adhesive isn’t permanent, so you can reposition it if needed.
- Hoop your fabric: Hoop your fabric to keep it taut while stitching.
- Stitch through the Fabri-Solvy: Stitch through the Fabri-Solvy as normal. If the adhesive transfers to your needle, you can wipe it with a damp cloth to remove the adhesive.
- Remove the stabilizer: Once you’re done stitching, rinse your piece under warm water to dissolve the Fabri-Solvy. Gently agitate the fabric to help the Fabri-Solvy dissolve more evenly. Squeeze out excess water and allow the piece to air dry completely.
Remember to follow the manufacturer’s instructions and test the Fabri-Solvy on a small, inconspicuous area of your fabric before using it on a larger project.
Preparing Your Design
For printing patterns, you’ll want to make sure your printer is compatible with Sulky Sticky Fabri Solvy, as some inks may bleed or leave residue. Alternatively, you can trace or draw directly onto the stabilizer, allowing for greater creative expression and custom designs.
Printing Patterns
Preparing Your Design: Printing Patterns
To guarantee a fruitful embroidery undertaking, it’s imperative to opt for the appropriate technique to convey your design onto fabric. Here are four pivotal aspects to contemplate when printing patterns:
- Printers: Inkjet and laser printers are both viable options, however, inkjet printers might induce ink seepage, while laser printers could leave behind black particles. Evaluate your printer’s prowess before embarking on your project.
- Ink: Inkjet ink may bleed, thus it’s paramount to test your printer’s ink prior to employing it for your embroidery design.
- Stabilizer: Utilize water-soluble stabilizers such as Sulky Sticky Fabri Solvy, which dissipates in water upon completion of stitching.
- Computerized Embroidery: If you’re utilizing computerized embroidery, ascertain that your design is appropriately formatted and your machine is compatible with the file format.
Tracing or Drawing
Prepare your design by tracing or drawing it onto the Sulky Sticky Fabri Solvy.
Handwritten designs can be easily traced using a lightbox.
Digital tracing is a breeze with a printer.
Freehand drawing is also an option, but remember that the design will be reversed when transferred to the fabric.
For intricate patterns, consider adapting templates or using freestanding lace as a guide.
Once your design is ready, it’s time to apply the sticky Fabri Solvy to your fabric.
Applying to Fabric
Once you’ve prepared your design on the Sulky Sticky Fabri-Solvy, it’s time to apply it to your fabric. Carefully cut around the design, leaving a small margin, then peel off the backing paper and gently press the adhesive side onto your fabric, repositioning as needed—the adhesive is temporary, so you can adjust placement before stitching.
Cutting and Peeling
To apply your design to the fabric using Sulky Sticky Fabri Solvy, first, cut around the design, leaving a small margin.
Next, peel the design from the backing and stick it to the fabric.
Be careful not to shift the design too many times to maintain adhesive strength.
If your needle becomes sticky, clean it with a damp cloth.
For dark fabrics or problem fabrics, consider using a different adhesive like Thread Heaven or Ultra Solvy.
For T-shirts, the design can be transferred and stabilized in one step, eliminating the need for removal after stitching.
Sticking and Repositioning
- Permanent Adhesive: Fabri-Solvy’s adhesive isn’t permanent, allowing you to reposition your design as needed.
- Repositioning Limits: Avoid shifting your design too many times to maintain its integrity.
- Sticky Needle Prevention: Wipe your needle with a damp cloth if it becomes sticky during the process.
Once you’ve stuck your design to the fabric, you can start stitching. Remember, Fabri-Solvy dissolves completely in water, so you’ll need to rinse your finished piece thoroughly. Use your thumb to gently agitate the fabric when rinsing, and sandwich it between towels to remove excess water. Happy stitching!
Embroidery Process
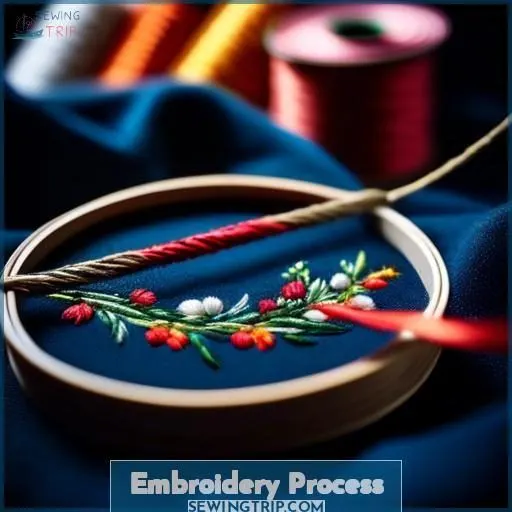
With your design securely adhered to the fabric, it’s time to hoop the fabric, ensuring your Sulky Sticky Fabri Solvy stabilizer remains taut and wrinkle-free. Then, carefully embroider through the stabilizer, letting your needle pierce its delicate surface as you bring vibrant threads to life upon the underlying fabric.
Hooping Fabric
Once you’ve got your design on Sulky Sticky Fabri Solvy, it’s time to hoop up! Hooping fabric is like taming a wild beast; you need the right tools and a gentle touch. Choose your hoop size wisely—it’s the arena where your embroidery gladiators will battle. Make sure fabric tension is just right; too loose, and your stitches will sag, too tight, and you risk fabric distortion. Let’s make your project a masterpiece, not a mess!
| Hooping Methods | Fabric Types |
|---|---|
| Standard Hoop | Lightweight and Sheer Fabrics |
| Magnetic Hoop | Stretchy Fabrics |
| Spring Tension Hoop | Thick or Napped Fabrics |
| No Hoop (Floating) | Machine Spun Lace (Needlelace) |
| Specialty Hoop | Freestanding Lace Edging |
Stitching Through Stabilizer
Stitching through Sulky Sticky Fabri Solvy is a breeze. Here’s how:
- Prepare Your Needle: Before you start, make sure your needle is clean and free of residue. Wipe it with a damp cloth if necessary.
- Stick the Needle: As you stitch, the needle will stick to the Solvy. To prevent this, dip the needle in water or use a needle threader.
- Dissolving the Solvy: Once you’re done stitching, immerse your piece in cold water. The Solvy will dissolve, leaving your design intact.
- Fabric Prep: For thicker fabrics like felt, you may need to soak the Solvy in distilled water before dissolving to prevent ink trapping.
Finishing Touches
To dissolve the Sulky Sticky Fabri Solvy after stitching, simply immerse your completed piece in warm water—the stabilizer will begin to disintegrate, leaving your embroidery pristine. For ideal results, gently agitate the fabric while rinsing, and consider sandwiching it between absorbent towels to remove excess moisture before allowing it to air dry.
Rinsing and Dissolving
After finishing your embroidery project, it’s time to remove the stabilizer and complete your piece. The rinsing and dissolving process is essential in making sure your finished embroidery looks great and lasts. Here’s how to do it:
- Rinsing Techniques: Start by immersing your embroidery in cold water for about 10 minutes. This will help break down the stabilizer. After soaking, gently rinse your piece under flowing water. Be sure to remove any remaining stabilizer or thread residue.
- Dissolving Time: The time it takes for the stabilizer to dissolve can vary depending on the type of stabilizer used. For most wash-away stabilizers, 10 minutes is usually adequate. However, if you’re using a more heavy-duty stabilizer, you may need to soak for longer.
- Water Temperature: Use cold water for rinsing and dissolving. Cold water helps the stabilizer dissolve more evenly and prevents any potential harm to your embroidery.
- Fabric Effects: The type of fabric you’re using can impact the rinsing and dissolving process. For example, if you’re working on a delicate fabric like silk, you’ll want to be extra gentle to avoid damaging the fabric.
- Design Preservation: Rinsing and dissolving correctly is essential for maintaining your embroidery design. If you don’t remove all the stabilizer, it can cause the design to fade or become distorted over time.
- Cut-work Designs: For cut-work designs, you may need to soak your piece for a longer time to make sure all the stabilizer is dissolved. Be patient and rinse thoroughly to prevent any residue from affecting your design.
- Thread Setting: If you’re using a thread that’s prone to tangling or knotting, you may need to set it before rinsing and dissolving. This can help prevent any potential harm to your embroidery.
- Charted Needlework Design Patterns: For intricate embroidery designs, you may want to use a charted needlework design pattern. This can help guide you through the rinsing and dissolving process, making sure your design remains intact.
- 3-D Appliqué: If your embroidery includes 3-D appliqué, you’ll need to be extra cautious during the rinsing and dissolving process. Make sure to remove all stabilizer from the appliqué pieces to prevent any distortion.
Drying Techniques
To dry your embroidery project after using Sulky Sticky Fabri-Solvy, you have several choices. First, you can let the piece air dry fully. This is the most straightforward method, as it requires no extra steps. However, remember that air drying may take some time, depending on the size and thickness of your project.
Another option is to use a heat source, such as a warm iron, to speed up the drying process. Be sure to use a press cloth to protect the fabric from direct heat. This method can be particularly helpful if you need your project to dry quickly or if you want to remove any potential stickiness from the fabric.
If you choose to use a heat source, take care not to overheat the fabric, as this could cause fabric distortion or damage. Additionally, be sure to follow the care instructions for your specific fabric type to get the best results.
Tips for Optimal Use
To handle sticky needles, keep a damp cloth nearby and wipe your needle periodically. Ensuring design integrity is essential; avoid shifting the adhesive design excessively, as it may impair the design’s clarity and adhesion.
Handling Sticky Needles
To handle sticky needles when using Sulky Sticky Fabri Solvy, first wipe the needle with a damp cloth to remove any residue.
If the needle becomes too sticky, use a clean cloth to gently rub the needle, then rewipe it with a damp cloth.
For ink management, test your printer’s ink on a scrap piece of fabric to ensure it doesn’t bleed.
To protect your fabric, use a serger lace as a barrier between the needle and the fabric.
In case of troubleshooting, remember that the adhesive isn’t permanent, allowing for repositioning without damaging the fabric.
Ensuring Design Integrity
Make sure your design remains unchanged during embroidery by following these tips:
- Avoid Ink Spread: Test your printer’s ink for spreading before beginning.
- Place Design Accurately: Precise positioning is essential for 3-D appliqué and shadow work.
- Manage Sticky Needles: Wipe your needle with a moist cloth if it becomes sticky.
- Dissolving Problems: Rinse your piece in warm water to dissolve the stabilizer.
Versatile Applications
Sulky Sticky Fabri Solvy is a versatile tool that empowers you to create custom cross-stitch and needle punch projects, transforming ordinary fabrics into stunning home decor pieces or personalized gifts. Its seamless integration with embroidery techniques opens up a world of creative possibilities, allowing you to infuse your unique artistic flair into every stitch.
Cross-Stitch and Needle Punch
Cross-stitch and needle punch designs are a breeze with Sulky Sticky Fabri-Solvy.
This versatile tool allows you to transfer patterns onto a variety of fabrics, making it perfect for cross-stitch projects and needle punch designs.
Whether you’re creating custom home decor or personalized gifts, the possibilities are endless.
With its easy-to-use application and dissolving properties, Sulky Sticky Fabri-Solvy guarantees a seamless finish for your embroidery masterpieces.
Custom Home Decor and Gifts
Customize your home decor and gift-giving with Sulky Sticky Fabri Solvy. Share your designs on social media using the @— tag, inspiring others in the embroidery community. Create stunning custom pieces for home decor or gifts, requiring only a few basic stitches. With a variety of supplies, you can bring your creativity to life.
Problem Fabrics and Solutions
You might encounter challenges with embroidering on dark or napped fabrics like velvet, terry cloth, or cuddle fleece, as well as stretchy or thick materials like T-shirts, polar fleece, and felt. But fear not, Sulky Sticky Fabri-Solvy is designed to tackle these tricky textures, providing a reliable stabilizing solution that allows you to stitch intricate designs with ease.
Dark and Napped Fabrics
Dark fabrics and napped fabrics like velvet, terry cloth, cuddle fleece, and polar fleece can be challenging to embroider with Sulky Sticky Fabri Solvy. Here’s how to address these obstacles:
- Improve Dark Fabric Visibility: Use a light pencil or a water-soluble pen to trace your pattern on the Fabri Solvy.
- Enhance Napped Fabric Adhesion: Press the sticky side of the Fabri Solvy onto the fabric with firm, even pressure.
- Minimize Heavy Stitching Impact: Use a smaller hoop and adjust your stitch length to prevent ink transfer.
- Optimize Soaking Time: Soak your finished piece in cold water for at least 15 minutes to guarantee complete dissolution.
Stretchy and Thick Fabrics
For placement on elastic and dense fabrics, facile handling is essential. Sulky Sticky Fabri Solvy is your solution. It improves clarity, fortifies elastic materials, and is ideal for cross-stitch and needle punch. No more grappling with fabric shifting or stretching. Simply remove the backing, adhere, and stitch.
Addressing Common Concerns
You may encounter issues with ink bleeding or stickiness when using Sulky Sticky Fabri Solvy, especially if your printer’s ink quality is poor or the fabric surface is challenging. Additionally, concern over fabric shrinkage and achieving proper stabilization during the embroidery process can arise, particularly with stretchy or thick materials.
Ink Bleed and Stickiness
To guarantee a flawless embroidery project with Sulky Sticky Fabri Solvy, it’s crucial to tackle ink bleed and stickiness problems.
Inkjet ink may smear, so experiment with it from your printer before beginning.
Laser printers may deposit black spots, which can be remedied with Shout and a washing machine.
Dense stitching may entrap ink, so soak your piece in distilled water to eliminate it.
Felt shrinkage isn’t a concern, but sticky needles can be neutralized with Thread Heaven.
Shrinkage and Fabric Stabilization
To guarantee that your embroidery projects with Sulky Sticky Fabri-Solvy are successful, you must address common issues like shrinkage and fabric stabilization. Here are four important points to keep in mind:
- Ink adhesion: Make sure the ink is totally dry before putting the Fabri-Solvy on the fabric. Ink that isn’t completely dry can bleed or smudge, compromising the design’s quality.
- Fabric density: Select the correct Fabri-Solvy for your fabric. Thicker fabrics may require a different kind of stabilizer to avoid puckering or distortion.
- Water temperature: When removing the Fabri-Solvy, use cold water to dissolve it. Warm water can cause the stabilizer to melt unevenly, possibly harming the design.
- Solvy removal: Submerge the finished piece in cold water to dissolve the Fabri-Solvy. Be careful to remove any excess water to prevent damage to the embroidery.
Sharing and Inspiration
Don’t keep your Sulky Sticky Fabri Solvy embroidery creations to yourself – tag @sulkythreadsu on social media to share your stunning designs and inspire others! Explore the endless creative possibilities by experimenting with different fabrics, patterns, and embroidery techniques, expressing your artistic flair and adding personalized touches to home decor, clothing, and gifts.
Tagging and Social Sharing
To maximize your reach and engagement on social media, consider implementing tagging strategies. Tagging can help your posts reach a wider audience and increase visibility. Here are some tips on how to effectively use tags:
- Use relevant hashtags: Hashtags are a powerful way to reach new followers and increase the discoverability of your posts. Research popular hashtags related to your niche and include them in your posts.
- Tag influencers and brands: Tagging influencers and brands can help you connect with their followers and potentially gain exposure to a new audience. Be sure to tag them in a relevant and respectful manner.
- Tag your location: If you’re posting from a specific location, tagging it can help your post reach people in that area and potentially attract local customers.
- Tag your team members: If you’re working with a team, tagging them in your posts can help build a sense of community and show appreciation for their contributions.
In addition to tagging, consider sharing your embroidery projects on various social media platforms to showcase your work and inspire others. Instagram, Pinterest, and Facebook are popular choices for visual businesses like embroidery. Engage with your followers by responding to comments and sharing behind-the-scenes content to build a strong community around your brand.
Exploring Creative Possibilities
- Design Inspiration: Browse online galleries, attend workshops, or join embroidery communities to find fresh ideas and perspectives.
- Fabric Experimentation: Try different textures, colors, and patterns to create unique combinations and effects.
- Artistic Expression: Use Sticky Fabri Solvy to express your personal style and convey emotions through your embroidery techniques.
- Creative Collaborations: Partner with other artists, crafters, or designers to exchange ideas and learn new embroidery techniques, pushing the boundaries of your artistic expression.
Conclusion
Unleash your creativity by mastering how to use Sulky Sticky Fabri-Solvy.
Like a canvas awaiting an artist’s stroke, this versatile stabilizer opens doors to flawless embroidery projects.
Whether crafting personalized home decor or unique gifts, you’ll navigate any fabric’s challenges with ease, ensuring your stitched masterpieces stand out.
Embrace the endless possibilities and let your imagination soar as you discover the secrets to professional-quality results.

