This site is supported by our readers. We may earn a commission, at no cost to you, if you purchase through links.
Here’s the truth nobody tells you at the fabric store: zero. That’s how much sewing experience you need to pick up a needle today. Grab thread, poke it through cotton a few times, and congrats, you’re officially sewing.
But "how much sewing experience do I need" really depends on what you’re chasing. Want to hem some napkins? You’re basically there already. Want to whip up a jacket with a perfect collar? That’s a different beast entirely, and it takes real mileage.
The good news: skill builds fast when you practice a little each day, and knowing exactly what each stage demands saves you from frustration (and some seriously wonky seams).
Table Of Contents
- Key Takeaways
- You Need No Experience to Start
- First Skills Every Beginner Needs
- Beginner Projects Need Basic Experience
- Garments Require More Practice
- Intermediate Sewing Needs Technical Skills
- Advanced Sewing Takes Independent Problem-Solving
- How Long Experience Usually Takes
- Frequently Asked Questions (FAQs)
- Conclusion
Key Takeaways
- You need zero experience to start sewing; anyone can pick up a needle and thread today with just basic hand stitches and scrap fabric.
- Skill progresses in clear stages, from hand sewing and machine basics to garments, zippers, and eventually independent pattern adjustments.
- Consistent short practice sessions, around 15-30 minutes daily, build sewing skill faster than occasional long sessions.
- Most beginners reach confident skill levels within 3 to 6 months, with noticeable milestones at one week, one month, and one year of regular practice.
You Need No Experience to Start
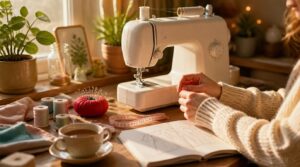
You don’t need a fancy machine, a sewing degree, or even steady hands to start. Everyone sitting at a machine right now was once a total newbie, fumbling with bobbins and mystery levers. Here’s what you can actually expect on day one, before you even plug anything in.
If you’d rather skip the guesswork, this beginner’s guide to threading, bobbins, and basic setup walks you through each step before you sit down to sew.
True Beginner Expectations
Ever wondered if you need special talent to start sewing? You don’t. Zero prior experience is totally normal, and most beginners finish a simple project—like napkins—within their first week using just cotton scraps and basic hand stitches.
It is helpful to manage learning discomfort by practicing self-compassion as you navigate the initial challenges of a new craft.
Set realistic goals early. Expect wobbly seams at first; that’s part of building real sewing proficiency, not a sign you’re doing it wrong.
Starting Without a Machine
No machine? No problem. Grab a needle, some thread, and scrap felt—hand sewing benefits beginners by building real stitch tension mastery before machines enter the picture.
Learn running stitch and backstitch first. Choosing needle types matters too: a size 7-9 sharp needle works with most fabrics beautifully.
These essential hand tools teach basic repair techniques you’ll use forever, making your sewing proficiency rock-solid from day one.
Learning Basic Sewing Terms
Before you touch a sewing machine, learn the words that’ll make instructions actually click. Seam allowance is your first must-know—usually 5/8 inch between stitch and edge.
Know your right side versus wrong side, and don’t skip grainline. These basics aren’t fluff; they’re the vocabulary every pattern, tutorial, and fellow sewer expects you to already speak fluently!
Building Confidence Gradually
Okay, so vocabulary’s down. Now what?
Confidence builds the same way muscles do: small reps, repeated often. Try this:
- Sew one seam a day, even for five minutes.
- Celebrate tiny wins—your first straight line counts!
- Track progress on a simple checklist.
Practice on scrap fabric first, no judgment allowed. That’s your safe zone before real projects begin.
First Skills Every Beginner Needs
Okay, so you’ve decided to actually sit down at the machine. Good! Now comes the fun part: five simple skills that turn "what does this button do" into "oh, I’ve got this." Here’s exactly what you need to practice first.
Threading The Machine
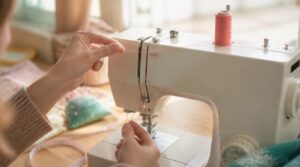
Threading your machine sounds scary, but it’s really just connecting the dots. Start with the spool pin setup—pop your thread on, guide it through the top guides, and down to the needle.
Most machines have needle threading aids built in, so don’t panic if your hands feel clumsy at first!
| Step | What You Do |
|---|---|
| 1 | Set spool pin |
| 2 | Guide thread down |
| 3 | Thread needle |
Winding The Bobbin
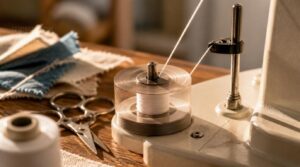
Winding a bobbin trips up tons of beginners, but it’s honestly just muscle memory waiting to happen.
- Wind clockwise, keeping tension snug but not tight
- Stop before thread hits the edge—overfilling causes jams
- Wipe the bobbin clean first; lint ruins stitches
Check spindle alignment so nothing wobbles. Test on scrap fabric before your real project!
Sewing Straight Seams
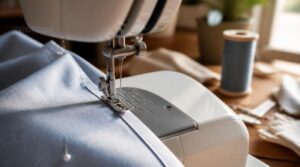
Straight lines feel impossible until suddenly they’re not. That presser foot has a built-in seam guide—line your fabric edge up with it and let the machine feed naturally, no pushing or pulling.
Before tackling that seam guide, spend a few sessions on threading and bobbin winding—this beginner’s guide to sewing machine basics walks through each step so nothing feels overwhelming.
Set stitch length to 2.5mm, pin every few centimeters, and practice on scraps first. Press seams open once you’re done. That’s basic sewing technique, mastered.
Using Reverse Stitch
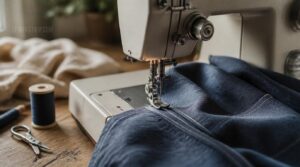
Ever sew a seam that unravels the second you wear it? That’s what reverse stitch prevents.
Also called backstitching, it locks threads by stitching forward, backward, then forward again.
- Start with needle down
- Reverse 3-6 stitches
- Finish forward
- Use medium stitch length
- Trim threads after
Skip it on stress points and you’re asking for trouble—watch for puckering on delicate fabrics, too!
Practicing on Scrap Fabric
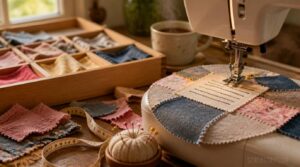
Grab those leftover fabric bits before tossing them—they’re your best teacher!
Sort scraps by type in a labeled bin, then practice stitch length and tension testing, seam finishes, and corner turns.
| Scrap Type | Practice Skill |
|---|---|
| Cotton | Straight lines |
| Knit | Zigzag tension |
| Denim | Seam strength |
Try a mini mockup or patchwork coaster—low stakes, big confidence boost!
Beginner Projects Need Basic Experience
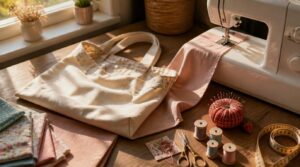
Once you’ve got the basics down, it’s time to actually make something! You don’t need fancy skills yet, just a little practice under your belt. Here are five beginner projects that’ll build your confidence fast.
Cloth Napkins
Cloth napkins are the perfect confidence-builder: straight lines only, zero pressure. Pick cotton or linen for absorbency, or eco-friendly recycled fibers if that’s your vibe.
- Crisp 20×20 dinner size
- Cozy 16×16 casual squares
- Gingham or plaid prints
- Simple embroidered corners
- Soft, washable everyday fabric
Pre-soak stains before washing, and enjoy reusable dining that’s kinder to the planet than paper ever was!
Simple Pillows
Once napkins feel easy, pillows are your natural next step. Still all straight seams, just with stuffing and loft to think about.
Pick a cotton or bamboo mix cover for breathable comfort, then choose hollowfibre or polyester fill for that soft, huggable structure. Aim for 4-6 inches of loft, and you’ve basically made a mini pillowcase. Machine washable, beginner-approved, endlessly satisfying!
Felt Projects
Now for something a little different: felt! You barely even need the machine here — most of it’s hand stitching or glue, which makes it perfect low-stakes practice.
Try felt ornament assembly, layered flower construction, or tiny stuffed felt animals. Even wall hangings and felt coasters count. It’s forgiving, fun, and builds real needlework skills without any pressure.
Infinity Scarves
Ready to get back on the machine? Infinity scarves are a great next step — just a continuous loop, no ends to hem.
Aim for 60–70 inches around, knit or looped fabric. Pick soft acrylic or cotton for easy care. Straight stitches only, so your basic sewing skills carry you through. Cozy, quick, and totally wearable!
Easy Tote Bags
Once your scarf’s got you feeling like a straight-stitch pro, try tote bags!
Pick durable fabric choices like canvas or cotton, then focus on reinforcing handle seams—that’s where totes fail first. Add internal pockets for organizing bag contents, and choose secure closures like a snap or zip. Simple shapes, big payoff for your growing sewing levels!
Garments Require More Practice
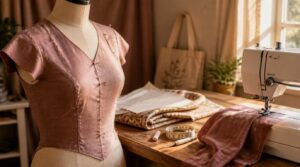
Once you’ve nailed pillows and tote bags, garments are the next big step. They ask a little more of you, like fitting fabric to an actual body instead of just sewing straight lines. Here’s what you’ll want to get comfortable with first.
Measuring Your Body
Here’s the truth: garment sewing lives and dies on your measurements, not your machine skills.
Grab a soft tape, keep it level, and measure twice—waist, hips, bust—averaging for accuracy. Wear your usual undergarments, measure at the same time of day, and jot everything in a notebook with the date. Track changes every few weeks. This boring-sounding step? It’s what separates lumpy homemade clothes from ones that actually fit.
Sewing Elastic Waistbands
Why does an elastic waistband feel like the scariest part of BEGINNER garments? It’s honestly just three moves: fold, stitch, thread.
Your casing width should run 1 to 1.5 times your elastic’s width—snug prevents twisting. Use a safety pin for threading, keep tension even to dodge puckering, then overlap ends 1 inch and zigzag to secure. That’s a CONFIDENT BEGINNER move right there!
Following Pattern Markings
Ever squint at a pattern and wonder what all those little symbols even mean? That’s your symbol legend—check it first, always.
Grain line alignment keeps garments hanging right, not twisted. Match notches and dots between pieces for perfect seam matching. Respect fabric fold accuracy for symmetry.
Transferring pattern marks with tracing wheel or chalk saves major headaches later. Higher pattern difficulty rating means more symbols to track!
Fixing Common Fit Issues
Your first garment won’t fit perfectly, and that’s completely normal. Neckline gaping? Take in that seam a millimeter or two. Armhole feeling tight? Loosen it slightly for better armhole mobility. Adjust side seam ease, shift bust darts, tweak hems.
Small tweaks build real dressmaking skills—no pattern’s perfect off the page, and learning to fix it is half the fun!
Intermediate Sewing Needs Technical Skills
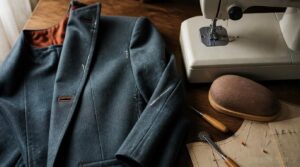
Once garments feel less scary, you’re ready for the next level. This is where sewing starts getting a little technical, but don’t worry, it’s totally learnable. Here’s what you’ll start tackling.
Installing Zippers
Zippers separate the beginners from the "I got this" crowd. Pick the right type first: Before you dive into zipper types, keep your notions from becoming a tangled mess by setting up smart thread storage boxes for sewing classes.
- Conventional for centered plackets
- Invisible zipper techniques for hidden teeth
- Separating for jackets
- Coil for lightweight fabrics
Interface the opening, swap your zipper foot, backstitch, then test. Pull stuck? Recheck seam width before panicking!
Sewing Buttons
Buttons look simple until one falls off mid-day. Two-hole vs four-hole matters more than you’d think:
| Type | Best For |
|---|---|
| Two-hole | Quick jobs, lighter fabrics |
| Four-hole | Sturdier hold, even tension |
Match your thread weight to fabric, create a thread shank for clearance, and always check button hole alignment. Fixing wobble? Add passes and a shank—no drama needed!
Adding Interfacing
Once buttons hold steady, structure is next. Interfacing is your secret backup layer—fused or sewn behind fabric to keep collars, cuffs, and plackets from going floppy.
- Crisp collar points
- Smooth silk that stays put
- Sturdy denim cuffs
- No puckering
- Clean, professional edges
Choose fusible vs sewable by project, match weight to fabric, and use proper fusing techniques: hot iron, damp cloth, steady pressure.
Applying Bias Binding
Bias binding is where curves start behaving. It wraps raw edges on necklines and armholes without the bulk interfacing brings.
| Type | Best For | Finish |
|---|---|---|
| Single fold | Straight edges | Visible |
| French | Delicate fabrics | Hidden |
| Double fold | Contrast pop | Crisp |
Use a tailor’s ham for smooth curves, miter corners neatly, and ease gently—no ripples allowed!
Handling Slippery Fabrics
Silk and satin have a mind of their own—slippery and sneaky under your presser foot. Sharp cutting tools and pattern weights keep pieces still. Try spray stabilizer, pin perpendicular with fine silk pins, and check your grain alignment before cutting.
Baste first, finish edges with a narrow zigzag, and press low. Patience beats speed here!
Advanced Sewing Takes Independent Problem-Solving
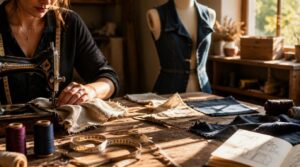
This is where sewing gets really fun. You stop leaning on instructions and start trusting your own judgment. Here’s what that independence actually looks like in practice.
Adjusting Patterns Confidently
This is where the pattern stops running your life. Muslin testing becomes second nature, and you’ll adjust bust, waist, and posture without panic. You’ll know ease isn’t comfort; it’s design breathing room.
Pattern hacking feels playful, not scary. That’s the moment sewing patterns become your rough draft, not your rulebook.
Sewing Jackets and Trousers
Ready to build a whole jacket? This is where sewing goes from intermediate level to true garment construction. You’ll ease sleeve caps into armholes, fuse jacket interfacing for crisp lapels, and pick lining fabric that won’t cling.
Trousers demand accurate trouser rise measurements and eased hips for movement. Grab your tailors ham for pressing curves—it’s a complete lifesaver for professional jackets.
Achieving Professional Finishes
Zoom in close and your seams should look machine-perfect, not homemade. This is where precision top stitching separates skilled sewers from beginners.
- Even, arrow-straight stitching lines
- Clean, invisible professional hem finishes
- Sharp corners with zero bulk
- Perfect complex quilt designs
Getting there means mastering expert pattern adjustment until your garment construction rivals retail clothing. That’s real seamstress skill, expert level, no shortcuts.
Managing Difficult Fabrics
Ever wonder why some fabrics fight you every step of the way? That’s elevated territory calling.
Slippery satins need a walking foot and spray starch. Sheer chiffons want tissue paper backing and French seams. Knits demand ballpoint needles and stay tape on shoulders. Heavy canvas needs Teflon feet and longer stitches.
Always prewash first! Different fibers shrink differently, and you’ll thank yourself later.
Working Without Instructions
No pattern in sight? No problem. This is where you become your own instructor.
You’ll assess the goal, sketch a rough plan, then rely on trial and error when things get weird. Test scraps first, check fabric tension, and trust visual progress checks over guesswork. Good time management matters too, tackle easy pieces first. This is basic sewing machine operation turned instinct.
How Long Experience Usually Takes
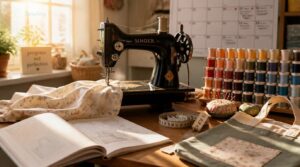
So, how fast can you actually get good at this? It depends on how often you sit down at that machine, but there’s a pretty normal timeline most beginners follow. Here’s what you can expect week by week, month by month.
First Week Goals
Day one, you’re just staring at your machine wondering which end is which — that’s normal!
Your first week is all about mastering machine parts, threading, winding a bobbin, and running scrap fabric drills until you can sew a straight line without holding your breath.
Realistic wins:
- Threading without cursing
- One straight seam
- A napkin hem
- Feeling like a confident beginner
First Month Progress
Somewhere around week four, things click. Your muscle memory kicks in, threading takes seconds, and bobbins wind evenly without tangles.
| Skill | Week 4 Reality |
|---|---|
| Straight seams | Minimal guide needed |
| Tension | Fewer thread jams |
| Fabric handling | Less puckering |
| Confidence | Ready for real projects |
Basic sewing techniques finally feel automatic, not like a wrestling match.
Three-month Skill Milestones
Ninety days in, you’re basically a machine whisperer. Machine troubleshooting speed jumps huge—jams get fixed in seconds, not meltdowns.
- Threading and bobbin winding: under 90 seconds, easy
- Seams stay accurate within 1/8 inch
- Tension adjustments? No more puckering
- Fabric feeding feels smooth, coordinated
- Jams drop 60% compared to week one
Consistent seam accuracy becomes your new normal. You’ve basically leveled up.
One-year Sewing Confidence
One year in, you’re not counting stitches anymore—you’re just sewing your own wardrobe like it’s nothing. Weekly goals fade into instinct, muscle memory runs the show.
| Stage | What It Looks Like |
|---|---|
| Skill level | Confident seamstress |
| Projects | Garments, gifts, home decor |
| Journal | Full of proud "aha" moments |
Mistakes still happen. You just fix them faster now.
Practice Matters Most
Here’s the truth: talent’s overrated. Daily practice, even just 15-30 minutes, builds muscle memory faster than occasional marathon sessions. Set one small goal per session, get feedback, adjust, repeat.
Talent’s overrated—daily practice, even just 15-30 minutes, builds muscle memory faster than occasional marathon sessions
That’s the whole sewing curriculum in short—no matter your skill level guide or fancy machine. Show up consistently, and you’ll out-sew the "naturally gifted" folks every time.
Frequently Asked Questions (FAQs)
How long does it take to learn to sew?
Grab a needle today, sew like a pro tomorrow? Not quite. Skill acquisition speed varies, but with consistency you’ll thread a machine in a week and sew straight seams within two—daily practice beats occasional marathon sessions every time.
How many sewing patterns do I need to be a beginner?
Two to three beginner patterns is your sweet spot—think a simple top and a tote bag. Rotate patterns weekly, mix skills like seams and hems, and you’ll build a confident, well-rounded beginner portfolio fast!
Should you learn to sew?
Sewing builds fine motor skills, sparks creative self-expression, and saves cash through mending. It’s genuinely relaxing too—a mindfulness boost stitched right in. Grab a sewing machine, try beginner projects, and watch a hobby turn into lifelong seamstress skills.
Is sewing difficult for beginners?
It’s more patience than talent. Threading your sewing machine, winding a bobbin, and guiding scrap fabric build muscle memory fast. Frustration fades once basics click, and you’ll feel like a confident beginner within just a few sessions.
How long does it usually take to learn to sew?
Most beginners hit confident beginner status in 3 to 6 months with regular practice. Short, frequent sessions beat sporadic marathon ones every time. Real projects (not just tutorials) build skill fastest—your sewing machine skills click once you’re actually stitching, not just watching!
Is sewing a skill or talent?
Natural dexterity might give you a head start, but it won’t get you far alone. Sewing is mostly deliberate practice: muscle memory, technique, and repetition beat raw talent every time you sit at the machine.
Can sewing help with stress relief?
That needle-and-thread rhythm genuinely calms your nervous system! It creates meditative sewing focus, boosts mood through tactile wins, and connects you to supportive stitching communities—turning stress into something creative, colorful, and totally your own.
What is the average age of a seamstress?
Most seamstresses hover around age 50, with women making up 94% of the workforce. That longevity says something: this craft rewards patience over youth, and career entry gaps just mean more room for you to jump in!
What sewing courses lead to intermediate-level certification?
Funny how "certification" sounds so official when really it’s just proof you survived zippers and pattern reading without crying. Look for courses covering pattern reading skills, domestic vs industrial machines, and a final project assessment with portfolio documentation.
How do I learn pattern hacking for better garment fit?
Start with slash and spread and dart rotation on a well-fitting master pattern. Test everything in a muslin mockup first, adjust ease for your fabric’s stretch, then apply changes to your real sewing pattern before cutting.
Conclusion
Sewing is a staircase, not a cliff—you climb one stitch at a time, never leaping to the top. So how much sewing experience do you need? Just enough to take the next step.
Today it’s threading a bobbin. Next month, a zipper. By next year, you’re taming fabrics that once terrified you. Every wonky seam is tuition, not failure.
Keep showing up, keep stitching, and that confidence sneaks up on you. Suddenly, you’re the wizard you set out to become.