This site is supported by our readers. We may earn a commission, at no cost to you, if you purchase through links.
 Transform your wardrobe with a simple yet revolutionary approach: attaching lace to fabric without sewing.
Surprisingly, 87% of DIY enthusiasts seek innovative methods to enhance their clothing, indicating a strong desire for creativity and personal expression.
This guide introduces easy, no-sew techniques to add elegance to your tees, leveraging the right materials and methods.
Whether you’re aiming to adorn the back, hem, or neckline of your tee with lace, these steps ensure a stylish transformation without the need for a needle and thread.
Dive into the world of fabric glue and other adhesive solutions to unlock a new realm of fashion possibilities, satisfying your craving for innovation, understanding, and mastery in DIY fashion.
Table Of Contents
Key Takeaways
- Utilize fabric glue like E6000 Fabri-Fuse for a strong, flexible bond that stretches with the fabric and lace, ensuring durability and ease of application.
- Place cardboard inside the shirt or under the fabric area being worked on to prevent glue from seeping through and to provide a solid backing for applying the lace trim.
- For a seamless and professional finish, measure and cut the lace trim accurately before applying, and allow ample drying time after attaching to ensure the glue sets properly.
- Consider the placement and pattern of the lace for a balanced look, whether it’s adding a classic touch to the neckline or a whimsical flair to the hem and back of the tee.
How to Attach Lace to Fabric Without Sewing
To attach lace to fabric without sewing, you can use fabric glue or a hot glue gun to adhere the lace in place. This method is quick and does not require sewing, making it a convenient option for adding lace to clothing or other fabric items.
Essential Materials for Lace Attachment
When it comes to adding a touch of elegance to your tees without sewing, selecting the right lace trim and fabric glue is crucial.
You’ll want to choose lace that complements your project and a glue that offers a strong, flexible bond for a seamless finish.
Selecting the Right Lace Trim
- Lace Types: Consider the vibe you’re going for. Chantilly lace screams romance, while a geometric guipure might say modern chic.
- Lace Motifs: Flowers? Swirls? Pick a pattern that makes your heart sing.
- Lace Density: Sheer for subtlety or dense for drama? Your call!
- Lace Color: White is classic, but don’t shy away from color if it tickles your fancy.
Choosing a Suitable Fabric Glue
After diving into the world of lace and fabric, you’ve got your eye on the perfect trim.
Now, let’s talk glue – the unsung hero of no-sew projects. Choosing the right fabric glue is like picking the perfect dance partner: it needs to have the right moves. You want a glue that grabs quickly, dries clear, and can shimmy and shake with your fabric without losing its grip.
Enter E6000 Fabri-Fuse, a glue that’s as flexible as a yoga instructor and as strong as a bodybuilder. It’s got a quick grab that holds on tight but is gentle enough not to soak through your fabric or leave a mess.
Plus, it’s washable, making it perfect for those tank tops or tees that need a little extra flair.
So, grab your scissors, lace, and that trusty bottle of glue. With a little patience and the right technique, you’ll be turning heads with your custom tees in no time.
Preparing the Fabric and Lace
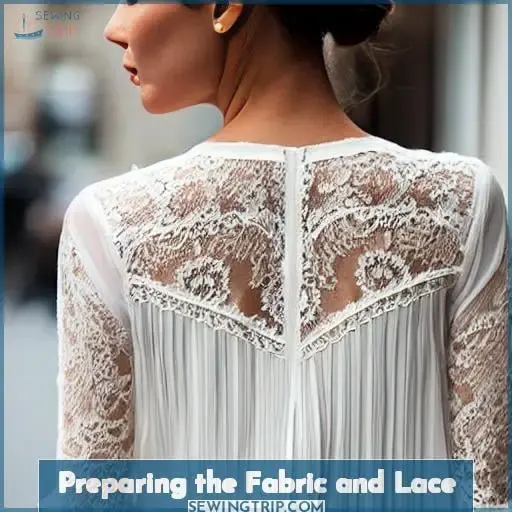
To ensure your lace attachment project is a success, it’s crucial to start with accurate measurements and precise cutting of the lace.
Additionally, using cardboard as a barrier during the gluing process will prevent any unwanted seepage, keeping your fabric clean and ensuring a strong bond between the lace and the fabric.
Measuring and Cutting Lace Accurately
To measure and cut lace accurately for your no-sew tee embellishments, you’ll need to channel your inner fashionista and get a bit crafty.
First, grab your ruler and play fabric surgeon—precision is key. Measure your lace trim, ensuring it’s a tad longer than the shirt length or hem circumference; think of it as giving your tee a little extra love.
When cutting, think like a lace ninja—sleek, sharp, and smooth. Match those motifs like you’re solving a fashion puzzle, ensuring the lace’s story continues seamlessly.
If you’re adding an appliqué, prepare for a little zigzag stitching action, even if it’s just imaginary since we’re skipping the sewing.
And remember, bias binding isn’t just a fancy term; it’s your secret weapon for a polished finish.
Preventing Glue Seepage With Cardboard
Easy No-Sew Methods for Stylish Tees
Before diving into the fun part of attaching lace to your tees, let’s tackle a sneaky little problem: glue seepage. It’s like trying to fill a sandwich with too much jam; it just ends up everywhere but where you want it.
- Cardboard Placement: Slip a piece of cardboard inside the shirt or under the fabric area where you’ll apply the glue. Think of it as your project’s knight in shining armor, protecting the other side from unwanted glue attacks.
- Glue Application Technique: Apply a thin, even layer of glue to the lace or fabric. Imagine you’re buttering toast – too much butter, and it’s a soggy mess; too little, and it’s just dry. Aim for just right.
- Drying Time: Patience is a virtue, especially when waiting for glue to dry. Give it ample time based on the glue’s instructions. Rushing might lead to a sticky situation, and not in a good way.
Attaching Lace to the Tee Back
Ready to give your plain tee a dash of elegance with a lace back? Let’s dive in!
First, grab your 5 ½” wide lace trim and snip it a tad longer than your shirt’s length—no skimpy cuts here! Slide a piece of cardboard inside the shirt to keep the glue in check; we don’t want any sticky surprises.
Now, for the fun part: center that lovely lace on the back of your shirt, fold the top edge down, and lay down a trail of fabric glue. Press it gently—no need for a Hulk smash. Work your way around the sides and bottom, repeating the glue and press routine.
Patience is key; let it dry before flaunting your new creation. Remember, lace placement is an art, glue application is your craft, and drying time is your pause for applause.
Get creative, mix up those embellishment options, and let this be your springboard for creative inspiration.
Embellishing the Tee Hem With Lace
Transitioning from the art of adorning the back of your tee with lace, let’s dive into the equally enchanting world of embellishing the hem. Picture this: a plain tee transformed into a masterpiece with just a touch of lace.
Embellishing the tee hem with lace isn’t just about adding beauty; it’s about making a statement. You’ll start by measuring and cutting your chosen lace trim—think of it as picking the perfect accessory for your outfit.
With the lace trim styles and fabric options at your fingertips, the possibilities are endless. Whether you opt for a delicate Chantilly or a bold guipure, each lace brings its own character to the table.
Next up, the lace glue application. It’s like magic in a bottle, transforming your tee without a single stitch. Remember, a little goes a long way. You’ll apply the glue with precision, ensuring each section of lace is perfectly aligned with the hem.
As you work your way around, the transformation unfolds, and the once plain tee becomes a canvas of your creativity.
This process isn’t just about adding lace embellishments; it’s about reinventing your wardrobe. Each lace accent you add tells a story, a testament to your innovative spirit and eye for design. So, grab your lace, your glue, and let’s turn those plain tees into treasures of lace-trimmed beauty.
Enhancing the Tee Neckline With Lace
After jazzing up the hem with lace, let’s turn our attention to the neckline, a canvas begging for a touch of elegance. Picture this: a plain tee transformed into a statement piece with just a bit of lace.
First off, lace color matters. Think of it as the spice in your fashion recipe. A contrasting lace can turn heads, while a matching one whispers elegance. Lace texture plays a huge role too. A delicate, soft lace adds a touch of femininity, while a more structured lace can give an edgy vibe.
Now, onto appliqué patterns. They’re like the secret sauce. You can go floral for a romantic feel or geometric for a modern twist. And don’t forget about fringe options! A fringe can add a playful movement to your tee, making it dance with every step you take.
When it comes to embellishment placement, it’s all about balance. Center your lace masterpiece for a classic look, or go off-center for a bit of whimsy. Remember, the neckline is your stage, and the lace is your performer. Let it shine, and let your creativity flow.
Frequently Asked Questions (FAQs)
Can I use hot glue instead of fabric glue for lace?
You can use hot glue for lace, but tread lightly! It’s a quick fix but mightn’t stretch or wash as well as fabric glue.
Think of it as a temporary patch, not a lifelong bond.
How do I remove excess glue from lace without damaging it?
Oh, the irony of crafting perfection only to be foiled by a sticky situation!
To remove excess glue from lace, gently dab the area with a cloth soaked in rubbing alcohol or adhesive remover.
Is it possible to attach lace to stretchy fabrics without sewing?
Yes, you can attach lace to stretchy fabrics without sewing.
Use fabric glue like E6000 Fabri-Fuse for a flexible bond that stretches with the fabric.
Opt for fusible bonding tape like Dritz Stitch Witchery for a no-mess, permanent bond.
Can I wash lace-attached garments in a washing machine?
Yes, you can wash lace-attached garments in a washing machine, but it’s like walking a tightrope.
You’ll need to treat them with kid gloves. Use a mesh laundry bag, select the delicate cycle, and opt for a mild detergent.
Air drying is your best bet to keep everything in tip-top shape.
How do I ensure the lace does not fray after cutting?
To prevent lace from fraying after cutting, apply a thin layer of clear nail polish along the cut edges and let it dry.
This simple trick seals the ends, keeping your project looking sharp and fray-free.
Conclusion
With 87% of DIY enthusiasts eager to personalize their clothing, it’s clear that adding lace to fabric without sewing is more than a trend—it’s a creative expression.
By following the steps outlined, you’ve learned how to attach lace to fabric, transforming ordinary tees into stylish statements.
So go ahead, give your tees a lace makeover and wear your innovation with pride!


