This site is supported by our readers. We may earn a commission, at no cost to you, if you purchase through links.
Push the needle up through your fabric, then move forward a short distance and bring the needle back down. For the next stitch, bring the needle up a stitch length ahead, then insert it back into the end of the previous stitch—think of connecting the dots in reverse.
This creates a strong, continuous line that’s great for seams or outlines. Keep your stitch lengths even for the best look.
There’s more to mastering backstitch than meets the eye, so stay curious.
Table Of Contents
Key Takeaways
- You’ll create stronger seams than machine stitching by moving your needle backward into the previous stitch, building a continuous line that won’t fail under stress.
- Keep your stitches even and short for professional results – use a ruler or your finger as a guide to maintain consistent spacing and tension.
- Thread your needle with 18 inches or less to prevent tangling, and always knot the end before starting your first stitch.
- You can use backstitch for both repairs and decoration – it’s perfect for reinforcing torn seams, creating embroidery outlines, and adding durability to high-wear areas.
Backstitch Basics
Learning to backstitch is your gateway to stronger, more durable hand sewing that’ll outlast machine stitches in high-wear areas.
Master the backstitch for hand-sewn seams that stay strong where machine stitches often fail.
This fundamental technique creates a continuous line of small, touching stitches that’s perfect for both functional seams and decorative embroidery work, and it is a key part of creating durable hand sewing.
Definition and Purpose
Backstitch creates a continuous line of small, touching stitches that’s stronger than running stitch.
This hand sewing technique moves backward with each stitch, building exceptional seam strength for garments and providing clean outlines for embroidery uses.
You’ll find backstitch essential for reinforcing seams, repairing tears, and creating detailed decorative work across various sewing projects.
History and Origins
This ancient sewing technique’s origins trace back centuries, with confirmed examples from 16th-century English Jacobean crewel work. However, its roots likely extend much deeper into sewing history and tradition.
The stitch is used in various embroidery techniques worldwide.
- Ancient Origins: Evidence suggests early applications in Egyptian, Chinese, and Greek textiles predating documented examples
- Global Variations: Portuguese Guimarães whitework (10th century) and Indian Chikan embroidery showcase cultural significance across continents
- Stitch Evolution: Middle Eastern textiles from Yemen and Syria demonstrate how this back stitch tutorial technique spread through trade routes
- Sewing Heritage: Each culture adapted the method to fit local fabrics and decorative needs, creating rich hand sewing traditions
Comparison to Running Stitch
When weighing the backstitch method against the running stitch, you’ll notice clear strength comparison—backstitch is tougher and better for seams under stress.
Running stitch wins for speed efficiency but isn’t as durable.
Aesthetic differences matter too: backstitch forms a solid line, great for outlines.
The learning curve is gentle for both, making them essential hand sewing techniques in any sewing basics or back stitch tutorial.
How to Backstitch
Anyone learning hand sewing techniques can master the backstitch by following a few key steps. Start by threading your needle and securing the thread with a knot—good knot placement keeps your stitches from slipping.
Next, focus on fabric handling; keep your material taut for even tension control. Here’s how to backstitch:
- Bring the needle up through the fabric, then insert it back one stitch length behind.
- Pull the needle forward, skipping ahead the same distance, then repeat the backward stitch.
- Maintain a steady stitch direction and consistent length for neat results.
This sewing basic is perfect for sewing for beginners, creating strong seams with simple, reliable hand sewing. To guarantee a lasting hold, consider how to manage thread tension, ensuring a lasting hold with simple techniques.
Backstitch Materials Needed
To get started with backstitch by hand, you’ll need a few basic materials like a sharp needle, strong thread, and a piece of fabric.
Having scissors, an embroidery hoop, and a marking tool nearby will help you work neatly and accurately.
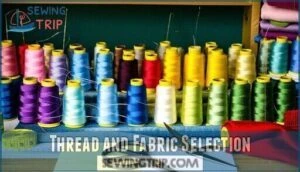
Thread and Fabric Selection
Now that you know how to backstitch, let’s talk thread and fabric selection.
Match thread durability to fabric weight—cotton thread suits cotton, while polyester handles blends. Color matching keeps seams hidden. Pay attention to fiber content and texture pairing for smooth results.
Fabric choices range widely, so understanding woven and knitted fabrics is important for the best results.
Use this table for quick reference:
| Thread Type | Fabric Weight | Color Matching |
|---|---|---|
| Cotton | Light/Medium | Easy |
| Polyester | Heavy/Blend | Versatile |
| Handquilting | Thick | Bold/Contrast |
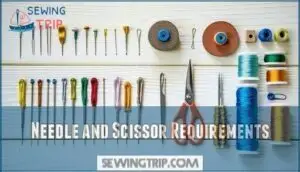
Needle and Scissor Requirements
Choosing the right hand sewing needles and scissors makes the backstitch method much smoother. Look for needles that match your fabric and thread thickness.
Scissor sharpness is essential for clean cuts—dull blades can fray thread. Protecting fingers with a thimble helps, too.
For accurate fabric slicing, consider using rotary cutters.
Here’s what you’ll need:
- Needle sizes for your fabric
- Threading needles easily
- Specialty scissors for precision
- Sharp scissors for clean cuts
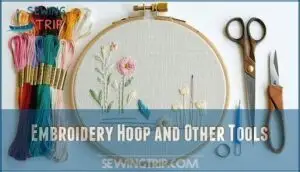
Embroidery Hoop and Other Tools
Once you’ve got the right needle and sharp scissors, grab an embroidery hoop to keep your fabric taut.
Hoop size matters—pick one that fits your project. Different projects require various hoop dimensions to accommodate the fabric.
For hand embroidery, use fabric marking tools to sketch your design. A thimble helps protect your fingers during hand stitching.
Keep thread length manageable, and choose needle types that match your embroidery tutorial or hand stitching guide.
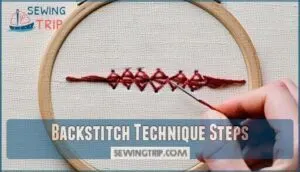
Backstitch Technique Steps
You’ll learn each step of the backstitch technique, from knotting your thread to keeping your stitches even.
Follow these instructions to create a strong, neat line that holds fabric securely in place.
Knotting The Thread
Once you’ve picked your thread and tools, it’s time to knot the thread. For backstitch and embroidery, use a knot size that matches your fabric—too big, and it’ll show; too small, and it might slip through.
Place the knot securely at the thread’s end. If you’re looking for supplies, consider different thread options.
Doubling your thread adds strength, while hiding knots keeps your hand sewing tidy.
Creating The First Stitch
Once your Anchoring Knot is set, focus on Initial Placement.
Bring your needle up through the fabric at your desired starting point, making sure to secure the thread firmly. If you want a tidy look, hide the knot under the fabric.
This Consistent Start lays the groundwork for any hand embroidery, especially for embroidery for beginners and mastering the backstitch embroidery stitch.
Stitching Backwards
Once you’ve made the first stitch, it’s time to move your needle backwards. This classic backstitch move is all about precision.
Focus on:
- Needle Placement just behind the last stitch
- Stitch Direction, always heading back before moving forward
- Consistent Backtracking to keep your line solid
- Avoiding Gaps by overlapping each embroidery stitch
Keep your tension steady for neat hand sewing.
Maintaining Consistent Stitch Length
Consistency is your secret weapon for neat, uniform stitching in hand sewing.
Even stitches make your sewing look tidy and professional every single time.
Use visual aids or a ruler for measuring stitches, aiming for even stitch length every time. Practice techniques like marking dots along your seam.
Tension control matters—don’t pull too tight or leave stitches loose. Remember, fabric impact can change results, so adjust your backstitch as needed to ensure uniform stitching.
Backstitch Applications and Uses
You’ll find backstitch useful for embroidery, reinforcing seams, repairing tears, quilting, and applique work.
This stitch creates strong, neat lines, making it a practical choice for both decorative and functional sewing projects.
Embroidery and Decorative Sewing
Once you’ve got the hang of the backstitch, it’s perfect for embroidery and decorative sewing.
Use it for Thread Painting, Stitch Samplers, and Monogramming Techniques.
Backstitch creates crisp outlines and adds definition to Fabric Embellishments or Mixed Media projects.
You’ll find this hand stitching technique brings precision and polish to your hand sewing and embroidery stitches every time.
Reinforcing Seams and Repairing Tears
After outlining embroidery details, let’s talk about seam reinforcement and tear repair.
When hand sewing, use backstitch to strengthen stress points and boost fabric stability.
For mending seams or fabric repair, keep your stitch density tight—small, even sewing stitches hold up best. This method works wonders for fixing rips or reinforcing high-wear spots, making your repairs last longer, which is the key to tear repair.
Quilting and Applique Work
In quilting, backstitch works perfectly for Securing Applique pieces to your quilt top.
You’ll use hand sewing needles to create precise Applique Outlines that hold multiple Fabric Layers together.
This hand stitching method excels at Applique Detailing, letting you attach decorative elements with invisible stitches.
For Decorative Quilting, backstitch provides the strength needed for intricate Quilt Detailing work.
Mastering Backstitch Tips
Now that you’ve learned the basic backstitch technique, you’ll want to master the finer points to create professional-looking results.
These tips will help you troubleshoot problems, avoid common pitfalls, and explore advanced variations that can enhance your sewing projects.
Common Mistakes to Avoid
Even experienced sewers stumble into these backstitch pitfalls that’ll make your work look messy.
Your needle choice and thread tension directly impact your final results.
- Uneven Stitches – Your backstitch looks like a drunk line when stitch lengths vary
- Thread Tangling – Pulling too hard creates knots that’ll drive you crazy
- Knot Size – Massive knots show through fabric and ruin your clean finish
- Fabric Puckering – Incorrect tension pulls fabric into ugly wrinkles
Troubleshooting and Repairing Errors
When your backstitch goes wrong, don’t panic.
Stitch Looseness happens when you pull too gently—tighten each stitch as you go.
Uneven Stitches result from inconsistent spacing, so use a ruler or your finger as a guide.
Thread Tangling occurs with long pieces—keep thread under 18 inches.
Fabric Puckering means you’re pulling too hard—ease up on tension.
Knot Visibility ruins clean work, so bury knots between fabric layers for professional results, and remember to avoid Stitch Looseness and Thread Tangling to ensure a clean finish.
Advanced Backstitch Techniques and Variations
Once you’ve fixed common mistakes, try advanced hand stitching techniques to boost your skills.
Whipped Backstitch gives a rope-like look, while Thread Painting and Layered Backstitch add depth and texture.
Shadow Backstitch creates subtle outlines, and Beaded Backstitch brings sparkle.
For durability, consider using double backstitch.
Exploring these embroidery stitches and stitch variations lets you master backstitch for creative, polished results in any project, using techniques like Layered Backstitch.
Frequently Asked Questions (FAQs)
How do you do a back stitch?
When you want your seams to stick like glue, thread your needle, knot the end, and stitch backward into the last hole.
Keep the stitches even, line up with your guide, and tug them snug.
How to set yourself up with the first stitch backhand?
Thread your needle and tie a knot at the end.
Push the needle up through the fabric where you want your line to begin, then pull until the knot catches.
Now you’re ready for your next move.
How to backstitch for strong hand stitching & embroidery?
Start by anchoring your knotted thread, then move the needle back behind the last stitch, following a drawn guideline.
Keep each stitch short and tight.
Consistency and overlap make your seam tough—like sewing with invisible armor.
How do you make a backward stitch?
Like a pro, you’ll bring the needle up, insert it behind the previous stitch, and pull it through, creating a strong, backward stitch with ease and precision, every time.
Why is the backstitch important?
You’ll find the backstitch important because it creates a strong, durable seam, making it perfect for outlining shapes and adding fine details in various sewing and embroidery projects effectively.
Which is the back side of a backstitch?
You’ll notice the back side of a backstitch shows overlapped stitches, appearing less tidy, with loops around the fabric for added strength and durability in your handmade projects.
Do you have to backstitch when sewing?
You don’t always have to backstitch, but it’s recommended for reinforcing seams, especially in high-wear areas, to prevent unraveling and guarantee durability in your sewing projects.
How do you finish and secure backstitch ends?
Thou shalt tie a knot, you’ll secure backstitch ends by weaving thread tails or tying a small knot to prevent unraveling, ensuring your handiwork remains intact.
Can backstitch be used on stretchy fabrics?
You can use backstitch on stretchy fabrics, but to make certain you use a suitable needle and thread to guarantee durability and prevent stitches from coming undone over time easily.
How do you remove backstitch without damaging fabric?
You carefully remove backstitch by gently pulling threads or using a seam ripper to avoid damaging fabric, working slowly to preserve the material’s integrity.
Conclusion
Like a steady drumbeat that holds a song together, mastering how to back stitch by hand creates the foundation for countless sewing projects.
You’ve learned the essential technique that transforms loose fabric into secure, professional-looking seams. Practice makes perfect, so don’t worry if your first attempts aren’t flawless.
Start with simple projects like hemming or basic repairs to build your confidence. Remember, even experienced sewers started with uneven stitches.
With patience and repetition, you’ll develop the muscle memory needed for consistent, beautiful backstitching that will serve you well in all your future handwork, leading to professional-looking seams.
- http://youtube.com/treasurie
- https://www.reddit.com/r/HandSew/comments/1100uwy/new_to_hand_sewing_is_there_a_specific_type_of/
- https://maggieframestore.com/blogs/maggieframe-news/mastering-back-stitch-embroidery-essential-techniques-and-creative-applications
- https://mellysews.com/fabric-types-to-sew/
- https://www.mhthread.com/blog/products/how-to-choose-the-right-thread-sizes

