This site is supported by our readers. We may earn a commission, at no cost to you, if you purchase through links.
 To backstitch by hand, thread a needle, tie a secure knot, and start by pushing the needle through the fabric from the underside.
Make your first stitch by moving forward about 1/8 to 1/4 inch, then bring the needle back through to the underside. Insert the needle a stitch-length behind your starting point, pulling it through to overlap the previous stitch.
Repeat this process, creating a strong, continuous line resembling a machine stitch. Keep your stitches even in size and tension for a clean look.
Practice helps perfect this versatile stitch—ideal for seams, repairs, or detail work you want to last.
Table Of Contents
Key Takeaways
- Start by threading your needle, tying a secure knot, and stitching backward into the previous stitch to create a strong seam.
- Keep your stitch size consistent (about 1/8 inch), and maintain snug thread tension to avoid puckering or uneven seams.
- Use backstitch for durable repairs, outlining embroidery, or reinforcing high-stress areas like armholes and zippers.
- Practice regularly on scrap fabric to build muscle memory and improve stitch precision for professional-looking results.
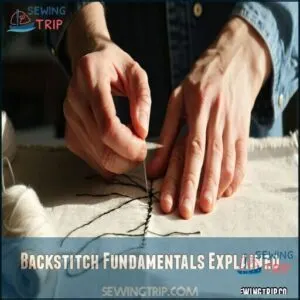
Backstitch Fundamentals Explained
Backstitch is a hand-sewing technique that creates strong, durable seams by overlapping stitches in a back-and-forth motion.
Backstitch weaves strength and precision into every stitch, making it a timeless cornerstone of hand-sewing craftsmanship.
Named for its backward movement, it’s a versatile stitch used for seams, embroidery outlines, and repairs, and is particularly notable for its ability to create durable seams.
Definition and Uses of The Backstitch
The backstitch is one of the most dependable hand sewing techniques, offering unmatched strength and versatility for various projects.
This basic stitch, ideal for beginners, creates overlapping stitches underneath, forming a smooth, durable line on the surface.
Its uses range from seam reinforcement to intricate embroidery applications, making it a go-to stitch for projects needing precision and durability.
Whether attaching a zipper, repairing clothing, or exploring historical sewing methods, mastering the backstitch will elevate your skills.
-
Key Uses:
- Creating lasting seams
- Strengthening high-stress areas
- Outlining designs in embroidery
- Mending and decorative sewing
Characteristics of a Strong Backstitch
What makes a backstitch so reliable? It’s all about getting the details right.
To guarantee stitch strength and sewing durability, focus on these four essentials:
- Stitch Length: Each should measure around 1/8 inch for ideal balance between strength and flexibility.
- Thread Tension: Keep it snug—flat against the fabric without puckering or sagging.
- Stitch Consistency: Overlap stitches by half their length for seamless security.
- Reinforcement Stitches: Even spacing guarantees your hand stitching rivals machine precision.
Mastering these steps guarantees stitch security, making your seams durable enough to handle stress without unraveling.
Comparison to Machine-Sewn Stitches
When comparing backstitch by hand to machine stitches, each has clear strengths.
Sewing machines excel in speed and automation advantages, producing seams quickly with consistent tension. However, hand sewing offers unmatched control in tricky areas like curved edges.
The backstitch’s stitch strength stands out as it creates durable, interlocking seams resistant to unraveling. Unlike the uniform thread patterns of a sewing machine, the backstitch produces a continuous, rope-like line that adds character to your work.
While slower, hand sewing proves cost-effective—requiring only basic tools and no equipment maintenance. With backstitching, you trade speed for precision, making it ideal for high-stress or delicate sewing tasks, where delicate sewing is crucial.
Benefits of Using The Backstitch
Unlike machine stitches, this hand-sewing method gives unmatched precision and control.
A good backstitch offers benefits that explain its long-standing popularity in sewing basics:
- Seam Durability: Perfect for seams under pressure, ensuring they hold without tearing.
- Versatile Applications: From garment repairs to embroidery, it fits countless projects.
- Knot Replacement: Handy for starting or ending seams cleanly.
With a solid backstitch tutorial, you’ll master this technique, creating long-lasting stitches suitable for almost any fabric or sewing need.
Essential Materials and Preparation
To start backstitching, you’ll need a good needle, strong thread, and a way to mark straight lines on your fabric.
Proper preparation, like securing fabric layers and tying a secure knot, helps guarantee smooth and accurate stitching.
Choosing The Right Needle and Thread
Choosing the right needle and thread is key to mastering a strong backstitch. Your needle should match the fabric weight: small for silks, medium for cotton, and large for denim. For knits, use ball-point needles to avoid snags.
A properly matched needle glides smoothly and doesn’t fray the thread. Thread type impacts stitch durability and appearance. Polyester works for most fabrics, but cotton thread suits lighter materials.
Here’s a quick guide to pair needle size, thread type, and fabric:
| Fabric | Needle Size | Thread Type |
|---|---|---|
| Silk | 9–10 | 60wt Polyester |
| Cotton | 5–7 | 50wt Cotton |
| Denim | 3–4 | Heavy-duty Polyester |
Keep the thread light for soft fabrics and sturdy for heavier ones. Balanced thread tension guarantees durability while keeping stitches smooth—so everything looks professional. To achieve superior stitching results, consider the needle selection guide for your specific project.
Marking Sewing Lines With Precision
After selecting a needle and thread, creating accurate sewing seam lines should be your next focus in this backstitch tutorial.
Precise fabric marking tools guide your stitching and help you achieve professional-quality results. Use water-soluble pens, chalk, or fabric pencils to mark clear sewing seam lines. These marks keep your stitching neat and consistent.
Selecting the right tools can be simplified by exploring different fabric marking options.
- For straight lines: Use a ruler or straight edge for even pencil marks.
- Curved line marking: Connect measured points using transfer paper or tailor’s tacks for accuracy.
- Marking knit fabrics: Stick with chalk or fabric-safe pens to prevent snags.
These steps reduce guesswork and guarantee your sewing precision matches your vision. Confident seam marking means better-looking, stronger projects every time.
Preparing Fabric for Backstitching
Before stitching, take time to prepare your fabric properly—it’s the foundation of strong, neat seams.
With your fabric marking complete, focus on setting up your materials for smooth sewing.
- Secure layers with pins placed across the sewing seam marking, ensuring nothing shifts as you sew.
- Flatten wrinkles to avoid puckering and keep stitches even.
- Pick thread matching your fabric weight and project needs for a clean finish.
- Decide stitch direction based on hand sewing comfort to reduce errors.
- Test stitching on similar scrap fabric to refine your technique and check thread tension.
Good preparation transforms projects from ordinary to professional!
Threading The Needle and Tying a Knot
To master backstitching, start by nailing down the basics of needle threading and thread knotting. Choose thread lengths under 18 inches to avoid tangles during hand sewing—shorter threads are easier to handle, especially for beginners.
Match your thread type with your project: cotton for natural fabrics, polyester for stronger seams, or silk for delicate work. Use the right needle size—sharp-pointed needles for woven fabrics and ball-point needles for knits work best.
Cut your thread at a 45° angle for easier threading, or use a needle threader if the eye is small. Many find threading needles easier using specialized tools.
For knot security, tie a double knot at the thread’s end. This guarantees durability and keeps your stitches clean. With this foundation, your backstitch journey will be smoother!
Mastering The Backstitch Technique
To master the backstitch, focus on creating even stitch lengths and maintaining consistent thread tension. This strong, back-and-forth motion guarantees secure, durable seams for all your sewing projects.
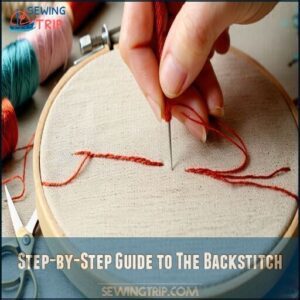
Step-by-Step Guide to The Backstitch
Getting started with backstitching is simple and rewarding—it’s like drawing with your needle.
Follow this backstitch tutorial for strong, clean seams:
- Push the needle up from below the fabric, anchoring the first stitch.
- Pull the thread snug, keeping the knot secure.
- Insert the needle a short step forward (about 1/8 inch).
- Bring the needle back down at the end of your previous stitch.
- Move it forward, a consistent length, along the seam line.
- Continue this steady back-and-forth motion.
Manage your thread tension to avoid puckers, and keep the stitch direction straight.
Practice seams on scrap fabric before diving into projects. With patience, even beginners in hand embroidery or sewing will create professional-looking seams!
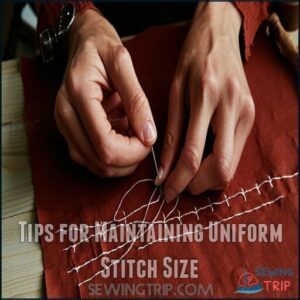
Tips for Maintaining Uniform Stitch Size
Keeping your backstitch neat requires consistent length and even spacing. A simple trick? Use visual aids like chalk lines or your fingernail as a measuring tool.
Steady fabric tension is key—avoid pulling too tight or leaving it loose. Place your non-dominant hand flat, steadying the fabric about an inch from the stitching area.
Practice techniques like slow, even motions to build muscle memory over time. Refer to the table below for helpful tips:
| Tip | Why It Works | Suggested Tool |
|---|---|---|
| Mark stitch lines | Guarantees alignment | Fabric chalk/pencil |
| Use steady tension | Prevents puckering | Hand positioning |
| Keep hand steady | Achieves smoothness | Non-dominant hand |
| Measure stitches | Builds consistency | Fingernail guide |
| Practice daily | Boosts accuracy | Scrap fabric |
Your stitching rhythm will improve with practice, turning small tasks into polished results. With consistent practice, you can achieve smoothness and accuracy in your stitching, making it a valuable skill to master.
Managing Thread Tension for a Secure Stitch
Managing thread tension is key to secure backstitching that holds strong without puckering the fabric. Think of tension like a handshake—firm, but not too tight.
Here’s how to troubleshoot tension and keep stitches consistent:
- Pull gently but firmly on the thread as you sew. Too tight causes puckering, too loose leaves gaps.
- **Match thread weight to fabric type.
Light threads suit delicate fabrics, while heavier fabrics need sturdier threads.
- Regularly check stitch security by flipping the fabric. Look for knots or loops on the underside.
- **Practice even tension.
As you pull, relax the thread slightly to let stitches settle naturally.
Understanding the importance of balanced thread tension is essential for achieving professional-looking results. Stay focused, and your hand-sewn seams will balance durability with precision.
Avoiding Common Mistakes in Backstitching
Strong backstitches depend on avoiding a few pitfalls. For tension issues, don’t use thread longer than 18 inches—it tangles and snaps easily.
Prevent puckering by relaxing your hand tension and letting the thread glide naturally. Inconsistent stitches? Stop guessing. Mark guidelines to keep stitch length even.
Avoid fabric distortion by inserting the needle perpendicular to the fabric. To fix mistakes like uneven sewing stitches, gently remove them with a seam ripper and try again.
Always move the fabric—not your needle—for straighter hand sewing lines. This approach helps in maintaining evenness and preventing errors, making it easier to achieve strong backstitches.
Backstitching in Various Sewing Projects
You can use backstitching in a variety of sewing projects to create strong, durable seams that last.
It’s perfect for garment construction, embroidery, quilting, and reinforcing areas that endure wear and stress.
Using The Backstitch in Garment Construction
In garment sewing, the backstitch shines as a versatile technique for creating durable, long-lasting seams.
Whether working on seam reinforcement for waistbands or stress points like shoulders, its strength rivals and often surpasses machine sewing. Backstitching is an old technique with its origins dating back to 1611.
- Maintain stitch spacing: Keep stitches 1/8 inch apart for uniform durability.
- Double up in high-stress areas: Add extra backstitches at corners or seams under tension.
- Choose suitable fabrics: Medium-weight fabrics work best for precise stitching.
- Use quality tools: Sharp needles and sturdy thread guarantee clean, secure sewing.
Backstitches also suit alterations, zipper applications, and historical garments, making them a go-to for skilled hand sewing enthusiasts.
Applying The Backstitch in Embroidery and Quilting
The backstitch is your go-to for crisp embroidery outlines and secure quilting seams.
In hand embroidery, it creates sharp lines perfect for outlining text, shapes, or even intricate design filling.
For quilting, its strength guarantees reliable fabric joining.
Try experimenting with stitch spacing to add artistic touches or use multiple threads for bold, decorative effects.
Stretch your fabric tightly for precision, and maintain even thread tension for smooth results.
Needlework like this takes practice but delivers durability and professional results.
Reinforcing Seams With The Backstitch
Reinforcing seams with backstitch is essential for areas under heavy strain.
To tackle seam stress points, position your stitches about 1/8 inch apart for maximum durability.
Remember, fabric type matters—lighter fabrics need thinner thread, while thicker fabrics benefit from stronger hand-quilting thread.
Stitch length impacts strength too; shorter stitches make tighter connections.
For extra seam strength, use double-threaded needles and secure seam ends with a few tight backstitches.
This stitch reinforcement method guarantees reliable, durable sewing seams that last.
Creating a Strong and Durable Seam
A seam’s strength starts with the right fabric choice and thread quality.
To boost sewing seam strength and guarantee stitch durability, focus on consistent stitch density and proper hand sewing techniques.
For reliable sewing reinforcement, follow these steps:
- Position backstitches close together (about 1/8 inch apart) for added seam reinforcement and stitch durability.
- Test your work—gently tug both fabric sides. A strong seam won’t separate or stretch.
- Secure the ends with three overlapping backstitches to guarantee knot security.
Careful attention to detail makes your seams durable enough for daily wear, and proper techniques ensure seam strength.
Troubleshooting Common Backstitch Issues
When your backstitch doesn’t look quite right, it’s usually a sign of small technique or tension issues.
By identifying problems like uneven stitches or puckered fabric, you can make simple adjustments to improve your results.
This process allows you to improve your backstitch by making adjustments to address the identified issues.
Dealing With Uneven or Inconsistent Stitches
Uneven or inconsistent stitches can ruin the clean look of your backstitch.
To fix this, start by marking the fabric with a ruler for clear stitch spacing. Pay attention to needle placement—insert and exit the fabric at consistent points.
Use firm, even pressure to maintain stitch length control and tension adjustment. If issues persist, consider that thread tension affects stitches.
Practice stitch consistency on scrap fabric, moving slowly to build rhythm. Keep your sewing surface stable, removing wrinkles for fabric stability to avoid sewing mistakes.
Patience leads to progress.
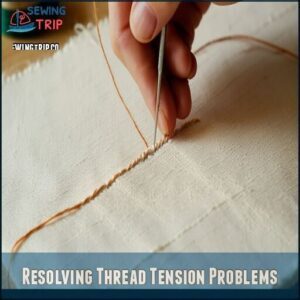
Resolving Thread Tension Problems
When thread tension goes wrong, your backstitch suffers. Loose stitches or puckered fabric? Let’s fix it.
- Pull thread gently—don’t yank—keeping a smooth, steady motion.
- Match needle size to fabric thickness; small needles struggle with heavy fabrics.
- Use shorter sewing threads (under 18 inches) to avoid tangling and breakage.
- Hold your thread at the same angle as you sew for consistent stitch tension.
Mastering tension troubleshooting transforms uneven backstitches into hand-sewing perfection with neat, strong seams.
Fixing Mistakes and Removing Stitches
Mistakes happen, even with careful hand sewing! Start by identifying errors in your backstitch. To fix them, use a seam ripper or small scissors for stitch removal. Carefully slide the tool under the thread and cut every few stitches to avoid tearing the fabric.
For stubborn areas, pull the thread gently with tweezers. Keep a steady hand and work in good lighting to prevent damage to the material.
When ready to repair, guarantee clean edges by removing loose threads. Practice re-stitching techniques for a seamless result. Use even, precise stitches to conceal repairs. A little patience guarantees your sewing seam shines!
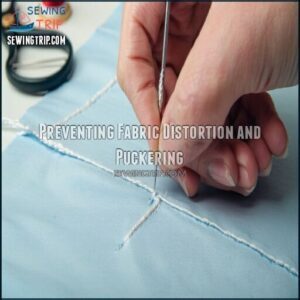
Preventing Fabric Distortion and Puckering
Fabric puckering can derail your backstitching, but you can keep it under control with some simple practices. Start by confirming proper grain alignment—this keeps the fabric stable as you sew. Use fabric stabilizers like fusible interfacing for particularly thin or stretchy fabrics.
Pay attention to stitch tension and avoid pulling the thread too tight; gentle tension adjustment guarantees the fabric stays smooth. Choose the right thread weight to match your fabric, as heavier threads can cause distortion.
Maintain consistent stitch density and stitch length. Secure your layers with pins placed perpendicular to the stitching line, giving you control. Flat, even pressure when hand sewing helps minimize puckering, making your backstitch both neat and durable.
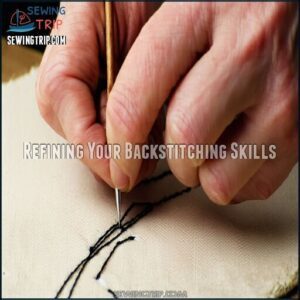
Refining Your Backstitching Skills
Improving your backstitching skills takes practice, patience, and attention to detail. By experimenting with stitch lengths and aiming for consistency, you’ll achieve neat, durable seams that look professional.
Practicing The Backstitch for Consistency
Building consistency in your backstitch takes daily practice and a bit of patience. Start small, dedicating just 10 minutes a day to focus solely on hand sewing. Grab some scrap fabric and draw clear, parallel lines as guides. This simple setup improves your ability to create basic stitches with consistent length and even spacing.
Here’s how you can structure your practice:
- Use scrap fabric to experiment, saving nicer materials for projects.
- Work in good lighting to see stitch placement clearly.
- Time your stitching to develop a natural rhythm.
- Switch fabric types to learn thread control on different weights.
- Track your progress with photos to notice improvements.
With time, your hands will naturally memorize the motion of backstitching, making each stitch stronger and more precise. Consistency grows with repetition, so keep practicing to refine your stitch technique.
Experimenting With Different Stitch Lengths
Exploring stitch lengths can transform how your seams look and perform.
Shorter stitches provide excellent seam strength for high-stress areas, like armholes, while longer ones speed up general tasks without compromising durability.
Adjust your stitch spacing based on the fabric type and project requirements.
Smaller backstitches create neat, aesthetic effects, perfect for visible seams in hand sewing.
Experimenting with stitch length is a core hand sewing basic to match every sewing seam stitch length perfectly.
Developing Muscle Memory for Smooth Stitching
Muscle memory is the secret to smooth, natural backstitching. With repetitive practice, your hands learn the motions so well that stitching feels effortless.
Start by handsewing on scrap fabric for 10 to 15 minutes a day. This helps improve finger dexterity, hand-eye coordination, and tension control.
- Maintain a consistent rhythm by focusing on even, steady movements.
- Grip your fabric comfortably, guiding it with your non-dominant hand.
- Alternate speeds to balance precision with confidence as you progress.
Over time, you’ll find your stitches becoming neater without much thought. This consistent stitch practice builds a strong foundation, transforming deliberate effort into the fluid precision of a skilled hand.
Refining Your Technique for Professional Results
Now that you’ve built great stitching habits, it’s time to fine-tune your technique for polished results.
Focus on consistent stitching by keeping your needle at a steady 45-degree angle. Pay attention to perfecting tension—hold the thread firmly but not too tight to avoid puckering.
Your needle selection and thread choice should suit the fabric, ensuring smooth hand sewing. Consider using water-soluble pens for accurate marking.
Relax your hands and maintain a light grip for fewer mistakes and less fatigue. With daily practice, you’ll master neat lines, strong seams, and clean hand stitching knots.
Over time, your sewing skills will deliver seamless stitch strength and professional-level results.
Frequently Asked Questions (FAQs)
How do you do a backstitch?
To backstitch, thread a needle and knot the end.
Push through fabric, take a small backward stitch behind the starting point, then repeat forward and back.
Keep stitches even for a strong, neat seam.
How can backstitch be used in sewing?
Picture stitching a cracked seam together like zipping up a jacket.
You use a backstitch to secure fabric, outline embroidery designs, or reinforce seams under stress.
It’s your go-to for strong, durable stitches.
How do you do a back stitch?
Start by threading the needle and tying a knot.
Push the needle up through the fabric, move back slightly, and reinsert it.
Repeat, overlapping each stitch for a durable, tight seam that holds strong.
What is hand sewing backstitch?
Hand sewing a backstitch involves using a needle and thread to create small, overlapping stitches in a backward motion.
It’s durable, ideal for seams under stress, embroidery outlines, or repairing fabric without a sewing machine, making it a backstitch.
Can You backstitch by hand to embroidery?
Yes, you can use backstitch in embroidery to create sharp outlines or define intricate patterns.
It’s perfect for adding detail, ensuring clean edges, and making your designs pop with strong, consistent stitches, which is why backstitch is particularly useful.
What is the first step in sewing backstitch?
You might think it’s tricky, but sewing a backstitch starts simply: thread your needle, knot the end, and push it through the fabric where the seam begins.
Pull the thread tight to secure it.
Why is the backstitch important?
The backstitch is essential because it creates strong, durable seams that rival machine stitching.
It reinforces high-stress areas, prevents unraveling, and offers precision for intricate designs, making it essential for both functional and decorative sewing, with its ability to create durable seams.
Which is the back side of a backstitch?
The "back side" of a backstitch is where the thread forms interconnected loops, overlapping slightly.
It’s less smooth than the front, with visible thread overlaps showing the stitch’s anchoring strength on the fabric’s underside, which demonstrates its anchoring power.
Do you have to backstitch when sewing?
You don’t always have to backstitch while sewing, but it’s essential for strong, durable seams.
It anchors stitches, prevents unraveling, and works especially well in high-stress areas, like armholes or shoulder seams.
How to backstitch correctly?
Measure twice, cut once" applies here too: Start by marking your fabric.
Thread the needle, knot the end, then sew backward into the previous stitch.
Keep stitches tight and evenly spaced for durability and precision.
Conclusion
Why rely on a machine when you can master the backstitch by hand?
This durable, versatile stitch is perfect for creating strong seams, handling repairs, and adding detail work to projects.
By practicing the steps and tips outlined here, you’ll develop precision and confidence in your stitching.
Maintaining even sizes and proper tension guarantees clean, professional results.
With time, you’ll find the backstitch is a reliable tool for nearly any sewing task. Start stitching today!
- https://klasseneedles.com/choosing-the-right-needle
- https://www.reddit.com/r/CrossStitch/comments/1caogrr/chat_recommendation_backstitching/
- https://www.needlenthread.com/2014/11/hand-embroidery-needles-how-to-choose-them-use-them.html
- https://www.mollyandmama.com.au/how-to-back-stitch-practical-tips-for-hand-embroidery/
- https://www.youtube.com/watch?v=PtBGZn0yohU&pp=ygUMI2hhbmRuZWVkbGVz

