This site is supported by our readers. We may earn a commission, at no cost to you, if you purchase through links.
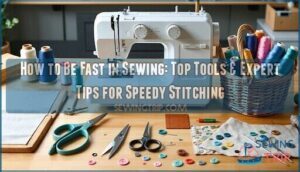 If you’re wondering how to be fast in sewing, start by choosing the right tools—think pinking shears for quick cuts or a ruffler foot for speedy gathers.
Keep your space tidy, trust me, hunting for scissors can add ten minutes to any project.
Cut a few pieces at once, use pins sparingly, and keep a rolling chair handy so you’re not zigzagging around the room like a runaway bobbin.
Master chain stitching and you’ll really fly, and there’s an art to working smarter, not harder—and that little trick with gray thread? It’s only the tip of the thimble.
Table Of Contents
- Key Takeaways
- Top 5 Sewing Tools to Help You Sew Faster
- Tip: Organize Fabrics and Patterns
- Tip: Cut Multiple Items at The Same Time
- Tip: Use Pins or Clips Sparingly
- Tip: Use Gray Thread for Inside Seams
- Tip: Chain Stitch
- Tip: Whenever Possible, Use Flat Construction Methods
- Tip: Get a Rolling Swivel Chair and Organize Your Sewing Space
- Tip: Use a Kneebar
- Frequently Asked Questions (FAQs)
- Conclusion
Key Takeaways
- You’ll save time by choosing the right tools, like pinking shears for quick cuts or a ruffler foot for speedy gathers, and keeping your space tidy to avoid wasting time searching for supplies.
- You can boost your sewing speed by using techniques like chain stitching, which enables continuous sewing and saves time, and cutting multiple items at once to transform fabric cutting into a timesaving production line.
- You’ll work more efficiently by using pins or clips sparingly, opting for sewing basting or washable school glue sticks instead, and utilizing gray thread for inside seams to eliminate constant thread changes.
- You can optimize your sewing workspace by getting a rolling swivel chair, planning your workspace layout for tool accessibility, and using a kneebar to control the presser foot with your knee, keeping your hands focused on guiding fabric and increasing your sewing speed.
Top 5 Sewing Tools to Help You Sew Faster
If you’re tired of your sewing projects taking forever, the right tools can seriously speed things up and keep your sanity intact.
Let’s check out five handy gadgets that can help you sew faster, avoid headaches, and maybe even have a little fun along the way, with the goal of helping you sew more efficiently.
1. Janome Blind Hem Foot
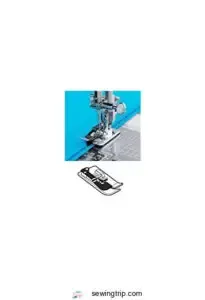
When you need professional-looking invisible hems without the hassle, the Janome Blind Hem Foot becomes your secret weapon.
This specialty presser foot transforms tricky hemming techniques into a smooth, predictable process that’ll save you tons of time. The foot’s metal blind hem guide keeps fabric perfectly aligned while three grooves prevent slipping—no more wrestling with fabric that won’t cooperate.
Effortlessly create flawless hems and say goodbye to fabric battles with this time-saving blind hem foot.
As your needle swings over the center guide, you’ll achieve those crisp invisible hems that look store-bought. What makes this sewing machine accessory a speed booster? Foot compatibility with most Janome models means consistent results every time.
The precision engineering eliminates guesswork, letting you focus on sewing speed rather than fixing mistakes. Check your Janome settings before starting—proper tension and stitch length make all the difference.
While some users report packaging mix-ups affecting fit, once you’ve got the right foot, you’ll wonder how you ever hemmed without it. This investment in quality sewing machine presser feet pays off in professional results.
2. Binder Low Shank Sewing Machine Presser Foot
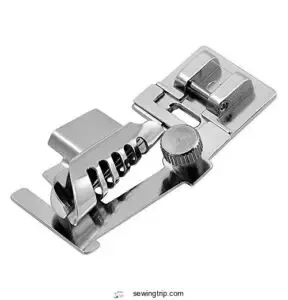
Skip the guesswork with binding—this Low Shank Binding foot transforms tedious hand-sewing into machine magic.
Simply fold your binding strip, guide it through the foot’s grooves, and watch as it wraps perfectly around quilt edges or garment seams.
This specialty presser foot eliminates uneven binding gaps, boosting your sewing speed dramatically.
Even complex Quilting Binding Foot applications become straightforward, and mastering this Foot Attachment Methods technique once will make you wonder how you ever survived without it.
3. Singer Brother Juki Sewing Machine Ruffler Foot
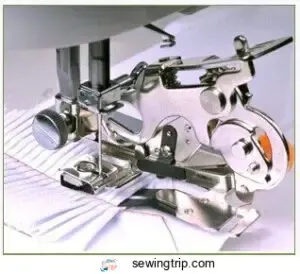
While binding adds professional edges to quilts and garments, you’ll create stunning ruffles and pleats even faster with the Singer Brother Juki ruffler foot.
This attachment transforms your sewing machine into a gathering powerhouse, automating what used to take hours of hand-stitching.
Here’s how to master this time-saving tool:
- Pleat Size Adjustment: Turn the adjustment screw to control fullness—tighter for subtle gathers, looser for dramatic ruffles
- Fabric Compatibility: Works best with lightweight to medium-weight fabrics like cotton, chiffon, and silk
- Attachment Methods: Secure the foot properly to your machine’s low shank for smooth operation
Practice your sewing techniques on scraps first, as improper setup can damage needles.
Once you’ve got the hang of it, this efficient sewing tool dramatically increases your sewing speed for any project requiring decorative gathers.
4. Aleenes Fabric Fusion Permanent Fabric Adhesive Clear 4oz
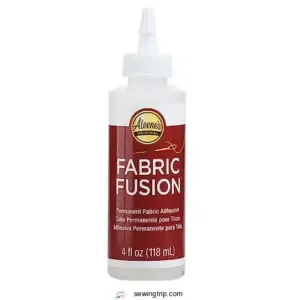
When you’re racing against time, Aleenes Fabric Fusion becomes your secret weapon for lightning-fast embellishment attachment.
This permanent fabric adhesive creates a washable bond that’ll outlast countless wash cycles, making it perfect for appliques, patches, and trims.
Simply apply a thin layer, let it set, then sew as usual. The clear formula won’t show through most fabrics, and its flexible nature moves with your garment.
For quick project suitability assessment, this adhesive works brilliantly on cotton, denim, and synthetic blends, saving precious minutes on every embellishment. For rigid fabrics, consider heavy-duty adhesives for a more durable bond.
5. Serated Pinking Shears Set of 3 Pairs
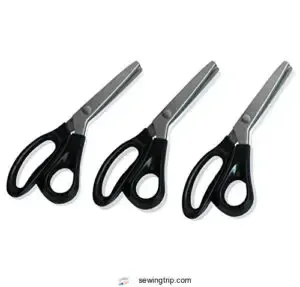
When you grab a set of pinking shears, you’re basically telling fabric fray, “Not today!”
Pinking Shear Sizes let you pick just the right edge finish.
Try these quick hacks:
- Snip pesky frays fast
- Choose sharp ergonomic shear handles
- Rotate sizes for different textiles
- Clean blades regularly
Simple, speedy, stress-free sewing tips!
Tip: Organize Fabrics and Patterns
In the context of sewing faster, a smart sewing room setup can be your secret weapon.
Ever lost a pattern or dug through piles to find fabric? You’re not alone!
Use clear project bins to wrangle your fabric inventory, and keep patterns filed by number for quick grabs—think of it as a personal sewing library.
Trust me, a little time up front with labeling systems pays off big later.
Hang delicate fabrics to dodge wrinkles and sort materials into “wovens” and “knits”—your future self will thank you.
Don’t overlook digital organization for patterns; a scanned backup means one less panic attack.
Keeping everything in its spot, easy to spot, means more making and less hunting.
Here’s a table to spark easy sewing project organization:
| Fabric Organization | Pattern Storage | Labeling Systems |
|---|---|---|
| Clear bins | Expanding files | Color-coded tags |
| Hanging shelves | Binders | Sticky notes |
| Divided drawers | Digital folders | Barcode labels |
| Labeled baskets | File cabinets | Chalkboard tags |
| Project bins | Numbered boxes | Clip-on tags |
Tip: Cut Multiple Items at The Same Time
Nothing saves time in sewing quite like cutting multiple items at once. If you’ve ever thought, “Isn’t there a faster way?”—there is!
Try layering fabrics, stacking two, three, or even four pieces together. Lay them flat on a large cutting mat, line up your patterns, and secure them with pattern weights (ditch the pins—your fingers will thank you).
A rotary cutter glides through the fabric like butter, meaning you’ll slice through several layers with one smooth sweep. Mark any details first with fabric marking tools to avoid mix-ups.
This trick transforms fabric cutting into a timesaving production line, boosting sewing efficiency. To explore options, you can purchase rotary cutters online.
In the end, you’ll have your piles of cut fabric ready before you can say, “Where’d all my scissors go?”
Tip: Use Pins or Clips Sparingly
You’re looking to boost your sewing speed. To do that, consider using pins or clips sparingly.
- Try sewing basting for temporary bonding
- Use washable school glue sticks to hold layers
- Clip only at notches or seam intersections
- Baste hems with long stitches instead of pinning.
For thick or slippery materials, consider using sewing clips instead. This will help you achieve clipping efficiency and better fabric control, leading to increased seam accuracy and sewing speed.
By mastering these sewing techniques, you’ll be sewing faster in no time, using valuable sewing shortcuts to enhance your sewing efficiency.
Tip: Use Gray Thread for Inside Seams
Smart sewists often discover that gray thread is their secret weapon for speeding up projects.
This neutral shade blends seamlessly with approximately 95% of fabric colors, eliminating constant thread changes that slow you down.
Gray thread mimics natural shadows inside seams, making stitches nearly invisible even when exposed.
As a "top secret," it’s neutral color knowledge among quilters.
Here’s how different thread colors perform on various fabrics:
| Thread Color | Light Fabrics | Medium Fabrics | Dark Fabrics | Patterned Fabrics | Sheer Fabrics |
|---|---|---|---|---|---|
| Gray | Excellent | Excellent | Good | Excellent | Excellent |
| White | Excellent | Poor | Poor | Poor | Good |
| Black | Poor | Good | Excellent | Poor | Poor |
| Matching | Excellent | Excellent | Excellent | Excellent | Excellent |
| Contrasting | Poor | Poor | Poor | Poor | Poor |
Using gray thread for interior seam aesthetics saves time and money.
You’ll stock fewer spools, reduce thread waste, and maintain professional results.
This simple thread color theory hack transforms your sewing techniques, helping you sew faster without sacrificing quality.
Tip: Chain Stitch
You’re about to revolutionize your sewing routine with chain stitching. This technique enables continuous sewing, linking stitches from one seam to the next, saving you time and thread.
By leaving threads attached and gently pulling fabric backwards, you can advance to the next piece and resume sewing. Chain stitching boosts production efficiency, ensuring seam consistency and significant time savings.
It’s a game-changer for sewing faster, especially when working on long seams or multiples. You can explore chain stitch products online.
Mastering chain stitching will take your sewing techniques for speed to the next level, making you a pro at sewing machine speed and thread management.
Tip: Whenever Possible, Use Flat Construction Methods
You’ll boost your sewing speed with flat construction methods. This technique allows for efficient construction and minimizes fabric handling.
To get started, try these tips:
- Arrange pattern pieces strategically to minimize fabric handling
- Use basting stitches and slightly longer stitch lengths
- Finish seams after checking fit.
Flat sewing saves time and increases sewing productivity, making garment construction faster and more efficient. By using flat construction, you’ll improve your sewing techniques for speed and overall sewing productivity.
Tip: Get a Rolling Swivel Chair and Organize Your Sewing Space
You can sew faster, and feel better, with a great sewing workspace! Ergonomic Seating, and sewing organization, are key. A good sewing workspace setup, and sewing workspace design, will boost your speed, and save your back.
Here’s how to make your sewing workspace organization shine:
- Get a rolling, swivel chair with adjustable height. Zip around your sewing space with ease.
- Plan your Workspace Layout. Keep Tool Accessibility in mind.
- Optimize Lighting, and aim for Clutter Reduction.
With a comfy chair, and smart sewing workspace, you’ll fly through projects! Plus, you’ll feel great. Now, get rollin’! Your next, speedy, sewing adventure awaits.
Tip: Use a Kneebar
Whether you’re working on your third shirt or your thirteenth, a kneebar can transform your sewing speed by keeping your hands exactly where they need to be.
This handy lever hangs below your sewing machine cabinet, and you’ll push it right with your knee to control the presser foot.
Instead of constantly reaching for controls, you can lift and lower the foot while maintaining perfect fabric control.
The kneebar benefits extend beyond simple foot control – you’ll discover that hands-free operation means smoother pivoting, better steering, and faster overall progress.
With practice, this knee movement becomes second nature, dramatically improving your sewing efficiency.
Your sewing machine speed increases naturally when both hands stay focused on guiding fabric rather than fumbling with controls.
This simple tool delivers real speed sewing advantages that experienced sewists swear by.
Frequently Asked Questions (FAQs)
Is it faster to sew without pinning or basting?
Think sewing without pinning or basting is a shortcut? You’re half right!
Skilled hands can zip along faster, but newbies might get wobbly seams.
Test the waters if you’re brave — just don’t skip practice or coffee!
How can I make sewing machine presser feet faster?
Swapping out presser feet for the right job speeds things up—zipper foot for zippers, ruffler for ruffles—so you’re not forcing a square peg in a round hole.
A specialty foot handles tricky bits with ease!
Is it faster to sew French seams with a serger?
Like trying to cut a steak with a butter knife, using a serger for French seams just isn’t faster.
A serger’s built for speed, but French seams need two passes—so your regular machine keeps up just fine.
What is the point of the sew faster book?
You’ll learn tips and tricks to boost sewing speed and efficiency with the Sew Faster book, helping you complete projects quickly and confidently.
How to cut fabric faster?
You’ll cut fabric 25% faster by using a rotary cutter, self-healing mat, and cutting multiple layers at once, making the process more efficient and saving you time.
How do you make sewing easier?
You make sewing easier by organizing your space, using proper tools, and mastering basic techniques, which helps you work more efficiently and accurately, saving time and reducing frustration.
How to get faster at sewing?
You’ll get faster at sewing by practicing regularly, using the right tools, and streamlining your workflow with efficient techniques and organization.
What is the fastest sewing technique?
Don’t worry, you won’t be slow forever, you’ll master chain stitching, a fast technique that saves time by sewing multiple pieces without cutting threads between them, boosting your sewing speed.
Is sewing a skill or talent?
You’ll find sewing is a skill that can be learned and mastered with practice, patience, and dedication, rather than an innate talent, allowing you to improve over time.
How quickly can I learn to sew?
What’s the hurry?
You’ll pick up sewing quickly, as it’s a skill that can be learned with practice, patience, and dedication, in just a few weeks or months, depending on you.
Conclusion
Now you’re sewing like a pro, mastering how to be fast in sewing with top tools and expert tips.
You’re saving time, and your projects are turning out great.
Remember, it’s all about working smarter, not harder, and using the right techniques, like chain stitching, to get the job done quickly and efficiently with your new how to be fast in sewing skills.


