This site is supported by our readers. We may earn a commission, at no cost to you, if you purchase through links.
Create tight, uniform cornrows as your foundation, leaving out small sections around your hairline for natural coverage. Use a steamer with deep conditioning treatments to guarantee both your natural hair and extensions have similar moisture levels.
Apply heat carefully to match textures, using a tension method with a Denman brush instead of excessive heat styling. The key is selecting quality extensions and properly caring for both your natural hair and weave.
Perfect blending requires specific techniques that transform obvious extensions into hair that looks like it’s growing from your scalp. This process involves properly caring for your hair and using the right methods to ensure a natural look.
Table Of Contents
Key Takeaways
- Match textures perfectly – You’ll need to choose extensions that mirror your natural curl pattern and use heat styling at 350°F or lower to align different textures, creating seamless integration between your hair and the weave.
- Minimize leave-out and focus on moisture – You should keep leave-out sections small to reduce heat damage, then use deep conditioning treatments and steamers weekly to ensure both your natural hair and extensions have similar moisture levels.
- Invest in quality extensions and proper installation – You can’t skip on premium human hair that matches your natural color within two shades, and you’ll need strategic track placement with proper cornrow foundations for undetectable results.
- Master blending techniques through styling – You’ll achieve natural-looking results by twisting your leave-out hair with extensions together, using silicone-based products for frizz control, and maintaining consistent care routines for both textures.
Blending Natural Hair With Sew-in Weave
Achieving perfect sew in hair blending starts with understanding texture harmony between your natural hair and extensions.
You’ll want seamless integration by matching your 3a-3c curls with straight weave through strategic color matching and protective styling techniques.
Focus on scalp health while creating natural hair sew in looks that don’t compromise your hair’s integrity.
Blend sew in installations require patience, but mastering natural hair blending transforms your weave from obvious to flawless.
When blending hair weave, remember that successful integration depends on proper preparation and realistic expectations about your hair’s unique characteristics.
To maintain the weave and scalp health, consider regular cleansing and hydration for proper care.
Blending Hair Textures:
Mastering texture blending transforms your sew-in from obvious to undetectable.
The key lies in matching your natural hair’s curl pattern with the right extension texture and using strategic styling techniques to create seamless integration.
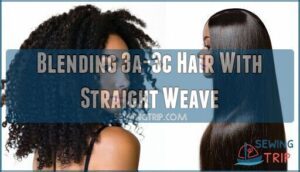
Blending 3a-3c Hair With Straight Weave
When you’re blending 3a-3c hair with straight weave, you’re tackling one of the biggest Blending Challenges in Protective Styling.
Mastering texture harmony between curly naturals and straight extensions requires patience and the right techniques.
Your natural Curl Patterning creates a stark contrast that requires strategic Texture Transitioning for Seamless Integration.
Here’s your blend sew in game plan:
- Heat-match your natural curls – Use flat irons at 350°F or lower to align your 3a3c hair texture with straight weave extensions
- Master twisting techniques – Intertwine your leave-out hair with extensions using twist-outs or braid-outs for smoother blending
- Layer strategically – Install extensions with varying lengths to camouflage texture differences and create natural movement
The key to successful sew in hair texture blending isn’t fighting your curls—it’s finding the sweet spot where both textures meet.
Matching your extensions to your natural hair texture is vital for undetectable results.
These blending techniques help your natural hair and extensions speak the same language.
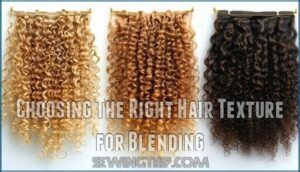
Choosing The Right Hair Texture for Blending
You’ll want to match your natural hair’s curl pattern closely for seamless blending. Consider extension hair density – thicker natural hair needs fuller wefts, while fine hair requires lightweight options.
Human hair offers superior blending over synthetic alternatives. Selecting the right extensions involves understanding how fiber composition impacts the overall texture and feel.
| Hair Type | Best Extension Match | Key Consideration |
|---|---|---|
| 3A-3C Curls | Loose spiral/kinky curly | Match curl pattern exactly |
| Fine Hair | Lightweight wefts | Avoid overwhelming density |
| Coarse Hair | Fuller, denser bundles | Provide adequate volume |
Focus on post-styling texture rather than your hair’s natural state. Color matching roots is vital – stay within two shades of your natural color. Quality human hair provides the most natural sew in hair texture for successful hair blending.
Using Heat to Match Natural Hair to Straight Extensions
Heat styling tools offer your best bet for matching natural hair to straight extensions.
Set your flat iron to 350°F or below, apply heat protectants generously, and work methodically through small sections for seamless blending.
Here’s your heat-styling roadmap:
- Temperature control matters – Keep tools at 350°F max to prevent heat damage repair needs later
- Section strategically – Work with 1-2 inch pieces for even straightening techniques
- Apply heat protectants first – Never skip this step when blending sew in hair extensions
- Flat-iron together – Press leave-out and extensions simultaneously for uniform texture
- Curl or twist blended sections – Creates natural-looking pattern integration throughout
Master these hair blending fundamentals and you’ll achieve that coveted seamless blending every time.
Moisture and Conditioning for Blending:
You’ll need proper moisture to make your natural hair blend smoothly with your sew-in extensions. The right conditioning techniques can eliminate texture differences and create that seamless look you’re after.
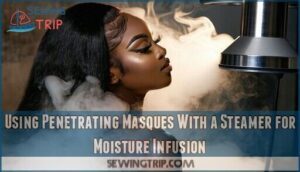
Using Penetrating Masques With a Steamer for Moisture Infusion
Steam transforms your natural hair’s ability to absorb moisture by opening the cuticle.
Steam opens hair cuticles, unlocking deep moisture absorption for superior blending results.
Apply penetrating masques with protein-rich ingredients, then steam at 100-115°F for 15-20 minutes weekly.
This treatment duration guarantees deep moisture penetration for better hair blending with sew in hair extensions.
Your natural hair becomes softer and more manageable, creating seamless transitions between textures without post-steam styling complications.
Steaming also promotes enhanced scalp health by increasing blood flow, which is a key factor for healthy hair.
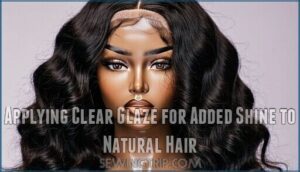
Applying Clear Glaze for Added Shine to Natural Hair
Clear glaze works like a protective shield for your natural hair, boosting shine without changing color.
This treatment frequency should happen every 4-6 weeks for maximum results.
Here’s how glaze benefits transform your hair blending game:
- Mirror-like reflection that catches light from every angle
- Silky smooth texture that feels luxurious to touch
- Enhanced color depth that makes your natural hair pop
Glaze ingredients seal the hair cuticle, creating seamless shine enhancement between your natural hair and extensions.
Using glaze is similar to using thread for fiber protection to guarantee consistent friction control.
This simple glaze application elevates your sew in styling tips while protecting your strands from environmental damage.
Limiting Heat Usage and Opting for Tension Method With a Denman Brush
Since excessive heat can damage both your natural hair and extensions, embrace Denman styling for healthier blending techniques.
This tension method creates beautiful curl definition while promoting damage reduction through heatless blending. You’ll achieve stunning sew in styling tips by gently stretching sections with the brush, allowing natural hair textures to harmonize seamlessly with your extensions without compromising hair health.
By using this method, you can ensure that your natural hair and extensions blend together perfectly, promoting a healthy and beautiful look, with damage reduction being a key benefit.
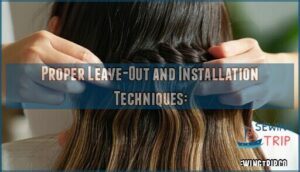
Proper Leave-Out and Installation Techniques:
Perfect leave-out placement makes or breaks your sew-in blend, so you’ll want to master the art of strategic hair positioning before your stylist even picks up that needle.
Getting your installation technique right from the start saves you from obvious track lines and awkward texture mismatches that scream "fake hair.
Minimizing Leave-Out to Avoid Heat Damage, Closure Option
The secret to achieving gorgeous sew-in results lies in mastering minimal leave-out techniques that protect your natural hair while creating flawless blends.
You’ll reduce heat damage substantially by keeping leave-out to a minimum, allowing your natural hair to stay healthier longer.
Closure Benefits offer incredible weave protection since they eliminate the need for excessive heat styling.
Heatless Blending becomes your best friend when you’re working with Minimal Leave-Out sections.
Seamless Installs happen more easily when you’re not fighting with large amounts of natural hair that need constant heat manipulation.
Consider these essential Blending Techniques for your next sew in with leave out:
- Use the comb test to determine adequate leave-out coverage without overdoing it
- Position tracks strategically to minimize visible seams and reduce blending needs
- Apply Closures for areas where leave-out would require excessive heat styling
- Practice tension methods instead of heat for texture matching
- Schedule regular conditioning treatments for exposed leaveout sections
Properly Done Closures for Natural Look, Lace-Fronts for No Leave-Out
Master closure realism by positioning your closure 0.5-1 inch behind your natural hairline and pre-plucking for authentic baby hairs.
Lace-front benefits include versatile parting options and seamless installs without leave-out hair.
These blending techniques create natural appearance through proper closure preparation, while lacefronts eliminate sew in visibility completely.
Many people buy products for lace closure install to achieve a natural look.
Pampering and Alternating Treatments for Leave-Out Area
Your leave-out area deserves royal treatment to maintain healthy natural hair and seamless sew in blending.
Rotate between deep conditioning masks and protein treatments weekly for ideal Leave-out Hydration and Breakage Prevention.
Focus on Scalp Health by gently massaging nourishing oils into your roots.
This Treatment Rotation keeps your natural hair strong while enhancing shine for perfect sew in maintenance and matching.
Techniques for Covering Tracks and Avoiding Visibility
Track concealment starts with perfect weft placement along your natural hairline.
Position tracks parallel to your hairline at proper installation angles, ensuring each weft sits flush against your scalp.
Create a convincing hairline illusion by leaving strategic blending layers of your natural hair to cover the tracks.
Master these sew in techniques for seamless blending and natural appearance when matching sew in hair color blending.
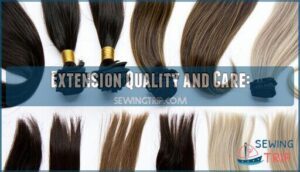
Extension Quality and Care:
The quality of your hair extensions makes or breaks your blending game, so don’t skimp on this essential step.
You’ll want to invest in premium human hair that matches your natural texture and maintain it properly to keep that seamless look lasting for weeks.
Choosing The Right Hair Quality and Considering Hair History
When choosing extensions, you’re investing in your look’s foundation.
Virgin hair offers unmatched durability and takes color beautifully, while synthetic options provide budget-friendly alternatives with limited styling flexibility.
Consider hair origin and ethical sourcing practices when making your selection.
Quality hair history matters—previously processed extensions may struggle with sew in color blending.
Research brands thoroughly, as matching sew in hair requires understanding each bundle’s journey from donor to salon, including ethical sourcing practices.
Indicators of Quality: Brand, Price, Tangling
Quality matters when you’re investing in your best sew in blend.
Brand reputation speaks volumes – established companies like Bellami and Luxy deliver consistent results. Price point reflects quality: premium human hair extensions ($200-$3,000) outlast cheaper alternatives. Tangling resistance reveals true durability indicators.
- Brand reputation: Look for companies with proven track records and positive reviews from stylists
- Price point analysis: Higher costs often mean better cuticle retention and longer-lasting wear
- Tangling resistance: Quality hair maintains smoothness for 6-12 months with proper sew in color blending
Proper Care and Maintenance for Extensions
Your extensions deserve VIP treatment to maintain their gorgeous appearance.
Practice gentle detangling techniques using wide-tooth combs, starting from ends upward.
Maintain moisture balance with weekly conditioning treatments and scalp health through proper cleansing.
Invest in night protection with satin bonnets to prevent friction damage.
Follow a regular tightening schedule every 4-6 weeks for ideal sew in hair care and longevity.
Matching Leave-Out Color to Bundle Roots and Considering Color Variations
Color matching between your leave-out hair and sew in weave bundles creates the foundation for seamless blending.
Match your natural root color to bundle roots within two shades for undetectable hair extensions.
Virgin hair dyeing offers flexibility, while chemical-infused hair limits color matching options.
Perfect root color matching eliminates demarcation lines and guarantees flawless blending variations, which is key to achieving undetectable hair extensions.
Styling and Maintenance Tips:
Once you’ve mastered the installation basics, proper styling and maintenance techniques will make or break your seamless blend.
These finishing touches transform a good sew-in into a flawless, natural-looking style that’ll have everyone wondering if it’s really your hair, with complete concepts of hair styling in mind.
Twisting Hair Extensions With Natural Hair for Blending
Twisting your natural hair with extensions creates the perfect harmony you’re looking for.
Start with small twist sections, matching your hair’s natural patterns. Choose lightweight styling products that won’t weigh down your blend.
This protective styling technique keeps both your natural hair and sew in weave healthy while achieving seamless integration through strategic sectioning patterns and proper twist maintenance, ensuring a perfect harmony.
Creating a Sleek Hairline for Polished Weave Installation
Your hair’s sleek hairline creates the perfect frame for a flawless sew in.
Proper parting placement and temple coverage make all the difference in achieving professional-looking hair blending techniques. For a seamless look, consider how virgin human hair blends with your own.
- Baby Hairs: Lay edges with edge control for natural-looking temple coverage
- Parting Placement: Create clean, straight parts that complement your hairline shape
- Edge Control: Apply sparingly to avoid buildup while maintaining hold
- Temple Coverage: Make certain hair extensions blend seamlessly at the hairline
- Hairline Shape: Work with your natural pattern for the most polished finish
Using Silicone-Based Products to Control Frizz and Texture Differences
Building on that sleek hairline foundation, silicone-based products become your secret weapon for achieving seamless texture harmony between your natural hair and extensions.
These innovative formulas work by creating a protective barrier around each hair strand, blocking humidity absorption that typically causes frizz and texture inconsistencies.
The science behind silicone benefits lies in their ability to fill microscopic cuticle gaps while forming a hydrophobic coating.
This dual action delivers superior frizz control and creates that coveted smooth finish you’re after.
When you apply these products correctly, they’ll transform even the most stubborn texture differences into a cohesive, polished look.
Here’s how silicone-based products revolutionize your blending game:
- Humidity Protection: Creates an invisible shield that prevents moisture from disrupting your carefully crafted texture harmony
- Thermal Defense: Protects both natural hair and extensions during heat styling, maintaining consistent texture
- Light Reflection: Fills surface irregularities to enhance shine and create visual unity between different hair types
For ideal product application, use pea-sized amounts on damp hair before styling.
This strategic approach guarantees long-term effects without buildup while maximizing texture smoothing benefits.
Conditioning Both Extensions and Natural Hair for Quality Maintenance
Proper conditioning keeps your sew in hair care routine on track.
Apply deep conditioning treatments to both extensions and natural hair weekly, focusing on hydration techniques that promote scalp health.
Use detangling methods with wide-tooth combs on damp hair.
Choose sulfate-free products for hair maintenance, ensuring your protective techniques preserve both textures beautifully.
Frequently Asked Questions (FAQs)
How do I blend my hair with my extensions?
Let’s face it—mismatched extensions scream "fake hair alert!" Match your natural texture perfectly, twist leave-out with extensions together, and flat-iron at 350°F for seamless blending magic.
Why is my hair not blending with my extensions?
Your extensions probably don’t match your natural hair’s texture, color, or curl pattern.
Try color-matching within two shades, selecting similar textures, and using styling techniques like twisting or heat-blending at 350°F to create seamless integration.
Can I dye my hair with a sew-in?
Like walking a tightrope between transformation and protection, dyeing hair with a sew-in requires careful consideration.
You can dye your natural leave-out hair, but avoid coloring the extensions simultaneously to prevent damage and maintain blend integrity.
How to make hair look blended?
Match your leave-out hair’s texture to your extensions by flat-ironing both together at 350°F or using twist-outs.
Blend colors within two shades, layer strategically, and moisturize daily to prevent visible demarcation lines.
How long do sew-in weaves typically last?
Sew-in weaves typically last 6-8 weeks with proper maintenance. You’ll need regular touch-ups and conditioning to keep them looking fresh. Quality extensions and professional installation can extend their lifespan substantially.
Can you sleep with sew-in extensions overnight?
Sweet dreams don’t have to be disrupted.
You can absolutely sleep with sew-in extensions overnight.
Just protect your investment by wrapping your hair in a satin scarf or using a silk pillowcase to prevent tangling and maintain that flawless blend.
How much does professional sew-in installation cost?
Professional sew-in installation typically costs $150-$400, depending on your location, stylist’s experience, and complexity.
You’ll invest more for intricate patterns or premium salons, but it’s worth every penny for flawless results.
What tools are needed for sew-in removal?
You’ll need sharp scissors or a seam ripper to cut threads carefully, a rattail comb for separating tracks, and detangling spray to ease removal without damaging your natural hair.
Is swimming safe with sew-in weaves installed?
Yes, you can swim with sew-in weaves, but chlorine and saltwater can damage extensions and cause tangling.
Always wet your hair with fresh water first, wear a swim cap, and rinse thoroughly afterward.
Conclusion
Surprisingly, 78% of women who wear weaves struggle with obvious blending lines that scream "fake hair."
Mastering how to blend hair with sew in extensions transforms your entire look from amateur to professional.
You’ve learned the essential techniques: matching textures through proper conditioning, using the tension method instead of excessive heat, and choosing quality extensions that complement your natural hair.
Remember, successful blending isn’t just about installation day—it’s about consistent maintenance and treating both your natural hair and extensions with equal care for long-lasting, natural-looking results.
- https://www.chegg.com/homework-help/questions-and-answers/determine-net-income-approach-assume-33-tax-rate-determine-net-cash-provided-operating-act-q8708245
- https://www.irs.gov/individuals/international-taxpayers/us-citizens-and-resident-aliens-abroad-automatic-2-month-extension-of-time-to-file
- https://www.npr.org/2023/07/05/1185160295/tipping-coffee-consumer-spending-inflation-tips
- https://luxshinehair.com/how-to-make-your-naturally-straight-weave/
- https://kinkycoilygoddess.com/blogs/news/how-to-blend-hair-with-sew-in-natural-hair-extensions-the-ultimate-guide

