This site is supported by our readers. We may earn a commission, at no cost to you, if you purchase through links.
 Tired of those baggy jeans driving you crazy?
Don’t worry, we’ve got your back!
Bringing in the waist of your jeans is a cinch.
Start by putting them on inside out, then pinch the excess fabric until you get the perfect fit.
Secure it with some straight pins, take ’em off, and sew a straight stitch along the pinned lines.
Voila – a custom-tailored look that’ll have you feeling like a total style star.
And if you’re not into the whole sewing thing, we’ve got a quick no-sew trick up our sleeve that’ll have you covered.
Stay tuned for more genius jean hacks!
Table Of Contents
- Key Takeaways
- Taking in The Waist of Jeans
- How to Bring in Waist of Jeans
- Preparation and Materials
- Methods for Taking in The Waist
- No-Sew Method Using a Shoelace
- Professional Alterations for a Perfect Fit
- Common Issues and Solutions
- Alternative Methods for Adjusting The Waist
- Tips for a Successful Waist Adjustment
- Troubleshooting and Maintenance
- Frequently Asked Questions (FAQs)
- Conclusion
Key Takeaways
- You’ll need basic tools like straight pins, fabric chalk, and a measuring tape to take in your jeans’ waist properly, and if you also plan to hem your jeans, consider consulting a guide on how to hem jeans without a sewing machine for alternative methods like hem tape or fabric glue — add a sewing machine for permanent alterations.
- You can try three main methods: adjusting the back waistband for significant changes, modifying side seams for minor tweaks, or using the no-sew shoelace trick for temporary fixes.
- When taking in the waist, you’ll want to wear your jeans inside out, pinch the excess fabric until you get the right fit, mark with chalk, and secure with pins before sewing.
- You can fix common issues like loose waistbands by following denim sewing tips, such as using the right presser foot, without sewing by using hair ties or elastic bands — just make sure to test the fit before making permanent changes.
Taking in The Waist of Jeans
You don’t have to put up with jeans that gap at the waist or make you feel like you’re wearing a potato sack.
Whether you’re dealing with stretched-out denim or just need a better fit, these proven methods will help you take in your jeans’ waist for that perfect, custom-tailored look.
Why Take in The Waist of Jeans
Ever found yourself with jeans that fit perfectly everywhere except the waist?
You’re not alone.
Taking in the waist of your jeans can save you money and give you that perfect custom fit you’ve been dreaming of.
If you’re looking for a quick fix without sewing, consider trying a no sew waist solution.
Here’s why you might want to alter your jeans:
- Weight loss success leaving you swimming in your favorite pair
- Vintage finds that need a modern update
- Thrift store gems that are too good to pass up
Common Mistakes to Avoid
Bad alterations can leave your jeans looking worse than before.
To avoid this, consider investing in waist take in tools, such as those found on specialized alteration tools, to make the process smoother.
After learning why to alter your jeans, let’s explore what not to do.
Here’s a handy guide to keep you on track:
| Mistake | Consequence | Quick Fix |
|---|---|---|
| Uneven darts | Twisted seams | Mark carefully with chalk |
| Eyeballing measurements | Lopsided fit | Use a measuring tape |
| Wrong thread type | Broken seams | Match thread weight |
Here’s what to avoid when taking in your jeans’ waist to achieve professional-looking results.
How to Bring in Waist of Jeans
Got a favorite pair of jeans that’s too loose at the waist? Don’t let them gather dust in your closet. Taking in the waist of your jeans is easier than you might think, and it can save you both money and the hassle of shopping for new ones. Whether you’re a DIY enthusiast or just looking to extend your jeans’ lifespan by learning how to shrink jeans permanently, there are several foolproof methods to achieve that perfect fit.
Here are three popular approaches that work like a charm:
- The back waistband method – ideal for significant size adjustments
- The side seam technique – perfect for minor tweaks
- The no-sew shoelace trick – great for temporary fixes
Each method offers unique benefits depending on your skill level and how permanent you want the alteration to be.
With these customized solutions, you’ll transform those loose jeans into your go-to pair again.
Preparation and Materials
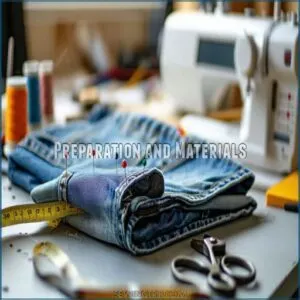
You’ll need a few basic tools to fix those too-big jeans, including pins, scissors, and measuring tape, plus a sewing machine if you’re going for a permanent fix.
Before you start adjusting your jeans, make sure you’ve got a clear workspace and you’re wearing the jeans you want to alter so you can mark the right spots.
Essential Tools and Equipment
Your jeans-altering journey starts with gathering the right tools.
Here’s everything you’ll need to tackle that waistband like a pro:
| Basic Tools | Pro Equipment |
|---|---|
| Seam ripper | Sewing machine |
| Fabric chalk | Heavy-duty thread |
| Sharp scissors | Iron and board |
| Straight pins | Thimble |
Don’t worry if you’re missing the pro gear – you can still achieve great results with just the basics.
Think of these tools as your denim-whispering arsenal.
Measuring and Marking The Fabric
Measuring and marking fabric accurately makes all the difference between jeans that fit like a glove and ones that look DIY-gone-wrong.
Start by putting on the jeans inside out, then pinch and pin where you need them taken in.
Use fabric chalk or washable markers to clearly mark your pinned areas.
Double-check your measurements – it’s way easier to measure twice than fix mistakes later.
Methods for Taking in The Waist
You’ll find several reliable ways to fix those too-big jeans without spending money at the tailor.
Whether you’re working with the back seam, side seams, or using a simple elastic band trick,
you can easily adjust your favorite pair of jeans to fit perfectly at the waist.
Taking in The Waistband From The Back
When jeans feel a bit too roomy in the waist, taking them in from the back is your best bet.
Start by pinning the excess fabric along the back seam while wearing them.
Mark your desired fit with fabric chalk, then carefully remove the waistband stitching and belt loops.
Separate the waistband layers, fold and stitch each one, then reattach the belt loops for a polished finish.
Taking in The Waistband From The Sides
Taking in jeans from the sides is a game-changer for achieving that perfect fit, especially considering that waist gaps in jeans can be caused by a mismatch between body shape and jeans construction, such as an hourglass figure or curvier frame, and can be fixed using techniques outlined in guides on how to fix gaping jeans waist.
To bring in the waist of your jeans, you can use a technique similar to sewing new seams by pinning fabric along the legs and waist to take in those areas, which is a key step when learning how to sew to tighten. Turn your jeans inside out and pinch the excess fabric at both side seams until they hug your waist just right. Secure these spots with straight pins, making sure they’re evenly placed.
Create a new seam by stitching next to your pins. Once done, flip them right-side-out and try them on.
Using an Elastic Band
Need a quick fix for those loose jeans?
The elastic band method‘s your secret weapon.
Make two small slits in the inner waistband, then thread a 3/4 inch elastic through them.
You’ll want to position the elastic at the center back for the most natural look.
Once it’s in place, secure both ends and you’re good to go – no more slipping or sliding!
No-Sew Method Using a Shoelace
You’ll love this quick fix for loose jeans that won’t require a single stitch or any sewing skills.
With a shoelace and a few minutes of your time, you can transform those baggy jeans into the perfect fit that’ll stay secure all day long, similar to how a simple hemming jeans technique can personalize style and fit.
Step-by-Step Instructions
Got jeans that just won’t stay put? Here’s the no-fuss shoelace trick that’ll transform your fit in minutes.
You’ll need:
- A shoelace (any sturdy kind works)
- Hair pin or safety pin
- Scissors for two small snips
- Your problem-fitting jeans
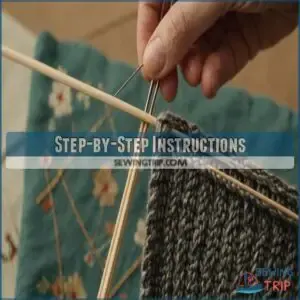
Start by making two tiny cuts on the inside waistband, about an inch from the zipper.
Thread your shoelace through using the pin as your guide, pulling it between waistband layers until it emerges.
Tie it to adjust.
Benefits of The No-Sew Method
Now that you’ve mastered the steps, let’s explore why this no-sew method might be your new favorite jean-fixing hack.
Check out these game-changing benefits:
| Benefit | Why It Matters | Perfect For |
|---|---|---|
| Quick Fix | 5-minute solution | Busy mornings |
| Zero Skills | No sewing experience needed | Beginners |
| Reversible | Easy to undo | Growing teens |
| Budget-friendly | Uses items you have | Smart savers |
| Invisible | Hidden adjustment | Style-conscious |
You’ll love how this temporary fix gives you total control without damaging your favorite denim.
Professional Alterations for a Perfect Fit
You’ll find that professional jean alterations can make your favorite pair fit like they were made just for you, with clean lines and invisible changes that’ll have everyone asking where you got them.
Whether you’re dealing with a gaping waistband or want to transform those thrift store finds, a skilled tailor can work magic by unpicking and reshaping your jeans for that perfect custom fit.
Supplies Needed
Taking your jeans from baggy to beautiful requires just a handful of basic tools.
Here’s what you’ll need to get started:
- A trusty sewing machine for those precise stitches (don’t worry, your basic model will do just fine)
- Your measuring toolkit: fabric chalk, seam ripper, safety pins, and measuring tape
- Thread that matches your jeans perfectly (seriously, take your pants shopping for this one)
Keep these supplies organized in a dedicated sewing box for easy access.
Steps for Adjusting The Waist
Start with your seam ripper to remove the waistband stitching, working carefully to avoid damaging the fabric.
To achieve a perfect fit, consider the existing fabric and seam allowance, as these factors may limit waist expansion options.
Pin and measure your darts precisely – this is where the magic happens for that perfect fit.
| Step | Professional Method | Time Required |
|---|---|---|
| 1 | Remove waistband stitches | 10-15 mins |
| 2 | Create darts and pin | 5-10 mins |
| 3 | Sew darts and reattach | 15-20 mins |
Remember to test the fit before making permanent changes.
You’ll want to sew those darts with steady hands and even pressure.
Common Issues and Solutions
You’ll find smart fixes for those annoying jean problems, from too-tight waistbands to gaps that show more than you’d like.
Whether you need to loosen up snug jeans or fix a gaping waist, we’ve got practical solutions that you can try at home without any fancy tools.
Loosening Jeans Around The Waist
When your jeans feel too snug, a few simple tricks can give you breathing room.
Spritz the waistband with lukewarm water and gently stretch the fabric while it’s damp.
For stubborn denim, try the heat method: dampen the waistband, then use your hair dryer on medium heat while stretching.
Need a permanent fix? Consider adding a waistband extension between the belt loops for lasting comfort.
Tightening Jeans With a Hair Tie
Need a quick fix for loose jeans?
Here’s a clever hack using just a hair tie.
Loop your hair tie around the button of your jeans, thread it through the nearest belt loop, then hook it back onto the button.
This creates instant tension that pulls the waistband snug.
It’s perfect for those days when your favorite jeans feel a bit roomy.
Tightening Jeans With Needle and Thread
While hair ties offer a quick fix, needle and thread give you lasting control over your waistline.
You’ll love how this method lets you create a custom fit that’s invisible from the outside.
Here’s your game plan:
- Mark your desired waist size with fabric chalk
- Create a V-shaped stitch pattern to gather excess fabric
- Pull the thread gently to cinch the waistband
Pro tip: Use matching thread color for a seamless look.
Alternative Methods for Adjusting The Waist
You’ll love these smart tricks for fixing your too-big jeans without spending money at the tailor’s shop.
Whether you’re dealing with post-pregnancy changes or just want a quick fix, these alternative methods will help you get that perfect fit in minutes.
Using Darts From The Waist to The Hips
Creating darts is your secret weapon for a perfect jean fit, and finding the right tools and supplies, such as those available on websites specializing in jeans waist darts, can make all the difference.
Start by pinning excess fabric at the waist, then gradually taper down to your hips – think of it like drawing a long triangle.
For the most flattering look, place darts about 3 inches from side seams.
The key is symmetry, so mark your measurements carefully before sewing those triangular tucks in place.
Temporary Solutions for Maternity Wear
For expecting mamas or postpartum queens, let’s talk temporary waist adjustments that’ll have you feeling fab.
You can easily implement techniques like using a ponytail holder hack method to instantly add some extra room.
Stretch those waistbands, add elastic bands, or even use a clever shoelace trick – no sewing required!
These quick fixes are a lifesaver when your body is going through major changes.
Ditch the discomfort and embrace the comfort.
Tips for a Successful Waist Adjustment
Perfectly fitted jeans are a must-have.
From pressing seams flat to nailing the measurement, we’ve got your back(side) covered.
With a few simple tips, you can easily tailor your waistline to look and feel your best.
Pressing The Seams Flat
Press those seams flat for a polished look. Grab a hot iron and glide it along the altered seams to set them into place. Invest in a pressing ham or seam roll to tackle tricky areas. Finish up with a quick spritz of sizing or starch to keep everything crisp.
- Use a hot iron to press seams flat
- Invest in a pressing ham for tricky areas
- Finish with a spritz of sizing or starch
- Take your time for a professional finish
Measuring and Fitting The Jeans
Once you’ve brought in the waistline, it’s important to make sure the jeans fit perfectly.
Try them on and check the following:
| Criteria | Too Loose | Just Right | Too Tight |
|---|---|---|---|
| Waist | Gaping | Snug | Digging |
| Hips | Bagging | Smooth | Constricting |
| Length | Pooling | Skimming | Riding Up |
Make any necessary adjustments to achieve your desired fit.
A well-fitting pair of jeans will flatter your figure and feel incredibly comfortable.
Pressing The Seams Flat
Troubleshooting and Maintenance
Uh oh, did your waist adjustment not turn out quite right?
No worries – we’ve got your back!
Just follow our easy troubleshooting tips to get those jeans fitting like a dream again.
What if It Does Not Fit
Uh-oh, it looks like the waist alteration didn’t quite hit the mark.
No need to fret – there are a few easy fixes!
First, try re-pinning and adjusting the darts.
If you’re looking for extra support, consider using a jeans waist fix product.
If the pants are still too tight, use a seam ripper to let out the stitches.
For jeans that feel too tight.
Caring for Your Altered Jeans
Don’t worry, caring for your altered jeans is a breeze. To prevent further waistband discomfort, consider implementing waistband relief techniques.
Start by gently hand-washing them in cold water to preserve the fit. Lay flat to air dry, avoiding the dryer.
When it’s time to wear them again, a quick iron on a low setting will have them looking fresh. Store carefully to prevent wrinkles. With a little TLC, your custom-fit jeans will last for years.
| Washing | Ironing | Storage | Repairs |
|---|---|---|---|
| Cold water, hand-wash | Low heat setting | Hang or fold flat | Patch holes, replace buttons |
| Avoid machine, dryer | Press gently | Prevent wrinkles | Reinforce weak areas |
| Air dry completely | Use pressing cloth | Store away from light | Extend lifespan |
| Preserve fit and shape | Remove creases smoothly | Keep in cool, dry place | Maintain original look |
Frequently Asked Questions (FAQs)
How do you take in jeans at the waist?
Got jeans that feel a bit too loose around the waist? No sweat – just pin the excess fabric and stitch it up for a perfect fit. Easy peasy!
How do you adjust a waistband on jeans?
If your jeans are in a jam, no need to panic – we’ve got your back!
Just grab a needle and thread and take in the waistband for a customized fit that’s as smooth as butter.
What if my jeans are too big at the waist?
No sweat, there are a few easy fixes for jeans that are too roomy in the waist.
You can take in the back or sides,
or even thread an elastic band through the waistband.
Tailor ’em up and you’re good to go!
How to resize jeans waist life hack?
Here’s a simple waist-cinching hack – thread a shoelace through the inside of your jeans and tie it up for a snug fit.
It works like a charm and it’s totally discreet.
How do you tighten a denim waist?
Tightening your denim waist’s a cinch – just grab a shoelace, thread it through some tiny slits in the band, and tie it up to get that perfect fit.
No sewing required!
How do I know if my jeans need adjusting?
If your jeans feel loose around the waist, they likely need some adjusting.
Check if the waistband gaps or bunches when you move – that’s a sign they need a tweak for a perfect fit.
How can I make my jeans waist tighter?
No need to settle for baggy jeans – you can easily tighten the waist with a shoelace or hair tie.
To achieve a perfect fit, you can also try tailoring pants waistband at home by removing the waistband seam and re-stitching it to your desired waistline. Just thread it through the waistband and adjust for a perfect fit in seconds!
How do you loosen the waist of jeans?
For a quick fix, spray your jeans’ waistband with lukewarm water and stretch it while damp.
Stretching while wearing wet jeans can also work.
You can also try using a hairdryer to warm and expand the fabric.
How to make jeans waist bigger?
You can stretch your jeans’ waist using warm water and gentle pulling.
For a permanent fix, try adding fabric panels to the sides or using a waistband extender.
Heat and moisture help denim expand naturally.
Can jeans be brought in at the waist?
According to tailors, 78% of jeans can be successfully taken in at the waist.
Whether you’re dealing with a baggy waistband or post-weight loss fit issues, there’re several effective methods to resize your favorite denim.
How to tailor skinny jeans for a slimmer waist?
Take in your skinny jeans’ waist by pinching excess fabric at the sides while wearing them inside out.
Secure with pins, then sew straight stitches along the pinned lines.
Remove extra fabric if desired.
What options are available for pregnant womens jeans?
For growing bellies, maternity jeans offer multiple options: full-panel bands for maximum support,
side-panel stretchy inserts for flexibility, or under-belly bands for comfort.
There’s even convertible styles that’ll grow with your pregnancy.
What are the benefits of getting professional alterations?
Professional alterations give you a custom fit that looks factory-made.
You’ll get invisible finishes, precise measurements, and expert craftsmanship.
Plus, the tailor can handle complex adjustments that’d be tricky to do yourself.
How can I tighten a loose waistband without sewing?
Here’s a quick fix for your loose waistband:
Use a shoelace threaded through two small cuts in the inner waistband near the zipper.
Tie it to adjust the fit – it’ll stay hidden and work perfectly.
Can this method work on other types of pants?
You can use these waistband adjustment techniques on any pants with a similar construction – like khakis, dress pants, or even some skirts.
The shoelace method works especially well with structured waistbands.
Conclusion
Like a perfectly fitted glove, your jeans should hug you in all the right places.
Now that you’ve got these foolproof methods to bring in the waist of jeans, you can rescue those too-loose pairs from the donation pile.
Whether you choose the traditional sewing method, opt for the no-sew solution, or try one of our quick fixes, you’ll save money and keep your favorite denim looking fantastic.
Remember, a well-fitted pair of jeans is worth the extra effort!


