This site is supported by our readers. We may earn a commission, at no cost to you, if you purchase through links.
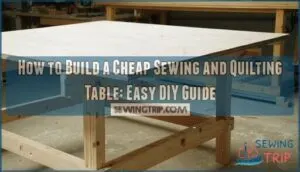
Start with a 4×8 foot plywood sheet for the tabletop, then construct a simple frame using 2x4s for the legs and supports.
Cut everything to size, assemble with wood screws, and add cross-braces for stability.
Sand the surface smooth and apply a protective finish.
This creates a sturdy workspace that’s perfect for spreading out fabric and cutting large pieces, and the secret lies in choosing the right materials and understanding a few clever construction tricks.
Table Of Contents
Key Takeaways
- You can build a functional sewing table for under $100 using basic materials like 3/4" plywood, 2×4 lumber, and standard hardware from your local home improvement store.
- You’ll need to plan your dimensions carefully – aim for 48-60 inches wide and 24-30 inches deep, with a height of 28-30 inches for comfortable sewing and quilting work.
- You can save money by using recycled materials like old furniture, shopping clearance sales, and buying lumber in standard lengths to minimize waste and cutting costs.
- You must prioritize stability by adding cross-braces, ensuring level installation, and properly securing all joints with wood screws and glue to handle machine vibrations and heavy fabric projects.
Building Cheap Tables
You can build a sturdy sewing table without breaking the bank by using simple materials like plywood and basic lumber.
Quality doesn’t require a big budget – smart material choices create professional results.
With just a few tools and some clever design choices, you’ll create a functional workspace that rivals expensive store-bought options at a fraction of the cost.
Materials and Tools Needed
Before you start gathering your plywood grades and lumber types, you’ll need the right arsenal of woodworking tools and materials.
Building a cheap quilting table doesn’t require fancy equipment, just smart choices that’ll get the job done without breaking the bank.
Essential materials and tools for your DIY sewing table:
- Plywood sheets (3/4" thick for tabletop, 1/2" for shelves) and 1×2 lumber types for framing
- Fastener selection includes wood screws (1.25"), bolts with washers, and wood glue for joints
- Basic sewing tools like circular saw, jigsaw, drill, clamps, and measuring tape
- Sandpaper options ranging from 120 to 220 grit for smooth finishing
- Protective gear including safety glasses, dust mask, and work gloves
For selecting the right material, consider plywood options available for your table.
Space and Budget Considerations
Before diving into your DIY sewing table project, you’ll want to measure your workspace carefully.
Small spaces demand multifunctional design—think foldable extensions and vertical storage.
Material costs can quickly add up, but upcycled options like repurposing old furniture offer serious DIY savings.
A cheap quilting table doesn’t mean cheap quality when you build smart and shop strategically for your homemade sewing station.
DIY Projects and Plans
Looking at plans gives you the roadmap, but now you need real options.
IKEA hacks transform basic furniture into functional sewing stations on a budget. Foldable designs maximize small spaces while cabinet plans create organized storage.
Upcycled projects breathe new life into old tables. Free online plans for cutting tables and DIY sewing stations offer step-by-step guidance for every skill level.
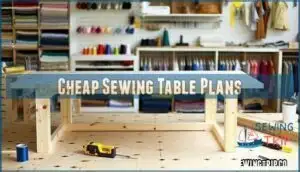
Cheap Sewing Table Plans
You’ll find a treasure trove of free plan resources online that’ll make your wallet happy.
These DIY sewing table plans range from simple $50 builds to more elaborate $150 projects, but most clock in around $100 or less.
Beginner-friendly designs focus on basic cuts and screws—no fancy joinery required.
Think Ikea hacks using desktop surfaces with simple legs, or upcycled material ideas like transforming old furniture into functional craft spaces.
Many plans feature space-saving plans with foldable legs that collapse to end-table size.
Popular budget-friendly hardware includes adjustable trestles, pre-cut plywood, and basic hinges.
Most affordable craft table designs offer modular layouts—start simple, then add features like storage cubbies or flush-mount machine inserts as your skills grow.
To accommodate different sewing machines, consider a design with interchangeable table inserts.
The best part? Community forums share troubleshooting tips and modifications, so you’re never building alone.
These simple sewing table plans prove that a quality budget sewing desk doesn’t require a master carpenter’s skills.
Choosing Table Materials
Selecting the right materials for your sewing table determines both your project’s cost and durability.
You’ll want to balance affordability with strength since your table needs to support heavy sewing machines and resist vibrations during use.
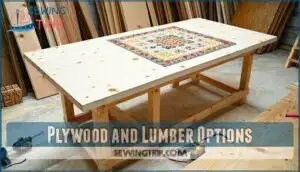
Plywood and Lumber Options
Plywood grades matter when you build sewing table projects.
Choose A-grade plywood for smooth surfaces, B-grade for budget builds.
Standard wooden lengths like 1×2 lumber work great for framing your DIY sewing table.
Pine costs less than hardwood but oak lasts longer.
Pre-cut plywood saves time and money at lumber sourcing locations.
Consider plywood options for tables for enhanced durability.
Your sewing and quilting table needs sturdy materials that won’t warp under machine weight, making smooth surfaces a priority.
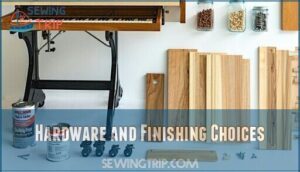
Hardware and Finishing Choices
Your hardware choices make or break your table’s performance. Pick hinges with solid hinge durability ratings—piano hinges work great for drop-down extensions.
Choose caster types based on your floor: rubber for hardwood, plastic for carpet. At the hardware store, grab quality screws—1.25" wood screws handle plywood joints perfectly.
Add edge trim using wooden lengths to prevent chipping. Consider a table with adjustable height features for ergonomic benefits.
For finish longevity, apply stain first, then seal with varathane for protection.
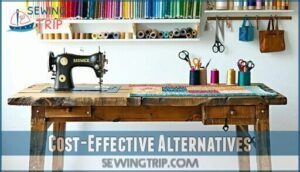
Cost-Effective Alternatives
Several smart alternatives can slash your DIY sewing table costs without sacrificing quality.
Reclaimed wood from old furniture or free plans online offer budget-friendly starts.
Thrift stores hide upcycled furniture gems, while discount retailers stock affordable quilting table materials.
For ideal sewing, consider how table setup transforms any space into a functional station.
Community salvage yards provide discounted materials, and basic budget hardware works perfectly for your cheap sewing table project.
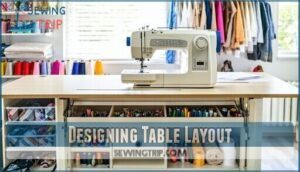
Designing Table Layout
Your table’s layout determines how efficiently you’ll work, so getting the dimensions right matters more than you think.
Smart design choices like foldable extensions and strategic storage will transform a simple plywood surface into a quilting powerhouse that doesn’t eat up your entire room.
Tabletop Dimensions and Shape
Your sewing table tabletop needs smart sizing to release your creative potential. Standard DIY dimensions work well, but you’ll want to match your space and projects.
Smart sizing beats guesswork every time – measure your space, then build to fit.
Consider these key tabletop measurements:
- Width: 48-60 inches provides ample quilting area and cutting space
- Depth: 24-30 inches balances reach and room efficiency
- Ergonomic height: 28-37 inches suits most sewers comfortably
- Shape benefits: Rectangular tops maximize workspace over curved designs
Size constraints matter—measure your room first. Your table dimensions should accommodate large quilts while fitting through doorways.
Storage and Shelf Options
Smart storage turns your DIY sewing table into a game-changer.
Lower shelves hold fabric bins, while adjustable shelves adapt to different supply heights.
Hidden storage compartments keep threads organized, and cubby design maximizes small spaces.
Rolling carts slide under your quilting table for easy access.
Consider shelf placement at comfortable reaching distances for a seamless workflow to ensure that your workspace is efficient and maximizes small spaces.
Foldable and Adjustable Features
Adding foldable extensions and adjustable height transforms your DIY sewing table into a space-saving powerhouse.
Install hinges on side panels to create drop-down extensions that expand your workspace when needed.
Adjustable legs let you customize height for different machines and users.
Add casters for easy mobility around your sewing room.
These features make your folding sewing table incredibly versatile and user-friendly.
Assembling Table Frame
Now you’re ready to put all those pieces together into a sturdy frame that’ll handle your sewing machine’s weight and vibrations.
Start by cutting your 1×2 lumber to the exact measurements from your plan, then assemble the frame using wood screws and glue for maximum strength.
This step is crucial for ensuring the frame can support the machine’s operation without compromising its integrity or causing damage.
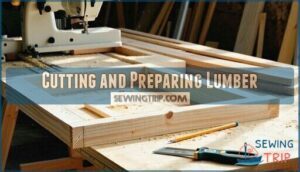
Cutting and Preparing Lumber
Once you’ve mapped out your DIY sewing table design, it’s time to transform raw lumber into precisely cut pieces.
Your wood material choices and cutting techniques will determine your project’s success. Accurate measurements and proper joint preparation create the foundation for a sturdy DIY quilting station.
- Lumber Selection – Choose straight, dry boards without knots or warping for your cutting table frame
- Accurate Measurements – Mark all cuts twice using a square and pencil before making any cuts
- Cutting Techniques – Use a miter saw for crosscuts and circular saw for rip cuts on plywood
- Joint Preparation – Test-fit pieces together and mark any adjustments needed before final assembly
- Sanding Methods – Sand all cut edges with 120-grit paper to remove splinters and rough spots
To guarantee stability, consider the tabletop material options.
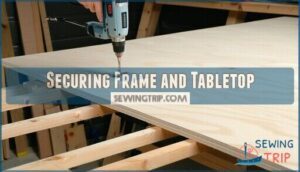
Securing Frame and Tabletop
Now you’re ready to lock everything together.
Start by drilling pilot holes through your frame pieces to prevent splitting, then drive 1.25-inch wood screws through the frame assembly steps.
Position your tabletop carefully and secure it with screws every 6 inches along the perimeter.
This tabletop attachment creates the foundation for your sewing and quilting table, and applying wood glue to joints before screwing for extra reinforcement techniques that boost table stability during heavy use is crucial.
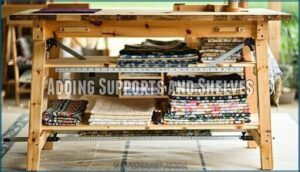
Adding Supports and Shelves
Once your frame feels rock-solid, you’ll want to beef up your DIY sewing table with smart shelf placement and support materials.
Install adjustable shelves using 1×2 lumber brackets, ensuring proper weight capacity for your quilting supplies.
Add cross-braces between legs for stability enhancement, creating storage zones that won’t wobble when you’re working on large projects, which will provide a rock-solid base for your work.
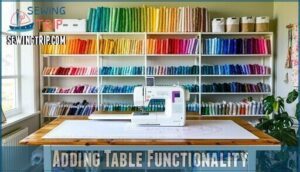
Adding Table Functionality
Now you can transform your basic table frame into a fully functional sewing workspace by adding the features that make it practical for everyday use.
These functional additions will turn your simple table into a versatile sewing station that can handle everything from quick alterations to large quilting projects, making it a practical tool for various sewing tasks.
Installing Hinges and Casters
Once your DIY sewing table frame stands ready, installing hinges and casters transforms it into a mobility powerhouse.
Choose piano hinges for foldable mechanisms on tabletop extensions, guaranteeing smooth operation. Select locking casters with proper caster load capacity to support your sewing machine’s weight.
Consider piano hinges for sewing applications to guarantee a flush surface. Position swivel casters at corners for easy movement around your craft space.
This sewing table tutorial step adds serious functionality to your project.
Incorporating Cable Management
Organizing electrical cords keeps your DIY sewing table tidy and safe.
Smart cord management solutions prevent tangling while you work on projects.
- Cable routing methods along table legs eliminate tripping hazards during late-night quilting sessions
- Grommet installation creates clean pathways for power cords without damaging your craft table surface
- Concealing power strips underneath maintains your sewing room organization while providing easy access
- Wire organization techniques using clips and trays keep everything within reach but out of sight
Customizing Storage Compartments
Build storage that works for your projects.
Start with compartment dividers using thin plywood strips to organize thread storage and accessory trays.
Create fabric bins from leftover materials, or add hidden drawers under your sewing table for extra space.
Your DIY quilting table becomes a craft room organization powerhouse when you customize storage solutions that fit your exact needs to make it a quitting table.
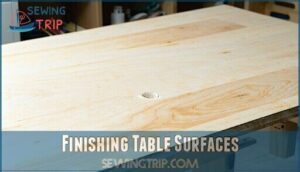
Finishing Table Surfaces
Once your table is assembled, you’ll need to finish the surface to protect the wood and create a smooth workspace.
A good finish prevents damage from pins, fabric dyes, and daily use while making cleanup easier, which is a complete concept in maintaining your table.
Sanding and Staining Options
After adding functionality to your DIY sewing table, you’ll want to smooth things out with proper sanding techniques. Start with 120-grit sandpaper, then progress to 220-grit for a silky finish. Your plywood deserves attention to detail.
- Start coarse, finish fine – Begin with 120-grit, end with 220-grit for smooth results
- Sand with the grain – Follow wood patterns to avoid scratches and marks
- Choose your stain types – Oil-based penetrates deeper, water-based dries faster
- Test color matching – Apply stain samples on scrap pieces first
- Master application methods – Use foam brushes for even coverage, rags for blending
Painting and Sealing Choices
Paint choices can make or break your sewing table’s durability and appearance.
Water-based paints offer easier cleanup and low odor, while oil-based paints provide superior paint durability.
Apply thin, even coats using brushes or rollers for smooth finish effects.
Sealer types include polyurethane for high-traffic surfaces or shellac for quick drying.
Cost analysis shows latex paint averages $30-40 per gallon, making it budget-friendly for DIY projects.
Adding Protective Coatings
Your table deserves armor that’ll last through countless projects.
Protective coatings shield your plywood from moisture, scratches, and everyday wear while keeping costs reasonable.
- Polyurethane finish – Clear, durable coating that resists water and heat damage
- Wood lacquer application – Quick-drying option that creates a smooth, professional surface
- Pickling stain with sealer – Lightens wood tone while providing excellent protection
- Multiple thin coats – Better coverage than one thick application, prevents drips
Coating Durability improves with proper prep work. Sand between coats for smoothness.
Finish Options range from matte to glossy – choose based on your workspace needs.
Application Methods include brush, roller, or spray.
Cost Analysis shows polyurethane offers best value.
Safety Precautions require ventilation and protective gear.
Sealing prevents moisture damage that warps plywood over time.
Table Safety and Stability
A wobbly table can turn your sewing session into a frustrating wrestling match with fabric and thread.
You’ll need to check that your base is level and secure before you start quilting, or you might end up with crooked seams and a sore back from fighting an unstable workspace, which can be a real challenge to your productivity and overall sewing experience, making it essential to ensure a stable workspace.
Ensuring Level and Secure Base
After finishing your sewing and quilting table, you’ll need to check that everything sits rock-solid. Start with floor leveling – place a level on your tabletop and adjust rubber feet or shims under table legs until the bubble centers perfectly.
This prevents your fabric from sliding around like it’s on a playground slide. Check leg adjustments by tightening all bolts and verifying weight distribution stays even across all four corners.
Add vibration dampening pads under each leg to stop your machine from turning your table into a jackhammer. Test joint reinforcement by gently pushing the corners – nothing should wiggle or flex during use.
For larger projects, consider the table’s weight capacity needs to verify stability. This step is crucial to ensure your table remains stable and secure, especially when working with heavy or large fabrics, to prevent any accidents or damage to your work.
Preventing Warping and Damage
Smart Wood selection matters for your sewing table’s longevity.
Choose kiln-dried lumber to minimize warping, and seal all surfaces, including underneath areas.
Joint strength depends on proper wood glue application and pilot holes for screws.
DIY workspace stability improves with climate control—avoid placing your quilting table near heat sources or windows.
Load distribution across the frame prevents sagging that damages storage compartments and affects organization, ensuring the overall longevity of your sewing table.
Maintaining Table Condition
After building your sewing and quilting table, proper maintenance keeps it working smoothly for years.
Clean the surface weekly with a damp cloth to remove fabric dust and thread bits. Check hardware monthly, tightening loose screws and hinges.
Apply wood conditioner annually for surface protection. Watch for joint loosening and reinforce with wood glue if needed.
Small scratches sand out easily with fine-grit paper. Your DIY sewing room centerpiece deserves this simple care routine.
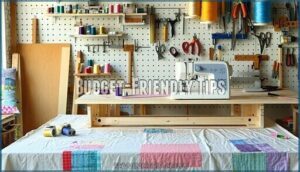
Budget-Friendly Tips
You don’t need to spend a fortune to build a quality sewing table that’ll last for years.
Smart shopping, creative material choices, and avoiding common pitfalls can cut your costs in half while still giving you a sturdy workspace that handles everything from delicate hemming to heavy-duty quilting.
Using Recycled Materials
Looking beyond the hardware store, you’ll find treasure troves of materials perfect for your DIY sewing table project.
Old furniture holds hidden potential, and creative sourcing can slash your budget dramatically.
- Pallet wood – Free from warehouses, perfect for rustic tabletops and shelving
- Door repurposing – Solid cores make excellent work surfaces with minimal prep
- Thrift store finds – Old desks and tables provide sturdy bases for upcycling
- Metal salvage – Repurpose bed frames or shelving units for industrial-style legs
Shopping for Discounts and Deals
Beyond recycled materials, savvy shoppers can slash costs through strategic purchasing.
Hunt for clearance events at hardware stores—they often discount discontinued items by 25-70%.
Stack coupons with sales for maximum savings.
Check thrift stores for sturdy tables you can modify.
Use bulk discounts when buying lumber and screws.
Many retailers offer price matching, so compare before purchasing your DIY sewing table or quilting table components.
Minimizing Waste and Costs
Every scrap of wood matters when you’re building your DIY sewing table on a tight budget.
Smart planning helps you squeeze maximum value from bulk purchasing and reclaimed materials while creating an inexpensive sewing setup that rivals expensive alternatives.
- Measure twice, cut once – Careful planning prevents costly mistakes and material waste
- Use every offcut – Turn scraps into drawer pulls, cord organizers, or small storage boxes
- Buy lumber in standard lengths – Avoid paying premium prices for custom cuts at the hardware store
- Share bulk orders – Split large purchases with fellow quilters to access wholesale pricing
- Compare hardware alternatives – Basic hinges and casters work just as well as fancy versions
Frequently Asked Questions (FAQs)
Do it yourself DIY sewing table?
Surprisingly, you’ll find that building your own sewing table costs half the price of buying one.
Start with plywood, add 1×2 lumber for framing, attach hinges for folding sections, and install casters for easy mobility.
What is the perfect height for a sewing table?
Your ideal sewing table height sits between 28-30 inches.
But here’s the real deal: measure from your elbow to the floor while sitting, that’s your sweet spot for comfortable, strain-free stitching sessions.
What kind of table should I use for sewing?
Most sewers waste 30% more time on unsteady surfaces.
You’ll want a sturdy table that’s 28-30 inches tall with enough space for your machine and fabric.
A solid wood or plywood top works best for stability.
How big of a table do I need for quilting?
You’ll need a large surface, roughly 60-80 inches wide and 36-48 inches deep. This gives you room to spread out quilt blocks and maneuver fabric without cramping your creative flow.
Can I use my existing desk for sewing projects?
You can absolutely use your existing desk for sewing projects! Just check that it’s sturdy enough for your machine’s vibrations and has adequate workspace for your fabric pieces.
Whats the ideal quilting table height for comfort?
Perfect quilting table height transforms your entire sewing experience.
You’ll want your table around 28-37 inches tall, depending on your height and comfort.
Most quilters find 30-32 inches hits the sweet spot for relaxed shoulders and proper posture.
How do I prevent fabric from snagging edges?
Sand all edges smooth, especially corners and cutouts.
Apply painter’s tape to sharp edges while working.
Round over edges with a router or sandpaper for gentle curves that won’t catch fabric.
Should I include a built-in ironing board feature?
Ironically, adding an ironing board sounds perfect until you realize it’ll collect dust while taking up precious workspace.
You’ll find a separate, portable ironing station works better—keeping your table clear for actual sewing projects.
Whats the best way to organize thread storage?
You’ll want dedicated thread storage built into your table design. Consider vertical spindle racks, magnetic strips, or shallow drawers with dividers. Keep frequently used colors within arm’s reach.
Conclusion
Sarah spent three weekends building her first sewing table and saved over $300 compared to buying one.
You’ve learned how to build a cheap sewing and quilting table using basic materials and tools.
With proper planning, quality lumber, and careful assembly, you’ll create a sturdy workspace that handles large quilting projects.
The key is taking your time with measurements and securing all joints properly.
Your new table will serve you well for years of creative projects.
- http://theborrowedabode.com/2012/12/how-to-build-a-sewing-or-crafting-table-with-trim/
- https://www.instructables.com/Cheap-Sewing-and-Quilting-Table-or-Desk/
- https://www.reddit.com/r/sewing/comments/smqnho/want_a_better_sewing_table_suggestions/
- https://quiltingjetgirl.com/2022/09/09/diy-drop-sewing-table-tutorial/
- https://sewezi.com/sewing-table-and-accessories/portable-sewing-table/

