This site is supported by our readers. We may earn a commission, at no cost to you, if you purchase through links.
 The burrito roll sewing technique gets its name from how you’ll literally roll your fabric like a burrito to create professional-looking necklines and armholes.
You’ll start by joining your main fabric and facing at the shoulders, then sew around the neckline with right sides together.
Here’s where the magic happens: roll your back bodice tightly toward the opposite shoulder seam, creating that signature burrito shape.
This method eliminates hand-sewing and gives you clean, finished edges that look like they came from a high-end boutique.
The technique works brilliantly for sleeveless tops, dresses, and tank tops where you want those crisp, professional finishes that make people wonder how you managed such perfect results.
Table Of Contents
- Key Takeaways
- What is The Burrito Method in Sewing?
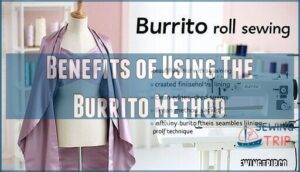
- Benefits of Using The Burrito Method
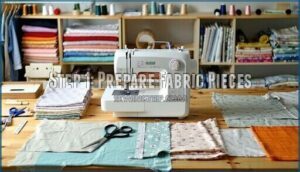
- Step 1: Prepare Fabric Pieces
- Step 2: Sewing The Shoulder Seams
- Step 3: Attaching The Facing/Lining
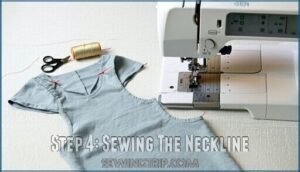
- Step 4: Sewing The Neckline
- Step 5: The Burrito Roll Technique
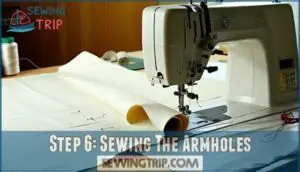
- Step 6: Sewing The Armholes
- Step 7: Finishing The Side Seams and Hems
- Tips and Tricks for Successful Burrito Rolling
- Frequently Asked Questions (FAQs)
- Conclusion
Key Takeaways
- You’ll achieve professional-looking finishes by rolling your fabric layers like a burrito, then sewing from the inside to create clean, enclosed seams without visible raw edges.
- Choose lightweight fabrics like cotton lawn or voile for best results, as heavy materials create too much bulk and won’t roll smoothly through the narrow openings.
- Master the rolling technique by tightly rolling your back bodice toward the opposite shoulder seam, then positioning facing pieces over the rolled fabric before sewing armholes.
- Prepare your fabric properly by cutting on grain, marking notches, and sewing shoulder seams first – this foundation work ensures your burrito roll will turn out perfectly every time.
What is The Burrito Method in Sewing?
The burrito method transforms ordinary sewing into a professional technique that eliminates messy raw edges and bulky seams.
You’ll roll your fabric layers together like wrapping a burrito, then sew from the inside to create perfectly enclosed seams.
This clever approach works by sandwiching your main fabric and facing between layers, rolling everything tightly, then pulling the entire piece through a narrow opening.
The result? Clean finishes that look like they came from a high-end boutique.
This technique excels with lightweight fabrics like cotton lawn or voile, especially in sleeveless tops and lined bodices.
Professional results become achievable without hand-stitching or visible topstitching.
The burrito roll sewing method gives you complete control over your fabric handling, turning even beginner projects into polished garments with impeccable clean finishes.
Mastering basic sewing techniques, including hand stitching basics, is essential for achieving success with the burrito method.
Benefits of Using The Burrito Method
When you master the burrito method, you’ll discover several powerful advantages that transform your sewing projects from amateur to professional quality.
This technique eliminates the guesswork and frustration that often comes with traditional lining methods, giving you complete control over your garment’s finish.
Here are three key benefits you’ll experience:
- Professional Finish Quality – The burrito roll sewing technique creates seamless results with all raw edges completely enclosed, giving your garments that store-bought appearance you’ve been chasing.
- Clean Edges Without Extra Work – You’ll achieve reduced bulk and clean finish in one streamlined process, eliminating the need for additional seam treatments or hand-stitching that eat up your precious sewing time.
- Durability Improvement – The enclosed seams protect your fabric from fraying and wear, ensuring your creations withstand repeated washing and regular use while maintaining their polished look.
This fabric rolling method isn’t just another sewing technique—it’s your ticket to creating garments that look and feel professionally made.
By utilizing the burrito sewing method, you can achieve a professional finish on your lined garments.
Step 1: Prepare Fabric Pieces
Success starts with proper fabric preparation—your foundation for flawless burrito roll sewing. Cut your fabric pieces on the grain alignment, ensuring straight edges that won’t distort during construction.
Mark notches, darts, and pattern details using fabric chalk or tailor’s tacks for accurate seam preparation. Finish raw edges through pinking, serging, or pressing under to prevent fraying.
Transfer all pattern markings to your fabric pieces before you begin rolling fabric layers together. This thorough approach to fabric cutting and edge finishing sets you up for professional results.
When you’ve completed your fabric preparation thoroughly, your sewing burrito roll technique will unfold smoothly, creating those coveted enclosed seams that separate amateur work from boutique-quality garments. Proper fabric preparation techniques are essential for achieving high-quality results in burrito roll sewing.
Step 2: Sewing The Shoulder Seams
Now that you’ve got your fabric pieces ready, it’s time to build the foundation of your burrito method project. Sewing shoulder seams correctly sets the stage for everything that follows, so let’s get those seams locked in place.
Start by placing your main fabric pieces right sides together, matching the shoulder seam edges perfectly. This seam alignment is critical for professional shoulder construction. You’ll want to maintain consistent fabric tension as you sew, keeping your stitches straight and even.
The enclosed seam method relies on precise initial construction to achieve that flawless finish. Here’s your game plan for perfect shoulder seams:
- Pin strategically – Place pins perpendicular to the seam line for smooth feeding
- Use consistent seam allowances – Typically 5/8 inch for garment construction
- Press seams open – This reduces bulk and prepares for the burrito roll technique
- Repeat for facing pieces – Your lining needs identical shoulder construction
Mastering basic hand sewing techniques is essential for achieving professional results.
These sewing techniques for shoulder seams create the strong foundation needed for successful sewing armholes later. With solid seam reinforcement in place, you’re ready to move forward confidently.
Step 3: Attaching The Facing/Lining
Before diving into the burrito roll technique, you’ll need to properly attach your facing or lining to create the foundation for this clever method. Start by placing your bodice and facing pieces right sides together, ensuring all shoulder seams align perfectly.
The key to mastering Facing Techniques lies in precise alignment—match every notch, curve, and edge like puzzle pieces coming together. Pin along the neckline and armholes to secure these layers, preventing any shifting during stitching.
This essential Fabric Preparation step sets up your Rolling Strategies for success later. Your facing should have finished bottom edges to prevent fraying, while maintaining proper Seam Allowances throughout.
Remember, the burrito method relies on this solid foundation where facing and main fabric become one cohesive unit, ready for the magical rolling process that’ll deliver that coveted clean finish. To achieve a professional finish, understanding the seam allowance rules is essential for a successful burrito roll.
Step 4: Sewing The Neckline
With your shoulder seams and facing perfectly aligned, you’re ready to create those flawless neckline seams that’ll make your garment look store-bought.
Pin the bodice and facing pieces together with right sides facing, ensuring you match up those shoulder seams exactly – this step determines whether your neckline finish will look professional or wonky.
Sew around the entire neckline using your standard seam allowances, taking care at curves and corners where fabric handling becomes tricky.
After stitching, clip and grade those seam allowances to eliminate bulk that could create an uneven neckline finish.
The burrito method shines here because these clean edge techniques prepare your garment for the magical rolling methods coming next.
Press the seam flat before moving forward – this sets the foundation for successful sewing techniques that’ll have you wondering why you ever struggled with neckline construction.
Mastering the sewing neckline techniques is essential for a professional finish.
Step 5: The Burrito Roll Technique
Once you’ve sewn the neckline, it’s time to master the burrito roll technique that transforms your garment into a professional-looking piece.
This fabric rolling method creates clean, enclosed seams without visible raw edges. Here’s how to execute this game-changing sewing trick:
- Roll the back bodice tightly toward the opposite shoulder seam, creating a compact cylinder
- Position the front and back facing pieces right sides together over the rolled fabric
- Align armhole edges carefully while keeping the burrito roll centered between layers
- Pin securely to prevent shifting during the vital sewing step
- Maintain tension on the rolled fabric to guarantee even seam enclosure
The burrito rolling technique requires patience and practice, but once you’ve got it down, you’ll wonder how you ever lived without it. This seam enclosure method eliminates bulk and creates that coveted boutique finish that elevates any garment from homemade to haute couture.
Mastering pressing techniques for collars is also essential for achieving a polished look in your sewing projects.
Step 6: Sewing The Armholes
With your bodice neatly rolled like a fabric burrito, you’re ready to tackle the armholes using this brilliant burrito technique.
Pull the facing pieces over your rolled bodice, bringing the front and back facing armholes together with right sides facing.
Pin these armhole seams carefully, ensuring your rolled bodice stays tucked inside like filling in a wrap.
Sew the armhole seam with precision, maintaining consistent seam allowances throughout.
This armhole sewing method creates perfect seam enclosure without any visible raw edges.
The burrito roll facing technique works like magic here—you’ll achieve professional armhole finishing that rivals ready-to-wear garments.
Once sewn, you’ll pull everything through to reveal clean, enclosed armhole seams that showcase your mastery of advanced sewing techniques for armholes.
To achieve a professional finish, understanding hand sewing techniques is essential for creating durable and elegant garments.
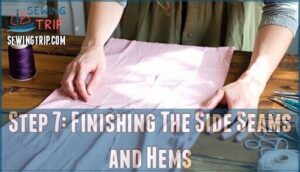
Step 7: Finishing The Side Seams and Hems
Now you’re ready to tackle the final construction phase. Seam Finishing becomes your best friend as you work the side seams using the burrito method’s clean finish principles.
Pin your bodice and facing pieces together at the sides, then stitch using your preferred sewing techniques—French seams work beautifully for delicate fabrics, while serging suits sturdier materials.
After completing your side seams, focus on Hem Folding with precision. Create a narrow double-fold hem by turning the raw edge under twice, then secure with Edge Stitching for that professional look.
Don’t forget Fabric Trimming around curved areas to reduce bulk. The burrito method’s magic extends to these final steps, ensuring your clean finish remains consistent throughout.
These sewing techniques for side seams and sewing techniques for clean finishes complete your garment’s transformation from homemade to boutique-quality. Mastering seam finishing techniques is essential for achieving a polished look in your sewing projects.
Tips and Tricks for Successful Burrito Rolling
Mastering the burrito method requires strategic fabric selection and proper rolling techniques to achieve professional results.
Lightweight woven fabrics roll smoothly, while heavy materials create bulk that complicates the process.
Perfect your burrito roll sewing with these essential sewing tips:
- Fabric Selection: Choose lightweight woven fabrics or stable knits that roll easily without creating excess bulk
- Rolling Techniques: Roll tightly and methodically, smoothing wrinkles as you work to prevent uneven seams
- Pressing Methods: Press seams open after sewing shoulders to reduce bulk before attempting the burrito roll facing technique
- Seam Finishing: Grade and clip curves on necklines to prevent puckering when turning the garment right-side out
- Edge Binding: Use clips instead of pins on delicate fabrics to prevent distortion during the burrito rolling process
Understanding embroidery tips tricks can also improve your overall sewing skills and attention to detail.
Practice on scraps first—you’ll master this game-changing technique quickly once you understand proper fabric handling and rolling fundamentals.
Frequently Asked Questions (FAQs)
What is the burrito method of sewing?
The burrito method wraps fabric layers together like rolling a burrito, then you sew from inside and pull through an opening for clean, professional seams.
How to roll a burrito step by step?
Like wrapping a precious gift, you’ll roll your fabric pieces tightly toward the center, creating layers.
Pin edges together, stitch seams, then gently pull through openings to reveal clean, professional finishes.
How to burrito roll clothes?
Rolling clothes into tight bundles saves space and reduces wrinkles.
Lay garments flat, fold sleeves inward, then roll tightly from bottom to top, creating compact cylinders that fit efficiently in luggage or storage.
How to turn lining inside out?
Pull your garment through the narrow opening you left during construction. Gently work the fabric through, turning it right-side out completely. Press seams flat for a professional finish.
Can you burrito roll heavy fabrics like denim?
Heavy fabrics like denim can challenge the burrito method since they create excessive bulk when layered.
You’ll struggle with thick seams that won’t turn properly through narrow openings, making this technique impractical for heavyweight materials.
What fabric weights work best for burrito method?
You’ll get the cleanest results with lightweight to midweight fabrics like cotton lawn, voile, rayon, or poly crepe.
These fabrics roll smoothly and create professional-looking seams without adding bulk to your finished garment.
How do you fix twisted seams after rolling?
Untwist your seams by carefully unrolling the fabric and checking that notches and shoulder seams align properly.
Press seams flat, then re-roll methodically, ensuring you’re matching the correct fabric pieces together throughout the process.
Ensure that you’re matching the correct fabric pieces together throughout the re-rolling to maintain accuracy.
Can burrito method work with stretch fabrics?
Surprisingly, stretch fabrics can sabotage your burrito method dreams.
You’ll need stabilizer or interfacing to tame the stretch, preventing distortion while rolling.
The technique works best with stable, non-stretch fabrics for clean results.
Whats the maximum seam allowance for burrito rolling?
Standard 5/8-inch seam allowances work perfectly for burrito rolling.
You can handle up to 3/4-inch allowances, but anything larger creates excessive bulk when you’re rolling and turning the fabric layers inside out, which can be a problem due to excessive bulk.
Conclusion
Like a perfectly seasoned chef who’s mastered their signature dish, you’ve now learned how to burrito roll sewing with confidence and precision.
This technique transforms amateur-looking garments into professional pieces that rival expensive boutique clothing.
You’ll save time while achieving those crisp, clean finishes that make your handmade items stand out.
Remember to practice the rolling motion slowly at first, then build speed as you become comfortable with the process.
Your future sewing projects will thank you for mastering this game-changing method.
- https://thesewingbuzz.com/index.php/2023/03/27/burrito-roll-an-advanced-sewing-technique?utm_source=www.thesewingbrew.com&utm_medium=referral&utm_campaign=the-burrito-roll-sewing-trick-everyone-should-know-seriously-it-s-magic
- https://sewingpatternsecrets.com/membership-area1593192150746?utm_source=www.thesewingbrew.com&utm_medium=referral&utm_campaign=the-burrito-roll-sewing-trick-everyone-should-know-seriously-it-s-magic
- https://elevate.sewingpatternsecrets.com/login?utm_source=www.thesewingbrew.com&utm_medium=referral&utm_campaign=the-burrito-roll-sewing-trick-everyone-should-know-seriously-it-s-magic
- https://www.instagram.com/stitchmaiden
- https://craftsing.com/burrito-method-perfect-armholes-sewing-technique/

