This site is supported by our readers. We may earn a commission, at no cost to you, if you purchase through links.

For deeper cleaning, create a vinegar solution using equal parts white vinegar and cool water. Soak the mat for 15-20 minutes to rehydrate and sanitize the surface.
Gently scrub with mild dish soap and a soft brush to remove embedded particles without damaging the self-healing properties. Rinse thoroughly with cool water and air dry completely flat, away from direct heat.
Regular cleaning prevents contamination, maintains cutting precision, and extends your mat’s lifespan. The right technique makes all the difference between a mat that works against you and one that becomes your quilting ally.
Table Of Contents
Key Takeaways
- Use packing tape for quick debris removal – Press it firmly across your mat’s surface and peel away to lift lint, fabric fibers, and embedded particles without damaging the self-healing properties.
- Deep clean with vinegar solution monthly – Soak your mat in equal parts white vinegar and cool water for 15-20 minutes, then gently scrub with mild dish soap to remove stubborn stains and restore tackiness.
- Always air dry flat and avoid heat – Rinse thoroughly with cool water and dry completely flat away from direct sunlight or heat sources to prevent warping, cracking, and permanent damage.
- Store properly to extend lifespan – Keep your mat flat under a bed or on a table, never rolled or propped on edge, to maintain its shape and cutting accuracy for years of reliable use.
Why Clean Your Sewing Cutting Mat?
A dirty cutting mat can transfer lint, adhesive residue, and fabric fibers onto your clean materials, ruining your project before you even start sewing.
Regular cleaning prevents contamination and keeps your cutting surface smooth, which protects both your fabric and rotary cutter blades from unnecessary damage, ensuring a smooth operation with regular cleaning.
Preventing Fabric Contamination
When fabric fibers, lint, and debris accumulate on your cutting mat’s surface, they transfer onto clean materials during cutting projects.
A dirty cutting mat contaminates fresh fabric with lint and debris before you even begin sewing
This contamination control issue affects fabric safety by introducing unwanted particles that can compromise your sewing work’s quality.
Regular cleaning sewing mat practices and proper cutting mat maintenance prevent these sanitary practices concerns.
Clean techniques for material handling guarantee your workspace remains contamination-free, protecting both current and future projects from debris transfer, ensuring overall quality of your work.
Extending The Mat’s Lifespan
Regular cleaning preserves your cutting mat’s structural integrity and prevents premature deterioration.
Proper mat maintenance removes accumulated debris that causes surface damage and scoring.
Consistent cutting mat care prevents warping and cracking that shortens lifespan.
Mat storage practices protect against environmental damage while sewing mat upkeep maintains the self-healing properties essential for longevity tips and peak performance.
Maintaining Accurate Cutting Lines
Dirty mats compromise cutting precision through accumulated debris that creates uneven surfaces.
Fabric fibers, dust, and adhesive residue interfere with ruler accuracy and blade sharpness, leading to imprecise measurements.
Clean surfaces guarantee proper fabric tension during cutting techniques.
Regular sewing cutting mat care maintains grid visibility and measurement reliability.
Proper cutting mat maintenance prevents material buildup that affects rotary cutter cleaning effectiveness and overall cutting performance, ensuring clean surfaces are maintained for optimal results.
Avoiding Damage to Sewing Tools
A contaminated cutting mat transfers debris to your rotary cutter blade, causing premature dulling and reducing cutting precision.
Lint buildup creates drag that strains your hand tools during use. Clean mats guarantee smooth blade movement, protecting both your cutting equipment and extending tool lifespan.
Proper mat cleaning tips and equipment care prevent costly replacements while maintaining sewing safety standards. Regular maintenance, including tasks like sewing equipment care, is vital for peak performance and longevity of your sewing tools.
How to Clean Sewing Cutting Mat Step-by-Step
Keeping your sewing cutting mat in top condition doesn’t require professional expertise. Most sewers underestimate how straightforward proper mat cleaning can be when you follow the right approach.
Here’s your thorough cleaning tutorial for rotary cutting mat maintenance:
- Remove loose debris – Gently scrape off fabric scraps and threads using a plastic scraper or old credit card
- Apply surface cleaning method – Use packing tape pressed firmly across the mat surface to lift embedded lint and fibers
- Prepare cleaning solution – Mix cool water with white vinegar (1/4 cup per gallon) for deep cleaning
- Scrub gently – Use a soft mushroom brush with mild liquid soap during the soaking process
- Rinse and dry properly – Remove all soap residue and air dry flat, avoiding heat sources
This systematic approach guarantees your sewing mat protection strategy works effectively. Proper sewing tool care prevents damage to both your mat and cutting implements. Following these mat cleaning tips regularly maintains the self-healing properties essential for accurate cuts while supporting overall sewing room organization.
Removing Lint and Debris From Your Cutting Mat
Lint and fabric threads can accumulate on your cutting mat’s surface, interfering with smooth fabric movement and accurate measurements.
Regular debris removal keeps your mat performing at its best and prevents contamination of future projects, which is crucial for maintaining the quality of your work and ensuring accurate measurements.
Using Packing Tape for Surface Cleaning
Packing tape works like a lint roller for cutting mat cleaning.
Press the sticky side firmly across the mat’s surface, ensuring proper surface adhesion. Pull away slowly to capture embedded fibers and debris through effective tape removal techniques.
This cleaning method requires minimal pressure to avoid tape residue while maximizing debris collection for ideal mat restoration.
To minimize residue, consider using techniques for tape residue removal when cleaning your cutting mat.
Bending The Mat to Release Fluff
After tape lifts surface debris, gentle mat bending opens cut grooves where stubborn fluff hides.
Hold opposite mat edges and create a slight curve along the longest axis. This mat flexing technique makes trapped fibers accessible by temporarily opening self healing mat lines.
The controlled bending motion releases deep-seated lint that surface cleaning methods miss, improving cutting mat maintenance effectiveness.
Regular use of a self healing mat requires careful handling to preserve its memory-retaining properties and ensure the mat remains effective for improving cutting mat maintenance.
Repeating Tape Application for Thorough Results
After initial tape removal, repeat the application process on stubborn areas where lint persists.
Different tape types offer varying adhesive strength for rotary cutting mat maintenance. Standard packing tape works well for routine cleaning frequency, while stronger adhesive options tackle embedded debris.
Inspect your cutting mat cleaning results between applications, focusing on areas with visible residue. This methodical repeat application guarantees thorough sewing tool care without damaging the mat’s surface through excessive force.
For best results, consider using sewing tape products to achieve a cleaner cutting mat.
Deep Cleaning and Stain Removal Techniques
Sometimes your cutting mat needs more than surface cleaning to remove stubborn stains and deep-set grime.
A thorough deep clean will restore your mat’s tackiness and extend its useful life substantially.
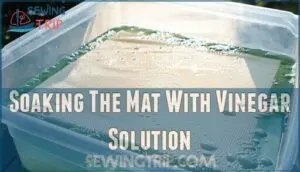
Soaking The Mat With Vinegar Solution
Mix one-quarter cup white vinegar per gallon of cool water for your vinegar soak.
Submerge the cutting mat for twenty minutes, allowing the cleaning solutions to penetrate and rehydrate the surface.
This mat sanitizing process offers significant vinegar benefits, including removing residue and restoring flexibility.
The soaking times help with mat restoration by moisturizing plastic fibers.
This sewing tool cleaning method prepares your mat surface cleaning for the scrubbing phase.
For effective cleaning, consider using a vinegar cleaning solution to achieve the best results, and enjoy the advantages of a properly cleaned and maintained cutting mat.
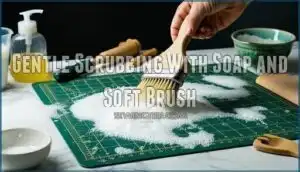
Gentle Scrubbing With Soap and Soft Brush
While the mat soaks in its vinegar bath, prepare your gentle scrubbing materials.
Select a mild liquid soap—dish soap works perfectly for mat cleaning. Choose soft brushes like mushroom brushes or soft sponges to avoid scratching the surface.
Apply soap directly to stubborn spots and use gentle strokes in circular motions. This careful approach removes embedded debris without damaging your sewing cutting mat’s grid lines.
This careful approach is crucial as it removes embedded debris without damaging your sewing cutting mat, and by using a mild liquid soap, you ensure the longevity of your mat.
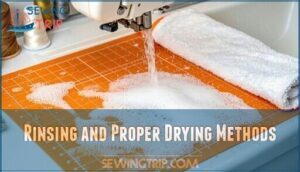
Rinsing and Proper Drying Methods
After scrubbing with gentle soap and soft brush, proper rinsing removes all residue.
Use cool water temperature to prevent warping while ensuring complete cleaning solutions removal.
Air drying maintains mat integrity better than heat sources.
Regular cutting mat cleaning is essential for extending the life of the mat.
Follow these rinsing and drying techniques:
- Rinse thoroughly with cool water until runoff runs completely clear, removing all white vinegar and soap residue
- Flip and rinse both sides to eliminate trapped cleaning solutions from cut grooves and surface markings
- Gently blot excess water using microfiber towels without rubbing or pressing hard into the mat surface
- Air dry flat on level surface away from direct sunlight and heat sources to prevent warping
- Ensure complete drying before mat storage to prevent mold, mildew, and odor development in humid conditions
Tips for Cutting Mat Care and Maintenance
Proper care and maintenance will substantially extend your cutting mat’s life and preserve its cutting accuracy.
Following these essential storage and maintenance practices prevents warping, cracking, and other common damage that can ruin your mat’s performance.
Storing The Mat to Prevent Warping
Once you’ve cleaned your mat, proper storage becomes your shield against warping.
Flat storage methods work best—slide your mat under a bed or store it on a dedicated table.
Never roll or prop it on edge, as this invites curling and cracking. Keep it away from heat sources and direct sunlight, which soften the material rapidly.
These storage solutions guarantee your cutting mat preservation for years. To maintain the mat’s quality, consider its self healing properties when choosing a storage method.
Restoring a Warped Cutting Mat
When warping occurs despite proper flat storage, heat application offers effective mat repair solutions.
Place a warm iron on medium heat over a pressing cloth-covered mat. The gentle warmth softens warped areas for mat reshaping.
Weight the heated section with heavy books for several hours. This cutting mat maintenance technique requires patience—repeat cycles improve cutting accuracy and restore your sewing mat care investment.
Regular mat maintenance involves checking for mat repair kits to guarantee the longevity of the cutting mat.
Avoiding Common Cleaning Mistakes
Beyond surface lint removal, several cleaning errors can permanently damage your rotary cutting mat.
Never use harsh chemicals or abrasive scrubbers that create scratches, compromising cutting precision. Avoid heat exposure during drying, which causes warping and cracking.
Don’t skip stain prevention by cleaning spills immediately. Store mats flat to prevent permanent deformation.
These maintenance tips protect your investment and guarantee accurate sewing cutting mat performance.
Regular Maintenance Schedule
Establishing consistent Mat Cleaning Tips guarantees your rotary cutting mat remains in prime condition throughout its lifespan.
Regular maintenance prevents damage and maintains cutting precision.
- Daily Inspection: Check for fabric debris and lint removal needs after each sewing session
- Weekly Regular Wipe: Clean surface with damp cloth to remove accumulated dust and fibers
- Monthly Deep Clean: Soak mat in vinegar solution for thorough cleaning and conditioning
- Quarterly Assessment: Evaluate Mat Storage conditions and rotate usage areas to prevent uneven wear
- Annual Review: Update Cleaning Schedules based on usage patterns and sewing room organization needs
Frequently Asked Questions (FAQs)
How often should I clean my cutting mat?
Most sewers clean their cutting mats every 2-3 months, but frequent crafters should clean weekly.
You’ll notice when sticky residue builds up or cuts become less precise, signaling it’s time for a thorough cleaning session.
Can you clean both sides of cutting mats?
Yes, you can clean both sides of your cutting mat.
Most self-healing mats have identical surfaces, so flip it over and use the same gentle cleaning method you’d use on the front side.
What cleaning products should you never use?
Never use harsh chemicals on your precious cutting mat.
You’ll absolutely ruin it with bleach, acetone, or abrasive cleaners.
These products cause cracking, warping, and permanent damage to the self-healing surface you’ve invested in.
How often should cutting mats be cleaned?
Clean your cutting mat after every 5-10 uses or when debris accumulates. Heavy users should clean weekly, while occasional crafters can stretch to monthly cleanings for best performance.
Can you use a dishwasher for cleaning?
Don’t take the plunge into dishwasher territory! You shouldn’t use a dishwasher for cutting mats since high heat and harsh detergents will warp, crack, or damage the self-healing surface permanently.
What causes permanent stains on cutting mats?
Permanent stains occur when materials like ink, fabric dye, markers, or adhesive residue penetrate your mat’s surface. Heat from cutting tools can also cause melting that permanently damages the material.
Conclusion
Despite thinking cleaning seems tedious, proper maintenance actually saves time by preventing cutting issues later.
Learning how to clean sewing cutting mat correctly guarantees your workspace remains efficient and productive.
Regular cleaning with simple household items like packing tape and vinegar solution removes debris while preserving the mat’s self-healing surface.
This straightforward maintenance routine prevents fabric contamination, maintains cutting accuracy, and extends your mat’s lifespan substantially.
Clean mats deliver consistently precise results for every project.
- https://faithandfabricdesign.com/2021/03/tutorial-clean-your-rotary-cutting-mat.html
- https://www.quiltingboard.com/main-f1/instructions-i-received-cleaning-my-olfa-self-healing-mat-distributor-t169322.html
- https://www.youtube.com/watch?v=utlQCgb2_NI
- https://www.nationalquilterscircle.com/post/caring-for-your-self-healing-cutting-mat
- https://ilovequiltingforever.com/what-is-a-self-healing-cutting-mat/


