This site is supported by our readers. We may earn a commission, at no cost to you, if you purchase through links.
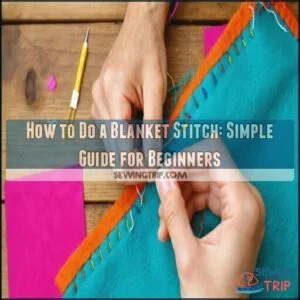
Start by bringing your needle up through the fabric’s edge. Move right about ¼ inch, then push your needle down through the fabric and back up, keeping the thread loop under your needle point. Pull gently—you’ve made your first stitch!
Continue this pattern, keeping equal spacing and tension. Like riding a bike, it feels awkward at first but becomes second nature quickly.
The beauty of this versatile stitch lies in its strength for joining fabric edges while creating that distinctive decorative border that’s stood the test of time.
Table Of Contents
Key Takeaways
- You’ll need basic supplies including embroidery thread, a needle with a large eye, and suitable fabric before starting your blanket stitch project.
- Start by bringing your needle up through the fabric edge, move right about ¼ inch, then push down and back up while keeping the thread loop under your needle point.
- Maintain consistent spacing and tension throughout your stitching to achieve a professional-looking finish that’s both decorative and functional.
- You can use blanket stitch for various projects beyond blankets, including appliqué work, raw edge finishing, hemming borders, and creating decorative embroidery designs.
Getting Started
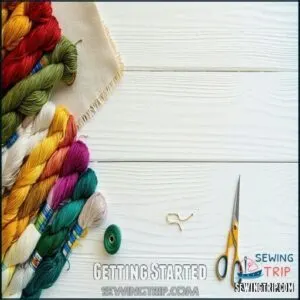
You’ll need to gather your basic supplies before you can start creating those beautiful edge stitches that’ll transform your fabric pieces.
Choose a needle with a large eye for easy threading and select thread that either matches or contrasts with your fabric, depending on whether you want your stitches to blend in or stand out.
Choosing The Right Thread
Selecting the right thread is the foundation of any successful blanket stitch project.
Choose embroidery thread for its visibility and durability. Consider these essential factors:
- Thread Weight – Thicker threads create more dramatic, visible edges
- Fiber Types – Cotton offers natural appeal, while polyester provides strength
- Color Matching – Complement or contrast with your fabric for visual impact
- Thread Durability – Confirm it withstands regular use and washing
- Specialty Threads – Metallic or variegated options add unique character
For delicate fabrics, consider finer silk threads for a professional finish.
Preparing The Needle
The right needle is your first step toward blanket stitch success. Choose a needle size that matches your fabric thickness—embroidery needles with larger eyes work best for beginners.
When threading, pull about 18 inches of thread through the eye, reducing tangles while giving you plenty to work with. Tie a small knot at the end to anchor your first stitch.
For hand sewing techniques, keeping your needle sharp guarantees smoother stitching and prevents fabric damage.
High-quality results require using specialized sewing tools to achieve professional-looking embroidery, and following these steps is crucial for successful stitching.
Selecting The Fabric
When starting your blanket stitch journey, fabric selection makes all the difference. Choose materials that hold their shape and complement your skill level.
- Fabric Weight: Lightweight cotton and medium-weight felt offer perfect practice grounds
- Fiber Content: Natural fibers like wool provide grip for easier stitching
- Weave Type: Tightly woven fabrics prevent frustrating fraying issues
- Colorfastness: Darker fabrics show your stitches better for beginners
Understanding cotton fabric weights can further refine your material choices. Remember, even experienced sewers started with simple fabric edge finishes – you’ll master hand sewing before you know it!
Doing a Blanket Stitch
Now that you’re ready with your materials, how do you actually create this classic stitch?
The blanket stitch rhythm is surprisingly simple once you get the hang of it. Insert your needle from back to front near the fabric edge, create a loop, and pull through with consistent stitch tension.
To guarantee a neat finish, consider evenly spacing stitches.
| Element | Beginner Tip |
|---|---|
| Loop Size | Keep uniform for neat edges |
| Edge Alignment | Stay 1/4" from fabric edge |
| Knot Security | Double-knot to start |
| Threading Technique | Use waxed thread for smoother stitching |
Practice on scrap fabric first—your fingers will remember the motion before your brain does, and it’s essential to achieve consistent stitch tension with a double-knot to start.
Blanket Stitch Variations
You’ll find that blanket stitch offers more than just the basic technique, with variations that can transform your projects from simple to spectacular.
The blanket stitch isn’t just a technique—it’s your passport to transforming ordinary fabric into something extraordinary.
Once you’ve mastered the standard stitch, you can try sloping your stitches, working multiple rows, using your sewing machine, or creating decorative borders and shapes.
These techniques will make your friends wonder where you learned such fancy needlework.
Sloping Stitches
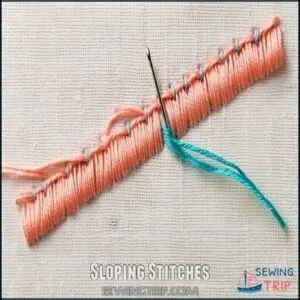
Now that you’ve mastered the basic blanket stitch, let’s add some flair with sloping stitches!
Creating angled blanket stitches adds visual interest while maintaining that classic edge finish. By controlling your stitch angle and slant direction, you’ll achieve stunning decorative effects.
- Angle each stitch consistently in the same direction for uniform sloping
- Maintain even stitch spacing despite the slant
- Practice on scrap fabric first until your sloping rhythm feels natural
Your projects will thank you for this decorative upgrade!
Working Multiple Stitches
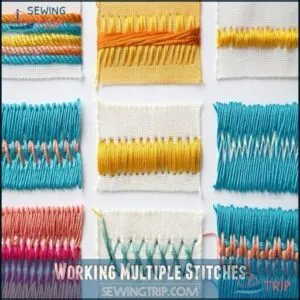
While sloping stitches add flair, working multiple stitches transforms your projects entirely.
You can create stunning designs by layering different blanket stitch patterns with consistent spacing and proper tension control.
Try these combinations for your next project:
| Stitch Type | Best For | Difficulty | Thread Type | Tips |
|---|---|---|---|---|
| Double Row | Borders | Easy | Embroidery floss | Maintain 1/4" spacing |
| Crossed | Decorative edges | Medium | Pearl cotton | Control tension carefully |
| Whipped | Appliqué | Medium | Contrasting colors | Weave through existing stitches |
| Stacked | Geometric patterns | Advanced | Variegated thread | Keep stitch alignment even |
| Alternating | Modern designs | Easy | Two-tone thread | Use continuous thread method |
These stitch combinations can help you achieve stunning designs and add a personal touch to your projects, making them truly unique with the right tension control.
Using a Sewing Machine
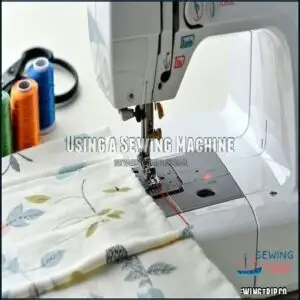
The convenience of using a sewing machine can bring your blanket stitch to life in half the time.
Most modern machines have this decorative stitch built-in.
- Choose the blanket stitch setting (sometimes called buttonhole stitch)
- Set proper tension control to prevent thread bunching
- Select the right needle type for your fabric
- Adjust stitch length and width for your desired look
Always practice on scrap fabric first!
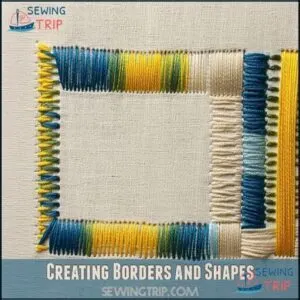
Creating Borders and Shapes
Frequently, blanket stitch transforms ordinary projects into stunning works with shaped edges and decorative borders.
You can create geometric designs by varying stitch length and spacing along curved borders. Try inward stitching for unique effects, or build layered borders for added dimension.
This hand embroidery technique works beautifully for both practical edge finishing and artistic expression.
Follow any blanket stitch tutorial or stitch guide to experiment with patterns that flow naturally with your fabric’s contours. Don’t be afraid to mix colors for extra visual impact, and remember that blanket stitch is a versatile technique that can be used to create geometric designs and add dimension to your work.
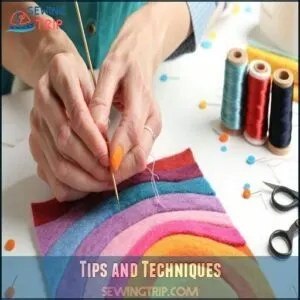
Tips and Techniques
You’ll master the blanket stitch faster with these practical tips that solve common problems like uneven stitches and tricky corners.
From maintaining consistent stitch sizes to selecting the right thread colors for your project, these techniques will transform your sewing from frustrating to fantastic.
Handling Corners
While blanket stitch variations add flair to your projects, corners require special attention.
Turning a perfect corner doesn’t have to be intimidating.
When you reach a corner in your blanket stitch tutorial:
- For mitered corners, work two stitches into the same point
- With curved edges, decrease stitch spacing slightly
- On layered corners, secure each layer separately
- For diagonal corners, maintain consistent thread tension
You’ll create neat endings with practice, making your edging look professionally finished even around tricky corners.
Maintaining Stitch Size
After mastering corners, you’ll want to keep your blanket stitch size consistent.
To maintain even loops and spacing, use your thumb as a measuring guide for each stitch. Control tension by pulling thread with the same force each time.
Place your needle at equal distances along the fabric edge—about 1/4 inch works well for beginners.
Practice on scrap fabric first! Stitch spacing affects your project’s overall look, so take your time.
Remember, consistent hand stitching comes with practice and patience.
Using Backing Fabric
Backing fabric provides essential stability to your blanket stitch projects.
For beginners, choosing the right fabric enhances both durability and appearance.
Cotton offers breathability, while fleece adds warmth to seasonal items.
When layering techniques come into play, make certain your backing and top fabric match in care requirements.
Understanding how to create mitered quilt corners is vital for a professional finish.
Secure your backing by pinning before stitching, preventing unwanted shifting.
Hand stitching through both layers creates a clean finish that’ll stand up to regular use, and it is crucial to prevent unwanted shifting by securing the backing properly, which contributes to a durable blanket stitch project.
Thread Color Choices
While backing material supports your work, your thread color choice is what brings your blanket stitch to life.
Your sewing thread color can make your decorative stitches either stand out or blend in:
- Fabric Complement: Choose thread that matches your material for elegant, subtle embroidery stitches.
- Contrasting Thread: Pick bold, opposite colors to make your blanket stitch pop.
- Seasonal Colors: Align thread with holiday themes or time of year.
- Project Theme: Select colors that enhance your overall design concept.
Consider exploring options for high-quality thread for your blanket stitch. Trust your personal preference—it’s your project after all!
Advanced Applications
You’ll be amazed at how your blanket stitch skills can transform into beautiful appliqué work, decorative embroidery, and professional edge finishing once you’ve mastered the basics.
Now that you’re comfortable with the standard technique, you can apply this versatile stitch to create stunning borders on garments, secure fabric pieces in quilting projects, and even repair worn edges on your favorite items.
Hemming and Borders
In terms of edge durability, hemming with blanket stitch creates both functional and beautiful results.
Simply fold your fabric edge inward, pin in place, and work your stitches through both layers.
This technique reinforces hems while adding decorative borders to blankets, tablecloths, and other fabric items.
Try alternating thread colors or varying stitch spacing for unique border fabrics that’ll stand the test of time—practical sewing stitches with personality!
Applique Work
While hemming sets the foundation, appliqué work truly showcases the blanket stitch as a decorative element. You’ll transform ordinary projects into personalized masterpieces by attaching fabric shapes to your background material.
Before starting, proper fabric selection and design transfer make all the difference. Secure your appliqués with fusible adhesive for stability, then work your blanket stitch about 1/4 inch from the edge.
- Use contrasting thread colors to make your designs pop
- Try layering techniques for dimensional effects
- Switch to heavier thread for bold statement pieces
- Experiment with different spacing for varied textures
The blanket stitch isn’t just functional—it’s your secret weapon for stunning appliqué work!
Embroidery Projects
Moving beyond appliqué work, blanket stitch shines in embroidery projects too!
With the right embroidery floss and needle selection, you’ll create stunning designs that pop.
Choose your fabric wisely and maintain proper stitch tension for professional results.
Here’s how different combinations create unique effects:
| Project Ideas | Fabric Choice | Embroidery Floss Type |
|---|---|---|
| Floral Hoops | Linen | Variegated Colors |
| Monogrammed Gifts | Cotton | Metallic Thread |
| Seasonal Decorations | Felt | Pearl Cotton |
| Wall Hangings | Canvas | Six-Strand Floss |
Your beginner embroidery journey just got more exciting with these stunning designs and unique effects!
Raw Edge Finishing
Raw edge finishing with a blanket stitch serves three essential purposes: fray prevention, edge durability, and decorative appeal.
Raw edge finishing with blanket stitch isn’t just practical—it’s where durability meets decoration in perfect harmony.
You’ll want to position your stitches 1/8" from the fabric’s edge for maximum protection. Keep your stitch density consistent—not too tight or loose—for a professional finish.
This technique works beautifully on felt projects but isn’t sufficient for fabrics that fray excessively.
For beginners, try contrasting thread colors to make your edge stitching pop. For fabrics prone to unraveling, consider zigzag stitch methods as an alternative to achieve a decorative appeal and ensure edge durability.
Sewing in From The Edge
After finishing raw edges, you’ll want to master sewing in from the edge—a technique that gives your projects professional polish.
When starting your blanket stitch slightly inward (about 1/4" from the edge), you’ll create better fabric stability while preventing puckering.
Maintain a consistent seam allowance as you work, keeping your thread tension control steady. This edge stitching method works wonderfully for beginners and creates a clean blanket edging every time.
Frequently Asked Questions (FAQs)
How do you do a blanket stitch step by step?
Brilliant blanket stitching begins by bringing your needle up through the fabric edge.
Loop your thread under the needle tip, pull tight, and continue with evenly spaced stitches along the edge.
You’ll create a decorative border.
How to blanket stitch two pieces of fabric together?
Pin your two fabric pieces together.
Thread your needle, knot the end, and insert from back to front.
Loop thread under the needle before pulling tight.
Maintain even spacing as you work along the edge.
How many threads do you use for blanket stitch?
Thread choices for blanket stitch are as flexible as putty in your hands.
You’ll typically use 2-6 strands of embroidery floss, depending on your desired thickness and the fabric you’re working with.
What is the difference between a whip stitch and a blanket stitch?
When comparing these stitches, you’ll notice blanket stitch forms decorative loops along the edge, while whip stitch creates diagonal lines.
Blanket stitch provides stronger reinforcement and a fancier finish for your sewing projects.
What materials are needed for a blanket stitch?
Armed with the right tools, you’ll need a suitable needle, thread or embroidery floss, fabric, and scissors. A thimble’s optional for finger protection during your stitching journey.
Can the blanket stitch be done with different types of yarn?
Yes, you can definitely use various types of yarn for blanket stitch.
Thicker yarns create bold, decorative edges while thinner ones produce delicate finishes.
Just match your needle size to your yarn thickness for best results.
How long does it take to complete a blanket stitch?
The time investment for your blanket stitch journey varies widely. You’ll spend 1-3 hours on small projects and several days for blankets, depending on your experience level and project size.
Are there any tips for sewing corners with the blanket stitch?
For corners, stitch normally until you reach the angle, then make two stitches in the same hole, adjusting the second loop perpendicular to the first.
This creates a clean, professional-looking corner.
Can the blanket stitch be used for other projects besides blankets?
You’ll find blanket stitch incredibly versatile beyond just blankets.
It’s perfect for appliqué work, felt crafts, decorative edges on clothing, and even repairing garments.
Try it on ornaments, coasters, or quilting projects too!
How can I fix uneven blanket stitches?
To fix uneven blanket stitches, unpick the problematic section using small scissors.
Practice consistent spacing on scrap fabric first, and use your thumb as a guide to maintain uniform stitch depth and tension.
Conclusion
Remarkably, over 80% of professional quilters say learning how to do a blanket stitch was their gateway skill.
You’ve now mastered this fundamental technique that will serve you in countless projects. Whether you’re finishing a fleece blanket, adding appliqué details, or creating decorative edges, your blanket stitch skills will elevate your work.
Remember, practice builds muscle memory—the more you stitch, the more natural it becomes. Your crafting journey has just expanded with this versatile, timeless technique.
- http://www.holiday-crafts-and-creations.com/how-to-do-blanket-stitch.html
- https://www.wikihow.com/Sew-Blanket-Stitch
- https://youtu.be/ofnBmni1k4o
- http://www.craftsy.com/sewing/article/blanket-stitch/
- https://pinterest.com/pin/create/button/?url=https://www.allfreesewing.com/Basics-and-Tutorials/How-to-Blanket-Stitch-by-Hand

