This site is supported by our readers. We may earn a commission, at no cost to you, if you purchase through links.
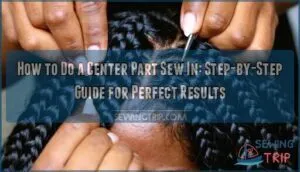
Create a precise center part using a rat-tail comb, then braid flat cornrows parallel to this part as your foundation.
Choose quality extensions that match your hair texture and install wefts by sewing them securely to the cornrows.
The key is maintaining moderate tension to prevent scalp damage while ensuring the wefts lie flat for a natural look. Your technique determines whether you’ll achieve that flawless, undetectable finish that makes heads turn.
Table Of Contents
Key Takeaways
- Prepare your foundation properly – You’ll need to detangle thoroughly with a wide-tooth comb, cleanse with sulfate-free shampoo, and ensure your hair is completely dry before creating precise cornrows that serve as your installation base.
- Choose quality extensions that match your texture – You must select human hair wefts that perfectly match your natural curl pattern and color within two tones to achieve that seamless, undetectable blend.
- Master the braiding technique – You’ll create flat, secure cornrows parallel to your center part using moderate tension that’s tight enough to hold wefts but gentle enough to prevent scalp damage and traction alopecia.
- Maintain your sew-in with targeted care – You’ll extend your install’s lifespan by cleansing between tracks with diluted shampoo, avoiding heavy products that cause buildup, and scheduling professional removal after 6-8 weeks maximum.
How to Prepare Your Hair for a Center Part Sew-In
Preparing your hair correctly sets the foundation for a flawless center part sew-in that looks natural and lasts longer.
You’ll need to detangle thoroughly, cleanse with sulfate-free products, and make certain your hair is completely dry before starting the braiding process to ensure a natural look.
Detangling and Cleansing Techniques
Your hair needs proper preparation before installation to guarantee lasting results. Start with thorough Hair Detangling using a wide-tooth comb, working from ends to roots.
Thorough detangling sets the foundation for a flawless, long-lasting sew-in installation
Follow these essential steps:
- Apply leave-in conditioner for Hair Hydration during detangling
- Use Gentle Cleansing methods to remove product buildup
- Focus on Scalp Care with massaging motions while washing
This foundation prevents matting and creates the ideal base for your sew-in installation. Understanding proper braid patterns is vital for a successful sew-in.
Using Sulfate-free Shampoo for Scalp Health
When you’ve gently worked through tangles, choosing the right cleanser becomes your next power move.
Sulfate-free shampoo protects your scalp’s natural oils while providing gentle cleansing that won’t strip away moisture.
This hair detox approach reduces irritation and buildup, creating the perfect foundation for scalp care before installation begins.
Importance of Thorough Drying
After cleansing with sulfate-free shampoo, thorough drying becomes your next priority.
Wet hair stretches easily and breaks under tension, making proper drying techniques essential for scalp health.
Consider your hair porosity when selecting heat settings—low porosity hair needs higher temperatures while high porosity absorbs moisture quickly.
Complete moisture control prevents mold growth and maintains dryness prevention throughout your install.
Choosing The Best Hair Extensions for Sew-Ins
The right hair extensions make the difference between a professional-looking center part sew-in and one that screams amateur.
You’ll need to match your natural hair texture, choose the correct length and color, and invest in quality wefts that won’t tangle or shed after a few washes, which is crucial for a professional-looking result.
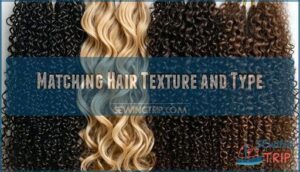
Matching Hair Texture and Type
Successful extension installation starts with perfect texture matching. Your natural hair texture determines which extensions will blend seamlessly.
Different curl patterns require specific fiber types to avoid obvious demarcation lines that scream "fake hair."
Consider these key matching factors:
- Hair Texture – Match your natural curl pattern exactly
- Curl Patterns – Type 3B-3C hair needs deep wave extensions
- Hair Porosity – Affects how extensions absorb styling products
- Fiber Strength – Human hair withstands heat better than synthetic
- Cuticle Layer – Natural cuticles create realistic movement and shine
To minimize damage, understanding hair extension risks is vital for a successful sew-in installation.
Selecting Length and Color
Choose hair length that complements your natural hair and desired style.
Extension Type should match your lifestyle needs. For Color Match, select shades within two tones of your natural hair for seamless blending.
Shade Selection becomes vital under different lighting conditions. Consider Texture Choice carefully – straighter extensions show length differences more dramatically than textured options.
Understanding hair extension options is essential for making informed decisions about your sew-in. This involves considering how the extensions will look and feel, and choosing options that fit your needs and preferences, including the importance of a good Color Match.
Assessing Quality and Durability
Determining Extension Materials and Hair Longevity requires sharp Quality Control skills.
Quality extension selection determines your sew-in’s lifespan and overall success
Premium human hair wefts outlast synthetic alternatives by months, with proper Sewing Techniques extending durability substantially.
To achieve the best results, it’s vital to understand the importance of hair quality checks when selecting extensions.
Here are five essential Durability Tests:
- Burn test – Real hair smells natural while synthetic produces plastic odor
- Comb test – Quality extensions show minimal shedding during gentle detangling
- Thickness check – Premium bundles remain thick from root to tip
- Water test – High-grade hair maintains texture after washing and drying
- Touch assessment – Authentic human hair feels uniformly smooth without excessive frizz
Creating a Precise Center Part and Cornrow Base
Creating a perfect center part requires precise sectioning with a rat-tail comb to guarantee your part stays straight throughout the entire install.
You’ll then braid your natural hair into small, flat cornrows that create a secure foundation while avoiding excessive tension that can damage your scalp and hairline, ensuring a secure installation.
Sectioning Hair for a Straight Center Part
Once you’ve chosen your extensions, grab a rat-tail comb for precise Hair Division.
Start scalp preparation by locating your natural crown, then draw a straight line from your hairline to the nape.
This Part Alignment creates your foundation.
Use sectioning tools to maintain accuracy while dividing hair into manageable portions for your cornrow base.
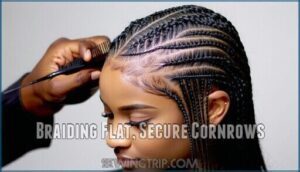
Braiding Flat, Secure Cornrows
After sectioning your hair for a clean center part, you’ll build the foundation by braiding tight, flat cornrows.
These cornrows serve as your anchor points for the wefts.
Here’s your braiding roadmap:
- Scalp Preparation – Apply light oil to prevent dryness during the braiding process
- Hair Sectioning – Create horizontal parts about finger-width apart for even spacing
- Braiding Tools – Use a rat-tail comb for precise parting and hair clips for organization
- Cornrow Patterns – Braid straight back from hairline, keeping rows parallel to your center part
- Braid Tension – Maintain firm but comfortable pressure to avoid scalp stress
The instructions provided are to be followed closely to achieve the desired braided hairstyle.
Preventing Excessive Tension and Scalp Issues
Avoid pulling your hair too tight while braiding – this prevents tension alopecia and scalp damage.
Keep braid size moderate and use gentle cornrow patterns that don’t strain your hairline.
Monitor for product buildup around your part, which can cause irritation.
For persistent itchiness, consider using a scalp relief serum to soothe irritation.
If you experience persistent itching, loosen the braids immediately for itch relief and healthier results.
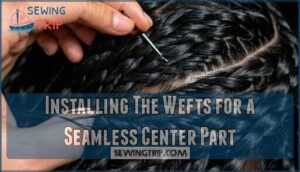
Installing The Wefts for a Seamless Center Part
Now you’re ready to attach the wefts and create that perfect center part look.
Start by positioning your first weft at the nape of your neck and work your way up, sewing each track securely to your cornrow base with small, tight stitches to achieve a secure and perfect attachment.
Sewing Techniques for Natural-looking Results
Mastering weft placement transforms your sew-in from amateur to professional.
Use the double lock stitch method for secure attachment, threading around both weft and braid.
Control stitch tension carefully—too tight creates puckering, too loose allows slippage.
Strategic knot concealment at track ends maintains invisibility.
Part reinforcement requires close track spacing near the center.
Effective blending methods include alternating single and double tracks for natural density.
Consistent tension is key, and adjusting machine tension prevents thread tangles.
Blending Leave-out Hair for a Flawless Finish
Once you’ve sewn your wefts securely, focus on achieving seamless integration with your leave-out hair. Matching texture becomes paramount for natural-looking results, while proper color matching prevents obvious lines of demarcation.
Here’s your blending roadmap:
- Apply heat protectant before any heat styling to prevent damage
- Use quality hair products designed for synthetic or human hair extensions
- Section leave-out hair into manageable portions for precise parting definition
- Test temperature settings on hidden sections first
- Work systematically from bottom to top layers
To achieve the best results, consider products that facilitate seamless blending for natural-looking results, and ensure you’re using the right techniques for proper color matching and seamless integration with your leave-out hair.
Flat Ironing and Blending Extensions
Apply heat protectants before flat ironing to shield your hair from damage.
Set your temperature control between 300-350°F for synthetic extensions, 350-400°F for human hair.
Use proper sectioning techniques to work through small portions systematically, focusing on damage prevention by avoiding excessive passes over the same section, as different extension types require specific heat settings for ideal blending.
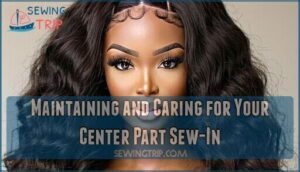
Maintaining and Caring for Your Center Part Sew-In
Your center part sew-in needs proper care to look fresh and protect your natural hair underneath.
Regular maintenance prevents buildup, irritation, and damage that can occur when extensions aren’t properly maintained, which is a key aspect of proper care for your hair.
Cleansing Scalp Between Tracks
Once your sew-in’s installed, keeping your scalp clean becomes your new priority.
Scalp Hygiene maintains healthy hair growth while extending your install’s lifespan through proper Product Application techniques.
Here’s your revitalizing routine:
- Mix diluted shampoo in an applicator bottle for targeted Build-up Prevention
- Gently squeeze solution between tracks without disturbing the wefts
- Massage scalp with fingertips for Itch Relief and circulation
- Rinse thoroughly using the same bottle technique for a Revitalizing Install
By following this routine, you can ensure your scalp remains clean and healthy, which is essential for maintaining a healthy hair growth.
Preventing Buildup and Irritation
Beyond regular cleansing, preventing product residue requires strategic care.
Avoid heavy greases during your night routine—they attract dirt and clog pores under extensions.
Instead, use lightweight oils for scalp oiling, focusing on dry areas only.
To maintain the health of your sew-in, consider scheduling professional maintenance for retightening every 6-8 weeks.
Weekly scalp exfoliation with gentle circular motions removes buildup effectively.
These protective styles demand balance: enough moisture without overdoing it, which is crucial for sew-in health and requires regular maintenance to prevent damage.
Safe Removal and Promoting Hair Health
When you’re ready to remove your sew-in, schedule it after 6-8 weeks to prevent matting and tension alopecia.
Cut threads section by section using small scissors, then apply detangling spray to reduce breakage by 42%.
Follow with deep conditioning treatments for regrowth promotion and scalp health restoration.
Gentle detangling prevents follicle damage while maintaining hydration importance for ideal recovery.
Frequently Asked Questions (FAQs)
How long does a center part sew-in typically last?
Most professionals recommend keeping your center part sew-in for six to eight weeks maximum.
You’ll want to schedule removal before this timeframe to prevent matting and maintain healthy hair growth underneath the install.
What should I do if my cornrow braids are too tight or uncomfortable?
If your cornrow braids feel too tight, loosen them immediately by gently pulling the hair near your scalp. Don’t ignore discomfort—excessive tension causes traction alopecia and permanent hair loss.
Can you sleep normally with a sew-in installed?
Like a weighted blanket that takes adjustment, sew-ins need accommodation initially. You’ll sleep normally after a few nights once your scalp adjusts to the added weight and tension from extensions.
How much does a professional center part sew-in cost?
You’ll pay anywhere from $100 to $300 for a professional center part sew-in, depending on your stylist’s experience, quality of hair, and location.
Toss in the cost of premium hair, and your total goes up.
What tools are needed for DIY sew-in installation?
You’ll need a curved needle, upholstery thread, rat-tail comb, hair clips, scissors, and weaving hair extensions. Don’t forget a thimble to protect your fingers during the stitching process.
Can you exercise and sweat with a sew-in?
Yes, you can definitely exercise and sweat with a sew-in! Simply secure your style, stay hydrated during workouts, and cleanse your scalp afterward to maintain freshness and prevent buildup.
Conclusion
Mastering how to do a center part sew in transforms your hair game completely.
You’ve learned the essential steps from proper preparation through final styling techniques.
Remember that practice makes perfect—your first attempt won’t match salon results, but each installation improves your skills.
The key lies in maintaining moderate tension throughout the process while ensuring your extensions blend seamlessly with natural hair.
With patience and proper technique, you’ll achieve that coveted professional look every time.
- https://jiffyhair.com/what-types-of-hair-extensions-last-the-longest/
- https://vinhairvn.com/how-long-do-weft-extensions-last/
- https://www.airyhair.com/blog/increase-hair-extensions-lifetime/amp/
- https://www.hermosahairextensionbar.com/hair-extensions/how-long-do-sew-in-hair-extensions-last/
- https://ballicevirginhair.com/blogs/hair-blog/how-long-does-a-sew-in-last

