This site is supported by our readers. We may earn a commission, at no cost to you, if you purchase through links.
Start by choosing stable fabric and contrasting colors, and add interfacing for extra oomph.
Design your label with details like the quilt’s name and date, using embroidery software for that personal touch.
Set up your machine with a Schmetz needle, 40 wt thread, and the right hoop.
Tweak the tension to avoid mishaps like puckering.
Attaching your label can be quick with fusible web or secure with hand stitches.
If things go awry, check tension, stabilize fabric, and keep calm.
Ready to ace your quilt label? Let’s stitch!
Table Of Contents
- Key Takeaways
- Choosing the Right Fabric
- Designing Your Quilt Label
- Preparing Your Embroidery Machine
- Embroidering Your Quilt Label
- Correcting Embroidery Mistakes
- Attaching Your Quilt Label
- Troubleshooting Embroidery Issues
- Quilt Label Best Practices
- Labeling and Preserving Your Quilt’s History
- Frequently Asked Questions (FAQs)
- Conclusion
Key Takeaways
- Choose Your Fabric and Colors Wisely: Picking the right fabric for your quilt label is like choosing a best friend—it needs to complement and support. Stable, woven fabrics in contrasting colors stand out and make your words pop. Don’t skip the interfacing; it’s the secret ingredient that adds backbone to your label.
- Master Your Embroidery Machine Setup: Setting up your machine can feel like prepping for a big date—everything needs to be just right. Use a Schmetz needle, 40 wt thread, and the correct hoop. Adjust tension carefully to avoid any "oops" moments like puckering stitches.
- Tackle Embroidery Issues Confidently: Embroidery mistakes happen—think of them as little learning opportunities. If stitches go astray, calmly remove them with a seam ripper, check your tension, and try again. Remember, even pros have hiccups, but persistence is key!
- Make Your Quilt Label Memorable: Label your quilt like you’re crafting a legacy. Include essential details and add your creative flair with custom designs or motifs. It’s your quilt’s birth certificate, so have fun with it! Preserving its story ensures it lives on for generations.
Choosing the Right Fabric
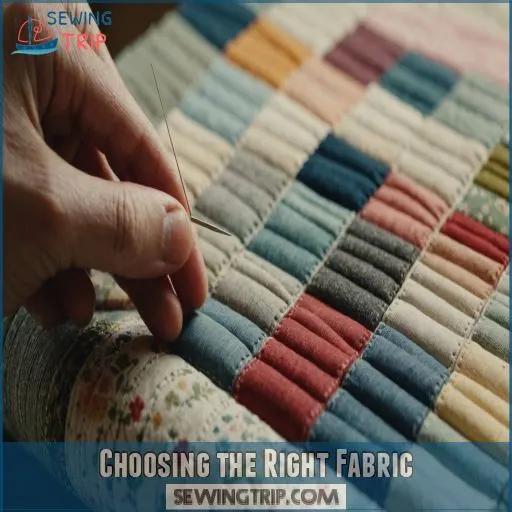
Choosing the right fabric is like picking the perfect shirt for a first date—it’s got to look good and feel right.
To make sure your quilt label holds up and stands out, focus on using stable, woven fabric, consider contrasting colors for a pop, and don’t forget about adding interfacing for that extra bit of stability.
Stable, Woven Fabric for Embroidery
Diving into embroidery, consider using stable, woven fabric for the quilt label. It’s like choosing the right sidekick—essential for a seamless adventure! Here’s what to look for:
- Balanced fabric weight makes for a durable quilt label.
- Tight weave types prevent distortion.
- Keeps even thread tension in check.
- Supports efficient hooping techniques.
- Offers a good stitch density for embroidery designs, which is important when creating a quilt label.
Selecting Fabric Colors for Contrast
When selecting fabric for your quilt label, think about how the colors will contrast with the quilt’s background.
A light label on a dark quilt or a dark label on a light quilt will make your text pop.
Play around with different thread and fabric combinations to find the perfect look that complements your overall quilt design.
Considering Interfacing for Extra Stability
Ever wonder if your quilt labels need a little backbone? Interfacing weight can make a world of difference. Choose between fusible or sew-in types based on your label placement. A gentle balance helps your machine embroidery stay sharp.
Watch out for stitch density and hoop size, too. They’re like the unsung heroes that support your quilt label design and embroidery stitches!
Designing Your Quilt Label
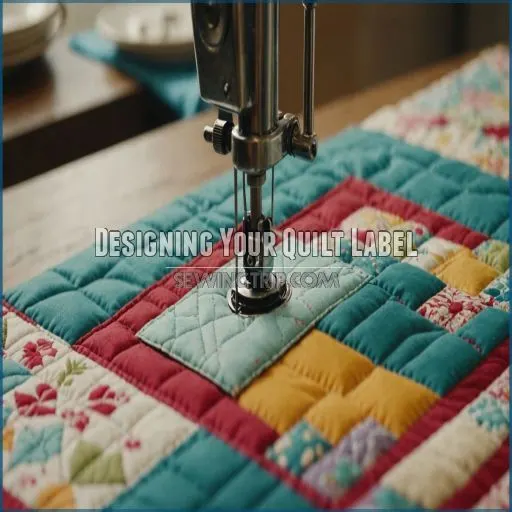
Creating a quilt label lets you express your creativity while preserving your quilt’s story for future generations.
It’s like adding your own signature flair to a fabric masterpiece—just make sure not to stab yourself with the needle, or the quilt may end up with an unexpected crimson splash!
Deciding on Label Content and Layout
To nail your quilt label content and layout, focus on essential details like the quilt’s name, date, your name, and intended recipient.
Choose a font that’s legible at a reasonable size, ensuring the style matches your quilt’s overall vibe.
Place the label snugly on the quilt, where it’s easily visible.
Remember, adding thoughtful touches can transform a simple label into a cherished memory.
Using Embroidery Software or Machine Functions
Your embroidery software or machine functions make designing your quilt label a breeze.
Explore built-in design tools to create custom lettering, patterns, and motifs that reflect your unique style.
Digitize your own sketches or browse pre-made templates – the options are endless!
Just be sure to choose a font and thread colors that complement your quilt.
Creating a Custom Design or Using Pre-Made Templates
Let’s get started creating a custom quilt label design using embroidery software—it’s like painting with thread!
Get inspired by browsing templates or doodling your ideas.
As for font choices, mix in some whimsy with practicality.
Customize your label like a pro, and before you know it, your quilt’s history will be immortalized with your unique stitch signature!
Preparing Your Embroidery Machine
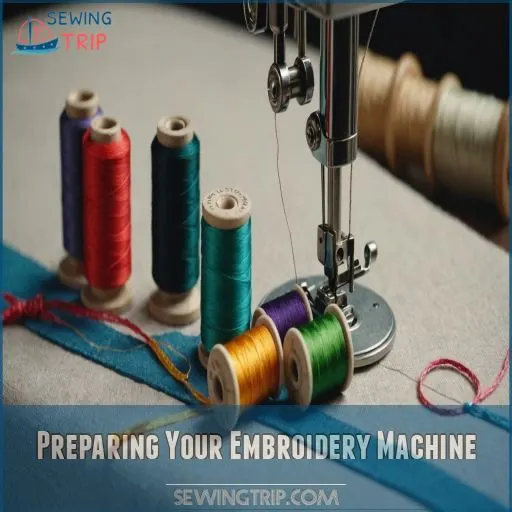
To achieve a flawless quilt label, setting up your embroidery machine might feel like preparing for a mini sewing marathon, but don’t worry—it’s easier than finding a missing sock.
You’ll need the right needle, thread, hoop, and stabilizer to make your label look as good as a perfectly baked pie.
Choosing the Right Embroidery Needle and Thread
Starting with the right needle size helps make sure smooth sailing when embroidering a quilt label. Choose a Schmetz embroidery needle for stitch quality, typically size 75/11.
As for thread, let your quilt label shine by matching colors wisely. Opt for a thread weight like 40 wt for durability—Sulky Soft n Sheer helps prevent distortion for great results.
Setting Up Your Embroidery Hoop and Stabilizer
Alright, let’s get your embroidery hoop and stabilizer set up for that quilt label, and if you’re new to this, check out some ITH projects https://sewingtrip.com/in-the-hoop-embroidery-designs-my-newest-obsession/ for inspiration!
First, choose the smallest hoop possible to minimize distortion.
Next, fuse a lightweight, tear-away stabilizer to the back of your fabric – this will provide essential support during stitching.
Finally, secure the fabric tightly in the hoop, ensuring there are no wrinkles or puckers.
With your setup dialed in, you’re ready to start embroidering!
Adjusting Tension and Thread Length
Getting bobbin tension right is like threading a needle—tricky, but really important!
Adjust tension based on thread choice and fabric type.
For thick threads, ease tension; for delicate work, tighten slightly.
Needle size matters too—pick wisely to embroider smoothly.
If stitches run amok, troubleshooting adjustments is key.
Remember, a well-behaved thread leads to a delightful quilt label!
Embroidering Your Quilt Label
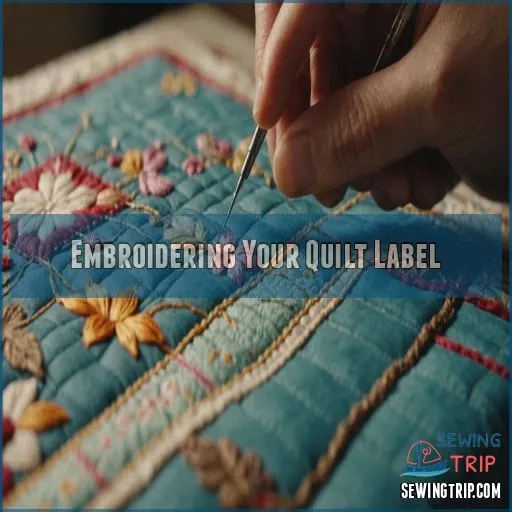
Get ready to bring your quilt label to life with a few stitching secrets that transform plain fabric into a storytelling canvas.
From selecting the perfect embroidery thread to keeping your stitches even and frustration-free, it’s time to show that quilt label who’s boss—without any tangles in sight!
Starting the Embroidery Process
Two hands, a dash of patience, and a pinch of creativity—that’s all you need to embroider a quilt label!
First, secure your fabric in the embroidery hoop, ensuring just the right size to support fabric tension.
Choose thread and stabilizer types wisely, and transfer your design.
Remember, every stitch connects your story to the fabric, so have fun!
Maintaining Even Stitching and Tension
As you start embroidering your quilt label, maintaining even stitching and tension is really important.
Keep a close eye on your thread tension, adjusting it as needed to prevent puckering or loose stitches.
Use the smallest hoop possible and a lightweight, tear-away stabilizer to provide a sturdy foundation.
With a little practice, you’ll nail that perfect, professional-looking embroidered label in no time!
Troubleshooting Common Embroidery Issues
Don’t let embroidery hiccups unravel your enthusiasm.
If your stitch quality looks like a cat’s scratch post, check the thread tension and needle size.
Hooping issues can cause puckering; make sure your fabric is taut like a drum.
Troubleshooting quilt labels is part of quilt making.
Stay calm, keep a cool head, and embroider with confidence!
Correcting Embroidery Mistakes
Sometimes embroidery doesn’t go as planned, but don’t worry; you’re not alone!
We’ll explore how to fix those pesky mistakes and keep your quilt label looking sharp and professional.
Identifying and Removing Excess Thread
Spotting excess thread while embroidering a quilt label can be like finding a needle in a haystack.
Look out for jump stitches, pesky thread tails, or bobbin buildup.
These loose threads love to play hide-and-seek.
With sharp scissors and a steady hand, trim the excess without snipping your stitches.
Troubleshooting embroidery mishaps keeps your quilt label looking sharp!
Fixing Incorrect Stitches or Letters
If you spot any incorrect stitches or letters in your embroidered quilt label, don’t worry – it’s an easy fix! First, use a seam ripper to carefully remove the errant stitches. Next, clean up any excess thread using small scissors. Then, re-embroider the corrected design, taking care to maintain even tension and stitch quality.
- Use a seam ripper to remove incorrect stitches.
- Trim away any excess thread with small scissors.
- Re-embroider the corrected design with even tension.
- Take your time to achieve a professional-looking result.
Preventing Future Mistakes
After you’ve fixed those pesky stitches, let’s talk about preventing future embroidery hiccups.
Keep stitch tension even like a tightrope walker and double-check hooping stability as you’d secure a lid on a stubborn cookie jar.
Rotate needle selection for fresh starts, and wield your stabilizer like a trusty sidekick.
Follow these troubleshooting tips, and your quilt label’s journey will be smooth sailing!
Attaching Your Quilt Label
Attaching your quilt label doesn’t have to be a tricky task—think of it as giving your quilt a fancy name tag!
Whether you stitch it by hand for security, iron it on with fusible web in a flash, or neatly baste and bind it, your quilt will wear its label proudly.
Hand-Stitching the Label for a Secure Finish
Ah, embroidery mistakes handled, it’s time to attach that quilt label.
An invisible stitch is your best friend for a neat finish.
Choose a sturdy thread and focus on securing corners.
Imagine you’re tucking your quilt in for a cozy night.
Mindful label placement makes sure it’s in the spotlight but not stealing the show.
Happy stitching, thread maestro!
Using Fusible Web for a Quick Attachment
Using fusible web is a quick and easy way to attach your quilt label.
Simply choose a lightweight, iron-on variety, position the label where desired, and press with a hot iron.
The fusible web will adhere the label securely, allowing you to focus on the creative aspects of your embroidered masterpiece.
Basting and Binding the Label for a Neat Finish
Now that you’ve mastered attaching your label with fusible web, let’s chat about basting and binding techniques.
Baste the label in place, ensuring it’s secure, then stitch it along with the quilt’s binding to keep it neat.
Thread matching is a must! Think of it as a gentle embrace for your label.
Keep your stitch tension balanced—no wonky waves!
Troubleshooting Embroidery Issues
Even skilled embroiderers encounter issues like misaligned designs and thread breakage, which can feel like your needle’s on strike.
With a little troubleshooting know-how, you can keep your quilt label looking smooth, flawless, and frustration-free!
Why is My Embroidery Design Not Lining Up?
When your embroidery design doesn’t line up, you might feel like a cat chasing its tail.
Check hoop tension and watch out for fabric slippage.
Make sure your needle placement is precise, and double-check design scaling.
Stabilizer issues can tangle things up, so use sturdy options like Gütermann Dekor Rayon.
Remember, even pros need troubleshooting tips, especially when preserving quilt history for shows!
How to Prevent Puckering and Distortion
Puckering and distortion can really ruin an otherwise gorgeous embroidered quilt label. But don’t worry – with the right stabilizer and hooping techniques, you can prevent these pesky issues.
Start by fusing a sturdy, lightweight interfacing to the back of your fabric.
Then, make sure to hoop it tightly and evenly. Proper thread tension is key too – not too tight, not too loose.
A little trial and error will have your label looking flawless in no time!
Solving Issues With Thread Breakage or Tangles
If your embroidery thread keeps breaking or tangling, don’t pull your hair out just yet!
- Check thread tension; it should be neither too loose nor too tight.
- Use a needle type that matches your fabric type.
- Make sure your bobbin winding is smooth and even.
- Invest in high-quality thread to avoid unnecessary breakage.
Follow these tips for a stitch-less struggle!
Quilt Label Best Practices
When you’re crafting a quilt label, it’s all about blending essential info with eye-catching design elements.
Don’t fret too much over font styles—just pick one that’s easy to read and lets your personality shine through, like choosing a quirky T-shirt that makes you smile every time you wear it.
Including Essential Information on Your Label
As you smooth out embroidery issues, it’s a good idea to make sure your quilt label tells a story. Capture the quilt’s name, maker details, date made, materials used, and gift recipient info. Think of it as your quilt’s biography.
| Label Component | What to Include | Note |
|---|---|---|
| Quilt Name | Unique title | Add some flair! |
| Maker Details | Your name | Include collaborators |
| Date Made | Completion date | Helpful for memory lane |
| Materials Used | Fabric, thread info | Guide for care |
| Gift Recipient | Who’s it for | Personal touch |
Choosing the Right Font and Lettering Style
When choosing a font and lettering style for your quilt label, think about legibility. Opt for a clean, easy-to-read font that complements the overall aesthetic of your quilt. Consider the size – large enough to be seen, but not overpowering. Experiment with different script styles, serif vs. sans-serif, and font weights to find the perfect balance.
- Prioritize legibility for future generations
- Choose a font size that’s visible but not too big
- Play with script styles, serifs, and font weights
- Make sure the lettering style aligns with your quilt’s design
Including Essential Information on Your Label
Adding a Personal Touch With Custom Designs
Adding a splash of character with custom designs makes your quilt label a one-of-a-kind piece.
Combine embroidered lettering and custom motifs to reflect your style.
Create unique fonts, or hand-draw sketches for a quirky touch.
Sprinkling in personalized quotes adds charm and conveys heartfelt intentions.
Let your imagination run wild, like a crafty maestro conducting a quilty masterpiece!
| Element | Suggestion | Example |
|---|---|---|
| Embroidered Lettering | Elegant Script | Joyful Journey |
| Custom Motifs | Nature-Inspired | Leaves, Flowers |
| Personalized Quotes | Heartfelt Saying | "Stitched with Love" |
Labeling and Preserving Your Quilt’s History
When you label your quilt, you’re not just marking it as yours but weaving a part of your story into every stitch.
Think of it as future-proofing for your masterpiece—like a time capsule, only softer, and much less likely to be buried in the backyard.
The Importance of Documenting Your Quilt’s History
Building on best practices, embrace the power of your quilt story. Each label is like a diary page in your family legacy, transforming fabric into an heirloom.
Your maker’s journey enriches its historical context.
By documenting names, dates, and occasions, you’re not just preserving stitches; you’re weaving a timeless tale of belonging, connecting past, present, and future.
Including Care Instructions and Materials Used
Don’t forget to include care instructions and list the materials used when labeling your quilt.
This information helps preserve the quilt’s history for future generations.
Whether it’s washing guidelines or the specific fabrics and threads, these details add valuable context that will make your quilt even more meaningful down the line.
Creating a Legacy With Your Quilt Label
As you think about leaving a legacy, quilt labels play a key role in preserving stories. Quilt label traditions weave your tale into the fabric itself.
Family history quilts have stories to share; don’t let them fade like grandma’s old photos!
Embrace heirloom quilt labels—capture your quilt’s purpose, materials, and heartfelt inspirations. It’s time to immortalize moments.
Frequently Asked Questions (FAQs)
How to correct embroidery mistakes?
Even Da Vinci made a few mistakes!
To fix embroidery errors, carefully snip visible knots with tiny scissors.
Use a needle to gently remove the flawed threads, ensuring not to snag nearby stitches.
Re-stitch smoothly.
What stabilizer to use for quilt label?
Use a lightweight, tear-away or cut-away stabilizer under your quilt label fabric for stability.
It’s like a trusty sidekick that prevents puckering while you embroider, keeping your masterpiece looking sharp!
Why is my embroidery design not lining up?
Your embroidery design’s misalignment may result from a poorly hooped fabric, shifted stabilizer, or computer glitches in the design file. Understanding hoop overlap is crucial for ITH projects.
Make sure everything’s set properly, tighten that hoop like an old belt, and recalibrate your machine.
What is the best way to label a quilt?
Labeling your quilt is a breeze – you can embroider a custom design, use a permanent fabric marker, or even print a label right onto the fabric.
The options are endless, so get creative and make your quilt truly one-of-a-kind!
How do I choose the right embroidery thread for my quilt label?
Did you know 60% of quilters use cotton for embroidery because it’s versatile?
Choose thread colors that pop or complement, ensuring smooth stitches.
Embroidery should be fun, not threadbare, so test blends to avoid nasty surprises!
What are some creative ways to incorporate my quilts theme into the label design?
Imagine your quilt label as the cherry on top, mirroring your theme with colors, symbols, or patterns.
Add a quote or poem related to your theme for that extra pizzazz, making it truly unforgettable.
How can I ensure my quilt label remains legible over time?
You’ve stitched a masterpiece, so safeguard it like a treasure map!
Choose quality, fade-resistant fabric markers or embroidery threads.
Pre-wash fabric and store quilts away from direct sunlight to keep labels legible for generations.
What are the benefits of using a custom-made quilt label versus a pre-made one?
Custom-made quilt labels let you personalize your quilts with unique details, messages, and designs. They add a special touch that pre-made labels can’t match, making your quilts truly one-of-a-kind. (Source)
How do I properly store and care for my completed quilt label before attaching it?
Protect and preserve your precious project by placing it in a plastic storage box or cotton bag.
Keep it cool and dry, away from sunlight.
Don’t let dire dust or dreaded damp damage your detailed design!
Conclusion
So, are you ready to tackle how to embroider a quilt label with newfound confidence?
From selecting stable fabrics to troubleshooting tips, you’re armed with everything you need for success.
Embracing both the technical and creative aspects, each quilt label becomes a cherished signature of your craft.
Remember, even if you encounter thread tangles or misaligned designs, don’t fret—these troubleshooting tips will guide you to perfection.
Now, go forth and create labels that tell your quilt’s unique story!

