This site is supported by our readers. We may earn a commission, at no cost to you, if you purchase through links.
Start by selecting the right fabric, thread, and stabilizer. Adjust your machine’s settings for letter embroidery, lowering the feed dogs and swapping in a free-motion foot.
Create your design, then transfer it to the fabric using transfer paper or iron-on methods.
Practice basic stitches like straight, satin, and zigzag to bring your letters to life.
Experiment with different fonts and styles to find your signature look. Remember, even pros started somewhere, so don’t be afraid to make mistakes. With a bit of patience and practice, you’ll be stitching up a storm in no time. And who knows? You might discover some unexpected tricks along the way.
Table Of Contents
- Key Takeaways
- Essential Supplies for Embroidering Letters on Sewing Machines
- Preparing Your Sewing Machine for Letter Embroidery
- Creating and Transferring Letter Designs to Fabric
- Mastering Basic Stitches for Letter Embroidery
- Techniques for Embroidering Different Letter Styles
- Hooping Fabric Correctly for Letter Embroidery
- Troubleshooting Common Letter Embroidery Issues
- Enhancing Letter Embroidery With Decorative Elements
- Finishing Touches for Professional-looking Letter Embroidery
- Advanced Letter Embroidery Techniques on Sewing Machines
- Frequently Asked Questions (FAQs)
- Conclusion
Key Takeaways
- You’ll be stitching like a pro in no time. Start with the basics: choose the right fabric, thread, and stabilizer. It’s like picking the perfect ingredients for a recipe – get these right, and you’re halfway to embroidery heaven.
- Don’t let your machine intimidate you – it’s your partner in crime. Adjust those settings, lower those feed dogs, and swap in a free-motion foot. It’s like giving your sewing machine superpowers for letter embroidery, and you can find the perfect sewing and embroidery machines for your needs.
- Practice makes perfect, so don’t be afraid to make mistakes. Try different stitches, such as straight, satin, and zigzag, to bring your letters to life. Before you know it, you’ll be creating monograms that would make your grandma proud.
- Take your letters from "meh" to "wow" with some fancy footwork. Add appliqué, sequins, or play with multiple thread colors. It’s like jazzing up a plain outfit with some killer accessories – your letters will pop right off the fabric.
Essential Supplies for Embroidering Letters on Sewing Machines
You’re about to start a letter-embroidering adventure, and gathering the right supplies is your first exciting step!
From choosing the perfect fabric to selecting sharp needles and eye-catching threads, we’ll guide you through everything you need to set yourself up for embroidery success.
Choosing the Right Fabric
When choosing the right fabric for embroidering letters, you’ll want to think about both style and practicality. Your fabric choice can make or break your project, so consider these key factors:
- Fabric weight: Opt for medium-weight fabrics for best results
- Embroidery stability: Look for tightly woven materials
- Color matching: Choose a fabric that complements your thread
Selecting Appropriate Stabilizer
Stabilizers are the unsung heroes of letter embroidery.
You’ll want to choose one that’s as sturdy as your grandma’s determination to teach you sewing.
Here’s a quick guide to help you choose the right stabilizer:
| Fabric Type | Stabilizer Type | Weight |
|---|---|---|
| Lightweight | Tear-away | Light |
| Medium | Cut-away | Medium |
| Heavy | Water-soluble | Heavy |
| Stretchy | Iron-on | Medium |
Embroidery Thread Options
Countless thread options await you for letter embroidery! You’ll find two main types: rayon and polyester. Rayon offers a beautiful sheen, perfect for eye-catching designs.
Polyester, on the other hand, is more durable and budget-friendly.
Consider your project’s needs – do you want a glossy finish or long-lasting stitches?
Don’t forget to match thread weight to your fabric for the best results. Happy stitching!
Sharp Sewing Machine Needles
You’ve got your thread, now let’s talk needles! Sharp sewing machine needles are your best friends for letter embroidery. They’ll glide through fabric like a hot knife through butter, creating crisp, clean stitches.
Choose the right size for your fabric – thinner for delicate materials, thicker for heavy-duty jobs.
Design Files and Templates
Design files and templates are a big deal! Choose fonts that match your project’s vibe, and don’t forget to think about size – bigger isn’t always better. File formats can be tricky, so double-check compatibility with your machine.
Whether you’re using pre-made designs or crafting your own, a good template is your secret weapon. It’s like having a roadmap for your embroidery adventure!
Preparing Your Sewing Machine for Letter Embroidery
Before you start stitching those beautiful letters, you’ll need to get your sewing machine ready for the task.
Let’s walk through the essential steps to prepare your machine for letter embroidery, from adjusting your stitch settings to installing the right presser foot.
Adjusting Stitch Settings
- Stitch length: Shorter for crisp letters
- Stitch width: Wider for bold text
Play around with these settings on scrap fabric until you hit the sweet spot. Remember, practice makes perfect!
- Needle position: Center for most designs
- Thread tension: Balanced for clean stitches
Installing the Correct Presser Foot
In light of your embroidery adventure, let’s talk about the star player: your presser foot.
You’ll want to swap out your regular foot for a free motion or darning foot.
These specialized feet give you the freedom to move your fabric in any direction, creating beautiful letter designs.
Check your machine’s compatibility and snap on that embroidery-friendly foot.
It’s like giving your machine superpowers for stitching!
Lowering the Feed Dogs
With your feed dogs down, you’re ready to let your creativity flow! To lower them, locate the switch or lever on your machine – it’s often near the bobbin area. Flipping this magical switch disengages those pesky metal teeth, allowing your fabric to glide freely.
This freedom is essential for letter embroidery, giving you full control over your stitching direction and ensuring those letters look sharp and professional.
Threading the Machine for Embroidery
You’ll often find threading your machine for embroidery a bit trickier than usual.
Start by winding your bobbin with embroidery thread, then select the right needle for your fabric.
Place your embroidery thread spool on the machine, ensuring smooth flow. You can find top-rated embroidery threads online or at your local craft store.
Thread the top carefully, following your machine’s guide.
Don’t forget to adjust the tension – it’s key for those picture-perfect letters!
Creating and Transferring Letter Designs to Fabric
Ready to bring your embroidery ideas to life?
Creating and transferring letter designs to fabric is a key step in embroidering beautiful text on your sewing machine, and with the right techniques, you’ll be stitching up a storm in no time.
Designing Letter Templates
Creativity flourishes when you design your own letter templates for embroidery. Let your imagination run wild as you craft unique fonts that speak volumes about your style.
Here are some pro tips to get you started:
- Play with font styles: mix serif and sans-serif for visual interest
- Experiment with letter spacing to create balance
- Vary letter sizes for emphasis and hierarchy
- Incorporate decorative elements like swirls or dots
- Customize templates to fit specific projects or themes
Let your imagination run wild as you craft unique fonts that speak volumes about your style.
Transferring Designs Using Transfer Paper
Once you’ve got your letter design ready, it’s time to transfer it onto fabric using transfer paper. This nifty tool comes in various types, each with its own quirks. Simply place the transfer paper between your design and fabric, then trace away! Be careful not to press too hard, or you’ll end up with unwanted lines. Remember, practice makes perfect in mastering this technique.
Printing and Applying Iron-on Transfers
After mastering transfer paper, let’s explore iron-on transfers. These nifty designs are a game-changer for letter embroidery.
Simply print your chosen letters onto special transfer paper using an inkjet printer.
Then, iron the design onto your fabric – it’s like magic!
Be sure to follow the manufacturer’s instructions for best results.
Using Water-soluble Stabilizers for Design Transfer
Water-soluble stabilizers are like magic paper for your embroidery projects.
You’ll love how easy they make transferring designs to fabric.
Simply print your letter design onto the stabilizer, stick it to your fabric, and stitch away.
When you’re done, just rinse the stabilizer away, leaving your beautiful embroidery behind.
It’s perfect for delicate fabrics and intricate designs.
Give it a try – you’ll wonder how you ever lived without it!
Mastering Basic Stitches for Letter Embroidery
You’re about to become a letter embroidery pro with these essential stitches! From outlining to filling, we’ll cover the must-know techniques that’ll make your text pop on any fabric.
Straight Stitch for Outlining Letters
Now that you’ve got your design ready, let’s tackle the straight stitch for outlining letters. This technique is like drawing with thread – it’s your go-to for crisp, clean letter outlines.
Here’s why it’s a game-changer:
- Creates sharp, defined edges
- Perfect for intricate details
- Provides a foundation for other stitches
- Allows for easy color changes
Satin Stitch for Filling Letters
Ready to learn about satin stitches? You’ll love how they bring your letters to life!
Start with a tight zigzag, adjusting the stitch length to zero and width to your desired thickness.
Keep your tension balanced and move slowly for even coverage.
Experiment with different densities to create unique textures.
Zigzag Stitch for Letter Borders
Zigzag stitches are your secret weapon for creating eye-catching letter borders.
You’ll love how they add depth and definition to your embroidery.
Adjust your machine’s stitch width and length to achieve the perfect border thickness. You can find a list of the top-rated hat stitching machines to help you get started.
Don’t forget to experiment with thread tension for different fabric types.
With practice, you’ll master various zigzag variations, opening up a world of creative possibilities.
Your letters will pop, and you’ll feel like a true embroidery artist!
Backstitch for Small Details
While zigzag stitches add flair to your letter borders, let’s focus on the backstitch for those tiny details that’ll make your embroidery pop!
It’s like adding the perfect finishing touch to a masterpiece.
You’ll love how this stitch brings your letters to life, especially for intricate fonts or small text.
With a bit of practice, you’ll be nailing those fine lines and curves in no time!
Techniques for Embroidering Different Letter Styles
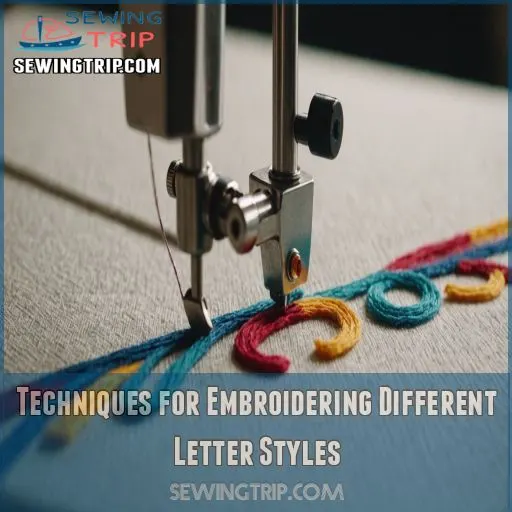
Ready to take your letter embroidery to the next level? Let’s explore techniques for creating stunning block letters, flowing cursive scripts, eye-catching decorative fonts, and even 3D puffy letters that’ll make your projects pop.
Let’s explore techniques for creating stunning block letters, flowing cursive scripts, eye-catching decorative fonts, and even 3D puffy letters that’ll make your projects pop.
Block Letters Embroidery Method
Now that you’ve mastered basic stitches, let’s tackle block letters! These bold beauties are your ticket to eye-catching embroidery. Choose a simple font and adjust your letter spacing for clarity.
Keep stitch density consistent for a polished look.
Pro tip: Use contrasting thread colors to make your letters pop! Remember, practice makes perfect, so don’t be afraid to experiment with different designs and techniques.
Cursive Lettering Techniques
Moving from block letters to cursive embroidery? You’re in for a treat! Cursive fonts add elegance and personality to your projects.
To nail that handwriting style, focus on maintaining a smooth letter flow.
Choose a thin, flexible thread and a smaller needle size for delicate curves.
Practice your stitch control – it’s like learning to write all over again!
With patience, you’ll be creating flowing masterpieces in no time.
Decorative Font Embroidery Tips
Ready to jazz up your embroidery? Let’s explore decorative font tips! Choose fonts that complement your project’s vibe.
Play with thread colors to make letters pop. Adjust letter spacing for balance – not too crowded, not too sparse. Tweak machine settings for each unique font.
Experiment with design placement; off-center can be eye-catching! Download embroidery designs to expand your options.
With practice, you’ll conquer any font style!
Embroidering 3D Puffy Letters
After mastering decorative fonts, let’s pump up your embroidery game with 3D puffy letters! These eye-catching designs add depth and texture to your projects.
Here’s how to create that coveted raised effect:
- Choose a bulky thread or specialty 3D embroidery thread
- Adjust your machine’s tension for looser stitches
- Layer multiple passes of satin stitches for extra volume
Hooping Fabric Correctly for Letter Embroidery
You’re all set to embroider those letters, but don’t forget the important step of hooping your fabric correctly! Proper hooping helps your design stay put and your stitches come out crisp and clean, so let’s explore some key techniques to get it just right.
Choosing the Right Hoop Size
Now that you’ve mastered different letter styles, let’s talk hoops! Picking the right size is like finding Cinderella’s glass slipper – it’s gotta be just right.
Your hoop should comfortably fit your design with a bit of breathing room.
Too small, and you’ll be constantly re-hooping.
Too big, and you’ll struggle with tension.
Proper Fabric Tension in the Hoop
Achieving the right fabric tension in your hoop can make or break your letter embroidery. You’ll want to strike a balance between too loose and too tight.
Here are some key points to keep in mind:
- Think "drum-tight" but not stretched beyond recognition
- Adjust tension gradually, working from the center outward
- Listen for a slight "ping" when tapping the fabric
- Check for wrinkles or puckers before starting
Hooping Techniques for Different Fabrics
With the right tension in your hoop, let’s explore how to handle different fabric types. Each material has its quirks, but don’t worry—you’ll be a hooping pro in no time!
Fabric Type Hooping Technique Stabilizer Choice
tension
Using Sticky Stabilizers for Hooping
How can sticky stabilizers make your letter embroidery a breeze?
These handy helpers keep your fabric taut without hooping, perfect for delicate or hard-to-hoop materials.
Here’s how to use them:
- Peel off the backing and stick to your stabilizer
- Smooth your fabric onto the sticky surface
- Embroider as usual
You’ll feel like a pro, tackling tricky fabrics with ease. Just remember to choose the right type for your project – temporary or permanent.
Troubleshooting Common Letter Embroidery Issues
Even with careful preparation, letter embroidery can sometimes throw you a curveball.
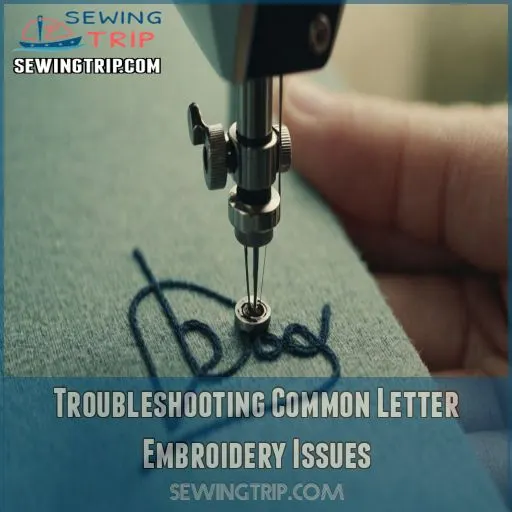
Don’t panic if you encounter issues like puckered fabric or misaligned letters – we’ve solutions to common problems that’ll have your embroidery looking picture-perfect in no time.
Fixing Puckered Fabric
Puckered fabric giving you a headache? You’ve got this! Make sure fabric tension’s just right and not pulled too tight in the hoop.
Choose the right stabilizer and balance stitch density and thread type.
Remember, fabric and embroidery are like dance partners—move in harmony. Try different embroidery design downloads, and celebrate all triumphs with your cozy stitching success!
Dealing With Thread Breakage
Thread breakage can turn your embroidery dreams into a tangled nightmare. Don’t let it unravel your progress!
Check your needle sharpness and thread quality first.
Is your bobbin wound correctly?
Consider your fabric type too.
Adjusting Tension for Clean Stitches
Ever wondered why your embroidered letters look messy? It’s all about tension! You’ll need to fine-tune your machine’s upper and bobbin tension for clean, crisp stitches.
Consider your thread type, needle size, and fabric weight when adjusting.
Correcting Misaligned Letters
Now that you’ve got your tension under control, let’s tackle those pesky misaligned letters.
Don’t panic if your text looks like it’s had one too many! Repositioning is key.
Double-check your hooping – fabric stretch can throw things off. Use guide lines or a grid to keep everything straight.
Enhancing Letter Embroidery With Decorative Elements
Ready to take your letter embroidery to the next level?
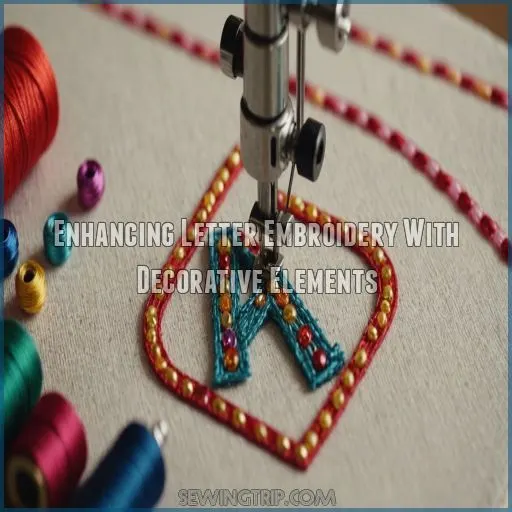
Let’s explore some exciting ways to enhance your designs with appliqué, sequins, beads, multiple thread colors, and textured stitches that’ll make your letters pop off the fabric!
Adding Appliqué to Letters
With appliqué, you can take your letter embroidery to new heights!
Choose fabric that complements your base material and cut out letter shapes.
Position them carefully on your design, then secure with a zigzag or satin stitch around the edges.
This technique adds dimension and texture, perfect for all skill levels.
Incorporating Sequins and Beads
Want to add some sparkle to your letter embroidery?
Incorporating sequins and beads can take your designs from plain to fabulous!
Choose beads that complement your thread colors and fabric.
For a polished look, plan your bead placement carefully.
Secure each sequin or bead with a tiny stitch, making sure they’re snug against the fabric.
You’ll be amazed at how these little embellishments can transform your embroidered letters into eye-catching works of art!
Combining Multiple Thread Colors
Get ready to take your letter embroidery to the next level!
Combining multiple thread colors can create stunning effects that’ll make your project pop.
Try a color gradient for a smooth change, or experiment with thread blending for an ombre look.
Mix and match hues to achieve eye-catching contrasts.
You’ll be amazed at how this simple technique can elevate your embroidery game and lead to countless creative triumphs!
Embellishing Letters With Textured Stitches
Anyone can take their letter embroidery to the next level with textured stitches.
You’ll love how these add depth and character to your designs.
Try combining seed stitches for a speckled look, or use French knots to create a raised effect.
Experiment with bullion stitches for a rope-like texture, or incorporate chain stitches for a delicate, flowing appearance.
The possibilities are endless – let your creativity run wild!
Finishing Touches for Professional-looking Letter Embroidery
You’ve stitched your letters, but don’t call it quits just yet!
These finishing touches will take your embroidery from homemade to pro-level, ensuring your hard work shines in all its glory.
Trimming Excess Threads
Now that you’ve added those dazzling decorative elements, let’s tidy up your masterpiece!
Trimming excess threads is like giving your embroidery a fresh haircut.
You’ll need:
- Sharp embroidery scissors
- Tweezers for stubborn bits
- A steady hand and good lighting
Don’t rush this step – it’s the difference between "homemade" and "wow, where’d you buy that?"
Take your time, snip close to the fabric, and watch your letters pop!
Removing Stabilizer Without Damaging Stitches
| Stabilizer Type | Removal Method | Safety Tips | Best For |
|---|---|---|---|
| Tear-away | Gently pull | Work from edges | Large letters |
| Cut-away | Trim excess | Leave small border | Stretchy fabrics |
| Water-soluble | Rinse in cool water | Pat dry, don’t rub | Delicate designs |
| Heat-away | Apply iron | Test temperature | Synthetic materials |
Stabilizer Type refers to the kind of stabilizer used to support the fabric during embroidery.
Removal Method describes how to remove the stabilizer after embroidery is complete.
Safety Tips are important to follow to avoid damaging the fabric or the embroidery.
Best For indicates the type of fabric or design that the stabilizer is best suited for.
Pressing and Steaming Embroidered Letters
With your embroidered letters looking sharp, it’s time to give them that professional polish.
Grab your iron and let’s work some magic!
Set the heat based on your fabric type – you don’t want to scorch your masterpiece.
Gently press the letters, letting the steam work its wonders.
A few extra seconds can make all the difference in achieving that crisp, store-bought look you’re after.
Adding Backing for Durability
After completing your letter embroidery, don’t forget to add backing for extra durability.
This final touch will protect your hard work and make sure your design lasts.
Here are some key points to keep in mind:
Advanced Letter Embroidery Techniques on Sewing Machines
Ready to take your letter embroidery skills to the next level?
In this section, we’ll explore advanced techniques that’ll transform your sewing machine into a powerhouse for creating stunning text designs, from tackling large-scale projects to mastering tricky fabrics.
Multi-hoop Embroidery for Large Designs
You’ve mastered the basics, but what about those grand designs? Multi-hoop embroidery lets you tackle large-scale letter projects like a pro. It’s all about strategic planning and precise execution.
Break your design into sections, marking hoop placement carefully.
Maintain consistent fabric tension across hoops to avoid misalignment.
Combining Letters With Other Embroidery Elements
Ready to take your letter embroidery to the next level? Let’s jazz up those stitches by combining them with other elements!
Imagine:
- Delicate flowers blooming around your initials
- A whimsical border framing your inspirational quote
- Playful shapes intertwining with each letter
By blending letters with complementary designs, you’ll create personalized embroidery art that truly pops. Don’t be afraid to experiment – your sewing machine’s got your back.
Who knows? You might just stitch up your next signature style!
Creating Monograms on a Sewing Machine
Building on your letter embroidery skills, let’s tackle monograms! These personalized designs add a touch of elegance to any project.
Start by selecting complementary font styles for initials. Experiment with different sizes and arrangements – traditional, stacked, or interlocking.
Play with thread colors to make your monogram pop. Don’t forget to adjust your machine settings for the perfect stitch density.
With practice, you’ll be creating stunning monograms in no time!
Embroidering Letters on Challenging Fabrics
Mastering embroidered letters on tricky fabrics is like reaching a new level in your sewing game.
Tackle denim with a sturdy needle and stabilizer, while leather demands a leather needle and tear-away backing.
For stretchy fabrics, use cut-away stabilizer and a ballpoint needle.
Silk calls for ultra-fine needles and water-soluble stabilizer, while velvet requires a nap-raising cloth.
With these tricks up your sleeve, you’ll conquer even the most challenging materials!
Frequently Asked Questions (FAQs)
Can I do embroidery on a sewing machine?
Yes, you can embroider on your sewing machine!
With the right attachments and techniques, you’ll turn your trusty machine into an embroidery powerhouse.
It’s like giving your sewing buddy superpowers – get ready for creative stitching adventures!
How to do letters on a sewing machine?
You’ll love creating letters on your sewing machine!
Set it to zigzag stitch, lower the feed dogs, and attach a free motion foot.
Then, guide the fabric smoothly as you trace your letter design.
It’s like drawing with thread!
What embroidery stitch is best for letters?
Like Ariadne’s thread, the zigzag stitch guides you through the labyrinth of lettering.
It’s your go-to for crisp, clean letters.
For delicate scripts, try a satin stitch.
What sewing machines can sew letters?
Many modern sewing machines can embroider letters, especially computerized models with built-in fonts.
Embroidery capabilities, adjustable stitch width, and a free-motion foot are features to look for.
Don’t forget, practice makes perfect when stitching those fancy ABCs!
How to embroider letters on stretchy fabric?
To embroider letters on stretchy fabric, use a stabilizer to prevent puckering.
Choose a ballpoint needle and polyester thread.
Lower your machine’s tension and use a stretch stitch.
Practice on scraps first to perfect your technique.
It’s easier than you think!
Can I embroider letters without a hoop?
You can, but you shouldn’t! Hoops keep fabric taut, ensuring crisp letters.
Without one, you’ll face puckering and uneven stitches.
For best results, grab a hoop and watch your embroidery skills soar. It’s worth the extra effort!
Whats the best thread weight for letter embroidery?
For letter embroidery, you’ll want to opt for a 40-weight thread.
It’s the sweet spot – not too thin, not too thick. Think Goldilocks finding the perfect porridge!
This weight provides crisp definition without overwhelming delicate designs.
How to embroider tiny letters accurately?
Ready for tiny letter perfection?
Slow down your machine, use a super-fine needle, and stabilize that fabric like it’s walking a tightrope.
Practice on scraps first, and you’ll be stitching microscopic masterpieces in no time!
Can I combine machine embroidery with hand stitching?
Combining machine embroidery with hand stitching creates unique, personalized designs, like those found in a detailed embroidery tutorial.
Start with machine-embroidered letters, then add hand-stitched embellishments like French knots or running stitches.
This blend of techniques offers endless creative possibilities for your projects.
Conclusion
Coincidentally, you’ve just mastered how to embroider letters on a sewing machine!
With these pro tips, you’re well-equipped to create stunning text on fabric.
Keep experimenting with different fonts, styles, and embellishments.
You’ll soon develop your unique embroidery signature.
Whether you’re personalizing gifts or creating custom designs, your newfound skills will open up a world of creative possibilities and help you explore different stitch variations.
So thread that needle, fire up your machine, and let your imagination run wild!

