This site is supported by our readers. We may earn a commission, at no cost to you, if you purchase through links.
 Don’t let a missing seam ripper ruin your sewing session! You’ve got this.
Grab those trusty scissors and carefully snip along the seam, gently pulling the fabric layers apart.
Tweezers are great for delicate fabrics – just pluck out those stubborn stitches one by one.
safety pins can also work in a pinch, easing open knit or stretchy seams.
And don’t forget those straight pins – use them to loosen threads before removing.
With a little patience and the right tools, you can tackle any sewing project without a seam ripper. Now, let’s get that fabric back in shape and keep those creative juices flowing!
Table Of Contents
- Key Takeaways
- Alternative Tools for Sewing Without a Seam Ripper
- Techniques for Removing Stitches by Hand
- 4 Best Tools for Sewing Without Seam Ripper
- Preventing the Need for Seam Ripping
- DIY Solutions for Creating Seam Ripper Alternatives
- Adapting Sewing Techniques to Minimize Mistakes
- Frequently Asked Questions (FAQs)
- Conclusion
Key Takeaways
- Don’t panic when your seam ripper goes missing – grab those trusty scissors, tweezers, safety pins, and straight pins to tackle any sewing mishap with ease. You’ve got this!
- Embrace your inner sewing MacGyver and get creative with household items like butter knives, screwdrivers, and needle files to craft your own seam ripper alternatives. DIY solutions are a sewer’s best friend!
- Slow down, stay mindful, and use smart sewing techniques like basting stitches, washable markers, and thorough pinning to prevent the need for seam ripping in the first place. An ounce of prevention is worth a pound of cure!
- Keep your sewing tools sharp and well-maintained, and choose the right thread for your project. With a little know-how, you’ll sew like a pro and bid farewell to those dreaded seam-ripping woes for good.
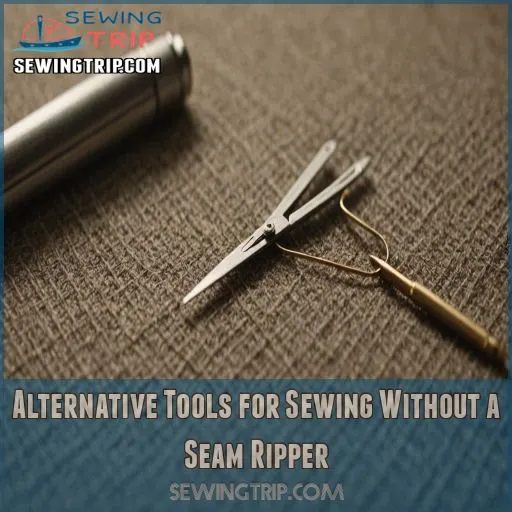
Alternative Tools for Sewing Without a Seam Ripper
When you can’t find your seam ripper and need to fix a sewing mistake, don’t panic—improvisation is key!
Embrace your inner sewing MacGyver by grabbing sharp scissors or even a safety pin to tackle those pesky stitches.
Sharp Scissors for Cutting Threads
When you’ve misplaced your seam ripper, sharp scissors can be your trusty sidekick for cutting threads. With precision akin to a tailor’s needle, these sharp sewing tools snip threads without mercy.
Sharp scissors provide control over every stitch.
Scissors allow you to conquer stubborn threads with ease.
- 淋 Feel the freedom of clean cuts
- ✂️ Embrace control over every stitch
- Be the master of your sewing domain
- Conquer stubborn threads with ease
- Express your creativity without fear
Tweezers for Pulling Out Stitches
Sharp scissors are your trusty sidekick, but let’s not forget tweezers for stitch removal.
They’re the heroes in precise embroidery or stubborn stitches.
With nimble fingers, you’ll grip and pull threads without breaking a sweat.
Ideal for delicate fabric types, tweezers offer finesse and control in your sewing adventures.
Think of them as your magic wand for stitch sorcery!
Safety Pins for Unpicking Seams
Instead of reaching for your trusty seam ripper, try using safety pins to gently unpick seams.
Safety pins come in various sizes to suit different fabrics – opt for smaller pins for delicate materials and larger ones for sturdier textiles.
Carefully slide the pin under the stitches and work it along the seam, lifting the threads as you go.
This technique is especially handy for knits and other stretchy fabrics that can easily tear.
Straight Pins for Loosening Threads
If safety pins aren’t quite cutting it, straight pins can be a nifty alternative.
Choose the right pin size for delicate fabrics and wield them like a pro!
Gently insert them under stubborn threads, using just enough tension to coax the threads.
Pin placement is key—too close and you risk snags.
Use these embroidery tips in your embroidery projects to master this technique!
Fine-tipped Crochet Hooks for Thread Removal
When you’ve accidentally stitched Mount Everest, reach for a fine-tipped crochet hook to work its magic on tough fabrics.
With careful technique, these hooks slide under embroidery threads with ease.
Pay mind to hook sizes; smaller crochet hook types are perfect for delicate fabric types.
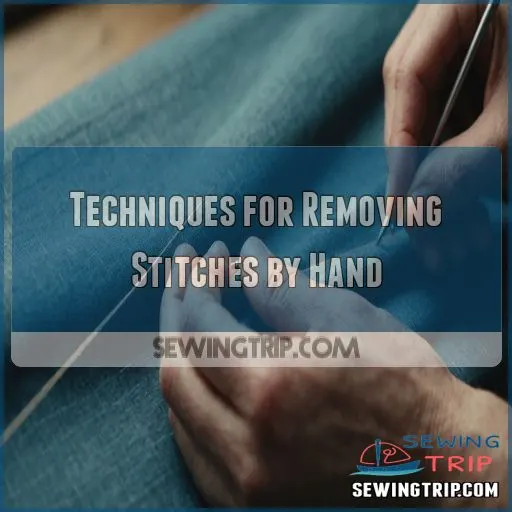
Techniques for Removing Stitches by Hand
Don’t panic if you find yourself without a seam ripper.
You have your hands and a few clever tricks.
With a bit of patience and finesse, you can unpick stitches by hand, turning a potentially challenging task into a minor speed bump.
Gently Pulling Apart Fabric Layers
Gently pulling apart the fabric layers can be an effective technique for removing stitches by hand. This approach works best on loosely woven or lightweight fabrics where the threads aren’t too tightly sewn.
Try:
- Carefully separating the top and bottom fabric pieces
- Using your fingernails to lift and loosen the threads
- Applying slight tension to break weak stitches
- Slowly peeling the layers apart, stitch by stitch
- Avoiding excessive force to prevent damaging the fabric
Cutting Threads at Regular Intervals
You’ve started gently pulling fabric layers apart, and now it’s time for some thread-snipping action.
Cut threads at regular intervals using thread-cutting tools. This strategy helps maintain seam accuracy.
Keep an eye on fabric tension and stitch spacing to avoid snafus. It’s like chopping veggies; precision matters.
Embroidery art history says even the greatest crafters sometimes grabbed scissors to remove embroidery mistakes!
Using Fingernails to Loosen Stitches
Loosen stitches like a pro with just your fingernails!
Make sure your nail care is good; you’ll need strong, tidy nails for the job.
Adjust stitch tension with care, considering fabric types.
For knit fabrics, gently nudge stitches apart, using hand strength and mindful finger size.
You might surprise yourself with how seamlessly those stubborn threads come undone.
Carefully Unraveling Threads
After loosening stitches with your fingernails, taming those pesky threads might seem like wrestling a stubborn spaghetti noodle!
Hold your fabric gently like you’re cradling a newborn kitten, and slowly unravel each thread without damaging the fabric.
This technique is great for various stitch and seam types.
Just remember, patience and steady hands are your best allies here—no strained threads or fabric woes!
Applying Slight Tension to Break Weak Threads
Gently applying slight tension to the fabric can help break weak threads and remove stitches without a seam ripper.
This technique works best on:
- Lightweight fabrics like chiffon or silk
- Loosely woven materials that tear easily
- Threads that have become brittle over time
- Areas with minimal thread density or tension
- Sections where the stitches are starting to unravel
4 Best Tools for Sewing Without Seam Ripper
If you’ve ever been elbow-deep in fabric and realized your seam ripper’s gone AWOL, don’t panic!
We’ve got four trusty tools—Gingher Stork Embroidery Scissors, Kretzer ECO Embroidery Scissors, Featherweight Thread Clippers, and Singer Sewing Kit—that’ll save your project faster than you can say "snip, snip, hooray!
1. Gingher Stork Embroidery Scissors
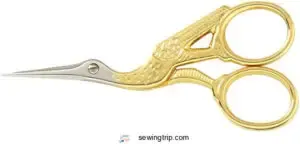
Need precision without a seam ripper? Let me introduce you to Gingher Stork Embroidery Scissors. Known for their superior craftsmanship, these sharp little beauties snip threads like a pro chef slicing through butter.
Designed for the sewing enthusiast craving control, they’ve got a solid build, ensuring you can tackle intricate threads effortlessly. With their charming stork shape and reliable performance, they’re a must-have.
They’re small enough for detail work but sturdy enough to last a lifetime. Every crafter needs a secret weapon, why not make it these scissors?
Best For: The Fiskars 220490-110 Gold Scissors are best for sewers and crafters who need precision cutting for fabrics, threads, and needlework yarn.
- Precision-ground blades for clean cuts.
- Ergonomic handle for comfortable use.
- Durable, forged steel construction.
- May be too small for heavier fabrics.
- Can be more expensive than other scissors.
- The gold-plated handles may be prone to scratches.
2. Kretzer ECO Embroidery Scissors
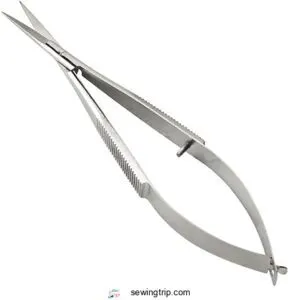
Start a sewing adventure with Kretzer ECO Embroidery Scissors, the sleek tool you never knew you needed for detailed work!
Lightweight and as sharp as a tack, these scissors make trimming threads an absolute breeze.
With curved blades that hug those tight corners, they’re your trusty sidekick for embroidery, quilting, or freeing a trapped finger from thread mishaps.
Though some folks notice inconsistencies, these German-engineered beauties usually hold their ground.
Life’s too short for dull tools—arm yourself with scissors that snip like a boss!
Best For: This is a great choice for sewers who want a comfortable, sharp, and versatile tool for embroidery, quilting, and other sewing tasks.
- Lightweight and comfortable to use
- Sharp, curved blades for precise trimming
- Durable and long-lasting
- Some users report inconsistencies in sharpness and performance
- Price point may be higher than some other options
- Durability may vary, with some users experiencing issues after a short period of time
3. Featherweight Thread Clippers 4 Inch
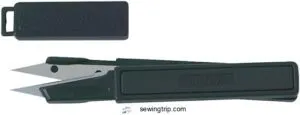
You’ll love the Featherweight Thread Clippers 4 Inch – they’re a real game-changer for sewing without a seam ripper!
These clippers make quick work of snipping threads in even the trickiest spots with their sharp, forged steel blades and lightweight, durable frame.
The protective safety loop cap keeps them secure when not in use.
Plus, the full lifetime warranty means you can count on these trusty tools for years to come.
Whether you’re altering garments or tackling detailed projects, these clippers are a must-have for your sewing arsenal.
Best For: These clippers are ideal for sewers and quilters who need precision and ease of use for snipping threads.
- Sharp blades for precise cutting.
- Lightweight and comfortable to use.
- Durable construction with a full lifetime warranty.
- The size may be too small for some users.
- The packaging can be difficult to open.
- Not TSA-approved due to the sharp blades.
4. Singer Sewing Kit with Tools
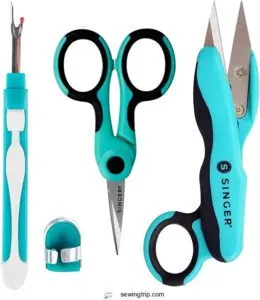
Discover the joy of sewing with the Singer Sewing Kit!
Offering a smooth ride through your sewing projects, this kit includes scissors, thread snips, a seam ripper, and a bonus thimble.
It’s like having a mini sewing savior at your fingertips!
Ergonomically designed for all hand types, the tools boast stainless steel blades for precision.
Everything’s in a teal color, making them easy to spot amid fabric chaos.
They’re perfect for retreats or classes where you want to impress.
Just watch out—some users say the scissors could use a bit of a workout!
Best For: This Singer Sewing Kit is perfect for beginners or those looking for a convenient, portable set of sewing tools like a pre-made sewing kit.
- Includes all the essential tools for basic sewing projects.
- Ergonomically designed for comfort and ease of use.
- The teal color makes the tools easy to find.
- Some users find the scissors to be a bit stiff.
- The seam ripper is large, which might make it difficult for some to use.
- The quality of the product can vary.
Preventing the Need for Seam Ripping
Keeping your sewing projects on track without having to rip out seams is easier than you think.
Basting stitches and using washable markers are a few savvy practices that can save you some fabric fate worse than needle threads!
Basting Stitches for Temporary Seams
So, you’ve mastered using handy tools. Now let basting stitches save your sanity! They’re temporary stitches holding fabric in place, like training wheels for your seams.
Types? Try hand basting with long stitches or use a machine’s basting setting. They easily pull out later, so skip ripping mistakes.
Practical, right? Sewing’s golden parachute without redoing everything!
Using Washable Fabric Markers for Guidelines
Washable fabric markers are a game-changer for sewing!
Choose vibrant colors that contrast with your fabric to easily see your guidelines.
Apply them sparingly, following pattern markings or sketching your own design.
When you’re done, simply dab the markers with a damp cloth to erase them without a trace.
No more seam ripping needed!
Pinning Thoroughly Before Sewing
You’ve got your washable fabric markers, but pinning thoroughly before sewing is your next secret weapon.
Think of it like setting tiny, fabric-safety checkmarks.
Experiment with pin placement — more for slippery fabrics, fewer for sturdy cottons.
Consider pin density around curves and corners, allowing for generous seam allowances.
When you pin mindfully, you’ll sidestep the need for a seam ripper altogether!
Double-checking Pattern Placement Before Stitching
Precise pattern placement often saves the day, sparing you from seam ripping woes. Here’s how to nail it every time:
- Pattern Accuracy: Always match the fabric grain with the pattern markings.
- Fabric Alignment: Lay out material flat without wrinkles.
- Pinning Techniques: Use strategic pins to secure pieces.
- Marking Tools: Utilize chalk or pens for accurate seam allowances.
DIY Solutions for Creating Seam Ripper Alternatives
When you’re in a pickle without a seam ripper, everyday household items can come to the rescue in unexpected ways.
Don’t toss that butter knife or small screwdriver just yet—they might be your next sewing sidekicks!
Sharpening the Tip of a Butter Knife
Sharpen the tip of a humble butter knife to create a makeshift seam ripper to learn more about the parts of a seam ripper!
Carefully run the blade against a sharpening stone or file to hone a fine point.
Just be extra cautious – you don’t want to nick your fingers.
This DIY tool can tackle light sewing tasks in a pinch, but lacks the precision of a dedicated seam ripper.
Modifying a Small Flathead Screwdriver
Ever thought your humble flathead screwdriver could moonlight as a nifty sewing tool?
By modifying it, you’ll have a functional DIY seam ripper.
Here’s how you can make repurposing fun and practical:
- File the tip to create a sharpened edge.
- Smooth rough spots for fabric-friendly work.
- Wrap the handle for better grip and slick sewing.
Creating a Needle File Seam Ripper
So, you’ve tackled the flathead screwdriver, but why not transform a needle file into a seam ripper? It’s as simple as pie! Wrap the handle in tape for grip, and sharpen one end to slice threads like butter. The needle file’s sharpness ensures precise cuts while keeping safety in mind.
Transforming a Needle File
| Step | Action | Tool |
|---|---|---|
| 1 | Wrap handle | Needle file |
| 2 | Sharpen to a point | Needle file |
| 3 | Cut threads | Needle file |
| 4 | Keep safety in mind | Tape |
| 5 | Store carefully | Container |
Repurposing a Letter Opener
A trusty letter opener can moonlight as a seam ripper if used wisely.
Opt for one that’s not too sharp to avoid slicing through fabric—sharp edge dangers abound!
Gently slide its blade under stitches like you’re gliding through butter.
Handle modifications can make it more user-friendly.
Crafting a Wire Loop Tool
Crafting your own wire loop tool is a breeze!
All you need is a sturdy piece of wire, a pair of pliers, and a bit of creativity.
Bend the wire into a small loop, ensuring it’s the perfect size for your sewing needs.
This handy DIY tool can gently remove stitches without damaging delicate fabrics.
Give it a try – it’s a game-changer!
Adapting Sewing Techniques to Minimize Mistakes
Finding yourself relying too much on a seam ripper? Don’t fret; mastering a few savvy sewing techniques helps you sew with confidence and keep those tiny mistakes at bay.
Slow and Steady Stitching Approach
Take a deep breath and channel your inner tortoise—slow stitching wins the race.
Patience and precision in your hand-sewing leads to better stitch quality and fewer mistakes.
Enjoy each moment as you sew, embracing mindfulness.
Let each seam be an opportunity to refine your craft, avoiding the dreaded seam ripper.
Using Contrasting Thread Colors for Visibility
Now that you’re moving steadily, consider how contrasting thread colors can make a world of difference. Here’s how:
- Thread color impact: Spot mistakes quickly, saving fabric!
- Visibility benefits: No more squinting or second-guessing.
Choosing thread pairs: Harmonize with fabric for easy adjustments.
Color coding seams: Stay organized and sew with confidence.
Frequent Pausing to Check Seam Alignment
Don’t just plow through your sewing project – take a moment to pause and check those seams!
Frequent alignment checks will help you catch any wonky stitches or fabric shifting before they become a bigger headache.
Use those marking tools to keep everything lined up perfectly, and pay close attention to stitch tension and fabric stretch.
A little mindfulness goes a long way in sewing success.
Implementing French Seams for Neat Finishes
For minimizing mistakes, French seams are the bee’s knees for neat finishes. They’re perfect for delicate fabrics and offer:
- Increased seam allowance for control
- Integrated structure for durability
- Talented pressing techniques for smooth edges
- Ultimate finishing tips for polish
Seam-wise, you’ll be as snug as a bug in a rug with these clever techniques!
Utilizing Flat-felled Seams for Strength
Flat-felled seams are known for their durability, offering a secure and tidy finish.
Imagine wrapping threads securely like a warm blanket – that’s flat-felling in garment construction!
Start by sewing your fabric’s wrong sides together, trim the seam allowance, then fold and stitch down.
It’s seamless strength with a tidy finish, like a double knot in a friendship bracelet!
Frequently Asked Questions (FAQs)
How to make a homemade seam ripper?
Grab a small craft knife and securely attach it to a pencil handle for grip.
It won’t sing and dance like a seam ripper, but it’ll cut through threads in a pinch!
Just handle with care!
How to remove a patch without a seam ripper?
Did you know nearly 40% of crafters misplace their seam ripper?
Don’t fret! Just gently snip threads using small, sharp scissors while carefully lifting them with tweezers.
It’s like a spa day for your fabric!
How to quickly undo stitching?
Don’t have a seam ripper? No worries! Gently tug on the thread’s end to pull out stitches, or carefully snip them with small scissors.
Take your time – you’ve got this!
How do you hide a seam when sewing?
Over 60% of people prefer hidden seams for that professional finish!
To hide a seam, press it flat, then sew just inside the existing seam line.
Think of it as camouflaging stitches—a stitch in time indeed!
What is the best fabric for beginners?
For beginners venturing into the sewing world, quilting cotton is your trusty steed. It’s steady, easy to handle, and forgiving.
Cotton spandex jersey’s got your back too, adding a stretchy twist without the sewing gymnastics (Source).
How can I fix uneven stitching?
Uneven stitching got you in stitches? Try gently removing problem areas, then re-stitch slowly, ensuring fabric feeds evenly. Adjust tension and use a steady rhythm. Practice makes perfect—soon you’ll sew like a pro, no strings attached!
What are common sewing machine problems?
Yikes, sewing machine troubles can really throw a wrench in your plans! Common issues include thread bunching, skipped stitches, and tension troubles.
But don’t sweat it – with a little troubleshooting, you’ll have that machine humming like a well-oiled machine in no time.
How to maintain sharp sewing tools?
Keep sewing tools sharp by regularly honing blades on a sharpening stone.
Clean lint and threads using a soft cloth.
Don’t try cutting stubborn materials.
What types of thread are best for sewing?
For the best sewing results, use threads like polyester for versatility, cotton for natural fibers, and silk for luxurious projects.
They won’t leave you hanging, they hold everything together, transforming chaos into a seamless symphony!
Choose wisely, thread smartly!
Conclusion
Just like a superhero without a cape, you can master sewing without a seam ripper using these creative strategies.
Think of technique tweaks and improvised tools, such as a sharpened butter knife, as your secret weapons.
With a toolkit of scissors, tweezers, and pins in hand, you’re ready to handle any sewing blunder.
Happy sewing!

