This site is supported by our readers. We may earn a commission, at no cost to you, if you purchase through links.
 Learning how to embroider with a sewing machine isn’t rocket science, but it does require the right setup.
First, you’ll need to lower your feed dogs and attach an embroidery or darning foot. Hoop your fabric with stabilizer underneath to prevent puckering.
Choose embroidery thread and adjust your tension settings. Start with simple designs like straight lines or basic shapes.
Move your hoop slowly and steadily while the machine stitches. Think of it like drawing with thread – you’re the artist guiding the canvas.
Don’t worry if your first attempts look wonky; even seasoned embroiderers had shaky starts. The secret lies in mastering tension adjustments and fabric handling techniques, which will help you achieve better results with practice and patience.
Table Of Contents
- Key Takeaways
- Essential Supplies for Embroidering With a Sewing Machine
- Preparing Your Sewing Machine for Embroidery
- Choosing and Transferring Embroidery Designs
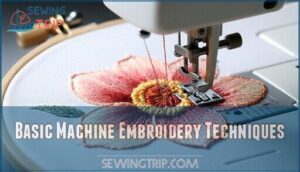
- Basic Machine Embroidery Techniques
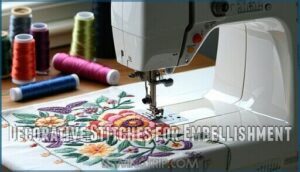
- Decorative Stitches for Embellishment
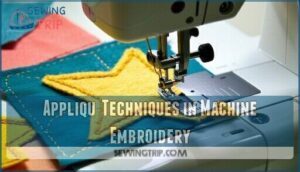
- Appliqué Techniques in Machine Embroidery
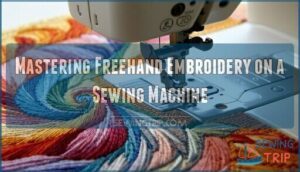
- Mastering Freehand Embroidery on a Sewing Machine
- Advanced Techniques for Machine Embroidery
- Troubleshooting Common Machine Embroidery Issues
- Frequently Asked Questions (FAQs)
- Conclusion
Key Takeaways
- You’ll need to prepare your machine by switching to a free motion or darning foot, lowering the feed dogs, and adjusting thread tension between 2-6 for smooth stitching results.
- Start with simple designs like straight lines or basic shapes, using an embroidery hoop with stabilizer underneath to prevent fabric puckering and distortion.
- Master essential techniques including straight stitch outlining for structure, satin stitch fills for solid areas, and free motion embroidery where you guide the fabric like drawing with thread.
- Practice proper troubleshooting skills by checking needle quality, adjusting tension settings, and using appropriate stabilizers to prevent common issues like thread breakage and fabric puckering.
Essential Supplies for Embroidering With a Sewing Machine
You’ll need a few key supplies to transform your regular sewing machine into an embroidery powerhouse, and the good news is you probably already own some of them.
Getting the right tools from the start will save you frustration later and help you create beautiful embroidered pieces that’ll make your friends wonder if you secretly attended art school.
Embroidery Hoops and Stabilizers
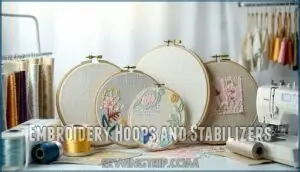
Embroidery hoops and stabilizers work like a dream team for machine embroidery success.
Your embroidery hoop holds fabric tight while the stabilizer prevents fabric distortion during stitching.
Think of them as your project’s best friends—they’ve got your back when things get tricky.
- Hoop tension keeps fabric perfectly taut without overstretching
- Stabilizer types include tear-away, cut-away, and water-soluble options
- Hooping techniques guarantee even fabric placement every time
- Stabilizer placement covers the entire design area completely
- Stabilizer for embroidery matches your fabric weight and project needs
Master these basics, and you’ll stitch like a pro!
You can purchase a quality embroidery hoop online.
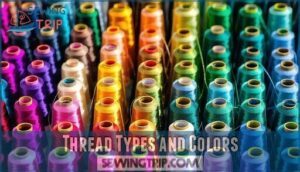
Thread Types and Colors
With your hoop and stabilizer ready, let’s talk about the rainbow of possibilities waiting in your thread collection.
Thread Fiber Choices matter more than you’d think – polyester thread offers durability and vibrant colors, while rayon thread brings that silky sheen that makes designs pop.
Metallic thread adds sparkle but requires patience since it can be temperamental.
Your Color Palette should complement your fabric, and don’t overlook thread color charts for perfect matches.
Thread Weight affects texture – lighter threads create delicate details, while heavier ones make bold statements.
Thread Blending opens creative doors you never knew existed.
For precise color matching, consider using a detailed thread chart that offers PMS color numbers.
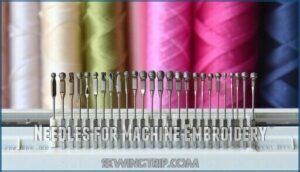
Needles for Machine Embroidery
Why do some embroidery projects look flawless while others pucker? Your needle selection makes all the difference! The right embroidery needles transform your sewing machine embroidery from frustrating to fantastic.
Here’s your needle game plan:
- Needle Sizes: Use 75/11 for delicate fabrics, 90/14 for medium-weight materials
- Needle Types: Choose ballpoint for stretchy knits, sharp for crisp wovens
- Needle Maintenance: Replace after every project to prevent snags and skipped stitches.
Consider browsing specialized embroidery options for enhanced performance.
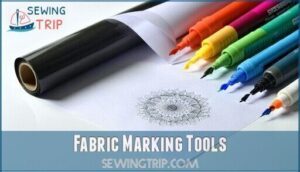
Fabric Marking Tools
After selecting the perfect needles, you’ll need reliable fabric marking tools to transfer your designs accurately.
Carbon paper creates crisp lines for precise design placement, while heat transfer methods work great for complex patterns.
Ink markers with disappearing formulas are perfect for tracing techniques on delicate fabrics.
Test each tool on scraps first—your embroidery success depends on clear, accurate markings that won’t show through your finished work.
Preparing Your Sewing Machine for Embroidery
Getting your sewing machine ready for embroidery is like prepping your car for a road trip – you’ll want to make a few adjustments before you hit the creative highway.
You’ll need to switch out your regular presser foot, lower those feed dogs, tweak your thread tension, and get that embroidery hoop attached properly.
This process involves several key steps to ensure your machine is embroidery ready.
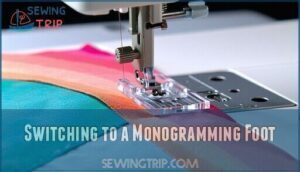
Switching to a Monogramming Foot
When switching to your monogramming foot, you’re upgrading to embroidery’s secret weapon. This specialized foot attachment transforms your regular sewing machine into an embroidery powerhouse. The clear toe gives you perfect design alignment, while the smaller opening creates precise stitches every time. It’s like having X-ray vision for your embroidery projects!
Here’s what makes the monogramming foot essential for sewing machine embroidery:
- Crystal-clear visibility – See exactly where each stitch lands
- Precise stitch selection – Perfect for detailed embroidery tutorial work
- Smooth fabric gliding – No more fabric snags or pulls
- Professional results – Your embroidery with sewing machine looks store-bought
For slippery fabrics, consider using a roller foot option for smoother movement.
monogramming-foot-guide
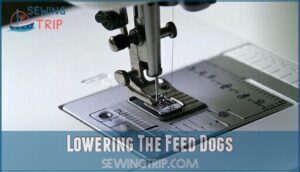
Lowering The Feed Dogs
After switching to your monogramming foot, you’ll need to lower those feed dogs to gain true creative stitching freedom.
Most sewing machines have a simple lever or dial that drops the feed dogs below the needle plate.
Some older machines require a darning plate instead.
This change gives you complete fabric movement control, letting you guide your work in any direction for stunning free motion embroidery and precise stitch control.
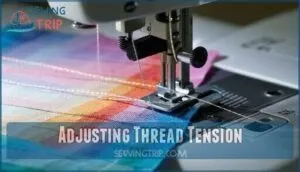
Adjusting Thread Tension
Getting your thread tension right is like finding the sweet spot on a guitar—too tight or loose, and everything sounds off.
Start with your tension dial between 4-5, then test on scrap fabric. If your top thread pulls the bobbin thread to the surface, loosen that dial.
When bobbin tension creates loops on top, you’ll need minor adjustments to the bobbin case screw. Perfect stitch quality happens when both threads meet in the fabric’s center.
Tension testing prevents embroidery headaches later, so don’t skip this essential step in your sewing machine embroidery setup, to achieve perfect stitch quality.
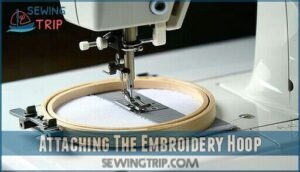
Attaching The Embroidery Hoop
Once your thread tension’s dialed in, it’s time to master hoop placement on your sewing machine embroidery setup.
Choose the right hoop size for your design, then practice proper hooping techniques for ideal fabric tension.
Secure clamping prevents shifting while avoiding puckering keeps your work smooth.
Position your embroidery hoop under the needle, ensuring it sits flat against the machine’s arm for seamless stitching.
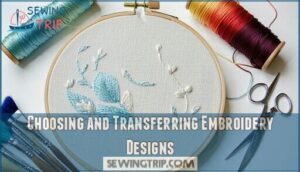
Choosing and Transferring Embroidery Designs
Now that your machine’s ready to go, it’s time to pick a design that won’t make you want to throw your hoop across the room.
You’ll discover that getting your chosen pattern onto fabric is easier than you think, whether you’re using carbon paper, heat transfer sheets, or those magical disappearing ink markers that vanish like your free time once you start embroidering.
Simple Designs for Beginners
Picking the right design makes all the difference when you’re starting embroidery with sewing machine.
Begin with these foolproof options that’ll boost your confidence:
- Simple shapes like hearts, stars, and circles for mastering basic stitching
- Easy lettering using block fonts to practice consistent movement
- Simple outlines of flowers or leaves without complex fill patterns
- Basic geometric patterns that forgive small mistakes
Beginner embroidery kits often include these design selection favorites.
Using Carbon Paper for Pattern Transfer
Carbon paper’s your secret weapon for flawless embroidery pattern transfers.
Choose dressmaker’s carbon paper types over regular office versions—they won’t stain your fabric permanently.
Place your embroidery pattern on top, carbon paper beneath, then fabric at the bottom. Trace firmly with a blunt tool for tracing accuracy.
The design placement stays crisp and clean. Secure your pattern with tape to prevent shifting.
After transferring, brush away any cleaning residue gently. These fabric marking tools make embroidery transfers foolproof every time.
Applying Heat Transfer Paper Techniques
Heat transfer paper transforms your embroidery design transfer process into a breeze.
Start with paper selection – choose quality transfer paper that won’t leave residue. For design placement, position your pattern carefully on fabric before applying heat.
Use steady heat application with your iron, holding for 20 seconds without moving.
Check design adhesion by lifting corners gently.
Troubleshooting issues? Make certain your iron’s completely dry and steam-free for perfect embroidery transfers.
Working With Disappearing Ink Markers
When heat transfer paper isn’t your cup of tea, disappearing ink markers become your best friend for machine embroidery. These magical tools make tracing designs onto fabric a breeze.
Here’s what you need to know about disappearing ink markers for embroidery with sewing machine projects:
- Ink marker types: Water-soluble vanishes with moisture, air-soluble fades naturally
- Tracing designs: Light pressure prevents fabric damage while marking
- Design placement: Mark key points first, then connect the dots
- Marker application: Test on scraps before marking your final piece
- Ink removal methods: Gentle dabbing beats aggressive scrubbing every time
Basic Machine Embroidery Techniques
Now that you’ve got your design transferred and your machine ready, it’s time to learn the core stitching techniques that’ll turn your fabric into beautiful embroidered art.
You’ll master four essential methods – straight stitch outlining, satin stitch fills, free motion embroidery, and adjusting your stitch settings – that work together like a painter’s brushstrokes to create stunning designs.
Straight Stitch Outlining
Straight stitch serves as your design’s backbone, defining shapes and adding structure to every embroidery project.
Start by outlining your transferred pattern with consistent, even stitches. Focus on stitch consistency by maintaining steady fabric movement and proper tension control.
Your sewing machine’s straight stitch creates clean lines that frame your design beautifully. Fabric stability improves with each precise outline you complete.
Satin Stitch Fill for Solid Areas
After outlining your design, it’s time to fill those empty spaces with rich, polished satin stitch. This technique creates smooth, solid areas that make your embroidery pop. Stitch density and stitch direction are your best friends here—they’ll transform basic shapes into professional-looking masterpieces.
Understanding the ideal satin stitch density is key to avoiding fabric snags.
- Design placement matters: position your hoop so you can move smoothly across the fill area
- Edge finishing keeps borders crisp by overlapping slightly with your outline stitches
- Fill variations add depth by changing stitch angles within the same shape
Free Motion Embroidery With Darning Foot
You’ve mastered solid fills, now let’s discover free motion embroidery with darning foot! This technique gives you complete design control and fabric movement freedom.
Lower those feed dogs and guide your fabric like you’re drawing with thread. Your thread choice matters here – experiment with different weights for varied effects.
- Practice smooth, consistent fabric movement for even stitches
- Control stitch direction by moving fabric in all directions
- Master practice techniques on scrap fabric first
Experimenting With Stitch Length and Thread Weight
By adjusting stitch length and thread weight, you’ll discover how these settings transform your embroidery’s personality.
Shorter stitches create refined detail, while longer ones give flowing movement.
Thread weight choices dramatically affect texture—heavier threads add boldness, lighter ones provide delicate touches.
| Stitch Element | Light Effect | Bold Effect |
|---|---|---|
| Stitch Length | Short (precise details) | Long (flowing lines) |
| Thread Weight | 40wt (delicate) | 12wt (dramatic) |
| Stitch Density | Sparse (airy) | Dense (solid) |
Experimenting with thread combinations creates unique textures and depth in your sewing machine embroidery techniques.
These embroidery stitches become your artistic vocabulary—mix and match until you find your signature style.
Decorative Stitches for Embellishment
Your sewing machine’s decorative stitches are like having a whole art supply box built right in, ready to transform plain fabric into something that’ll make your friends ask where you bought it.
You’ll discover how to mix and match these built-in patterns, adjust settings for perfect results, and combine different stitches to create designs that look way more complicated than they actually are, using your machine’s capabilities to produce perfect results.
Utilizing Built-in Decorative Stitches
Your sewing machine’s built-in decorative stitches are like having a professional embroidery toolkit at your fingertips.
Start with simple stitch selection – flowers or geometric patterns work great for beginners.
Adjust stitch width and stitch length to customize each design.
Smart design placement and quality thread choices transform basic sewing machine embroidery techniques into stunning embroidery machine stitches that’ll impress everyone.
Creating Texture With Stitch Variations
Texture magic happens when you play with stitch density and thread weight variations.
Your sewing machine embroidery transforms from flat to fabulous through clever stitch direction changes and layering stitches.
Here’s how texture effects captivate viewers:
- Dense stitches create bold, raised surfaces that beg to be touched
- Light stitch density whispers delicate elegance across your fabric
- Varying thread weight adds dramatic dimension and visual interest
- Strategic texture combinations make ordinary designs extraordinary
- Stitch variations turn simple embroidery stitches into masterpieces
Combining Stitches for Complex Designs
Now you’re ready to create stunning masterpieces by combining different embroidery stitches.
Layering Stitches transforms simple designs into works of art with Dimensional Effects.
Start with these proven stitch combinations:
- Thread Painting over satin stitches for realistic textures
- Incorporating Beads between decorative stitches for sparkle
- Specialty Threads mixed with standard ones for contrast
- Outline stitches combined with fill patterns for definition
Adjusting Machine Settings for Optimal Results
Perfect embroidery requires fine-tuning your machine like a concert pianist adjusts their instrument.
Start with Needle Choice – match size to fabric weight. Set Stitch Length shorter for dense fills, longer for outlines. Adjust Stitch Width based on design detail. Thread Tension should feel balanced, and Feed Dog Control stays lowered for free motion work.
| Setting | Light Fabrics | Medium Fabrics | Heavy Fabrics |
|---|---|---|---|
| Tension Adjustment | 2-3 | 3-4 | 4-5 |
| Stitch Length | 1.5-2mm | 2-2.5mm | 2.5-3mm |
| Stitch Width | 2-4mm | 3-5mm | 4-6mm |
| Needle Size | 70/10-80/12 | 90/14 | 100/16-110/18 |
| Feed Dog | Lowered | Lowered | Lowered |
Appliqué Techniques in Machine Embroidery
Appliqué turns your embroidery projects into colorful masterpieces by layering fabric pieces on top of your base material, like adding patches to your favorite jacket.
You’ll cut out shapes from different fabrics, secure them with tight zigzag stitches, and then add embroidered details to create designs that really pop off the fabric.
Preparing Fabric Pieces for Appliqué
Your appliqué success hinges on proper fabric preparation. Start with tightly woven fabrics like cotton or batik to minimize fraying. Apply fusible web evenly across your fabric pieces, then iron with steady pressure for secure adhesion.
- Fabric Stabilization: Choose dense weaves that won’t unravel easily
- Adhesive Application: Spread fusible web smoothly without gaps
- Cutting Techniques: Use sharp scissors for clean, precise edges
- Edge Finishing: Trim closely to prevent bulk under stitching
Securing Appliqué With Zigzag Stitches
Once your appliqué placement looks perfect, it’s time to lock those edges down! The zigzag stitch becomes your best friend here—think of it as a tiny fence protecting your fabric pieces.
Adjust your zigzag width based on your design’s needs, while stitch density determines how tight that "fence" gets. Smart thread selection makes all the difference for sewing machine embroidery success.
Your embroidery machine will handle securing edges beautifully with these embroidery techniques.
Repeat washing projects
Combining Appliqué With Embroidery
When you’re ready to elevate your applique embroidery, combining these techniques creates stunning dimensional artwork.
Your sewing machine embroidery becomes a canvas for creative embellishments and design integration.
Here’s your roadmap to success:
- Plan appliqué placement before stitching
- Select contrasting appliqué fabric choices for impact
- Master stitching appliqué with zigzag edges
- Add embroidery techniques for finishing touches
Your embroidery machine will love this creative challenge!
Experimenting With Fabric Textures
Like a painter mixing colors on canvas, you’ll discover endless possibilities when experimenting with fabric textures in appliqué embroidery.
Different fabric weights create stunning visual depth—try pairing lightweight organza with sturdy cotton for dramatic contrast.
| Fabric Type | Texture Effect | Best Stitch Density | Surface Quality | Recommended Thread |
|---|---|---|---|---|
| Organza | Sheer, delicate | Light, open patterns | Translucent layers | Rayon or cotton |
| Cotton canvas | Stable, structured | Dense, close stitches | Flat, professional | Polyester or cotton |
| Wool batting | Plush, dimensional | Medium density | Raised, textured | Hemp or cotton |
| Silk dupioni | Lustrous, crisp | Varied stitch spacing | Elegant sheen | Metallic or rayon |
| Linen blend | Natural, rustic | Moderate coverage | Organic texture | Cotton or hemp |
Your fabric choices dramatically affect embroidery outcomes. Heavier fabrics like cotton canvas provide stability for dense stitch patterns, while lighter materials need careful fabric manipulation to prevent puckering. This is crucial for achieving the desired visual effect and ensuring the quality of the embroidery. By choosing the right fabric and applying the appropriate stitching technique, you can create professional-looking results with elegant texture and dimensional depth.
Mastering Freehand Embroidery on a Sewing Machine
Freehand embroidery lets you become the artist behind the needle, creating unique designs that flow naturally from your imagination.
You’ll master the art of moving fabric freely under the needle, turning your sewing machine into a paintbrush that stitches beautiful, one-of-a-kind patterns.
Setting Up for Freehand Embroidery
Beyond appliqué, freehand embroidery opens up endless creative possibilities.
Start your sewing machine setup by attaching the free motion foot and adjusting the Feed Dog Position to lowered.
Check your Tension Settings and select the right Needle Choice for your fabric.
Practice on Scrap Fabric Testing first—it saves headaches later!
Your Foot Attachment and embroidery setup determine success:
- Lower feed dogs completely for smooth fabric movement
- Adjust tension between 2-4 for ideal thread flow
- Test stitch quality on fabric scraps before starting
Practicing Basic Freehand Motions
Once you’ve got your free motion foot installed, it’s time to get started with free motion practice. Start with basic circles—they’re perfect for mastering Line Control and Speed Variation.
Your freehand embroidery foot lets you create smooth Curved Lines without fighting the machine.
Practice these fundamentals:
Focus on Direction Changes and Filling Shapes with consistent movement. Free motion embroidery feels awkward at first, but steady practice builds muscle memory for freehand embroidery success.
Creating Intricate Designs With Freehand Techniques
Your creativity becomes limitless with Freehand Motion and Design Freedom in free motion embroidery.
Master Fabric Control while experimenting with Stitch Direction for stunning Texture Creation.
Here’s how to create intricate freehand embroidery designs:
- Layer different stitch densities to build dimensional flowers and leaves
- Vary your speed and direction to create realistic feather or fur textures
- Combine curved and angular movements for geometric patterns with organic flow
Troubleshooting Common Freehand Embroidery Issues
When fabric puckering ruins your free motion embroidery, don’t panic! Tension problems and thread breakage happen to everyone.
Check your free motion foot attachment and adjust thread tension first. Design distortion usually means your fabric isn’t secure enough.
For stitch consistency, slow down and keep steady hand movements. These embroidery mistakes are totally fixable with practice on your regular sewing machine.
Advanced Techniques for Machine Embroidery
Now that you’ve mastered the basics, it’s time to take your machine embroidery skills to the next level with techniques that’ll make your friends wonder if you secretly went to art school.
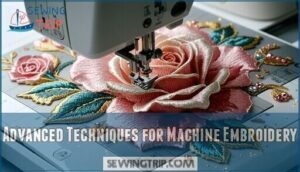
You’ll learn how to create stunning three-dimensional effects, add sparkly beads and sequins, paint realistic textures with thread, and work with fancy metallic threads that catch the light beautifully, using techniques that include realistic textures.
Layering Stitches for Dimensional Effects
Now that you’ve mastered freehand embroidery, stitch layering transforms flat designs into eye-catching dimensional effects. This technique creates depth through strategic thread placement, making your 3D embroidery projects truly spectacular.
Layering techniques involve building stitches in multiple passes, creating raised embroidery that practically jumps off the fabric. Start with your base layer, then add successive passes with varying thread weights and colors.
- Use thread painting methods to blend colors naturally across layers
- Apply shading techniques by gradually shifting from light to dark threads
- Create textured embroidery by varying stitch directions between layers
- Build height with thicker threads on top layers for dramatic raised effects
- Experiment with different tensions to achieve unique dimensional textures
Incorporating Beads and Sequins
Adding beads and sequins transforms ordinary machine embroidery into dazzling artwork.
Use a beading foot for smooth sequin attachment and precise bead placement. Choose sturdy thread and appropriate needle choice for your embroidery machine.
Plan design integration carefully—scattered sequins catch light beautifully, while clustered beads create texture. These embroidery techniques require patience, but the payoff is stunning.
Your embroidery designs will literally shine with these eye-catching accents!
Creating Realistic Textures With Thread Painting
Thread painting transforms ordinary fabric into stunning artwork through strategic blending colors and layering threads. This advanced technique mimics realistic textures using your embroidery machine.
Transform your fabric into a masterpiece—thread painting turns your embroidery machine into an artist’s brush.
Master this enchanting art with these essentials:
- Directional stitching creates natural flow and movement
- Thread weight variations add dimensional depth
- Texture variations through stitch density changes
- Layering threads builds rich, complex surfaces
Practice makes perfect! To achieve the best results, consider choosing the right needles for your project.
Experimenting With Metallic and Specialty Threads
Now you’re ready to jazz up your embroidery with metallic and specialty threads!
These shimmery beauties create stunning effects but come with Metallic Thread Challenges.
Use a topstitch needle for Needle and Thread Pairing, slow your machine speed, and make Thread Tension Adjustments.
The Specialty Thread Effects are worth the extra effort—your projects will sparkle!
Troubleshooting Common Machine Embroidery Issues
Even the most careful embroiderers run into snags like tangled threads or fabric that looks more wrinkled than a forgotten shirt.
Don’t worry though—most machine embroidery problems have simple fixes that’ll get you back to creating beautiful designs in no time.
Fixing Thread Tension Problems
When your embroidery machine throws a thread tension tantrum, don’t panic! Uneven stitches and birdnesting happen when your sewing machine’s tension isn’t balanced.
Start with tension adjustment on the dial, testing different settings on scrap fabric until you find the sweet spot.
Here’s your troubleshooting checklist:
- Check your thread type – some threads need different tension settings
- Examine needle problems – dull or wrong-sized needles cause tension issues
- Verify machine calibration – your embroidery techniques depend on proper setup
Addressing Fabric Puckering
Nothing ruins beautiful embroidery like fabric puckering creeping up on your project.
Here’s your game plan to keep things smooth:
- Adjust hoop tension – snug but not strangling your fabric
- Choose proper stabilizer for your fabric weight and design placement
- Reduce stitch density in your embroidery machine settings to prevent bunching
Smart fabric preparation beats fixing puckers later.
Insufficient stabilization often leads to fabric puckering issues.
Preventing and Resolving Thread Breakage
Nothing’s more frustrating than thread breakage mid-project!
First, check your needle quality—dull needles cause snags.
Adjust thread tension and bobbin tension to match your thread type.
Metallic threads need special needles for embroidery.
Keep up with machine maintenance by cleaning lint buildup.
Slow down your stitching speed—racing causes breaks.
These fixes will keep your threads intact!
Dealing With Design Distortion
Despite your best efforts, design distortion can still creep up on you.
Start with proper hooping techniques – your fabric should be taut but not stretched.
Choose the right stabilizer selection for your material, and don’t forget fabric preparation.
Adjust stitch density and tension adjustment on your embroidery machine to achieve perfect stitch consistency across all embroidery designs.
Frequently Asked Questions (FAQs)
What is the best sewing & embroidery machine?
Looking for the ultimate combo machine?
You’ll want Brother SE1900 or Janome Memory Craft 500E—they’re reliable workhorses that handle both regular sewing and intricate embroidery without breaking the bank or your patience.
How to prepare the sewing machine for embroidery?
Getting your ducks in a row means installing a free motion foot, lowering those feed dogs, and threading with embroidery thread.
Attach your hoop securely and adjust tension between 2-6 for smooth stitching success.
What is an embroidery machine?
An embroidery machine is a specialized sewing device that automatically stitches intricate designs onto fabric.
You’ll load digital patterns, and it’ll precisely create detailed artwork, monograms, or decorative elements without constant manual guidance, making it a valuable tool for automatically creating complex designs.
Which embroidery machine should I buy?
Forty-three percent of embroidery enthusiasts buy the wrong machine first.
You’ll want a combination sewing/embroidery machine with at least 5×7-inch hoop size, built-in designs, automatic threading, and good customer support for your skill level.
Can I turn my sewing machine into an embroidery machine?
You can’t fully convert your regular sewing machine into an embroidery machine.
But you can do basic embroidery by using a free-motion foot, lowering feed dogs, and manually guiding fabric through hoops.
Is embroidery hard on a sewing machine?
Machine embroidery isn’t particularly hard, but it requires patience and practice.
You’ll need proper setup, stabilizers, and tension adjustments.
Start with simple designs, expect some trial and error, and you’ll master it quickly.
How to do freehand embroidery on a sewing machine?
Drop your feed dogs, attach a darning foot, and you’re ready to "draw" with thread.
Move fabric smoothly while stitching, keeping hands steady near the needle for creative control and beautiful results.
Can a beginner use an embroidery machine?
You’ll master embroidery machines faster than you’d think.
Start with simple designs, use proper stabilizers, and don’t rush.
These user-friendly machines practically hold your hand through every stitch—perfect for nervous beginners, making them perfect for learning.
Can you embroider with a regular sewing machine?
Yes, you can embroider with a regular sewing machine.
You’ll need a free motion foot, embroidery thread, and stabilizer.
Drop the feed dogs, use an embroidery hoop, and practice moving fabric smoothly for beautiful results, with beautiful being the outcome of following these steps.
Can you sew with a regular sewing machine?
Like a trusty telegraph operator tapping out messages, you can definitely sew with a regular sewing machine.
It’ll handle basic stitching, hemming, and repairs beautifully.
Just thread it up and you’re ready to create.
Conclusion
You’ve discovered the absolutely mind-blowing world of machine embroidery that’ll transform every piece of fabric you touch.
Learning how to embroider with a sewing machine takes practice, but you’re now equipped with essential techniques and troubleshooting skills.
Start with simple designs, experiment with different threads, and don’t rush the process.
Remember, every professional embroiderer started exactly where you’re now. Keep practicing, stay patient, and watch your skills flourish beautifully.
- https://www.madeirausa.com/services/troubleshooting/adjusting-thread-tensions/
- https://buttonsandpaint.blogspot.com/2013/07/embroidery-mixed-media-course.html
- https://www.gathered.how/needlework/embroidery/thread-painting
- https://www.ehow.com/info_8746378_stabilizer-sewing.html
- https://www.thesewingdirectory.co.uk/free-motion-foot/

