This site is supported by our readers. We may earn a commission, at no cost to you, if you purchase through links.
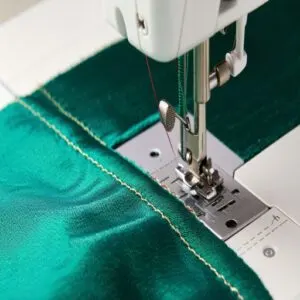
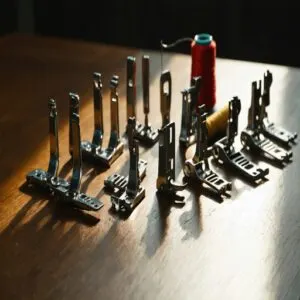 Sewing machine feet are like tiny superheroes, each designed to handle specific tasks and make your stitching life easier.
You’ve got your straight stitch foot for clean seams and your zigzag foot for flexible stitching or patching up worn edges.
Need sharp hems? The hemmer foot’s got you covered. For zippers, the standard zipper foot hugs in close, while an invisible zipper foot keeps things sleek.
Working with bulky fabrics? The walking foot guarantees no slipping or tugging. Always match feet to your machine’s shank type (low or high), and consult your manual—because not all sewing machine feet play nice!
Table Of Contents
Key Takeaways
- You can make sewing easier by matching the presser foot to the task, like using a zipper foot for closures or a hemmer foot for neat edges.
- Always check compatibility between your sewing machine and the presser foot by confirming shank height and attachment type.
- Specialized feet like walking feet and invisible zipper feet simplify tricky techniques, giving your projects a more polished look.
- Keep basic presser feet like the zigzag, straight stitch, and buttonhole foot handy—they’re versatile and fit most everyday sewing needs.
Understanding Presser Feet
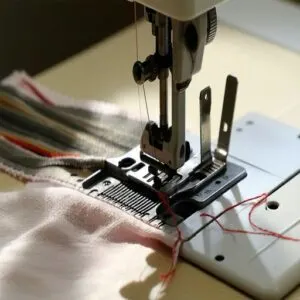
You’ve probably noticed that little metal piece holding your fabric steady as you sew—that’s the presser foot, and it’s more important than it looks.
Understanding how different presser feet work can make sewing easier, faster, and a lot more fun.
Definition and Function
If you’ve ever felt like your sewing projects had a mind of their own, chances are your presser foot wasn’t pulling its weight.
Presser feet are the unsung heroes of sewing machines, working hand-in-hand with the feed dogs to keep fabric under control.
They guarantee smooth fabric flow, consistent stitches, and proper foot pressure to help you nail even the trickiest techniques.
Each presser foot is a purpose-built design, crafted to specific tasks like zippers, quilting, or hems.
Choosing the right sewing foot makes fabric control a breeze and frustration history.
Types and Compatibility
Mastering sewing machine foot types can feel like assembling IKEA furniture—until you know the basics! Compatibility is key.
- Snap-on or Screw-on? Modern machines often use snap-on feet for quick swaps, while older models lean on trusty screw-ons.
- Shank height matters. Low shank? High shank? Know your machine’s height for better matches.
- "Universal" is tricky. Presser foot types labeled "universal" don’t always fit every machine snugly. Check specifics.
Tips to master compatibility:
- Match foot to shank type.
- Confirm with your machine manual.
- Test specialty foot types.
Standard Sewing Feet
You’ll use standard sewing feet like the straight stitch foot, zigzag foot, and hemmer foot for most of your basic sewing projects.
They’re dependable, easy to work with, and perfect for creating clean, professional-looking stitches without breaking a sweat.
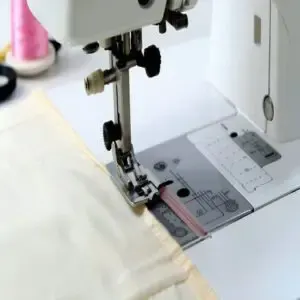
Straight Stitch Foot
Think of the straight stitch foot as your stitching BFF—it’s all about keeping things steady and smooth.
This all-purpose presser foot works wonders for fabrics ranging from delicate chiffon to hearty denim, giving you ultimate fabric guidance and sewing precision.
It’s perfect for straight stitches, ensuring high-quality stitch quality and thread control.
Most are snap-on presser feet, making swaps a breeze.
To achieve professional results, consider using a sewing machine feet guide for detailed information on various presser feet types.
Whether you’re piecing together a quilt or hemming a shirt, this stitching foot handles it all with reliable ease.
Zigzag Foot
While the straight stitch foot gets you neat, precise lines, the zigzag foot opens up a world of possibilities.
The zigzag foot is perfect for zigzag stitching, this zigzag presser foot handles side-to-side needle movements like a pro.
Whether you’re repairing a tear, sewing buttonholes, or whipping up decorative edges, it’s your go-to, with the added benefit of flawless fabric handling and stitch regulation when properly adjusted.
Snap-on presser feet like this keep sewing precision easy and accessible.
Hemmer Foot
The hemmer foot is your secret weapon for professional-looking hems without breaking a sweat.
Using it eliminates wobbly edges and frustration, especially with delicate fabrics. Understanding sewing machine feet is essential for achieving flawless hems.
- Experiment with hemmer foot types like narrow rolled hem or double fold options for flawless results.
- Shine with rolled hem variations that suit everything from silk to cotton.
- Breeze through projects with quick hemming speed adjustments that save time and sanity.
Mastering the rolled hem foot means no more struggling with perfect edges!
Zipper and Buttonhole Feet
You’ll love how zipper and buttonhole feet take the stress out of those tricky closures that used to make you want to throw your machine out the window.
Whether you’re installing a basic zipper or creating perfectly sized buttonholes, these specialized feet will help you nail professional-looking results every time.
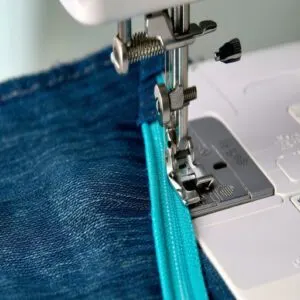
Standard Zipper Foot
Ever struggled with a crooked zipper?
Your standard zipper foot is about to become your new best friend.
With notches on both sides, this clever attachment lets you sew right up against zipper teeth without catching them.
It’s perfect for more than just zippers too – you’ll love how it handles pin tucks and piping.
Just adjust your sewing speed and keep steady fabric guidance as you work.
To learn more about zipper foot styles and techniques, practice makes perfect.
Pro tip: for the smoothest stitch control, start slow until you’ve got the hang of zipper alignment.
You’ll nail those perfectly straight seams in no time.
Adjustable Zipper Foot
An adjustable zipper foot is every sewist’s secret weapon.
Its ability to adapt makes zipper alignment and stitch control a breeze.
Whether you’re handling thick or delicate fabrics, it guarantees smooth stitching along tricky edges.
Mastering the zipper foot techniques can substantially improve the overall quality of your sewing projects.
- Precise foot adjustment for effortless fabric guidance.
- Ideal for sewing accuracy, even on uneven layers.
- Perfect for piping and decorative tape attachment.
- Moves easily to either side of the needle for better control.
This sewing foot brings versatility to your machine like no other!
Standard Buttonhole Foot
When tackling buttonhole sewing, the standard buttonhole foot is your best friend.
This handy presser foot takes the guesswork out of sizing and stitching, guaranteeing sewing accuracy every time.
Paired with proper foot maintenance, it helps improve stitch quality and fabric guidance.
Whether you’re crafting shirts or coats, this sewing machine foot keeps buttonholes looking polished and professional.
| Feature | Benefit | Ideal Uses | Tip |
|---|---|---|---|
| Buttonhole sizing | Ensures uniformity | Shirts, jackets | Practice on scraps to test size before sewing on your project. |
| Stitch support | Prevents uneven tension | Medium fabrics | Use stabilizers for lightweight or stretchy fabric to avoid puckering. |
| Fabric guidance | Smooth sewing experience | Buttonhole lines | Mark buttonhole positions with chalk or disappearing ink for precision. |
| Durability | Long-lasting performance | Routine projects | Keep the presser foot clean to maintain its performance over time. |
One Step Buttonhole Foot
After exploring the standard buttonhole foot, let’s talk about the one-step buttonhole foot—your ticket to faster, worry-free buttonhole sewing.
Forget about fussing with length and width; this clever attachment takes control. Just pop your button into the foot’s slot, and your sewing machine measures and stitches a perfectly sized buttonhole in one go.
Think of it as the GPS of sewing machine feet: precise, simple, and incredibly reliable. With excellent stitch control and fabric guidance, every buttonhole comes out flawless—no guesswork, no headaches.
Whether you’re stitching on a delicate blouse or thick coat fabric, this buttonhole presser foot provides sewing precision with minimal foot adjustment needed. It’s a lifesaver when uniform results matter most.
Advanced Sewing Feet
When your sewing projects call for precise finishes or tricky fabrics, advanced sewing feet are game-changers.
From invisible zippers to free-motion quilting, these specialized tools make the once-complicated feel surprisingly simple.
Invisible Zipper Foot
Mastering zipper installation? You’ll love the invisible zipper foot for that ultra-clean, polished look.
This sewing machine foot hugs the zipper teeth, keeping them out of sight like magic. Utilizing an invisible zipper foot can greatly enhance the overall appearance of your sewing projects.
- Adjust the foot to glide smoothly for perfect stitch control.
- Use fabric guidance techniques to align edges precisely.
- Practice sewing techniques to master that flawless, blind-stitch effect.
Invisible zippers? Total game-changer! The ultra-clean and polished look achieved with it is unmatched.
Walking Foot Options
Got layers that just won’t behave or fabrics that slip and slide?
The walking foot, also called an even feed foot, is your sewing secret weapon.
Unlike other feet, it’s built with its own set of feed dogs to keep your fabric stacks moving smoothly—no shifting, no headaches.
Whether you’re wrestling quilt sandwiches, sewing velvet, or tackling slippery silks, this foot’s got your back.
Choices include open-toe models for better foot alignment and visibility or a walking foot with a quilting guide for precision stitch regulation.
Need traction control for thick seams or edge finishing? It’s all here—your walking foot is the MVP for professional-looking stitches on even the trickiest fabrics.
Free Motion Quilting Foot
The free motion quilting foot, or darning foot, lets you roam freely, like drawing doodles with stitches.
It’s perfect for unique Quilting Techniques—stitch around details or fill backgrounds effortlessly.
Balancing Thread Tension and Foot Adjustment is key.
Pair it with stable fabric and steady hands for real control.
Add an embroidery hoop for pro-level Fabric Control on your sewing machine feet!
Specialized Sewing Feet
When your sewing projects call for unique finishes or tricky fabrics, specialized sewing feet step in to save the day.
From creating perfect pintucks to taming slippery materials, these tools make those challenging tasks feel surprisingly simple.
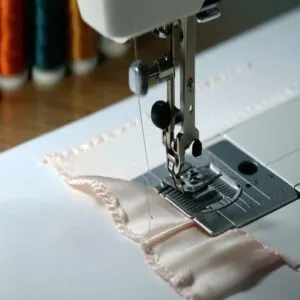
Overlock Foot
Ever wished for seams that won’t unravel and look pro-level? An overlock foot has your back. It mimics a serger, wrapping thread around fabric edges to prevent fraying and add durability.
- Edge finishing: Smooth, clean seams for fabrics that deserve more.
- Sewing efficiency: Quicker setups than a full serger.
- Foot adjustment: Handles lightweight to stretchy fabrics beautifully.
- Fabric control: Built-in guides keep stitches steady.
Pintuck Foot
Feeling adventurous with textures? The pintuck foot is your secret weapon for crisp pintuck stitches, perfect for adding elegance or charm to your projects.
Think of it as fabric sculpting—play with pleat control and tuck techniques for stunning results. Pair it with lightweight fabric, a twin needle, and a touch of patience.
Here’s a quick guide:
| Feature | Best Use | Bonus Tip |
|---|---|---|
| Twin Needle Setup | Perfect pinched tucks | Align for sharp lines |
| Lightweight Fabrics | Elegant texture | Avoid thick, bulky materials |
| Stitch Length | Balanced sewing | Test settings on scrap fabric |
No need to overthink—let this foot work its magic.
Roller Foot
The roller foot is a game-changer for fabric movement and glide performance.
Perfect for slippery silks or thick leather, it guarantees smooth sewing without snags.
Its rolling sewing machine feet handle tricky materials like a champ, giving you stitch control where it matters most.
Worried about sewing speed? No sweat—this roller pressure foot keeps things steady.
Keep it clean, and pair it with a teflon or adjustable zipper foot for even better results!
Decorative Sewing Feet
Decorative sewing feet let you add flair and personality to your projects with stitches that wow.
Whether you’re attaching delicate cords, making satin borders, or perfecting appliqué, these presser feet make fancy stitching surprisingly simple.
Cording Foot
Think of the cording foot as your secret weapon for creative sewing.
It transforms basic projects with ease, offering incredible stitch control for cord making and decorative trims.
Use its cord guides to secure one or more cords effortlessly.
Here’s the magic:
- Stitch bold piping.
- Add braided accents.
- Attach double welting.
- Elevate bias tape designs, using the cord guides to enhance your sewing projects.
Satin Stitch Foot
Ready to master your satin stitch foot?
Its grooved underside keeps fabric feeding smooth, while its open design gives you crystal-clear views of intricate work.
Perfect for designs needing dense, decorative stitches—just tweak your satin settings, thread tension, and foot adjustment for ideal stitch control.
This sewing foot guide proves a satinstitch foot on your sewing machine is a game-changer for precision.
It’s fabric guidance made easy!
Applique Stitch Foot
Getting creative with appliques? The applique stitch foot makes it a breeze to perfect those edges, giving your designs a polished, professional look.
Its wide needle slot handles sharp turns like a pro while keeping your lines crisp. Mastering hand sewn techniques is essential for achieving beautiful applique results.
- Fabric Adhesion: Keep fabric layers steady for flawless stitches.
- Thread Tension: Adjust for dense or delicate designs.
- Foot Adjustment: Guarantee smooth movement for varied applique techniques.
Measuring Shank Height
If you’ve ever wondered why some presser feet just don’t fit your sewing machine, it’s probably all about shank height.
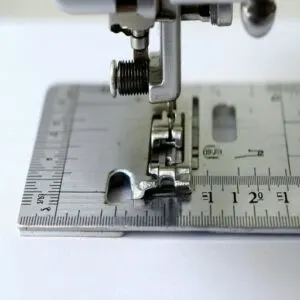
Measuring the shank height is quick and easy, and it helps you figure out whether your machine uses a high or low shank.
High Shank
Just like switching lanes for smoother driving, choosing the right shank type keeps your sewing flow steady.
High shank machines, with their taller “sewing heights,” are perfect for bulky fabrics or quilting.
A detailed shank guide can help determine your machine’s shank type. They use high shank presser feet exclusively, though adapters let you use low shank presser feet when needed.
Measure from the bed to thumb screw for compatibility!
Low Shank
Want to know if your machine uses low shank presser feet?
Here’s how: lower the presser foot and measure from the screw hole to the bottom.
If it’s 3/4 inch, congratulations—you’ve got a low shank!
These machines offer great versatility with snap-on presser feet, screw-on presser feet, and adapters for different foot types.
Perfect for precision sewing and effortless stitching!
Sewing Techniques and Tips
In the case of perfecting techniques like sewing, hemming, or edge stitching, the right presser foot makes all the difference.
You’ll save time, avoid frustration, and even nail those tricky details like a pro.
Sewing Zippers
Sewing zippers can be a breeze with the right zipper sewing machine foot. A zipper foot lets you place stitches close to the zipper teeth while dodging bulky fabric.
Before starting, fabric preparation is key—press seams and align everything. You can find a variety of zipper sewing machine feet online.
Need more control? Use an adjustable zipper foot.
- Check stitch tension to avoid puckering.
- Go slow; sewing speed matters near delicate zippers.
- For hidden closures, try an invisible zipper foot!
Hemming
Hemming’s like giving fabric a polished handshake—it’s all about clean edges and solid finishes.
From folded hem techniques to mastering a blind hem, the right hemming tools, like a hemmer foot or rolled hem foot, make sewing hems a breeze.
Check this cheat sheet:
| Hemming Tool | Best For | Pro Tip |
|---|---|---|
| Hemmer Foot | Straight hems | Use consistent hem allowance. |
| Rolled Hem Foot | Lightweight fabrics | Ideal for narrow rolled hems. |
| Blind Hem Foot | Invisible stitches | Great for formal wear edges. |
Keep stitching smooth with practice and patience!
Edge Stitching
Give your projects that polished, store-bought look with edge stitching! Using an edge stitch foot or edge joining foot helps you nail those crisp lines while maintaining perfect border control.
- Stitch Length: Adjust for a balanced edge finish.
- Fabric Guidance: Steer fabric gently—no tugging!
- Seam Allowance: Align edges for a professional touch.
- Blind Stitch Foot: Great for subtle finishes.
- Piping Foot: Perfect for detailed borders.
Edge stitching = mastery made simple!
Frequently Asked Questions (FAQs)
What Tips Are There for Attaching and Detaching Presser Feet?
Think of attaching a presser foot like snapping on a puzzle piece—easy once you’ve got the hang of it!
Align it properly, lower the shank, click it into place, and you’re ready to sew!
How Can I Tell if My Presser Foot Needs to Be Replaced or Repaired?
If your stitches look uneven, fabric bunches, or the foot wobbles during use, it’s time to check for damage.
Bent, worn, or missing parts usually mean you’ll need a replacement or repair.
What do different sewing machine feet do?
Don’t judge a book by its cover—sewing machine feet are game-changers.
They handle tasks like zippers, hems, quilting, and decorative stitches, making your sewing smoother, precise, and professional-looking.
No matter the project.
What are the most useful sewing machine feet?
Your must-have sewing machine feet include the all-purpose zigzag foot, zipper foot for perfect zippers, buttonhole foot for neat closures, and the quilting foot for precise stitches.
They’re like secret weapons for polished, pro-level projects.
What is the most common presser foot?
Imagine this scenario: you’re tackling a simple straight stitch.
The zigzag foot is your go-to hero.
It handles everything from basic stitching to decorative designs, making it the most common and versatile presser foot around.
Are sewing machine foots universal?
Sewing machine feet aren’t entirely universal.
While some feet fit multiple machines, others are brand-specific or need adapters.
Always double-check compatibility to save yourself the headache of a mismatched foot that doesn’t quite click.
How do presser feet affect seam alignment?
About 70% of stitch issues come from poor seam alignment.
They are caused by factors that prevent the fabric from being held steady, which is where presser feet come into play, keeping layers from shifting.
They’re like the unsung heroes of sewing—ensuring straight, professional-looking stitches every time.
Can presser feet be used on leather?
You can absolutely use presser feet on leather, but choose a teflon or roller foot to prevent sticking.
They glide smoothly, making leatherwork easier while keeping your stitches even.
Don’t skip testing on scraps first!
What causes skipped stitches with certain feet?
Skipped stitches can feel like hitting every red light.
It happens when the wrong foot doesn’t hold the fabric properly or causes uneven pressure.
Pairing the right foot and needle solves this sewing headache.
Are universal presser feet compatible with all machines?
Not all universal presser feet fit every machine.
While they claim flexibility, slight differences in shank size or attachment style can mess things up.
Check your machine’s compatibility before trusting the “universal” label.
Conclusion
Mastering sewing machine feet might feel overwhelming, but it’s like building your toolkit—once you know what each does, sewing gets so much easier.
From the straight stitch foot for crisp seams to the walking foot for tricky fabrics, having the right presser foot saves time and hassle.
Keep experimenting, and don’t forget to check your machine’s manual for compatibility. With sewing machine feet, your projects will go from good to pro-level faster than you’d think!
- https://craftworld.com/cms/sewing-machine-presser-foot-guide-for-beginners/
- https://www.sewessential.co.uk/blog/sewing-machine-presser-feet-guide/
- https://www.onlineclothingstudy.com/2019/05/different-types-of-presser-foot-and.html
- https://www.amazon.com/Hemming-Hemmer-Machine-Presser-Brother/dp/B07ZHVD1X6
- https://sewguide.com/sewing-machine-feet-guide/

