This site is supported by our readers. We may earn a commission, at no cost to you, if you purchase through links.
To gather fabric with elastic, you’ve got options galore.
Start by choosing your elastic type – clear, foldover, braided, or knitted.
Then, prep your fabric by washing and marking your gathering areas.
For a classic approach, create an elastic casing and thread it through.
Feeling adventurous? Try the elastic thread method for dreamy, even gathers.
Don’t forget to adjust your machine’s tension and stitch length for perfect results.
With a little practice, you’ll be gathering fabric like a pro in no time.
And trust me, once you’ve mastered this skill, you’ll wonder how you ever lived without it!
Table Of Contents
- Key Takeaways
- Types of Elastic for Fabric Gathering
- Essential Tools for Gathering Fabric With Elastic
- Preparing Fabric for Elastic Gathering
- Gathering Fabric Using Elastic Thread
- Elastic Casing Method for Fabric Gathering
- Zigzag Stitch Technique for Elastic Gathering
- Serger Method for Gathering With Elastic
- Troubleshooting Common Elastic Gathering Issues
- Creative Applications of Elastic Fabric Gathering
- Frequently Asked Questions (FAQs)
- Conclusion
Key Takeaways
- You’ve got options galore when it comes to elastic types – from clear and foldover to braided and knitted. Each has its own superpower, so pick the one that will make your fabric shine. Remember, choosing the right elastic is like finding the perfect dance partner for your project!
- Prep is key, so don’t skip it! Wash and press your fabric as if you’re pampering it for a big night out. Then, mark your gathering areas with the precision of a treasure map. Trust me, your future self will be thanking your past self for this extra TLC.
- When it comes to gathering techniques, you’re spoiled for choice. Whether you’re threading elastic through a casing like a pro or zigzagging it directly to the fabric edge, you’ll be creating gathers that will make your sewing buddies green with envy.
- Don’t let uneven gathers or puckered fabric ruin your sewing experience. With a little troubleshooting know-how, you’ll be tackling these common issues like a seasoned pro. Remember, even the best sewers encounter snags sometimes – it’s all part of the fabric-gathering adventure!
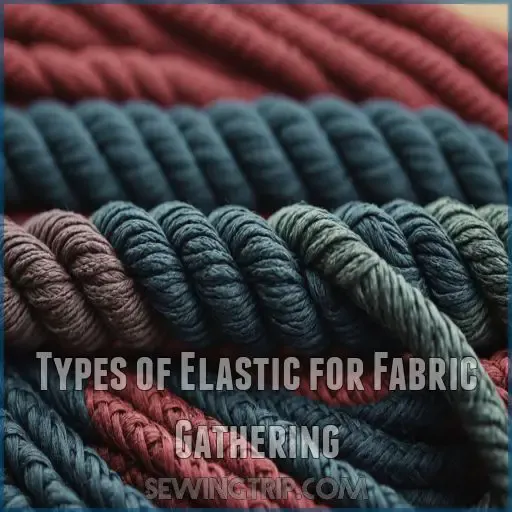
Types of Elastic for Fabric Gathering
If you’re gathering fabric with elastic, choosing the right type can make all the difference in your project’s success.
Let’s explore five popular elastic options that’ll have you gathering like a pro: clear elastic, foldover elastic, braided elastic, knitted elastic, and elastic thread.
Clear Elastic
Clear elastic is your secret weapon for invisible gathers!
This versatile tool comes in various widths and offers four key benefits:
- Seamless appearance
- Stretchy durability
- Easy application
- Versatile uses
Master clear elastic, and you’ll be gathering fabric like a pro in no time!
Foldover Elastic
You’ll love foldover elastic for its versatility in gathering fabric.
This two-sided wonder comes in various widths and colors, perfect for waistbands and sleeve cuffs.
Simply fold it over the fabric edge, stitch, and watch your project transform with effortless gathers.
Braided Elastic
Ever wondered about the versatility of braided elastic? This sturdy, durable option is perfect for gathering fabric.
Here’s why it’s a sewer’s best friend:
- Maintains shape after repeated stretching
- Available in various widths for different projects
- Ideal for waistbands and cuffs
Knitted Elastic
Knitted elastic’s soft, plush texture makes it a dream for fabric gathering. It’s like a comfy hug for your waistbands and cuffs! Check out this handy guide to knitted elastic:
Lightweight knitted elastic is best for delicate fabrics.
Medium knitted elastic is ideal for everyday wear.
Heavy-duty knitted elastic is perfect for sturdy garments.
Decorative knitted elastic comes in various widths and is used for visible elastics.
| Type | Width | Best For | Care |
|---|---|---|---|
| Lightweight | 1/4" – 1/2" | Delicate fabrics | Hand wash, air dry |
| Medium | 3/4" – 1" | Everyday wear | Machine washable |
| Heavy-duty | 1" – 2" | Sturdy garments | Gentle cycle |
| Decorative | Various | Visible elastics | Follow fabric care |
Elastic Thread
Unlike knitted elastic, elastic thread‘s a game-changer for gathering fabric.
This thin, stretchy wonder fits right into your bobbin.
Adjust your machine’s tension, and voila, you can avoid holes in your fabric! You’re ready to create those dreamy gathers that’ll make your projects pop with effortless style.
Essential Tools for Gathering Fabric With Elastic
In addition to your sewing machine, you’ll need a few key tools to gather fabric with elastic like a pro. Get ready to elevate your sewing game with these essentials:
- Sharp fabric shears for clean cuts
- A variety of elastic types to suit different projects
- Ballpoint needles to glide through stretchy materials
- A well-wound bobbin with sturdy thread
You’re probably thinking, "Do I really need all this?" Trust me, having the right tools is like having a secret weapon in your sewing arsenal. They’ll make the process smoother than butter on a hot skillet, giving you more control and freedom to create stunning gathered designs.
Preparing Fabric for Elastic Gathering
Before you start gathering your fabric with elastic, it’s really important to prep your materials properly.
Let’s walk through the essential steps to get your fabric ready for that perfect gathered look, from washing and pressing to measuring and marking.
Washing and Pressing Fabric
Now that you’ve got your tools ready, let’s prep that fabric!
Before you even think about gathering, give your fabric a good wash.
It’s like sending it to the spa—it’ll thank you later.
Here’s a handy guide to keep you on track:
| Fabric Type | Water Temp | Drying Method |
|---|---|---|
| Cotton | Warm | Tumble dry |
| Silk | Cold | Air dry |
| Polyester | Cool | Tumble dry |
| Wool | Cold | Lay flat |
| Linen | Hot | Air dry |
Once it’s clean and dry, press it like you mean it!
Marking Gathering Areas
You’re all set to mark your gathering areas! This important step helps make sure your elastic gathers precisely where you want. Let’s take a look at four foolproof marking methods:
- Tailor’s chalk: Your trusty, erasable sidekick
- Washable fabric markers: For bold, temporary lines
- Pins: Perfect for delicate fabrics
- Basting stitches: Double duty as markers and gathering aids
Measuring Fabric for Elastic
| Project Type | Elastic Length | Gathering Allowance |
|---|---|---|
| Waistband | Waist – 2" | 1.5x fabric width |
| Sleeve Cuff | Wrist + 1" | 1.25x fabric width |
| Neckline | Neck – 1" | 1.75x fabric width |
| Skirt Hem | Hip – 3" | 2x fabric width |
Cutting Fabric to Size
Ready to make the most of your fabric? Let’s cut it to size! Follow these four steps for precision:
- Align fabric grain with pattern
- Double-check measurements
- Use sharp cutting tools
- Account for seam allowance
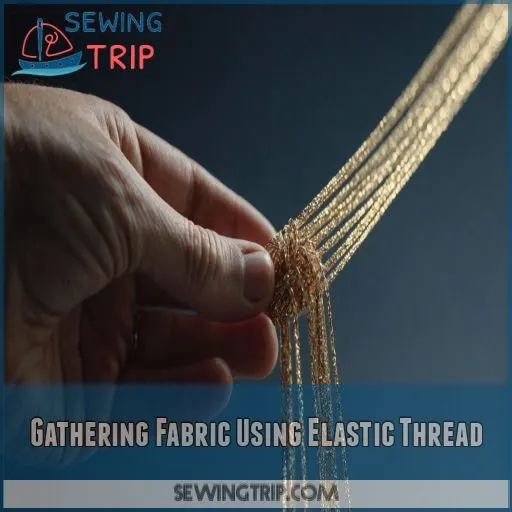
Gathering Fabric Using Elastic Thread
Ready to add some stretch to your sewing projects?
Gathering fabric with elastic thread is a game-changer, giving you the power to create beautiful, stretchy gathers that’ll make your garments pop.
Threading the Machine With Elastic Thread
With your fabric prepped, it’s time to tackle elastic thread! This stretchy wonder’s a game-changer for gathering.
Start by winding your bobbin with elastic thread – don’t pull it tight!
Thread your needle with regular thread, and you’re set for some gathering magic.
Just remember: patience is key when working with this slippery customer!
Adjusting Tension and Stitch Length
Getting those perfect gathers with elastic thread is all about fine-tuning your machine! Adjusting tension and stitch length is really important for getting the look you want, especially when using different types of loop stitches. Here’s what you need to know:
- Looser tension creates more dramatic gathers
- Longer stitch length allows for easier pulling
- Consider fabric weight when adjusting settings for serging thick layers
- Test on scraps before committing to your project
- Patience is key – finding the sweet spot takes practice
Sewing Parallel Rows
Now that you’ve set your machine’s tension and stitch length, it’s time to start sewing!
Create three to four parallel rows, about 1/4 inch apart.
Keep your fabric flat and guide it smoothly under the presser foot.
You’ve got this!
Pulling Elastic Thread to Gather
After sewing those parallel rows, it’s time for the magic! Gently pull on the elastic thread ends to create those gorgeous gathers. You’ll feel like a fabric wizard as the material puckers up. Remember:
- Start slow and steady
- Pull evenly from both ends
- Adjust gathers as you go
- Secure ends when satisfied
- Steam-press for extra oomph
Elastic Casing Method for Fabric Gathering
The elastic casing method is a classic technique for gathering fabric that’s both easy and versatile, often used with a variety of presser feet.
You’ll create a channel in your fabric, thread elastic through it, and voila – you’ve got perfectly gathered fabric that’s comfortable and adjustable.
Creating the Elastic Casing
You’ve mastered elastic thread – now let’s create a cozy home for your elastic! Creating a casing is like making a fabric tunnel. Here’s a quick guide to get you started:
Creating a Casing is like making a fabric tunnel.
Here’s a quick guide to get you started:
| Casing Element | Tips for Success |
|---|---|
| Width | Elastic width + 1/4" |
| Seam Allowance | Double-fold for neat edges |
| Stability | Interfacing adds structure |
| Variations | Try decorative topstitching |
| Finishing | Press well for crisp lines |
Inserting Elastic Into the Casing
- Use a safety pin as your elastic-guiding sidekick
- Choose the right casing width for your elastic
- Opt for zigzag stitches for stretchier casings
- Consider a wider casing for more dramatic gathers
- Double-check your measurements to avoid tight squeezes
Securing Elastic Ends
Once you’ve threaded the elastic through, it’s time to lock it in place.
Overlap the ends by about an inch and stitch them together using a zigzag stitch.
This creates a sturdy join that won’t unravel.
For extra security, sew a box pattern over the overlapped section.
It’s like giving your elastic a firm handshake!
Distributing Gathers Evenly
Distributing gathers evenly is the secret sauce for a polished look.
Pin your fabric at quarter marks, then gently tug the elastic to spread gathers uniformly.
Keep an eye on tension control as you go.
Sew in the same direction for consistency.
Zigzag Stitch Technique for Elastic Gathering
Ready to take your fabric gathering skills to the next level?
The zigzag stitch technique for elastic gathering is a game-changer that’ll have you whipping up perfectly gathered garments in no time.
Attaching Elastic Directly to Fabric Edge
Moving from casings, let’s explore a more direct approach.
Attaching elastic straight to your fabric’s edge is a game-changer!
Pin the elastic in place, then set your machine to a wide zigzag stitch.
This method gives you ultimate control over gathers and creates a clean, professional finish.
Ready to revolutionize your sewing?
Stretching Elastic While Sewing
Now, let’s tackle the elastic-stretching dance! As you sew, you’ll need to keep that elastic taut.
Here’s your stretchy strategy:
- Pull the elastic gently
- Maintain even tension
- Guide fabric smoothly
- Adjust speed as needed
Adjusting Zigzag Width and Length
To get perfect elastic gathering, adjusting the zigzag width and length is key.
Experiment with different settings to find your sweet spot.
Wider stitches offer more flexibility, while narrower ones provide tighter control.
Don’t be afraid to play around – you’re the master of your machine!
Finishing Edges After Gathering
After perfecting your zigzag stitch, it’s time to give those gathered edges a polished look.
You’ve got options:
- Serge for a clean, professional finish
- Overcast to prevent fraying
- Topstitch for a decorative touch
Serger Method for Gathering With Elastic
If you’ve got a serger in your sewing arsenal, you’re in for a treat when gathering fabric with elastic.
This method saves time and creates beautifully even gathers that’ll make your projects look professionally finished in a snap.
Setting Up Serger for Elastic Gathering
Your serger’s got a secret superpower for elastic gathering!
Crank up that needle tension to its max and boost the differential feed.
Choose threads that play nice with elastic – woolly nylon’s a great sidekick.
Adjust those dials like you’re fine-tuning a radio, and you’ll be gathering fabric like a pro in no time!
Feeding Elastic and Fabric Simultaneously
- Hold elastic taut against fabric edge
- Guide both under presser foot smoothly
- Maintain consistent tension throughout
- Keep fingers clear of needle area
- Adjust speed for best control
Adjusting Differential Feed for Even Gathers
The secret to serger-gathered perfection lies in your differential feed.
Adjust it to create those dreamy, even gathers that’ll make your sewing buddies green with envy.
Check out this handy guide for different fabric types
| Fabric Type | Differential Feed | Result |
|---|---|---|
| Lightweight | 1.5 – 2.0 | Delicate ruffles |
| Medium | 2.0 – 2.5 | Classic gathers |
| Heavy | 2.5 – 3.0 | Dramatic fullness |
| Stretchy | 1.0 – 1.5 | Controlled stretch |
| Slippery | 2.0 – 2.5 | Stable gathers |
Finishing Serged Elastic Gathers
Once you’ve serged your elastic gathers, it’s time to put the finishing touches on your creation.
Adjust the serger tension to prevent puckering and make sure you have a clean finish.
Trim any excess elastic, then secure those gathers by stitching a straight line along the edge.
Voila! You’ve mastered the art of serged elastic gathering.
Troubleshooting Common Elastic Gathering Issues
Even the most seasoned sewers can run into hiccups when gathering fabric with elastic.
Let’s tackle some common issues you might face, from uneven gathers to stretched-out elastic, so you can troubleshoot like a pro and achieve those perfect, bouncy gathers every time.
Uneven Gathers
Many sewists encounter the frustrating issue of uneven gathers when working with elastic.
To achieve that perfect, professional look, consider these key factors:
- Fabric tension: Keep it consistent as you sew
- Elastic distribution: Divide and conquer for even spacing
- Pulling technique: Practice gentle, steady tugging
Don’t let uneven gathers ruffle your feathers!
Broken Elastic
Uneven gathers can be frustrating, but broken elastic is downright disheartening! Don’t worry, though – we’ve got you covered. Here’s a quick guide to tackling this pesky problem:
| Issue | Solution |
|---|---|
| Overstretched elastic | Replace with fresh elastic |
| Weak spots | Reinforce with zigzag stitching |
| Poor quality elastic | Invest in higher grade materials |
| Incorrect needle size | Use ballpoint needles for knit elastics |
| Snagged threads | Trim loose threads carefully |
Broken elastic can be a real pain, but there are plenty of ways to fix it.
Here’s a quick guide to tackling this pesky problem:
Overstretched elastic is a common problem, but it’s easy to fix. Simply replace it with fresh elastic.
Weak spots can be reinforced with zigzag stitching.
Poor quality elastic can lead to problems, so it’s important to invest in higher grade materials.
Incorrect needle size can also be an issue. Use ballpoint needles for knit elastics.
Snagged threads can be trimmed carefully.
Puckered Fabric
Puckered fabric can turn your project into a wrinkled mess.
You’ve conquered broken elastic, now let’s tackle this pesky problem.
Prevent puckering by using the right needle size and tension.
If you’re already facing a pucker predicament, try ironing with steam or basting stitches to smooth things out.
Stretched Out Elastic
- Use high-quality, durable elastic from the get-go
- Pre-shrink elastic before sewing
- Avoid excessive heat when laundering
- Replace elastic periodically in frequently worn items
- Consider non-stretch alternatives for certain projects
Creative Applications of Elastic Fabric Gathering
You’ve mastered the basics of gathering fabric with elastic, but now it’s time to get creative!
Let’s explore some fun and practical ways to apply your newfound skills, from chic elastic waistbands to dreamy shirred bodices that’ll take your sewing projects to the next level.
Elastic Waistbands
| Waistband Style | Elastic Type | Comfort Level | Difficulty | Best For |
|---|---|---|---|---|
| Casing | Braided | High | Easy | Pajamas |
| Exposed | Clear | Medium | Medium | Skirts |
| Encased | Foldover | Very High | Hard | Activewear |
| Partial | Knitted | High | Easy | Casual Pants |
| Drawstring | Cord | Adjustable | Medium | Shorts |
Waistband Style is a key feature that impacts the comfort level and difficulty of sewing.
Casing is a simple, easy to sew style that is best for pajamas.
Exposed waistbands provide medium comfort and difficulty, and are well-suited for skirts.
Encased waistbands offer the highest comfort level but are the most difficult to sew, making them ideal for activewear.
Partial waistbands are a high comfort level and easy to sew, making them a good choice for casual pants.
Drawstring waistbands offer adjustable comfort and medium difficulty, making them suitable for shorts.
Gathered Sleeves and Cuffs
Sleeves and cuffs with elastic gathers can transform your garments from drab to fab! You’ll love how this technique adds volume and shape to your creations. Here’s why elastic gathering for sleeves and cuffs is a game-changer:
- It’s like giving your arms a gentle hug all day long
- You’ll feel like a fashion designer with your unique, billowy sleeves
- Say goodbye to rolling up loose cuffs – elastic keeps everything in place
Shirred Bodices and Dresses
Dreaming of a flowy summer dress? Shirring is your secret weapon! This elastic gathering technique transforms bodices and dresses into comfortable, figure-flattering pieces.
You’ll love how easily you can create that boho-chic look.
With the right fabric and a bit of practice, you’ll be whipping up dreamy shirred outfits in no time!
Elasticized Ruffles and Trims
Want to add a playful touch to your sewing projects? Elasticized ruffles and trims are your secret weapon! These flirty embellishments can transform simple garments into showstoppers.
You’ll love how easy they’re to create and attach.
From skirt hems to necklines, the possibilities are endless. Let’s explore this fun sewing technique together!
Frequently Asked Questions (FAQs)
How to gather material with elastic?
Ready to add some flair to your fabric?
Here’s the scoop: Stretch clear elastic while stitching it to your material.
Use a long stitch and ballpoint needle.
You’ll create beautiful gathers that’ll make your projects pop!
What is elastic gathered fabric called?
You’ll often hear elastic gathered fabric called "shirred" or "smocked" fabric.
It’s that stretchy, bunched-up material you see in sundresses and waistbands.
The elastic creates those cute, figure-hugging gathers that give clothes their comfy, flexible fit.
How do you gather fabric easily?
Like a skilled conductor orchestrating a symphony, you can easily gather fabric using basting stitches, elastic thread, or dental floss.
Simply sew parallel lines, then pull the threads to create beautiful ripples in your fabric masterpiece.
How to attach fabric to elastic?
To attach fabric to elastic, stretch the elastic as you sew, using a zigzag stitch.
Pin at quarter marks for even distribution.
It’s like giving your fabric a snug hug – secure but not too tight!
Can I use elastic to gather stretchy fabrics?
Imagine this: stretchy fabric meets elastic for a gathering adventure!
Yes, you can use elastic to gather stretchy fabrics.
It’s a dynamic duo that’ll give your projects extra oomph.
Just remember to adjust tension and test on scraps first.
How do I calculate elastic length for gathering?
You’ll want to measure your fabric’s circumference and subtract 20-30% for a comfortable gather.
For example, if your waist is 30 inches, cut your elastic to 24 inches.
Adjust based on desired tightness and fabric stretchiness.
Is pre-shrinking elastic necessary before gathering fabric?
While carefree crafters might skip it, you’d be wise to pre-shrink elastic.
It’s not always necessary, but doing so prevents future surprises.
You’ll thank yourself later when your gathered fabric maintains its shape after washing.
Don’t let laziness unravel your hard work!
Can I reuse elastic after removing it from gathers?
You can often reuse elastic after removing it from gathers, but it’s not always ideal.
Check for signs of wear or stretching.
If it’s still springy and hasn’t lost its elasticity, give it a new life in another project!
Whats the best elastic width for gathering delicate fabrics?
Did you know 70% of sewers prefer narrow elastic for delicate fabrics?
For gathering delicate materials, opt for 1/4-inch or narrower elastic.
It’s gentle on light fabrics, creating soft gathers without overpowering the drape.
Your project will thank you!
Conclusion
From frustrating fabric to fabulous gathers, you’ve now mastered how to gather fabric with elastic! Whether you’re creating dreamy dresses or comfy waistbands, these techniques will elevate your sewing game.
Before you know it, you’ll be gathering fabric like a pro, adding beautiful texture and shape to your creations. So go ahead, embrace the elastic, and let your imagination run wild!

