This site is supported by our readers. We may earn a commission, at no cost to you, if you purchase through links.
 Sewing terms can sound like a secret language, but once you crack the code, you’re on your way to sewing mastery.
Here’s a quick guide: Backstitch makes your seams strong by locking stitches together; imagine it as a stitch with a mission.
Baste is like a temporary friendship between fabrics, holding them together loosely.
Bobbin keeps your sewing machine’s lower thread in line—picture it as your trusty sidekick.
Bias and binding add flair and function to fabric edges.
Now, if you’re wondering about that mysterious "armscye," just think of it as the doorway to armholes.
Curious? We’ve got more sewing secrets to unravel!
Table Of Contents
Key Takeaways
- You will quickly grasp essential sewing lingo, such as backstitching for strong seams and basting for temporary holds, making your projects more successful.
- Understanding fabric types and their properties helps you select the right materials, enhancing your creations with the perfect weight and texture.
- Mastering sewing machine parts, such as understanding how the tension regulator controls the tightness and looseness of upper thread, and hand-sewing tools will improve your skill set and ensure smooth, enjoyable sewing experiences.
- You will learn and apply various sewing techniques and pattern alterations to customize your garments, ensuring a perfect fit and unique style. As you progress, you will master sewing machine basics, ensuring a perfect fit and unique style.
Types of Fabrics
In sewing, you’ll encounter a wide range of fabric types, each offering unique properties and uses.
Understanding these fabrics, from lightweight chiffons to sturdy denims, is essential for choosing the right material for your projects.
Types of Fabrics Used in Sewing
Exploring fabric types is important for your sewing journey.
Here’s a handy list to guide your selection:
- Natural Fabrics like cotton and linen offer breathability and comfort.
- Synthetic Fabrics such as polyester provide durability and easy care.
- Blended Fabrics combine natural and synthetic qualities for versatile uses.
Understanding these can enhance your projects and simplify sewing vocabulary!
Fabric Weights and Textures
When picking fabrics, think about how their weight and texture will affect your project.
Light fabrics like chiffon offer a soft drape, while heavier ones like denim provide structure.
The weave and yarn choice also influence how a garment hangs and feels.
Consider fabric care, as some heavier textiles may need special attention to maintain their quality.
Fabric Blends and Compositions
Because understanding fabric blends is key to successful sewing, let’s get started!
Fabric blends combine natural fibers like cotton and linen with synthetic fibers such as polyester or nylon.
This creates fabrics with unique properties.
- Increased durability: Blends often resist wrinkles better than 100% cotton.
- Improved drape: A blend might flow more smoothly than a purely natural fabric.
- Easier care: Synthetic fibers can make a fabric more resistant to shrinking.
Knowing the composition helps you choose the right fabric and appropriate care instructions.
Specialized Fabrics for Sewing
You’re in for a treat! Diving into fabric properties, you’ll come across specialized fabrics like knit and woven varieties.
These are just the tip of the iceberg.
Explore sustainable fabrics such as bamboo or recycled polyester, which blend environmental benefits with sewing terms ease.
| Fabric Type | Properties |
|---|---|
| Knit | Stretchy, flexible |
| Woven | Strong, durable |
| Sustainable | Eco-friendly, versatile |
Sewing Machine Parts
When you’re getting started with a sewing machine, knowing its parts can make your life easier and sewing more fun.
From the bobbin and presser foot to the feed dogs and needle plate, understanding these components will help you manage your projects more effectively.
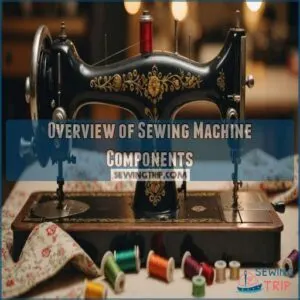
Overview of Sewing Machine Components
A sewing machine is like a car with various parts you need to master for smooth stitching.
The needle plate guides the fabric, while feed dogs pull it through.
The presser foot holds the fabric steady, essential for different techniques.
Knowing your machine components, like tension adjustment and foot types, makes sure sewing basics don’t become tangled threads of frustration.
Bobbin and Thread Management
Managing your bobbin and thread is like juggling—precision counts! Get it right and your sewing machine will sing. Here’s how:
- Bobbin Winding: Make sure it’s tight and even.
- Thread Tension: Adjust for different fabrics.
- Bobbin Case: Keep it clean.
- Thread Types: Match with fabric for seamless stitches.
Master these, and watch your projects sparkle!
Presser Feet and Accessories
After mastering bobbins and threads, presser feet become your new best friends.
Choosing the right presser foot types simplifies sewing tasks.
A walking foot moves layers evenly, while a zipper foot sneaks in close stitches.
Each foot serves unique functions, enhancing your stitch arsenal.
Don’t underestimate these common sewing accessories—they can transform your projects with precision and flair.
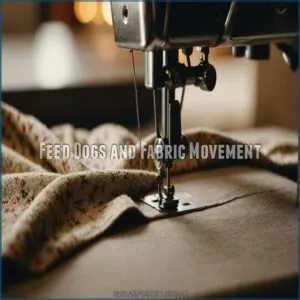
Feed Dogs and Fabric Movement
Imagine this: your fabric waltzing smoothly thanks to feed dogs.
These metal teeth under the needle plate move fabric along, ensuring even feeding.
Whether lightweight chiffon or sturdy denim, feed dogs handle different fabric grains like pros.
Watch for tension issues or skipped stitches—your machine offers adjustable settings for stitch length and feed dog types, perfect for any sewing project.
Hand Sewing Tools
Now you’ll learn about the handy tools you’ll need for hand sewing.
We’ll cover essentials like needles, thimbles, and seam rippers—because even the most experienced sewists sometimes need to unpick a stitch or two!
Essential Hand Sewing Needles
Choosing the right sewing needles is like selecting the right tool for a job.
Different needle types tackle specific fabrics.
For delicate tasks, try a sharp or between needle, while ballpoint needles do wonders on knits.
You can find a variety of these needles and other sewing basics at online stores like sewing supplies online.
Needle sizes range from thin to sturdy.
Proper needle care extends their life, so swap them when they dull, ensuring smooth stitches every time.
Thimbles and Finger Protectors
Just as hand sewing needles are about precision, thimbles and finger protectors provide comfort and safety.
Crafted from materials like metal or leather, they guard your finger from needle pricks.
Fit is key—too loose, and they slip; too tight, and they’re uncomfortable.
As sewing notions go, these humble tools are indispensable companions, blending history and functionality seamlessly.
Scissors and Cutting Tools
When it comes to scissors and cutting tools, precision is key.
You’ll need different types for fabric cutting, each designed for a specific task.
Here’s what you’ll rely on:
- Pinking Shears: Prevent fabric fraying.
- Rotary Cutters: Glide through fabric easily.
- Cutting Mat: Protects surfaces and aligns cuts.
- Blade Maintenance: Essential for sharp, safe tools.
Seam Rippers and Stitch Removers
From scissors slicing to seam rippers rescuing, each tool has its place.
Imagine this: You’ve sewn the wrong seam.
Relax! Seam rippers and stitch removers come to the rescue.
They’re tiny heroes, undoing stitching mishaps with precision.
Perfect for fabric tweaks without a fuss.
| Tool | Purpose | Feeling |
|---|---|---|
| Seam Ripper | Unpicks stitches | Relief |
| Stitch Remover | Corrects sewing mistakes | Satisfaction |
| Seam Ripper Types | Suited for varied fabrics | Confidence |
Sewing Techniques
When you explore sewing techniques, understanding the basics of choosing the right sewing machine, such as considering mechanical sewing machines, is crucial for successful garment creation. You’ll learn essential skills like basic stitches and seams, as well as more artistic methods like appliqué and decorative stitches.
Mastering these techniques, such as understanding the importance of choosing quality fabrics, improves your sewing projects and also allows your creativity to flourish on fabric.
Basic Stitches and Seams
Stitches make sewing magic happen, turning fabric into fashion.
Understanding basic stitches and seams gives you confidence.
Seam allowances set the stage with space for edges.
Straight stitch handles most tasks, while backstitch secures ends.
Zigzag stitch fights fraying, and serging adds polish to seams.
Get started with these essential techniques for neat, durable projects.
- Ease: Adjust fabric without creases.
- Clip: Snip seam allowances.
- Baste: Temporary hold for layers.
- Edge stitch: Neat fabric edges.
- Hems: Finish garment edges.
Gathering and Ruching Techniques
Ready to move on from basic seams? Gathering and ruching add beautiful texture.
Use a simple running stitch to gather fabric; pull the threads to create fullness.
For best results, consider the fabric weight gathering techniques to make sure the right stitch length and thread choice.
Ruching involves multiple rows of gathers for a more dramatic effect.
Experiment with different fabric choices—lightweight fabrics work best.
Avoid pulling too hard; it can break your thread!
Design inspiration is everywhere; let your creativity flow!
Appliqué and Patchwork Methods
Fantasy fabric transformation begins when you get started with appliqué and patchwork techniques.
Picture layering and stitching dynamic designs or creating intricate patchwork patterns from unique fabric selections.
It’s an art where fabric overlays bring your project ideas to life, offering endless design inspiration.
Whether you’re crafting cozy quilts or vibrant wall hangings, each stitch tells a creative story.
Embellishments and Decorative Stitches
While you’re mastering appliqué designs, think about embellishments and decorative stitches.
They’re your ticket to eye-catching pieces.
Experiment with embroidery techniques, like the feather stitch, to craft unique stitch patterns.
Hand embroidery can elevate your project with stunning details, while decorative trims add flair.
These tools let your creativity shine, transforming simple fabrics into personalized art.
Sewing Patterns and Alterations
When you’re working with sewing patterns, understanding markings and fitting techniques is essential.
You’ll learn how to customize patterns, adjust for a perfect fit, and make alterations that guarantee your project looks exactly as you envision it.
Understanding Pattern Markings
Understanding pattern markings is like reading a treasure map.
You’ll spot symbols guiding your sewing adventure.
Look for these:
- Grain lines – align your pattern with fabric threads.
- Notches – match these to make sure pieces fit.
- Seam allowances – know how much fabric to leave for stitching.
Arm yourself with marking tools and conquer your fabric layout!
Alteration Basics and Techniques
Now that you’ve cracked the code on pattern markings, it’s time to tweak your garment to fit like a glove. Mastering alteration basics—like hem adjustments, sleeve alterations, or adding darts and pleats—can turn a basic piece into something custom-made just for you. To make informed decisions, learn how to take in and let out garments properly by understanding the anatomy of a garment, including dart types, grainline, seam allowance, sleeve cap shape, and neckline style for a deeper exploration into alteration techniques. Play with bodice and waist shaping, and remember, a little ease makes for comfortable wear.
Pattern Fitting and Adjustments
Several key steps guarantee a perfect fit!
Start with a thorough body type analysis.
Then, create a muslin mockup to check the fit before cutting into your expensive fabric.
Make fit adjustments using darts and pleats to enhance your silhouette.
Consider pattern grading if you need significant size changes. Remember, even small adjustments can make a huge difference in the final garment’s look and feel.
Mastering these techniques will transform your sewing projects!
Customizing Sewing Patterns
After nailing down pattern fitting, you’re ready to make sewing patterns uniquely yours.
- Pattern grading adapts sizes for that perfect fit.
- Measure for precise body measurements.
- Experiment with silhouette modifications for style changes.
- Add custom embroidery to personalize.
- Enhance shaping with dart adjustments.
Keep these techniques handy for unique, well-fitting garments!
Garment Construction
In garment construction, you’ll focus on perfecting seam finishes and edges, mastering hemming techniques, and properly attaching sleeves, cuffs, collars, and necklines.
Knowing these essential skills guarantees your creations look polished and wear beautifully.
Seam Finishes and Edges
Mastering seam finishes like serged edges and selvage finishes can elevate your sewing game. You’re aiming for durable and stylish edges.
Wonder about zigzag edges or the sleek look of bias binding? They’re essential!
Explore the table below for a quick guide on different finishes.
| Finish Type | Best For |
|---|---|
| Serged Edges | Preventing frays |
| Frayed Edges | Casual styles |
| Selvage | Natural fabric end |
| Zigzag Edges | Stretch fabrics |
| Bias Binding | Decorative touch |
Hemming Techniques and Options
You’re at the edge of sewing mastery, hemming is next on your list.
Key options include Blind Hems for a seamless look and Invisible Hems for elegance.
Tackle hemming knits with the right stitch length for flexibility.
Edge finishing guarantees durability.
These sewing hems and finishes keep your projects looking sharp while following clear sewing instructions that guide your creative journey.
Sleeves and Cuffs Construction
Constructing sleeves and cuffs requires finesse and creativity.
Consider the Sleeve Cap Ease for a smooth fit and explore various Cuff Variations to personalize your style.
Try Bell Sleeve Construction for a dramatic flair, or Raglan Sleeves for comfort.
Don’t overlook details: baste, gather, tuck, and understitch for precision.
Mastering these techniques crafts garments with flair and functionality.
Collars and Neckline Finishes
Just as sleeves conclude, let’s explore collars and necklines. From Peter Pan collars to Mandarin necklines, adding charm to your garments involves pintuck details and ruffled trim.
For a thorough understanding of these techniques, refer to a reliable sewing glossary guide sewing terms explained.
Staystitch guarantees stability, while top stitch delivers a polished finish. Shirring effects add flair.
As a dressmaker, mastering these elements elevates your craft, creating fashionable and comfortable garments effortlessly.
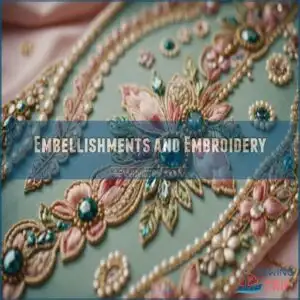
Embellishments and Embroidery
Incorporating embellishments and embroidery into your sewing projects can transform simple fabrics into masterpieces, adding a personal touch and style to your creations.
Master various techniques, from appliqué and patchwork to intricate quilting, and enhance your garments and home décor with these artistic details.
Types of Embellishments for Sewing
Moving from jackets and skirts, embellishments can elevate your sewing projects to new heights.
Think of embellishments like the icing on the cake, adding flair and personality.
Explore these techniques in your next creation:
- Sewing Beads for sparkle
- Fabric Painting for custom designs
- Quilting Stencils to guide patterns
- Sequin Application for shimmer
Embroidery Techniques and Stitches
Embellishments don’t stop at beads and sequins; embroidery opens up a world of intricate stitches.
You can play with chain stitches and experiment with stumpwork for 3D effects.
Try crewelwork with its woolen yarns or dazzly satin and goldwork stitches.
The classics like cross stitch, ladder stitch, and even zigzag stitch create beautiful textures.
It’s thread art with flair.
Appliqué and Patchwork Embellishments
Ready to take your sewing to the next level? Appliqué lets you add fabric shapes, creating unique designs. Think of it as a fabric collage!
Patchwork uses different fabrics sewn together. It’s perfect for Quilted Ornaments or Embellished Bags.
Experiment with Appliqué Techniques and bias cuts for a professional look. You’ll love the results!
Decorative Trims add a finishing touch.
Quilting and Home Decor Embellishments
Quilting transforms ordinary fabric scraps into cozy art, using quilt blocks that tell your story.
Jump into home decor projects with applique techniques and clever embellishment ideas.
Secure your edges with binding and try a blanket stitch for charm.
Add texture with wadding, and don’t forget cross stitch to bring your pieces to life.
Let creativity stitch freedom into your decor.
Sewing Terminology From a to Z
When it comes to sewing, the lingo can sometimes feel like a secret code.
With this A to Z guide, you’ll unravel the mystery behind common sewing terms, making your journey from novice to skilled stitcher seamless and enjoyable.
A-E Sewing Terms and Definitions
Ever felt confused by sewing terminology?
Let’s demystify a few essentials:
Appliqué involves layering fabric for decorative effects.
Bias cuts add stretch and drape.
Basting temporarily holds fabric pieces together.
A bodkin is perfect for threading elastic through a casing.
Get your edge stitch right to keep seams precise.
Understanding these terms boosts your confidence and mastery in sewing.
F-J Sewing Terms and Definitions
Frogging isn’t just for ponds; it’s the act of undoing stitches—because mistakes happen to the best of us!
Fabric weights affect your choices when gathering techniques or working with bias cuts.
Hook and eyes remain essential clasps, while invisible zippers magically disappear into seams.
Interfacing types give structure, and a face? That’s the fabric’s printed side.
K-O Sewing Terms and Definitions
Just as you’ve mastered fabric terms like “interfacing” and “lawn,” let’s explore sewing terms from K to O.
- Knot: Secure your threads and keep stitches tight.
- Overlock: Finish seams professionally with this stitch type.
- Needle: Essential sewing tool with varied types for different fabrics and stitches.
Understanding these will enhance your garment construction skills!
P-Z Sewing Terms and Definitions
Sometimes, sewing can feel like a maze of terms. Understanding sewing terminology basics is key to achieving proper fit and drape in your projects.
Here’s a quick guide to understanding P-Z:
| Term | Definition |
|---|---|
| Pintuck | Small, narrow folds stitched down |
| Pleat | Fold in fabric, creating volume |
| Yoke | Panel at shoulders or hips |
Mastering these terms: piping techniques, zipper insertion, quilting terminology, and sewing ergonomics can elevate your projects effortlessly.
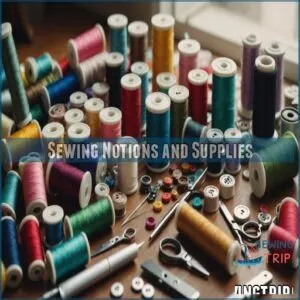
Sewing Notions and Supplies
When you’re just starting out in sewing, understanding the essential notions is key for success.
From thread and yarn to interfacing and buttons, these tools are the backbone of any sewing project, helping you stitch and fasten with ease.
Essential Sewing Notions and Tools
A well-stocked sewing kit is your creative toolbox.
Start with basics like scissors and measuring tape, investing in high-quality tools such as sharp sewing scissors for accurately cutting patterns and swatches, for precise fabric cutting techniques.
Add a seam ripper for those inevitable oops moments.
Sewing machine maintenance is key, so keep it in tip-top shape.
Don’t forget beeswax for smoother hand sewing ergonomics and tailor’s chalk for clean lines and color selection.
Thread and Yarn Options
Once you’ve gathered your sewing notions, consider thread and yarn options for your projects.
Explore different thread colors to match your fabric and choose yarn fibers or fiber blends for crochet endeavors.
Experiment with dyeing techniques to achieve unique hues.
Embrace sustainable threads for eco-friendly choices.
Even a simple cord can add charm to double-needle stitching on muslin.
Interfacing and Stabilizers
Starting on your sewing journey, you’re bound to encounter interfacing and stabilizers.
Fusible interfacings provide essential structure, while sewing stabilizers keep fabrics in check.
Knit stay tape helps with drapey knits, preventing sagging.
Mastering shoulder pad placement can transform a silhouette. Whether it’s a hidden support system or working with a vertical bobbin, understanding these tools boosts your sewing skills.
Buttons and Fasteners
Now that you’ve mastered interfacing, let’s move on to buttons and fasteners! You’ll find tons of options: classic buttons, sleek zippers, magnetic closures, or even sturdy snaps.
To expand your fastener knowledge, explore the various types of sewing fasteners, including decorative and functional fasteners.
Proper button placement is key; use guidelines for even spacing.
Learn different zipper installation tips for a professional finish.
Explore snap fastener techniques for a quick, secure closure.
Comparing fastener types helps you choose the best option for your project.
Happy sewing!
Garment Care and Repair
For garment care and repair, knowing how to properly launder fabrics and fix seams can extend the life of your clothes.
You’ll also find that tackling stains, or adding a creative touch by upcycling, makes maintaining your wardrobe both practical and satisfying, as it allows you to give old clothes a new life and adds a personal touch to your garments.
Laundering and Caring for Fabrics
Balancing your collection of sewing notions with proper fabric care is key.
To tackle laundering fabrics, test colorfastness to avoid surprise tie-dye mishaps.
Opt for fabric softener alternatives to keep delicates feeling fresh.
Prevent fabric shrinkage by checking care labels and washing in cold water.
Removing fabric odors doesn’t require chemicals—try natural solutions like vinegar for a fresh scent.
Repairing Seams and Hems
Repairing seams and hems doesn’t have to be intimidating.
To help you get started, you can find a variety of sewing guides and tools at sewing guide resources.
Strengthen weak seams with seam reinforcement techniques. Hemming denim? Go for a strong straight stitch. Got a frayed edge? Employ a frayed edge fix or invisible mending method.
Master different types of seams and stitches to make sure your garments last, whether you’re working on the right side or the wrong side.
Dealing With Stains and Spills
Stains and spills, the nemesis of fabrics. For effective fabric spot removal, act fast.
Apply pre-treatment methods like dabbing with vinegar or dish soap to common household stains.
When dealing with delicate fabrics like silk, it’s essential to follow specific stain removal techniques, such as those outlined in the guide to removing stains from silk fabric. Be gentle with delicate fabrics and try spot cleaning instead.
Prevent future mishaps with stain prevention tips—keep raw edges tidy and learn the basics of warp and weft.
Altering and Upcycling Garments
Uncertain about how to breathe new life into old clothes after those stains?
Think about altering and upcycling garments. Transform your wardrobe into a canvas for creative repurposing.
Incorporate sewing tricks to tackle bumble bunching, or add pockets and plackets.
Explore sustainable fashion by making upcycled accessories. Each piece tells a story, merging fabric revamping with garment reimagination.
Frequently Asked Questions (FAQs)
What do you need to know about sewing terminology?
Did you know there are over 100 consistently used sewing terms? Understanding basic terms like bobbin, bias, and backstitch simplifies patterns and techniques, making your sewing projects smoother and more enjoyable.
What is a sewing Dictionary for beginners?
It’s a handy guide! You’ll find common sewing terms defined simply. It’s perfect for getting started, explaining everything from "seam allowance" to "selvage." Grab one, and you’re ready to sew!
What does sew mean in sewing?
Sewing involves using a needle and thread to join pieces of fabric together.
You can think of it like connecting the dots; it’s about creating neat seams and stylish designs, turning fabric into something remarkable.
What is the a to Z of sewing terminology?
Ace your sewing skills with an A to Z glossary, including terms like applique, bias, dart, and selvage.
Each term guides you through essential techniques, giving you the confidence to tackle projects from blouses to blankets.
What Are Some Good Entry-level Sewing Machines for Beginners?
Consider machines like the Brother CS6000i, Singer 4423, or Janome 2212 for your sewing journey.
They’re user-friendly, durable, and supportive for beginners learning the basics.
You’ll appreciate their simplicity, helping build your confidence quickly.
How Do I Choose Fabric for Different Types of Garments and Seasons?
Choosing fabric for garments depends on season and use.
For summer dresses, go for light fabrics like chiffon or lawn.
In winter, pick warmer materials like flannel.
For jeans, denim is always a sturdy choice.
Where Can I Find Sewing Tutorials and Project Ideas for My Skill Level?
You can start with simple projects like tote bags and pillowcases, which are great for learning basic stitches and techniques found in easy sewing project ideas for beginners. You can find sewing tutorials and project ideas on YouTube, Pinterest, and blogs like Tilly and the Buttons.
These platforms cater to different skill levels, offering creative inspiration from beginner to advanced techniques.
Happy sewing!
What Supplies Do I Need to Get Started With Sewing?
Starting sewing? Grab a sewing machine, scissors, pins, measuring tape, fabric, thread, and needles.
A seam ripper helps fix mistakes, and an iron makes crisp seams.
Don’t forget a pattern for your first project!
How Do I Troubleshoot Common Sewing Machine Problems Like Skipped Stitches or Tangled Thread?
Check needle size and tension if you encounter skipped stitches; adjust them as needed.
Tangled threads might mean improper threading or tension issues.
Clean the bobbin area and rethread to prevent thread bunching and improve stitching.
How do I adjust sewing machine tension?
Tighten or loosen sewing machine tension like tuning a guitar.
Adjust the dial on your machine, usually marked 0-
Test on scrap fabric, checking for balanced stitches. Too tight? Loosen it. Too loose? Tighten slightly.
What is a seam allowance, and why is it important?
A seam allowance is the fabric space between the stitch line and fabric edge, typically 1/4 to 5/8 inches wide.
It’s essential for sewing stability, allowing for adjustments, fraying prevention, and garment durability.
How can I choose the right sewing needle?
A stitch in time saves nine.
Pick your needle based on fabric type and thickness.
Use a sharp needle for woven materials and a ballpoint needle for knits.
Match size to fabric weight for best results.
What is the difference between interfacing and lining?
Interfacing provides structure and support to fabrics, typically hidden between layers for stability.
Lining, on the other hand, involves an inner fabric layer, often enhancing comfort and appearance, while concealing seams and edges in garments.
How do I prevent fabric from fraying?
Frustrating fraying? Don’t despair! Use pinking shears for a zig-zag edge or a serger for a professional finish. Alternatively, try a simple, neat stitch along the raw edge. Problem solved!
Conclusion
Exploring the art of sewing is like unraveling a colorful tapestry of creativity and skill.
Armed with the right vocabulary, you’re ready to tackle projects with confidence.
Understanding essential sewing terms lets you transform fabric into fashionable creations or handy repairs.
From mastering fabric types to steering through intricate patterns, this guide gives you a solid foundation.
Keep this treasure trove of knowledge handy, and you’ll become fluent in the language of sewing before you know it.

